
3D Jar with Embossed Text in Photoshop CC
If you are into the DIY stuff, you must be familiar with jars and all the cool things created using them. Mason jars are among the frequently used jars to create some amazing DIY items, and they are simple molded glass jars with the brand name embossed on their front.
In this tutorial, you’ll learn how to use Photoshop CC’s 3D capabilities to create a mason jars-inspired jar from scratch. Then, you’ll modify its material Settings to give it a golden metallic spray painted appearance, and add some embossed text on it using Bump maps. You’ll then add the jar(s) created to a simple scene, and modify the final outcome in a couple more steps. This should be so much fun, so let’s get started 😉
The Final Result

Tutorial Details
- Software Used : Photoshop
- Version : CC
- Time : 2:00 – 3:45
Resources
- Jar Outline Reference Image.
- Delicious SmallCaps font.
- Kavaler Kursive font.
- WoodPlanksPainted0270 Texture.
- Bokeh Stock I by KathleenMay.
- Plant (Epipremnum pinnatum) by Black-B-o-x.
- You’ll also need to load a Pattern set. To do so, go to Edit > Presets > Preset Manager, and choose Patterns from the Preset Type drop down menu. Then, click the little arrow to the right of the Preset Type drop down menu, and click Texture Fill 2 near the bottom of the pop-up menu. When the dialog box appears after that, just click Append, and you’ll get the set.
Step 1
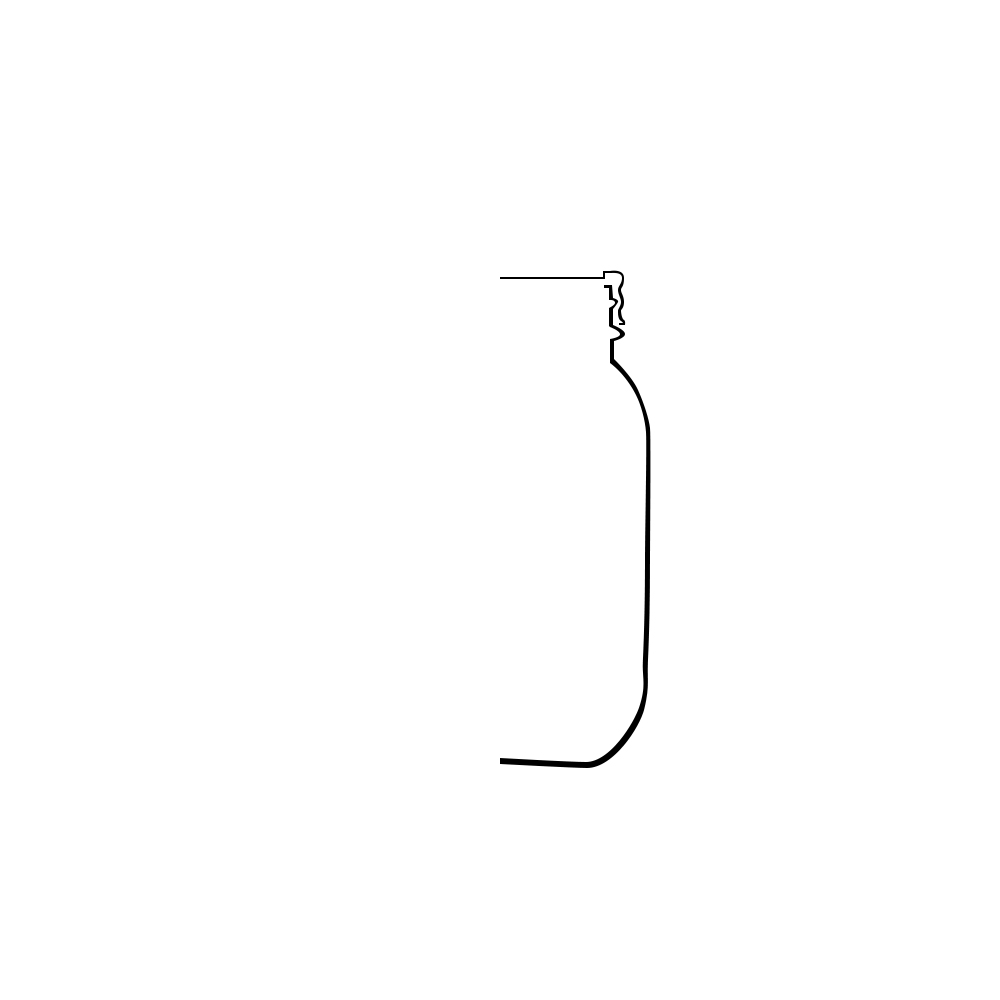
Create the new 1000 x 1000 px document, and set the Resolution value to 150. Then, use the Pen Tool with the Shape option selected in the Options bar to draw half of the jar and lid’s outlines. You can drag a Guide to the center of the document to help you connect the center points of the outline.
You’ll need to create thin closed shapes that define each part. These parts will be revolved later to create the full 3D shape. So try to imagine what the 3D shape’s outline will look like to create it. You can also use reference images of your choice, or use the image in the Resources section.
Some tips for using the Pen Tool:
– Click once to add sharp points.
– Click and drag to create curves.
– Click to add a point, press and hold the Shift key, then click again to create a straight line between the two points.
You can then use the Direct Selection Tool (A) to click and drag the points in order to move them, or click and drag their handles to change their orientation and width.
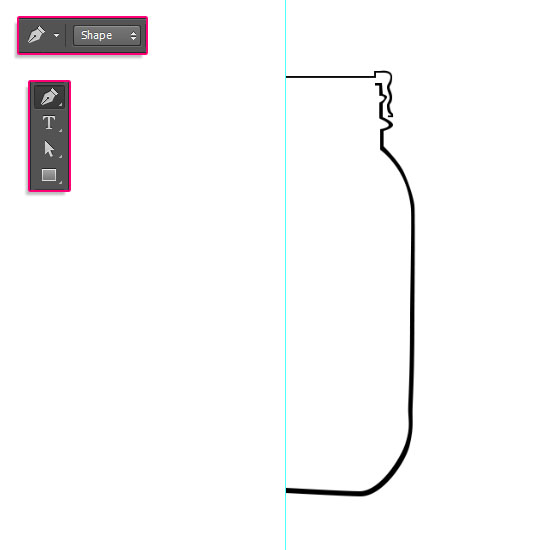
Creating the outline can be a bit time consuming, but it is really important as well. So make sure to perfect your outlines in order to get the best final result.
Make sure to create each shape in a separate layer as well, then rename its layer to keep things organized.
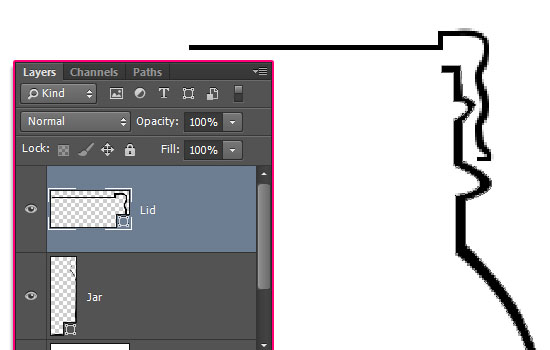
Once you’re done, for each shape layer, select it then go to 3D > New 3D Extrusion from Selected Path.
Select both 3D layers then go to 3D > Merge 3D Layers. This will place both meshes in the same 3D Scene.
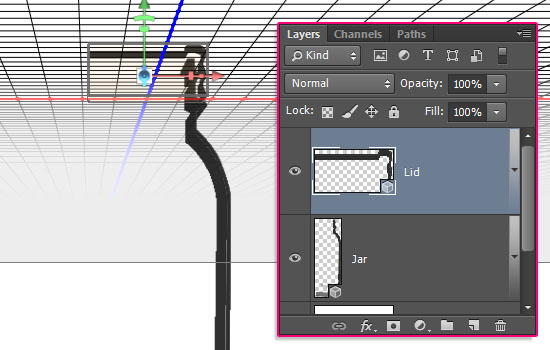
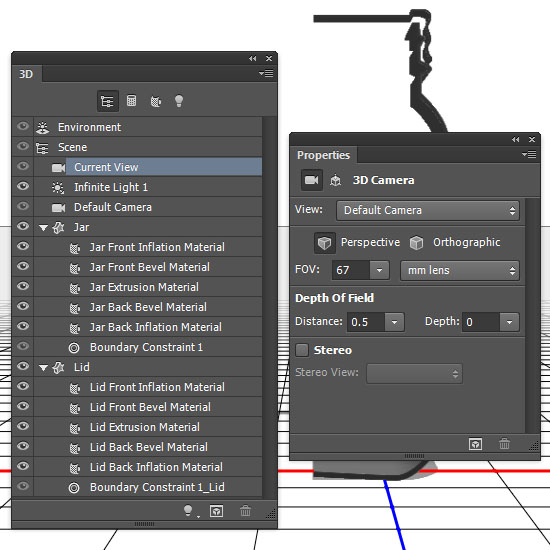
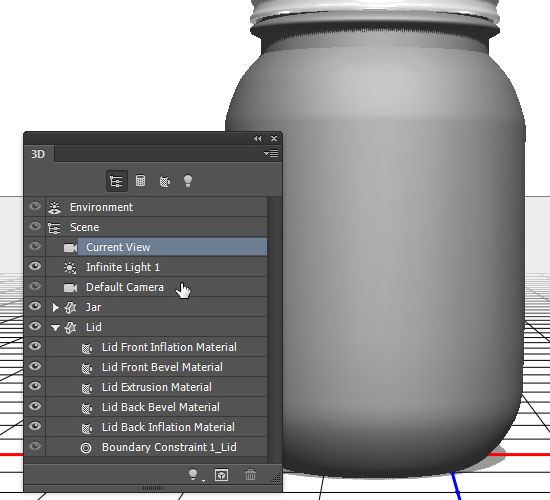
To access the 3D mesh Settings and properties, you’ll need to open two panels: The 3D panel, and the Properties panel (both found under the Window menu).
The 3D panel has all the components of the 3D scene, and when you click the name of any of those, you’ll be able to access its Settings in the Properties panel. So make sure to always select the name of the element you want to modify in the 3D panel before you change its Settings in the Properties panel.
Step 2
Select the Jar mesh name in the 3D panel, then click the Deform icon at the top of the Properties panel.
Change the Deformation Axis to Left, since this is the Axis we want the outline to revolve around. Then, change the Extrusion Depth to 0 and the Horizontal Angle (X): to 360.

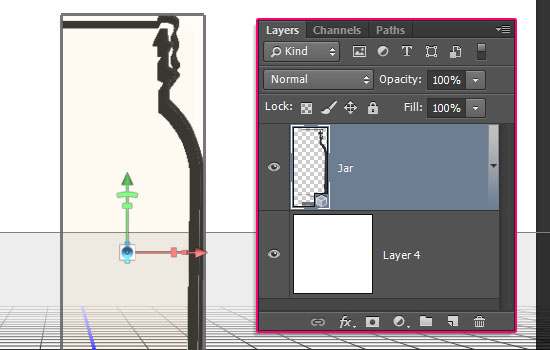
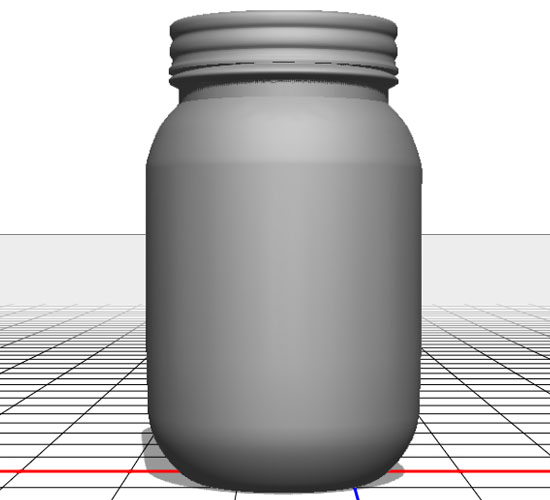
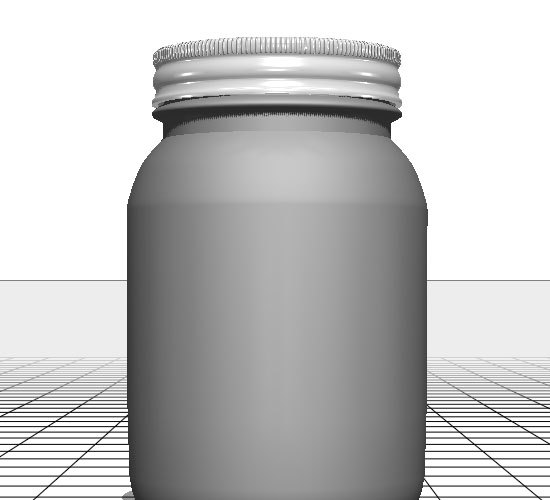
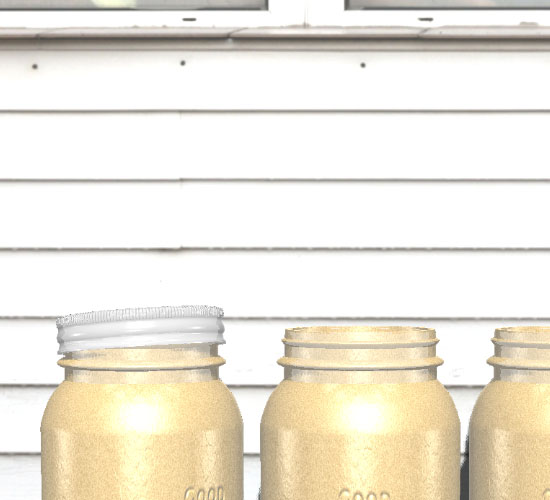
Repeat that for the Lid mesh. You’ll get nice jar and lid 3D meshes now.
To keep a back up of the jar save this Document (File > Save), then save it as a copy (File > Save As) to work on the texturing next.
Step 3
Before working on the texturing, we’ll need to create a simple pattern first.
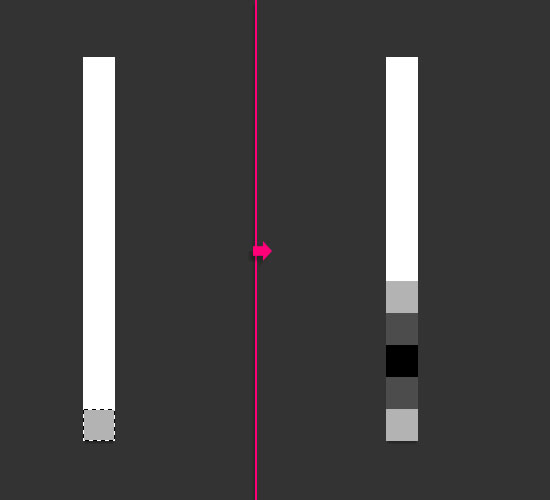
So create a new 1 x 12 px document with a White Background fill. Then, use the Rectangular Marquee Tool to create a 1 px square at the bottom, and use the Paint Bucket Tool to fill the square with the color #b3b3b3.
Create another square on top of the previous one and fill it with the color #4c4c4c. Create yet another one on top of both and fill it with the color #000000. Then, add two more squares and fill them with the colors #4c4c4c and #b3b3b3.
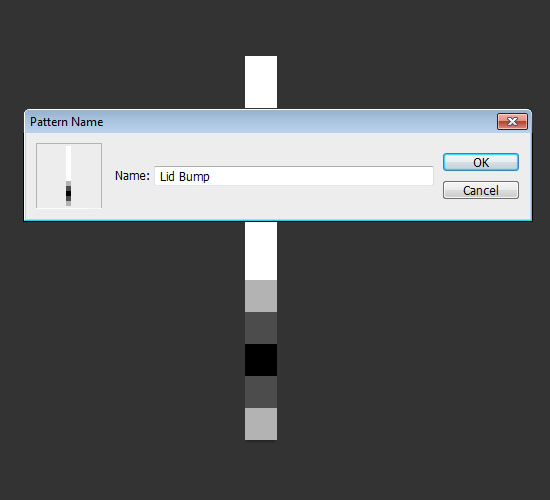
Go to Edit > Define Pattern, and type in the name Lid Bump.
Save the file and close it to go back to the original one.
Step 4
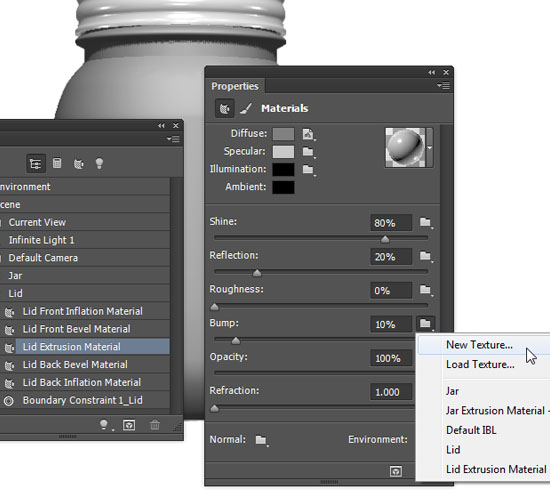
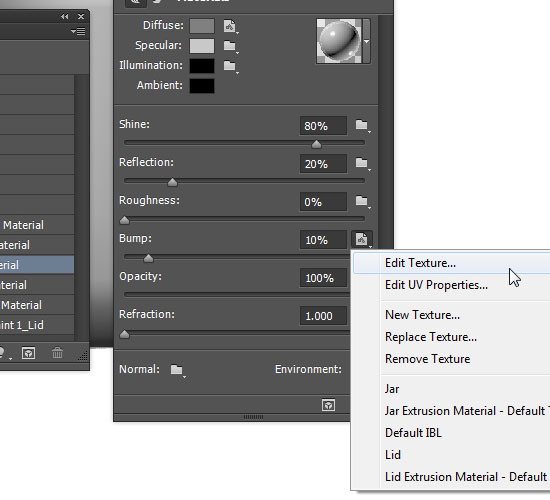
Click the Lid Extrusion Material tab in the 3D panel, the click the Diffuse texture icon in the Properties panel and choose Edit Texture.
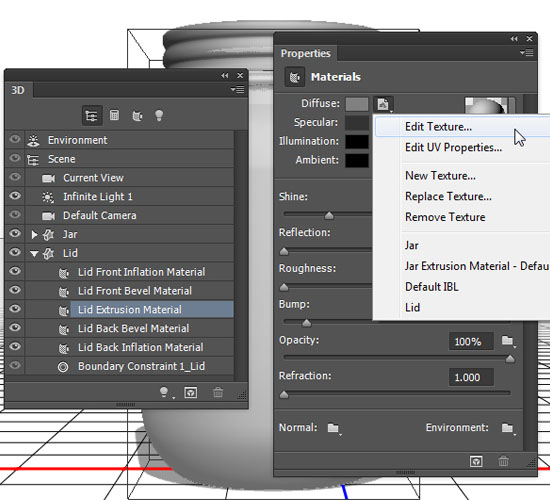
This will open the Texture’s file, so just go ahead and fill it with the color #9d9d9d.
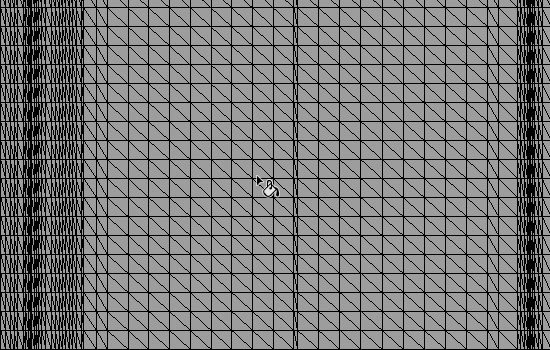
The black lines are the UV Overlay, which match coordinates in the 2D texture map with specific coordinates on the 3D model, allowing the 2D texture to be painted correctly onto the 3D model.
You can turn this on/off anytime by going to View > Show > UV Overlay.
Save the file and close it to go back to the 3D Scene’s file.
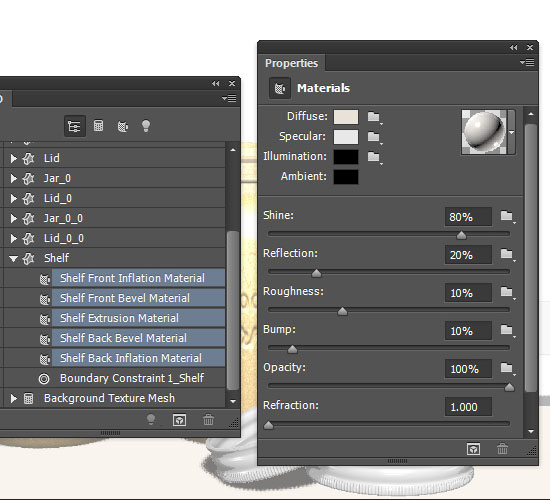
With the Lid Extrusion Material tab still selected, change the rest of the Settings as shown below:
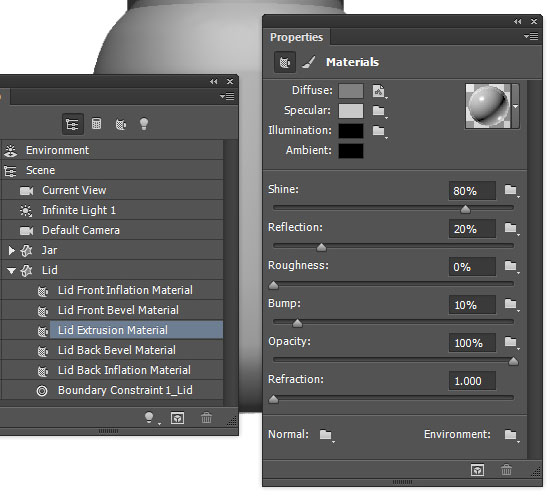
Note: The color values are given in RGB since Photoshop CC displays the HDR Color Picker for assigning 3D objects’ properties.
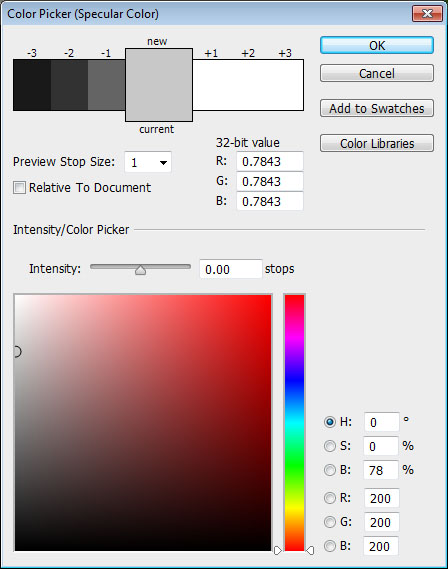
- Specular :
R = 200, G = 200, B = 200
Step 5
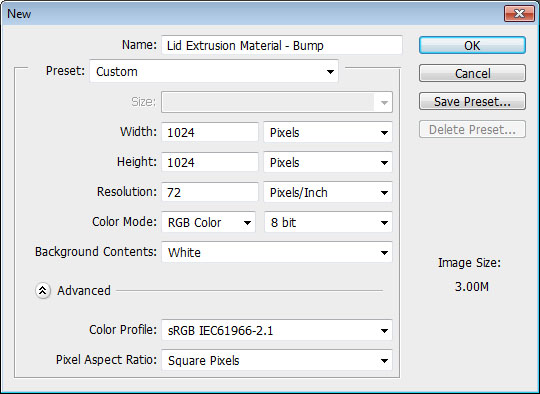
Click the Bump folder icon and choose New Texture.
The Width and Height values should match the Diffuse Texture’s. Here, they are both 1024.
Click the Bump texture icon and choose Edit Texture.
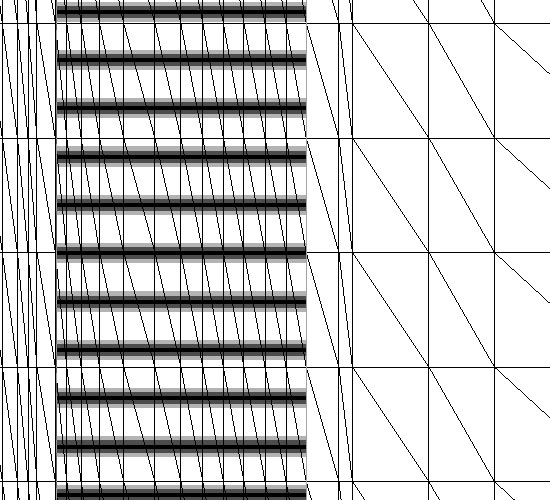
Use the Rectangle Tool to create a 62-px-wide rectangle that extends outside the top and bottom edges of the document. Place it anywhere for now, as you’ll be moving it around in a bit.
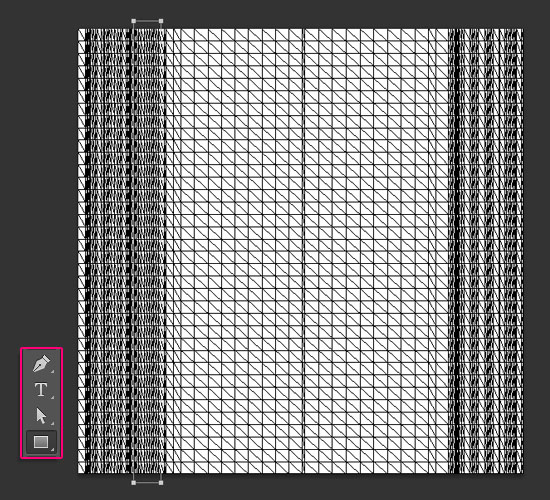
Double click the Rectangle’s layer to apply a Pattern Overlay effect using the Lid Bump pattern you created earlier.
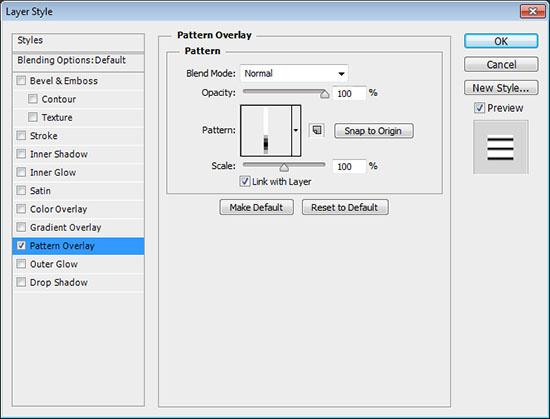
These lines will create the little bump texture at the top of the lid, so you’ll need to place them correctly.
To do that, save the file (Ctrl/Cmd + S), don’t close it yet, but click the original 3D Scene document’s tab to check out where the bump is applied. Then go back to the Bump Texture’s document to adjust the placement of the rectangle accordingly, or even change its size. Save the file and check the outcome once again.
You might need to repeat that a couple of times to get the placement right. This is what you should get.
Select the Move Tool and check its Options bar. You’ll find a set of 3D Modes for the tool to the right of the bar. When you choose one of those, you can then click and drag to perform any changes (on the selected element in the 3D panel).
So click the Current View tab in the 3D panel the click and drag to change the view so that you can check how the texture looks all over the lid. You don’t want the texture to be covering parts it is not supposed to cover.
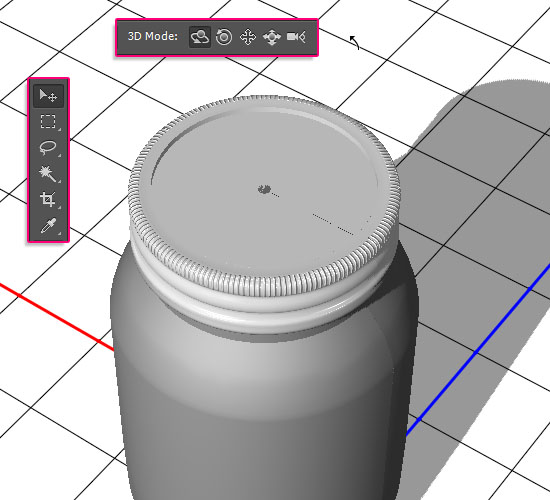
An important step to do each time after you change the Camera View is go back to the Default one by clicking the Default Camera tab in the 3D panel.
This will make placing the 3D elements in one scene easier later on.
That’s it for the Lid texturing. Next is the Jar’s.
Step 6
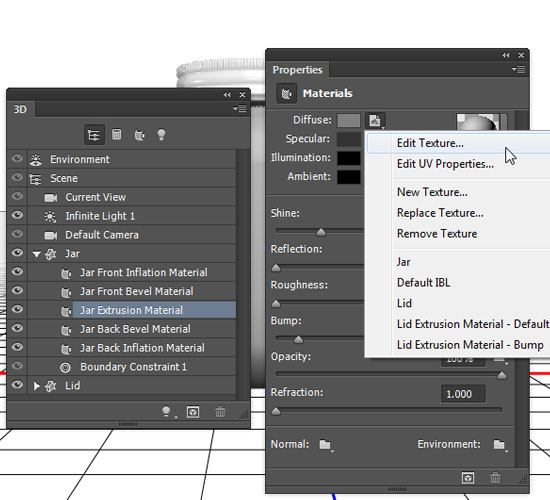
Click the Jar Extrusion Material tab, click the Diffuse texture icon and choose Edit Texture.
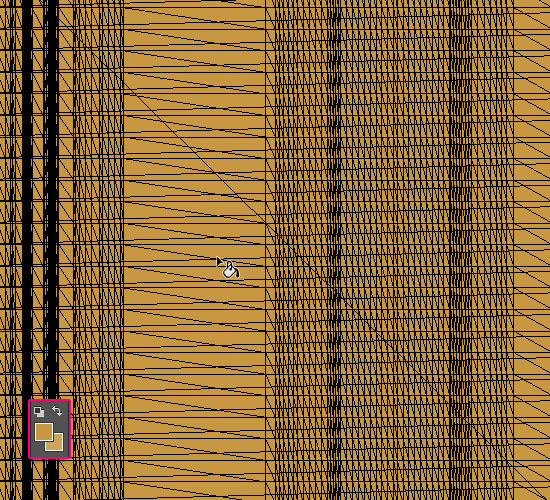
Set the Foreground color to #c89742 and the Background color to #cea45c, then fill the document with the Foreground color.
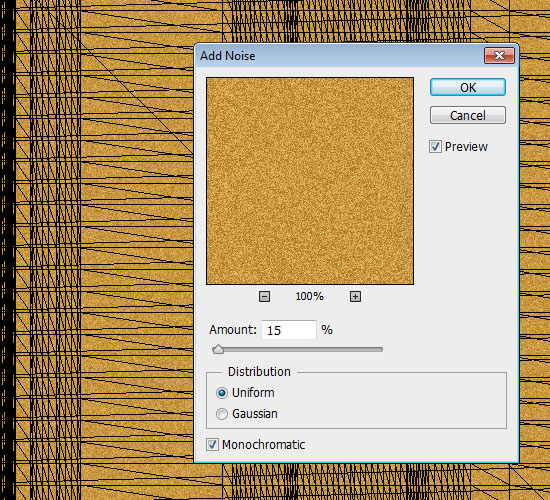
Go to Filter > Noise > Add Noise, set the Amount to 15, the Distribution to Uniform, and check the Monochromatic box. This will help with creating the sprayed metallic paint appearance.
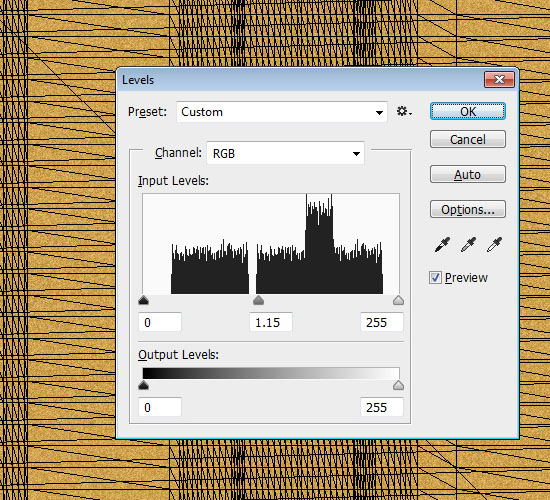
Go to Image > Adjustments > Levels, and change the Gamma value to 1.15.
Save the file and go back to the original document to change the rest of the Jar Extrusion Material Settings as below:
- Specular :
R = 168, G = 168, B = 168
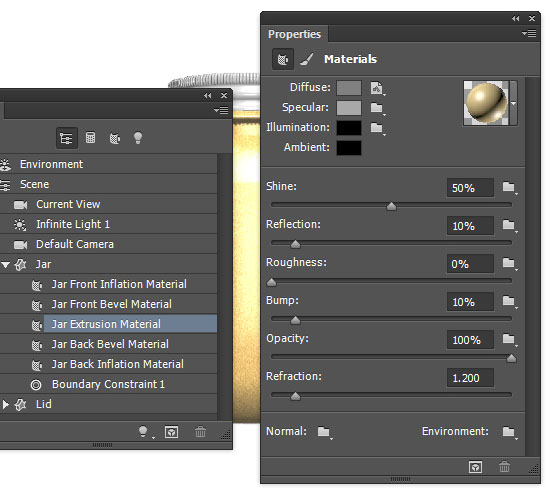
The other Jar materials are not modified since they are not shown in the final result. But if you are going to show the inner parts of the jars, you can go ahead and use the same previous texture and Settings to create the rest of the materials.
Step 7
Click the Bump texture icon, choose New Texture, type 1024 for both the Width and Height values, then click the Bump texture icon and choose Edit Texture.
Fill the Background with Black and duplicate its layer.
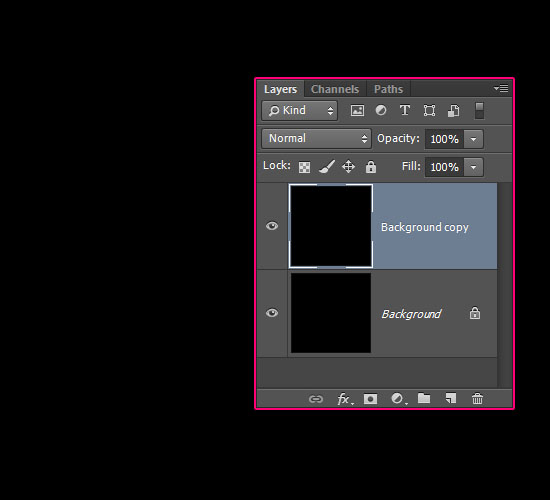
Double click the copy layer to apply a Pattern Overlay using the Stucco 4 pattern and the Opacity value of 15.
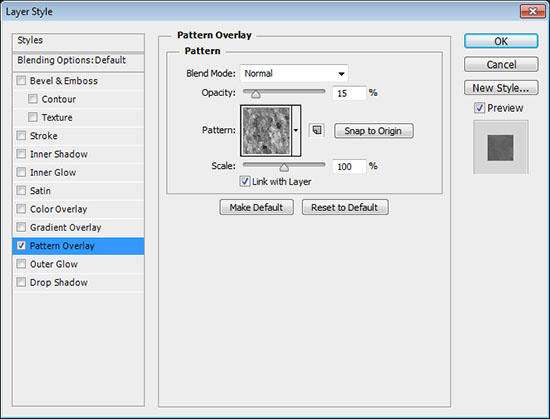
The Bump map is a grayscale image in which lighter values create an illusion of raised surface areas and darker values create an illusion of flatter surface areas. So the Pattern Overlay’s Opacity change will make the Bump texture’s effect more subtle.
Step 8
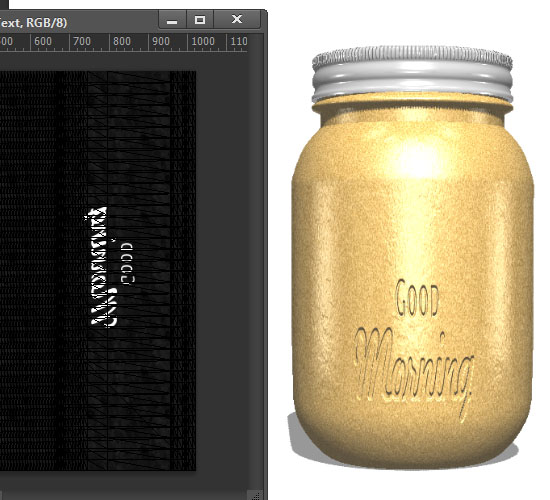
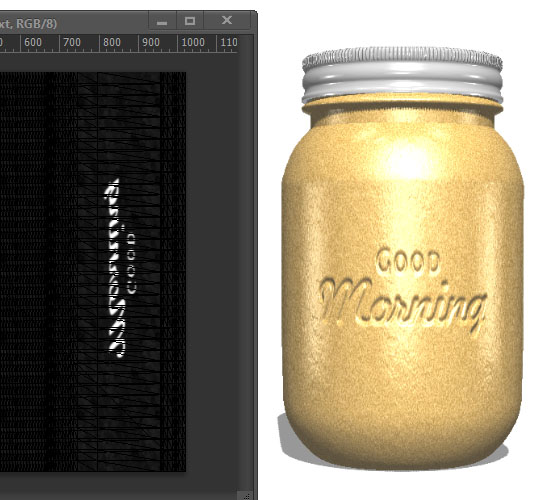
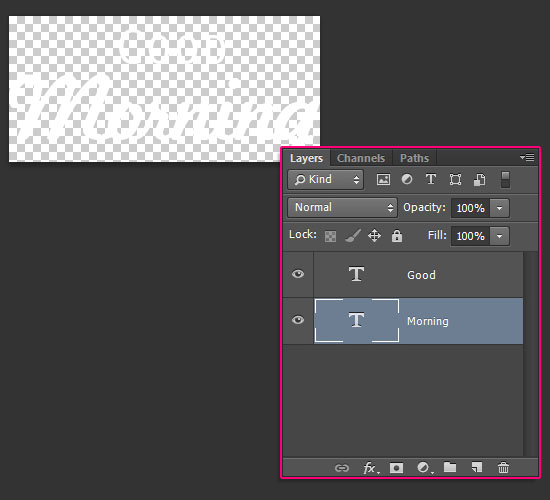
It’s time to add the text now. So create the text you want, any text, using whatever fonts and font sizes you like, just make sure to create it in White.
The text used here is created in two separate layers, using the fonts Delicious SmallCaps and Kavaler Kursive, and the font Sizes 55 and 65 pt.

Select all the text layers you have then go to Filter > Convert for Smart Filters. This will put the text layers inside a Smart Object, which will make the editing process a lot easier.
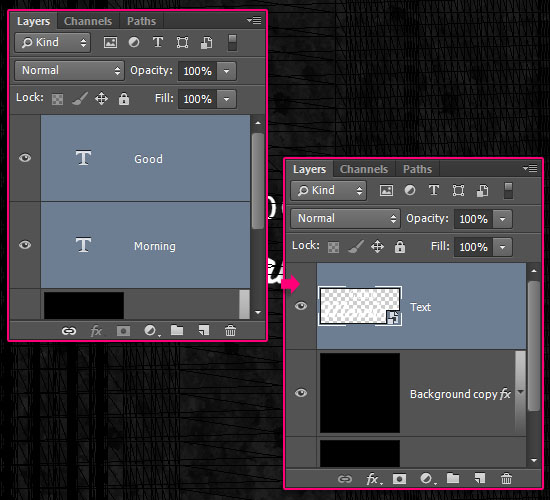
Click, drag, and drop the Bump texture document’s tab to let its window float around. Then resize it so that you can see it along with the original 3D Scene‘s document.
What you’ll need to do next, is make all the changes needed to place the text correctly on the jar. So you’ll modify the text inside the Bump texture’s window, save the changes (Ctrl/Cmd + S), then check the outcome in the 3D Scene’s document, and make some more changes accordingly until you like how things look.
Start by moving the text in the Bump texture’s document around until you can see it on the jar’s front. Don’t forget to save in order to see the changes.
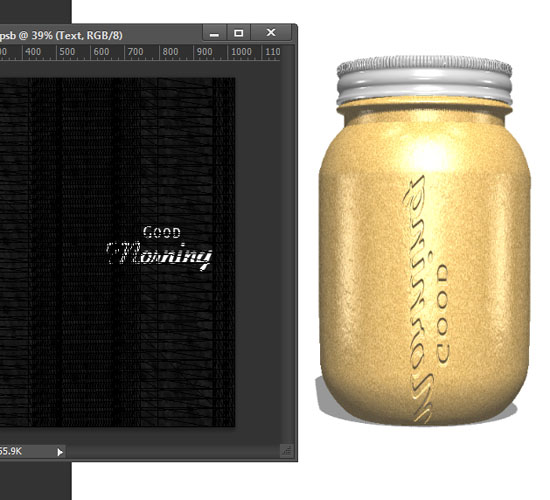
If the text appears to be written backwards, go to Edit > Transform > Flip Horizontal to fix that.
If the text is added vertically instead of horizontally go to Edit > Transform > Rotate 90° CW.
Enter the Free Transform Mode (Ctrl/Cmd + T), then start scaling and moving the text until you like the result. Hit Enter/Return to accept the changes when done before you save.
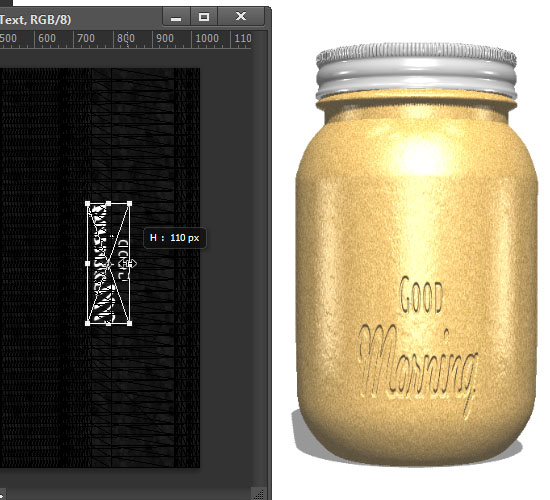
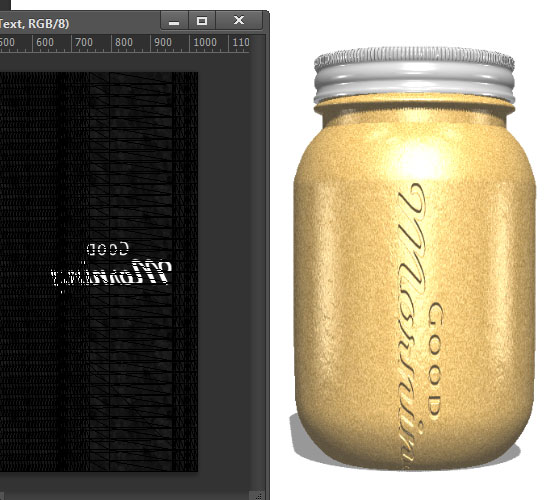
You can open the Bump texture anytime later on if you want to further modify the text, so don’t worry about perfecting it now.
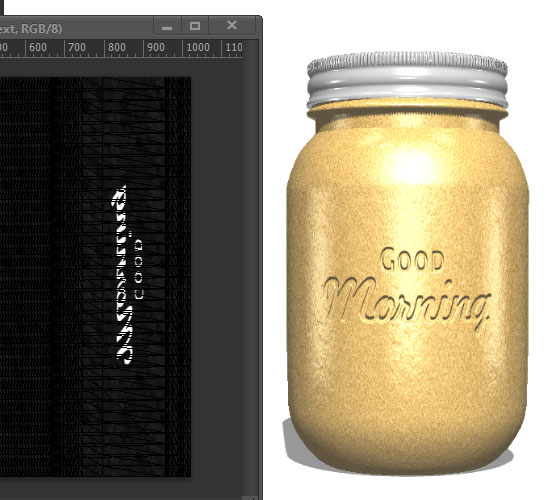
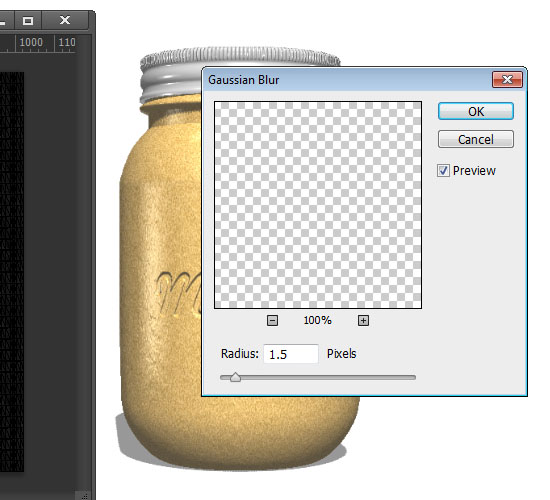
Go to Filter > Blur > Gaussian Blur, and change the Radius to 1.5. This will help make the edges a lot smoother.
Save the Bump texture’s document and close it to go back to the original document.
If at any point you want to change or modify the text, open the Bump texture’s document, double click the text smart object’s thumbnail, and that will open the original text layers’ file.
If you type new text that is larger than the document, you can go to Image > Reveal All to fix that issue.
Save and close to apply the changes.
Step 9
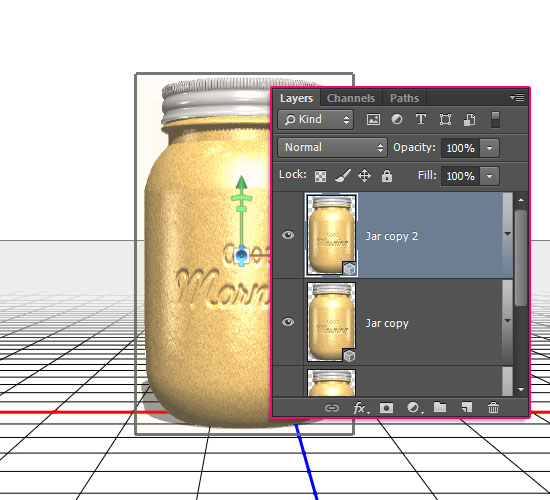
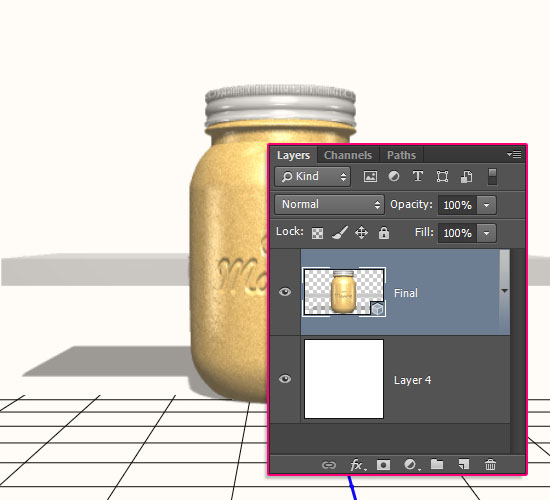
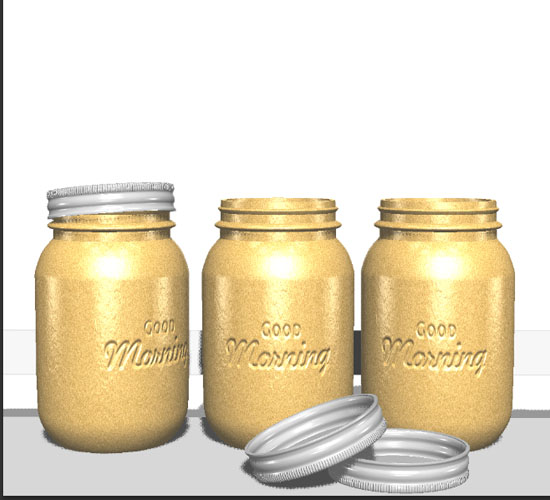
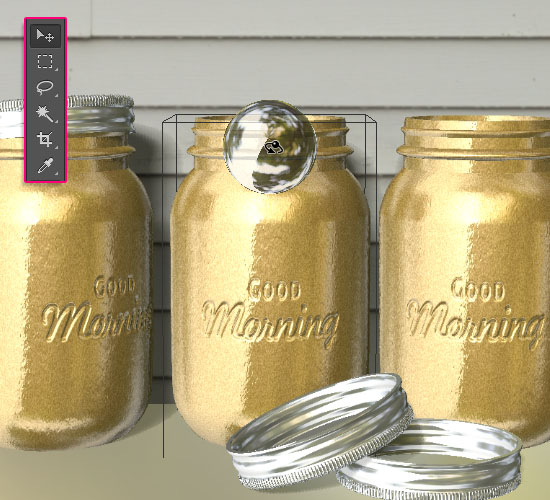
Once you like how the jar looks, duplicate it if you want to add more than one to the final scene.
Use the Rectangle Tool to create a 933 x 45 px rectangle, then rename its layer to Shelf.
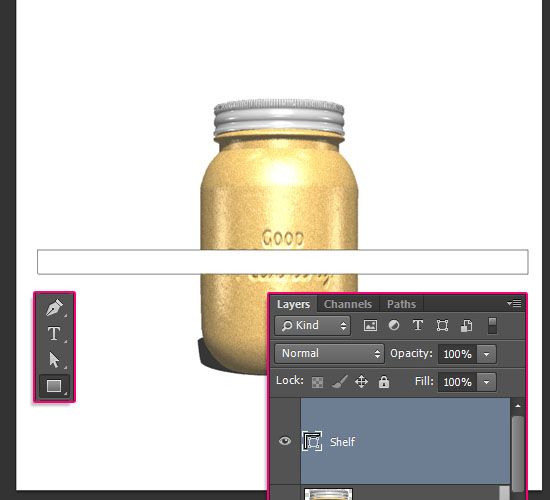
Go to 3D > New 3D Extrusion from Selected Path, select the mesh name, and change its Extrusion Depth value to 500.
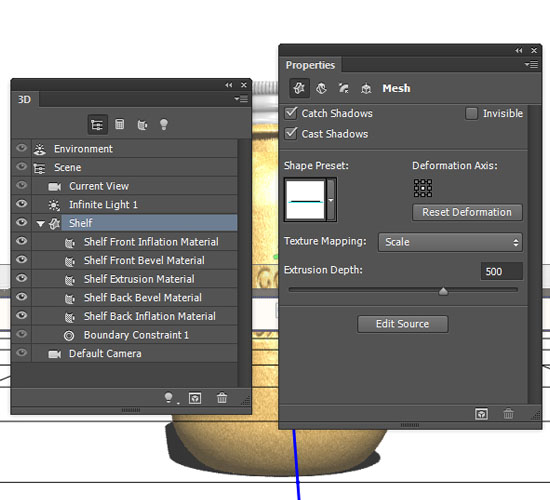
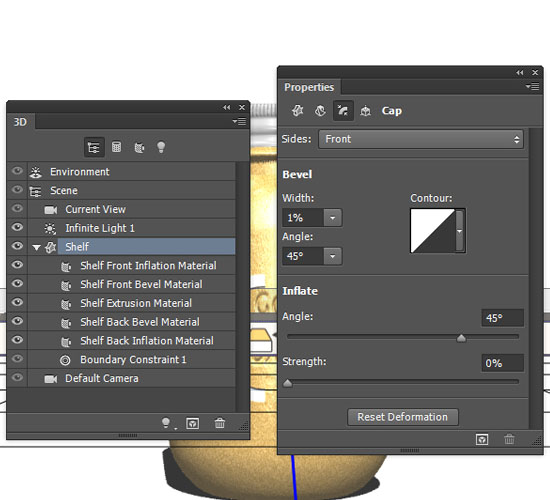
Click the Cap icon at the top of the Properties panel and change the Bevel Width to 1.
Create a new layer on top of all layers, call it Background Texture, and fill it with Black.
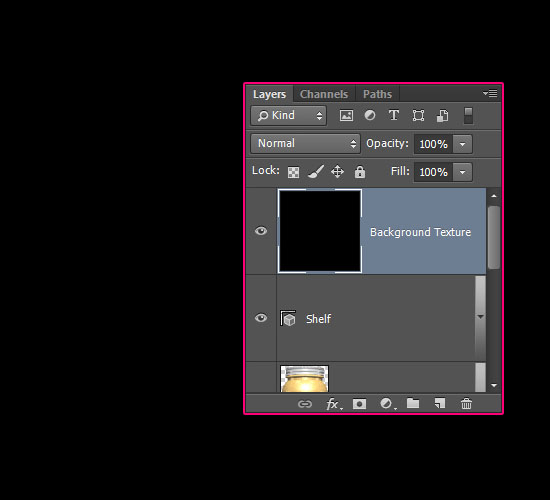
Go to 3D > New Mesh from Layer > Postcard.
You now have the 3D Jar layers, the Shelf layer, and the Background layer.
Step 10
Select all the 3D layers you have then go to 3D > Merge 3D Layers.
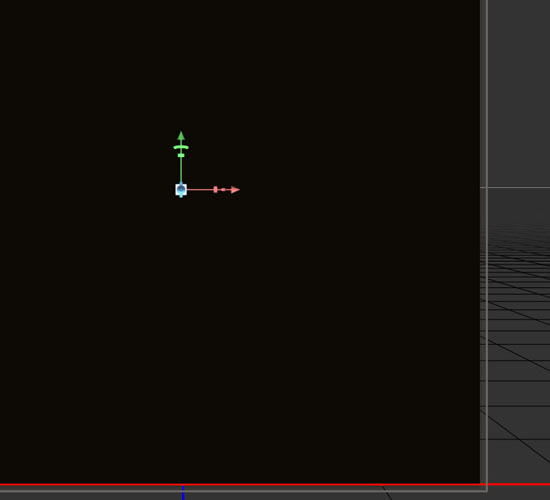
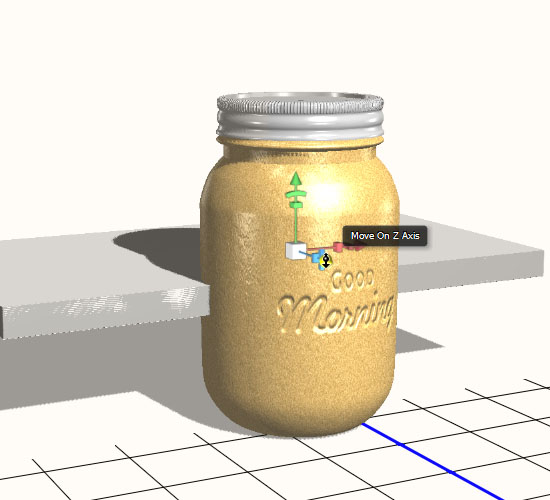
Start moving and rotating the meshes you have, and change the camera view as needed, until you like the result.
You can use the 3D Axis to do that (with the Move Tool selected). The arrows at the ends of the 3D Axis move the mesh, the part below them is used for rotation, and the cubes are used for scaling. The cube in the center is used to scale the object uniformly. All you need to do is click and drag the part you need to perform the changes.
This is a bit of a time consuming process as well, but things need to be placed nicely without overlapping.
You can select more than one mesh to modify at the same time (each jar and its lid for example), and you can also click the Coordinates icon at the top of the Properties panel to enter numerical values for the selected Mesh(es).
Here’s how the meshes were placed in this tutorial.
Step 11
Select all the Shelf Material tabs, then click the Diffuse texture icon and choose Remove Texture.
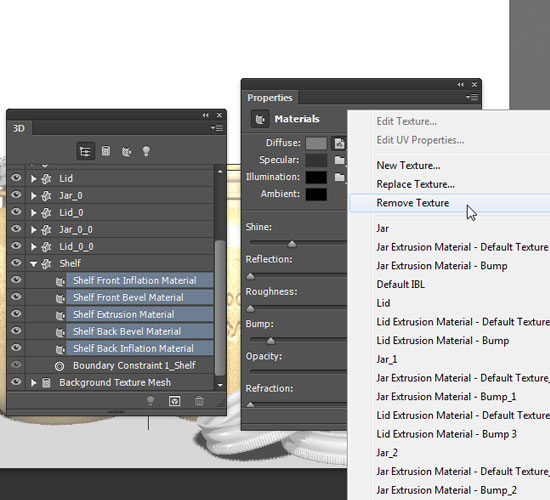
Modify the rest of the Settings as shown below:
- Diffuse :
R = 233, G = 226, B = 217 - Specular :
R = 232, G = 232, B = 232
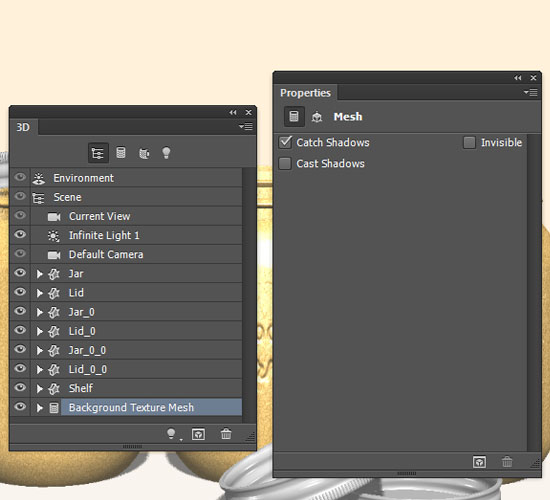
Select the Background Texture Mesh tab and un-check its Cast Shadows box.
Select the Background Texture material tab, remove the Opacity texture, and use the Settings shown below:
- Diffuse :
R = 79, G = 79, B = 79
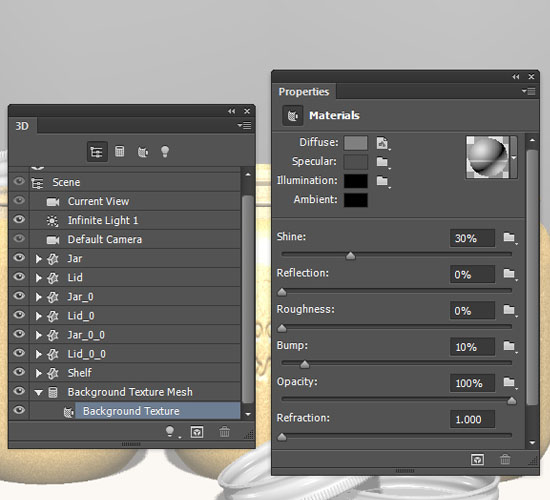
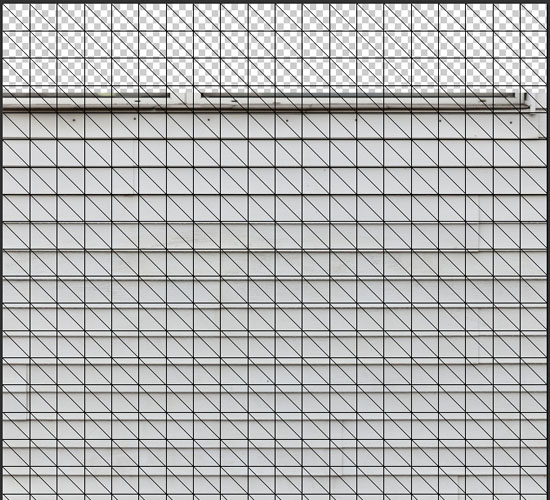
Click the Diffuse texture icon and choose Edit Texture. Place the WoodPlanksPainted0270 image then resize it as needed.
You’ll need to save and check how it looks in the original document until it’s placed correctly, just like you did with the text previously.
Step 12
Click the Environment tab, click the IBL texture icon and choose Replace Texture, then load the Bokeh Stock I image.
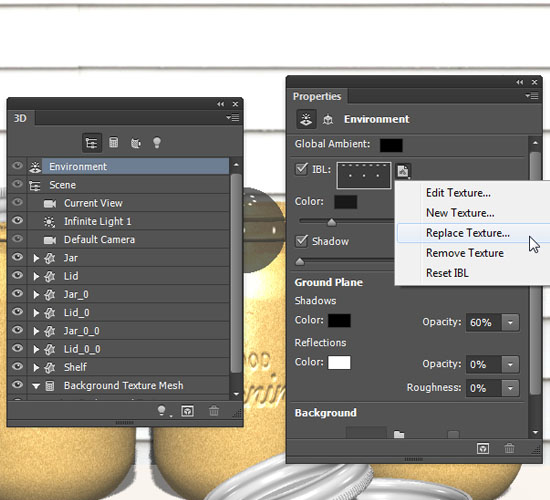
Change the Intensity to 50%.

Select the Infinite Light 1 tab, change its Intensity to 50%, and its Shadow Softness to 30%.

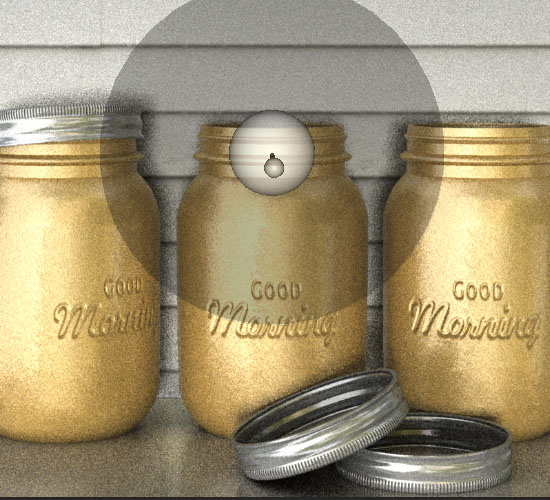
Next, select the Move Tool, select the Environment tab once again, then start clicking and dragging to move the texture around until you like the lighting of the scene.
You can run fast renders to see if anything needs further modification, by going to 3D > Render. Once you have a good idea on how thing look, press the Esc key to continue working on the scene.
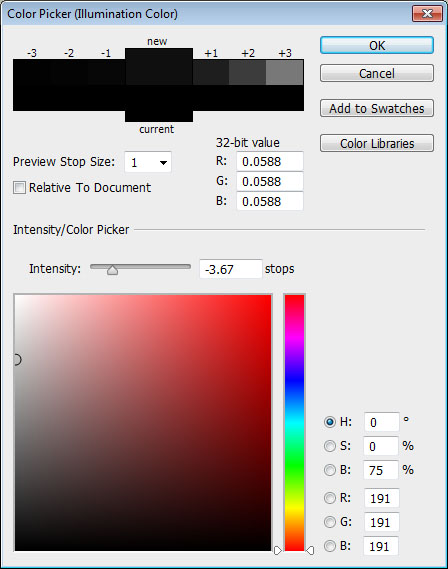
If the jars are too dark, you can select all their Extrusion Material tabs, and play around with the Illumination color values. Here, the color is R = 191, G = 191, B = 191, and the Intensity is set to -3.67.
You can also move the Infinite Light 1 around to get a different result. You can get many cool different outcomes by changing the Lighting of the scene.
Step 13
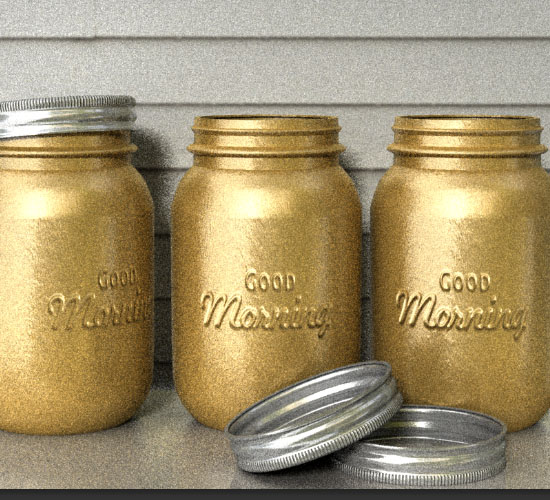
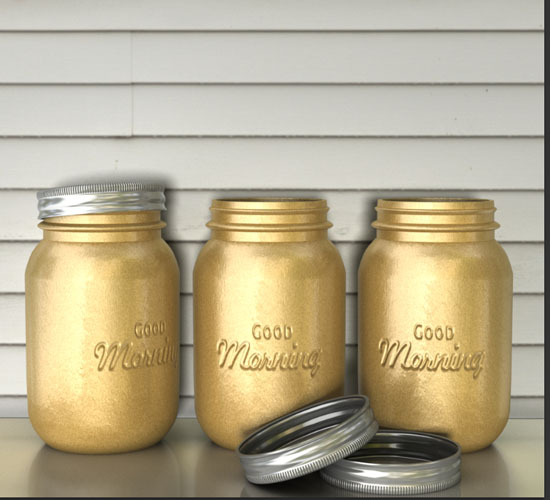
When you achieve a result you’re satisfied with, go ahead and fully render the scene.
The rendering might take some time. Once it’s done, save the file, then click the Create new fill or adjustment layer icon down the Layers panel, and choose Gradient Map.
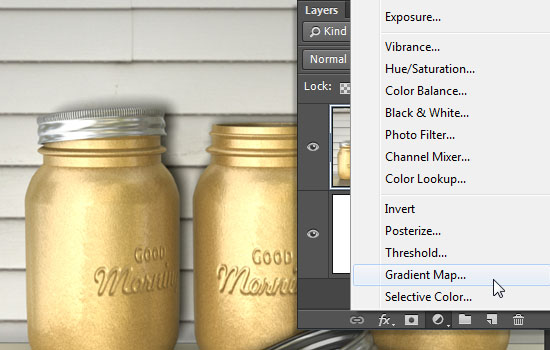
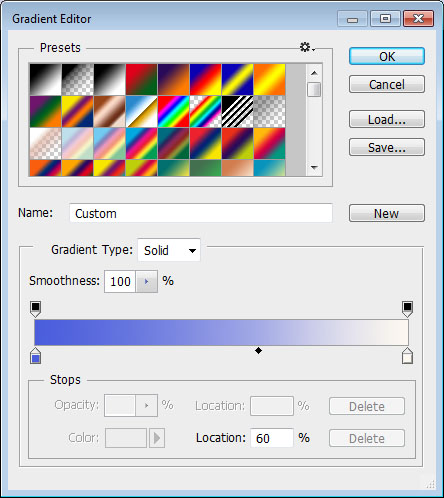
Change the Adjustment Layer’s Blend Mode to Color Burn and its Opacity to 10%. Then click the Gradient box to create the gradient used.
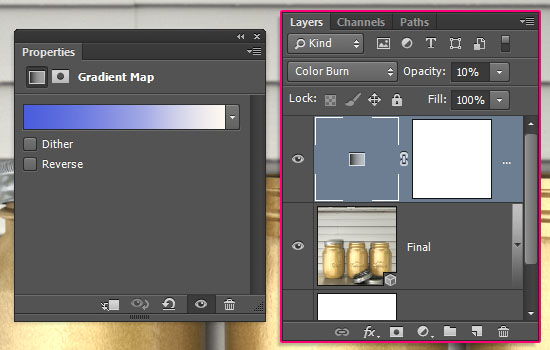
The Gradient is created using the colors #4a5ddc to the left and #fdf8ef to the right. The color Midpoint‘s Location value is then set to 60%.
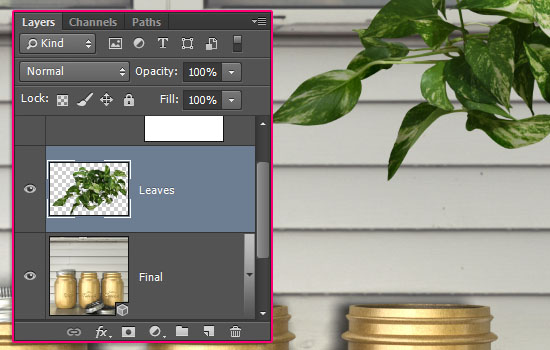
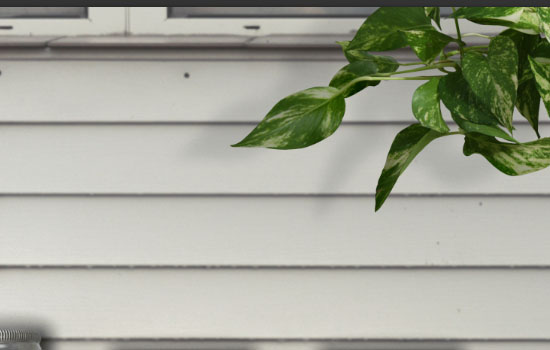
Open the Plant (Epipremnum pinnatum) image, go to Select > All, then to Edit > Copy. In the original document go to Edit > Paste. Duplicating the layer will un-render the scene, that’s why the image was copied and pasted instead.
Enter the Free Transform Mode (Ctrl/Cmd + T) to resize and position the image in one of the document’s corners – make sure that its layer is below the Gradient Map layer.
Double click the Leaves layer to apply a Drop Shadow effect:
- Opacity : 10%
- Uncheck the Use Global Light box
- Angle : 10 (An Angle that matches the 3D Scene’s Shadows)
- Distance : 80
- Size : 20
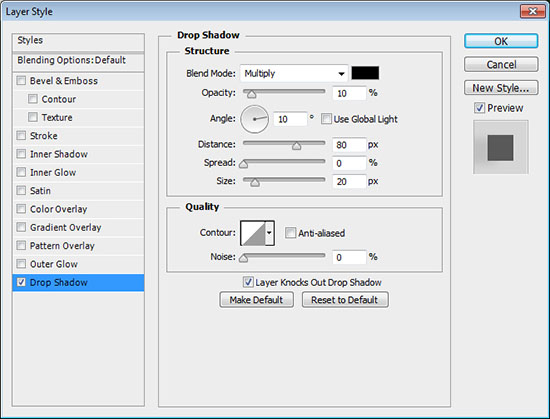
This will add a simple shadow to the Leaves.
And you’re done!
What’s cool about this effect is that you can absolutely play around with it as you like, using different colors, fonts, materials, etc.
Hope you enjoyed the tutorial and found it helpful 🙂
Did you enjoy this post? Please consider donating to help us cover our server costs.


Amazing yaar .. hats off …….!
Thank you very much! 🙂
I am using PS CC and it doesn’t matter what I do I cannot get to see the text on the jar.
I’ve moved it everywhere, made it larger, looked with the camera all around the jar but I can’t see it. I’ve done it in White, made it a smart object and am despairing. What can I be doing wrong please?
Glad the problem was solved!
Thanks a lot for the comment 🙂