
Blossom Text Effect
This tutorial explains how to create a soft blossoming text effect using Photoshop’s Layer Styles and a simple brush.
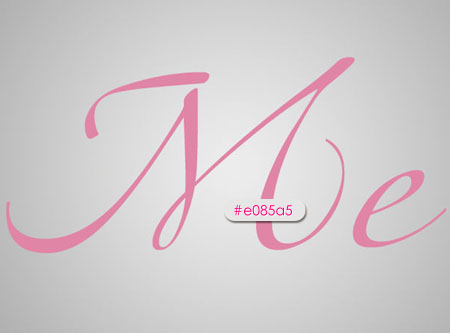
The Final Result

Tutorial Details
- Software Used : Photoshop
- Version : CS5 Extended
- Time : 0:20 – 0:35
Resources
- LTZapfino Two font, but you can use a similar free font like Easy Street Alt EPS font.
- Leaves Brush.
Step 1
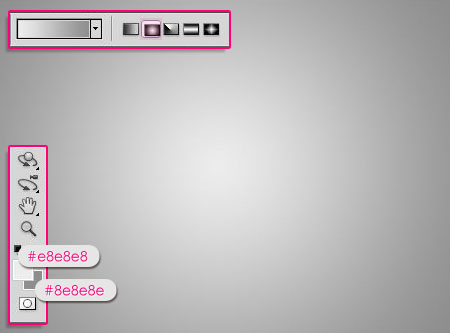
Create a new 1024 x 768 px document. Set the Foreground color to #e8e8e8 and the Background color to #8e8e8e, then, create a Radial Gradient starting from the center of the document to one of its corners.
Create the text using the color #e085a5. The font used is LTZapfino Two, but you can use the Easy Street Alt EPS font as well, and the Size is 450 px.
Step 2
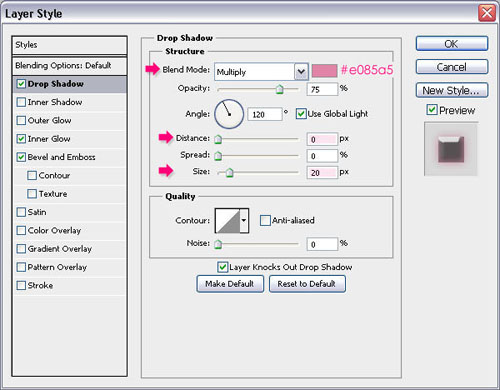
Double click the text layer to apply the following Layer Style:
– Drop Shadow
- Color :
#e085a5 - Distance : 0
- Size : 20
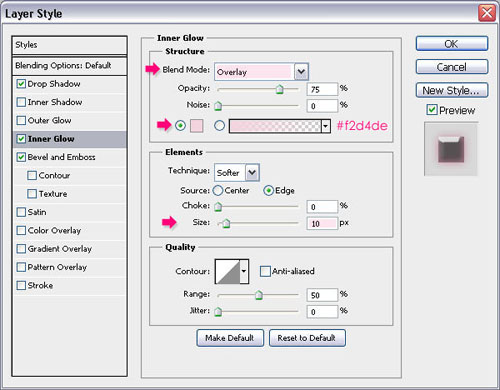
– Inner Glow
- Blend Mode : Overlay
- Color :
#f2d4de - Size : 10
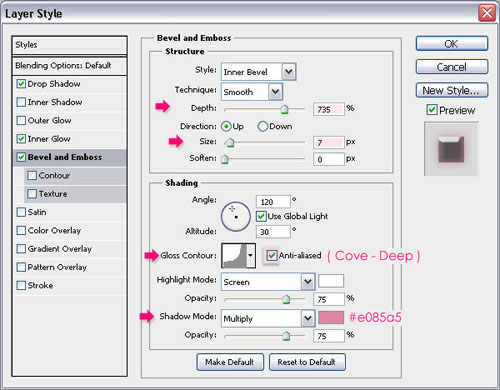
– Bevel and Emboss
- Depth : 735
- Size : 7
- Gloss Contour : Cove – Deep
- Check the Anti-aliased box
- Shadow Mode – Color :
#e085a5
The text should look like this:

Step 3
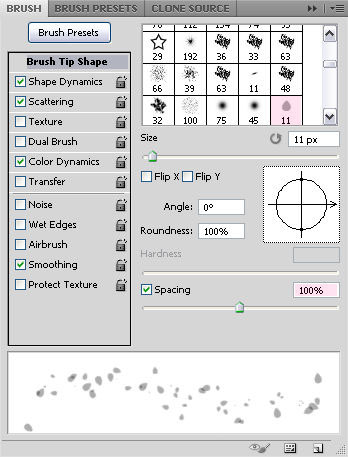
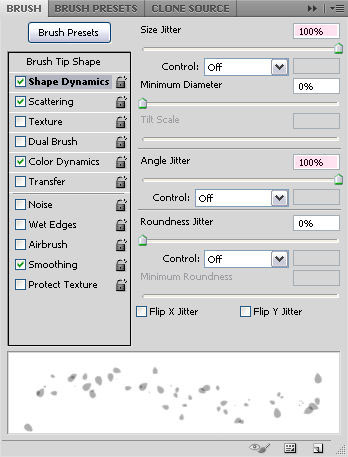
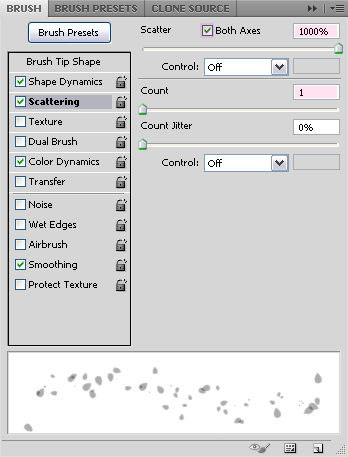
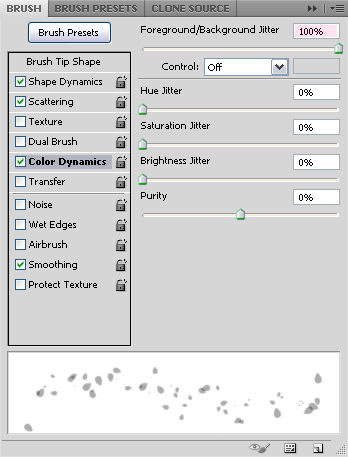
Load the Leaves Brush into your Brush panel (Window > Brush), and modify its Settings as below:
Brush tip Shape.
Shape Dynamics
Scattering
Color Dynamics
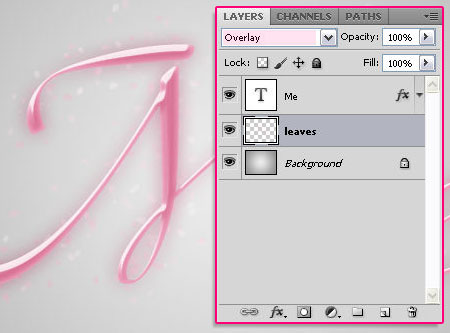
Step 4
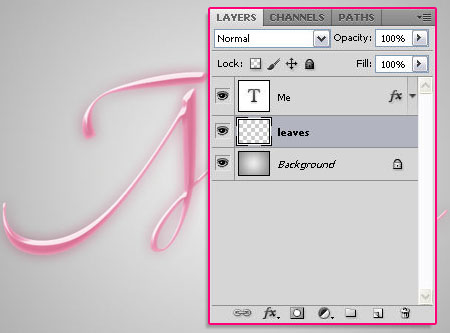
Create a new layer under the text layer and call it leaves.
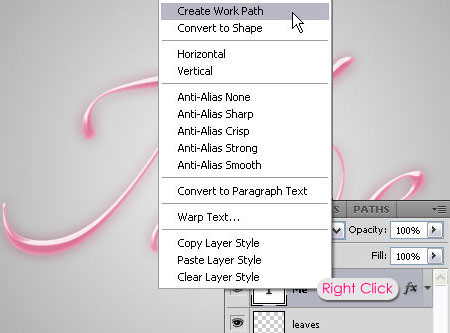
Right click the text layer and choose Create Work Path. Make sure to select the leaves layer once again.
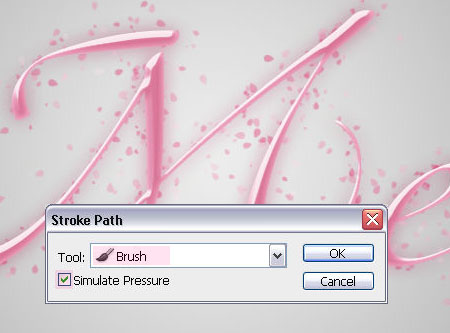
Set the Foreground color to #ffe3f2 and the Background color to #e90052. Then, right click the path and choose Stroke Path.

Choose Brush from the Tool drop down menu, and check the Simulate Pressure box.
Step 5
Change the leaves layer’s Blend Mode to Overlay.
Duplicate the leaves layer.
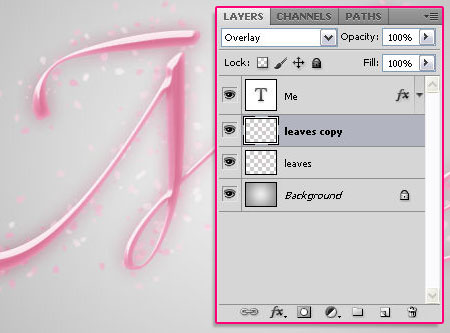
With the leaves copy layer active, go to Filter > Blur > Gaussian Blur, and change the Radius to 2.5.
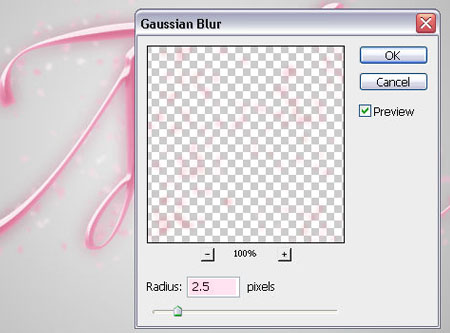
The blur will make the leaves look softer, so you can increase or decrease the Radius value as you like.

And that’s it!
Did you enjoy this post? Please consider donating to help us cover our server costs.


hi i found this tutorial sooooo amazing and fantastic to do have you anymore like this its so pretty
Hello samantha,
Thank you so much for the nice comment, glad you liked the tutorial.
You can check out the other tutorials as well, and hopefully I’ll create similar ones soon.
Thanks once again.
Nice one i like it
Thanks!
🙂
noriu pats susikurti logotipa
Hello Edvinas,
Do you mean a tutorial on how to create the text in the header of the website? If so, I’ll hopefully post a tutorial for a similar effect soon.
Aciu for the comment.
I really like this effect.
thanks for giving this effect.
Hi fathima, so glad you like it.
Thanks for the comment.
Used this for a picture I was making loved the outcome; soft and beautiful. Toda look forward to more tutorials. Shalom
Al lo davar!
It’s great that you used the effect in your work.
Thank you for the comment Lilly.
Cheers 🙂
Really great text effect. Can I translate it with your copyrights?
You definitely can, just please link back to this page.
Thank you so much for the comment.
This is really pretty, cute and elegant! I just love it! And it is very simple, thanks alot 🙂
So glad you liked it 😀
Thanks a lot for the comment 🙂
Ooooo….I had fun playing with you today :} Anniversary card for my daughter! Thanks…you rock! :)))))
Awesome 🙂 Hope she liked it 😉
Thanks a lot for the comment, and Happy Anniversary to your daughter 😀
Realy best and Easy Tutorials.
i am very thankful and have a bundle of thank fo rthe aurthor of this tutorials
plz carry on new tutorials. your style to make tutorial is eays thatw e can follow your steps.
I’m so happy to know that.
Thank you very much for the support.
really good tutorial. i love google. gogole show me your webiste at 2nd page for text tutorial photoshop. very goood and nice tutorial.
Please continue your gooooooooooood work. if possible for you to make tutorial to make letterhead envelope tutorial also
but i m very happy to make practice this tutorial
thank u so much buddy
Gotta love google for that 😉
Thank you very much for all the support, I’m so glad you found the tutorials helpful.
Thanks once again for the comment.
Hey,
I absolutely loooooooooved your amazing tutorial! Hope you make some more …
Smilies 🙂
Thanks a bunch for the nice comment and the support 😀
Very nice tutorial……….. thanks for sharing …….. 🙂
Thanks a lot for the comment 🙂
how is it
It looks great! But it seems like you’ve used different values for the text or the layer style, because the text is a bit less glossy.
Nice outcome, nonetheless 🙂
Thank you very much for sharing your work.
Hello,I am trying to do this tut and I am stuck where I should make a new workpath.PS creates a selection of my text with ancorpointes and I don’t know how to remove them????