
Glittering Text Effect
In this tutorial, we’ll create a sparkly glittering text effect, by using Layer Styles and applying some Filters.
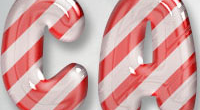
The Final Result

Tutorial Details
- Software Used : Photoshop
- Version : CS5 Extended
- Time : 0:45 – 1:15
Resources
- Forte font.
- 4 Free Leather Textures.
Step 1
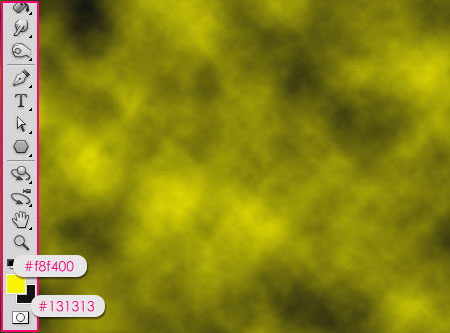
Create a new 1024 x 768 px document. Set the Foreground color to #f8f400, and the Background color to #131313. Then go to Filter > Render > Clouds.
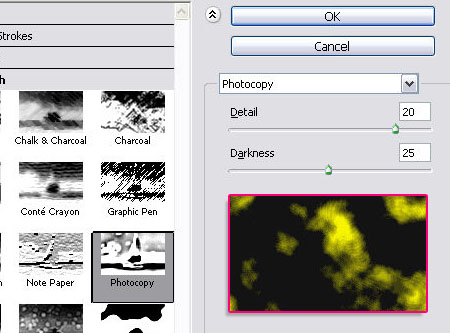
Go to Filter > Sketch > Photocopy. Set the Detail value to 20, and the Darkness value to 25.
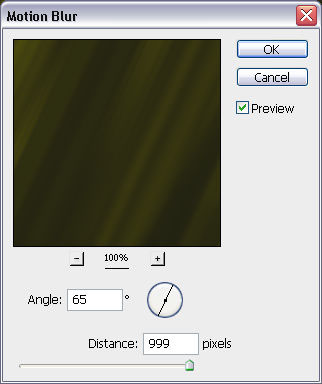
Go to Filter > Blur > Motion Blur. Set the Angle value to 65, and the Distance value to 999.
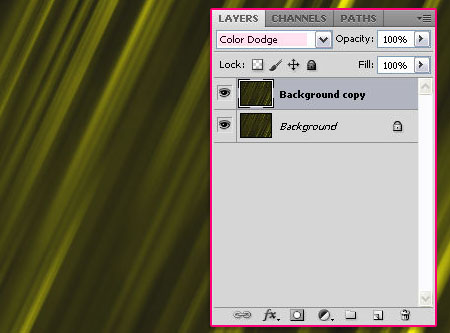
Duplicate the Background layer, and change the copy’s Blend Mode to Color Dodge.
Step 2
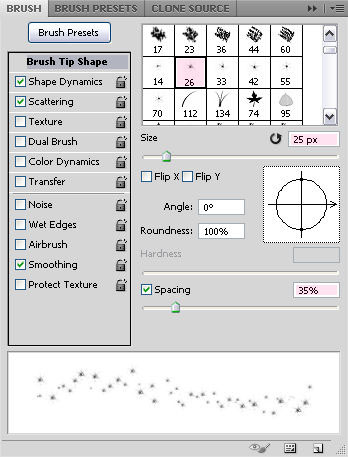
Open the Brush panel (Window > Brush). Pick one of the sparkle brushes available, and change its Settings as below:
Brush Tip Shape.
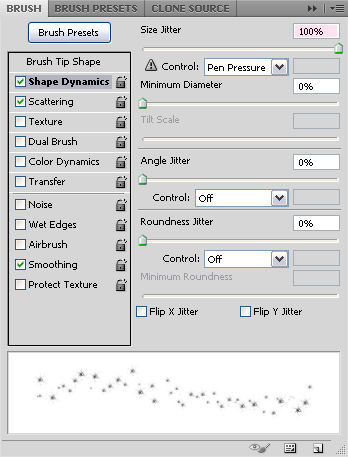
Shape Dynamics
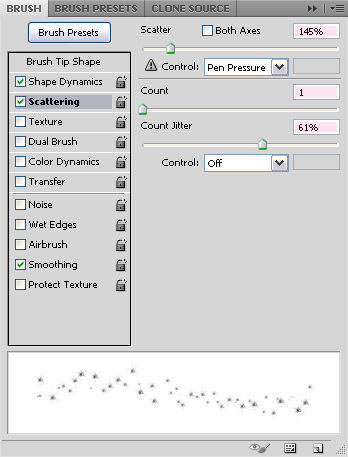
Scattering
Step 3
Create a new layer and call it BG Sparkles, change its Blend Mode to Color Dodge. Then, pick the Pen Tool, and draw a line (by clicking where you want it to start and where you want it to end). It is better to draw the line over the brighter areas in the background.
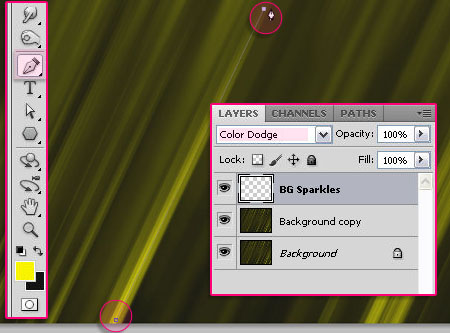
Make sure that the BG Sparkles layer is selected, then right click on the path and choose Stroke Path.
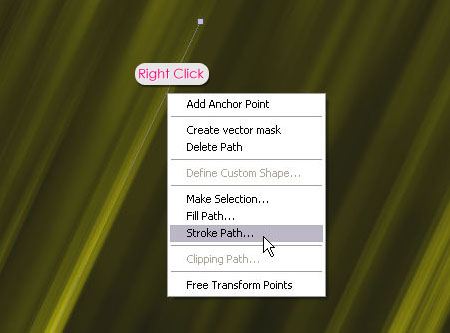
Choose Brush from the Tool drop down menu, and check the Simulate Pressure box.
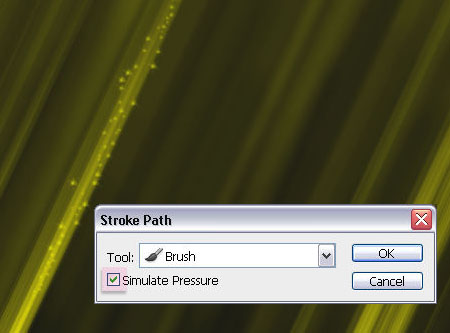
Hit Enter/Return to get rid of the path.
Repeat this to create as many lines as you like.
Step 4
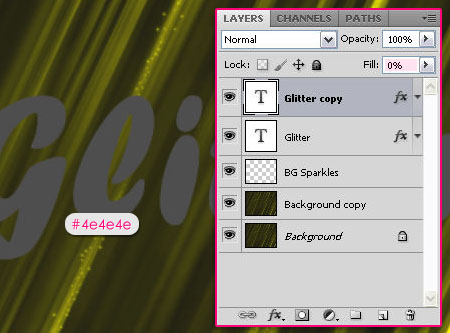
Create the text using the font Forte, the Size 300px and the color #4e4e4. Duplicate the text layer, and change the copy’s Fill value to 0.
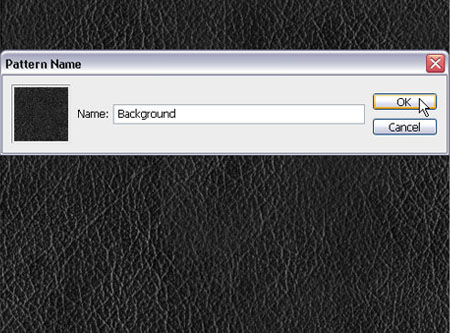
Open the black texture (number 2) from the 4 Free Leather Textures pack.
Go to Edit > Define Pattern, and type in a name for the pattern.
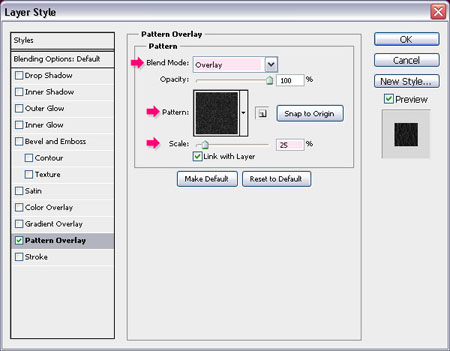
Double click the original text layer, and add a Pattern Overlay effect. Change the Blend Mode to Overlay, choose the defined pattern from the drop down menu, and change the Scale to 25%.
Step 5
Double click the copy text layer to apply the following Layer Style:
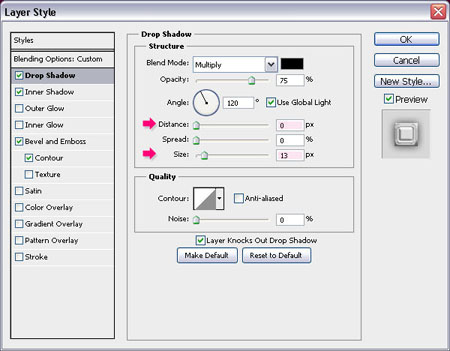
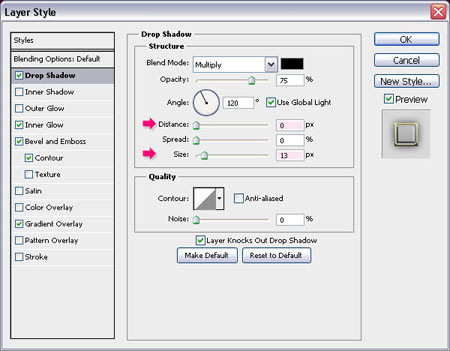
– Drop Shadow
- Distance : 0
- Size : 13
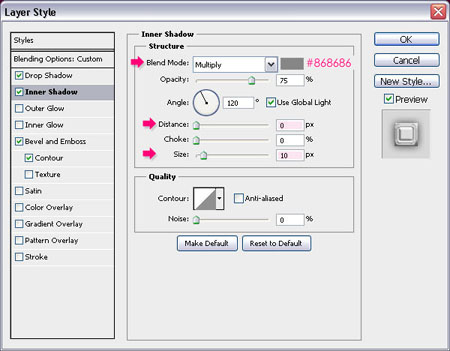
– Inner Shadow
- Color :
#868686 - Distance : 0
- Size : 10
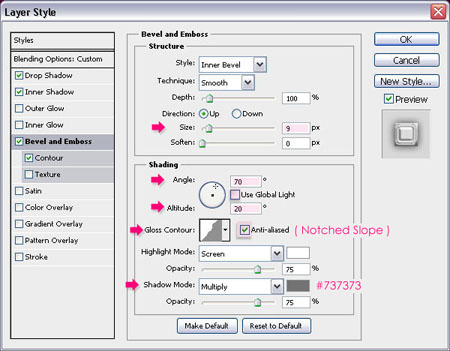
– Bevel and Emboss
- Size : 9
- Uncheck the Use Global Light box
- Angle : 70
- Altitude : 20
- Gloss Contour : Notched Slope
- Check the Anti-aliased box
- Shadow Mode – Color :
#737373
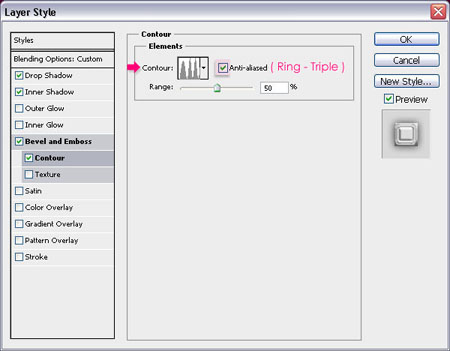
– Contour
- Contour : Ring Triple
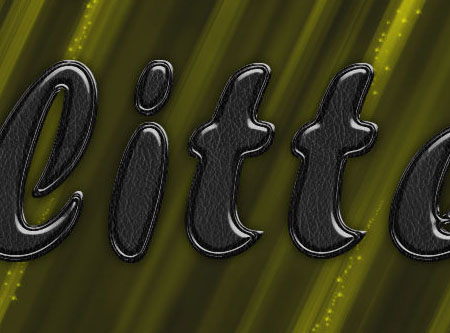
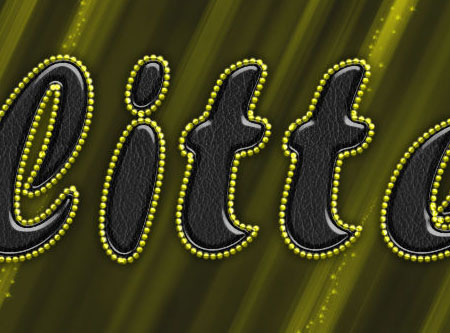
You should end up with something similar to this:
Step 6
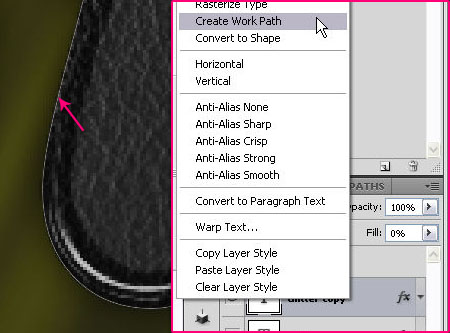
Right click any of the text layers and choose Create Work Path.
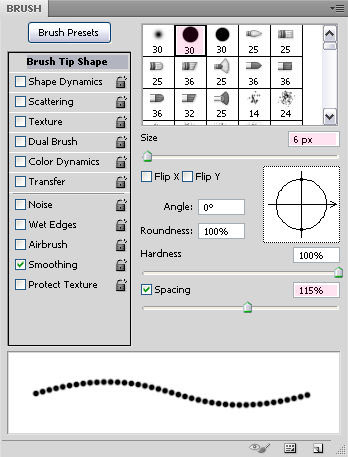
Open the Brush panel again, and this time, choose a round hard brush. Change the Size to 6px, and the Spacing to 115%.
Create a new layer on top of all layers, and call it Brush Stroke.
Change the Foreground color to #fff43e, then place the cursor somewhere near the work path and hit Enter/Return. This will stroke the work path with the brush.
Press Ctrl/Cmd + H to get rid of the work path.

Step 7
Double click the Brush Stroke layer to apply the following Layer Style:
– Drop Shadow
- Distance : 0
- Size : 13
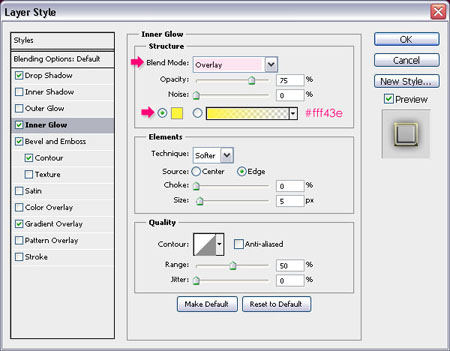
– Inner Glow
- Blend Mode : Overlay
- Color :
#fff43e
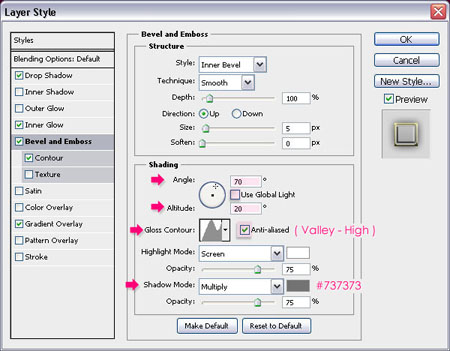
– Bevel and Emboss
- Uncheck the Use Global Light box
- Angle : 70
- Altitude : 20
- Gloss Contour : Valley High
- Check the Anti-aliased box
- Shadow Mode – Color :
#737373
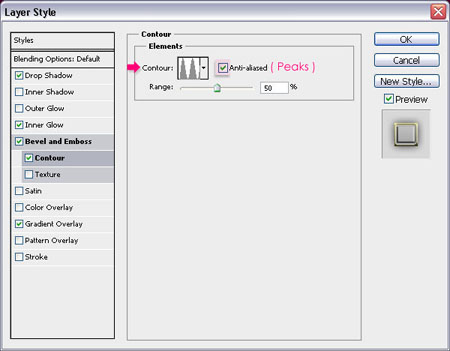
– Contour
- Contour : Peaks
– Gradient Overlay
- Blend Mode : Soft Light
- Angle : 90
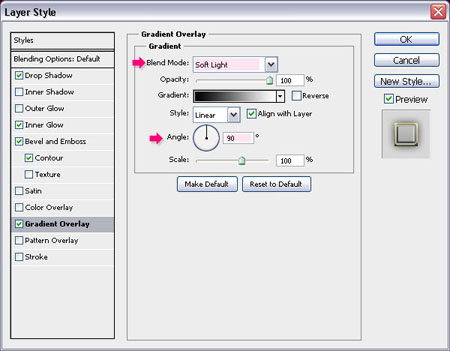
This will style the stroke.
Step 8
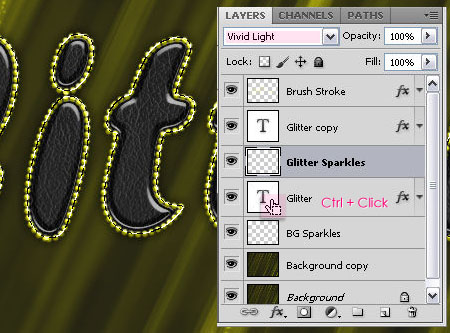
Create a new layer between the two text layers and call it Glitter Sparkles, then change its Blend Mode to Vivid Light. Ctrl/Cmd + Click one of the text layers’ thumbnail to create a selection.
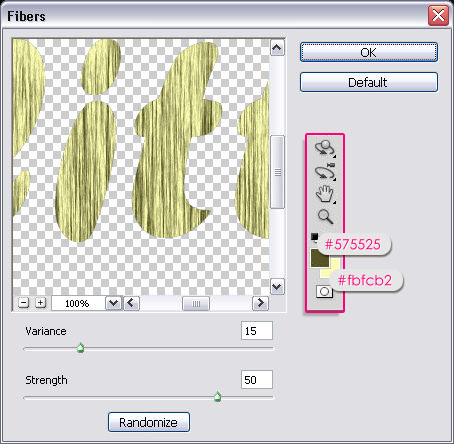
Set the Foreground color to #575525 and the Background color to #fbfcb2, and fill the selection with the Foreground color.
Then, go to Filter > Render > Fibers. Change the Variance to 15, and the Strength to 50.
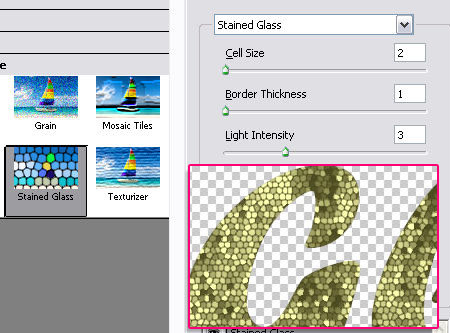
Go to Filter > Texture > Stained Glass. Change the Cell Size to 2, the Border Thickness to 1, and the Light Intensity to 3.
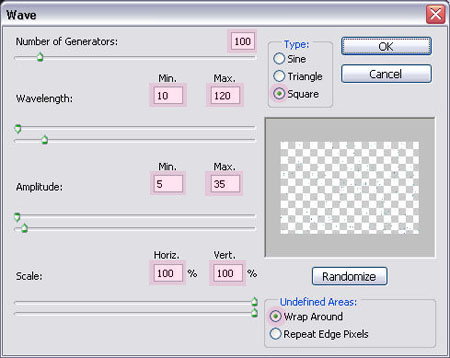
Go to Filter > Distort > Wave. Change the values as shown below.
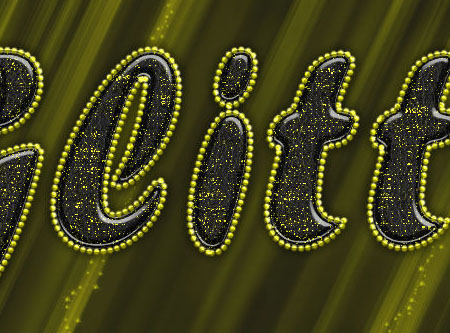
This is what you will end up with.
Step 9
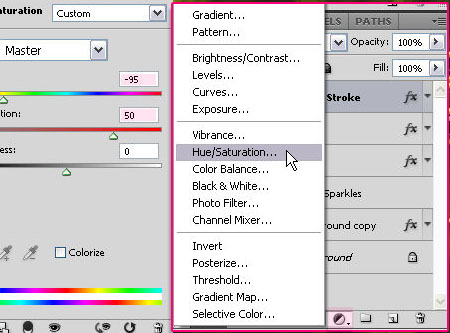
You can then add a Hue/Saturation adjustment layer on top of all layers, then change the Saturation value to 50. This will make the colors more vivid. You can also change the Hue value to change the color.
This is the final result once again.
Did you enjoy this post? Please consider donating to help us cover our server costs.


Nice Effect…good tutorial
Thanks!
Very nice tut. Todah!
Thank you Lilly 🙂
wowW
greaaaat 😀
Thanks 🙂
Awesome effect…Thanks…^^
Thanks for the comment.
Lovely….. effect….
Thanks!
Superb Tut……..! Thanks for Sharing…..
Thank you so much, glad you enjoyed it.
Which font did u use ????????
Hello Ashley,
The font used is “Forte”, but it’s not a free font. You can use any bold rounded font instead. Maybe something like Adira Display or Ballpark Weiner for example.
Hope that helps.
Best regards.
Thanks for saying me the name and I got it for free 😀
You’re welcome 🙂
I can not perform step 6, the brush is not as it should in outline … can you help me?
Hello Mary,
What does your brush look like? Did you make sure that you changed all the necessary values? Also, you might need to make sure that you are selecting the “Brush Stroke” layer before choosing Stroke Path.
Do you get any error messages when trying to do any of the above?
I really appreciate the time it took to make this. However as a novice user, I will be old and gray before I can complete all of these steps and get the desired end result. I need about 4 more years of PS experience!! LOL!!
That’s just hilarious! 😀
But I really don’t think you need all that time, this is an easy one. And even though it might seem there are too many steps, they are small easy ones.
Did you give it a try? If not, I hope you do. It’s not as hard or as long as it may seem.
Please feel free to leave a reply if you did.
Thanks for the comment 🙂
The glittering text effect is simply beautiful. I would like to use it to prepare an e-card for my friend’s birth day using this. Thank you so much for the detailed steps.
That’s so awesome to know 🙂
Thank you very much for the lovely comment.
Hope your friend likes it too 😉
Ive written my text but its the colour is light blue/green and it doesn’t let me go to Edit>Define Pattern, Why is that?
What was the Foreground color when you created the text? You can always go ahead and change the color from the Character panel (Window -> Character).
You may also want to check the Blend Mode, is it set to Normal?
When you try the Define Pattern option, is it grayed out? If not, what exactly is the problem you face?