
Noise-textured Text Effect
In this tutorial, we are going to create an easy text effect, and try to add some cool filters to the texture created using the “Noise” filter, making it even more dynamic. Just make sure you choose a pretty bold or big font type, to make the effect pop up more.
The Final Result

Tutorial Details
- Software Used : Photoshop
- Version : CS3
- Time : 0:30 – 0:45
Resources
Step 1
Create a new 1024 x 768 px document, and fill the Background with a pretty dark blue color, like #3c5362. You can also use a Gradient to fill the Background with darker or lighter colors.
Create the text using the font Bold, the color #9a3e40, and the Size 188 px.

Step 2
Double click the text layer to apply the following Layer Style:
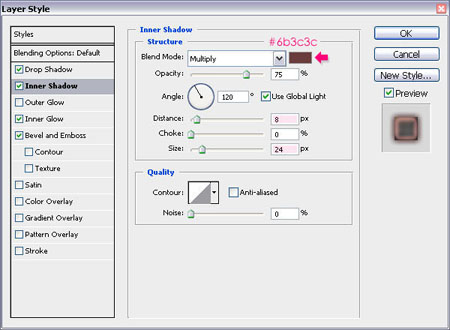
– Drop Shadow
- Color :
#532526 - Distance : 0
- Size : 9
- Contour : Half Round

– Inner Shadow
- Color :
#6b3c3c - Distance : 8
- Size : 24
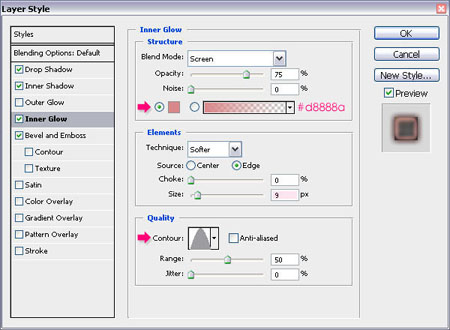
– Inner Glow
- Color :
#d8888a - Size : 9
- Contour : Cone
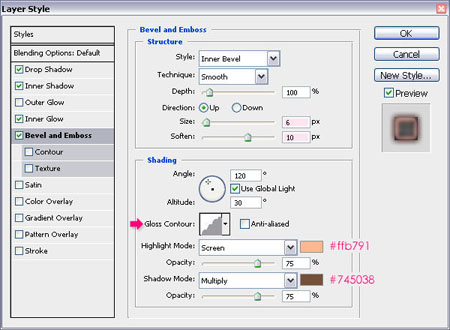
– Bevel and Emboss
- Size : 6
- Soften : 1
- Gloss Contour : Rounded Steps
- Highlight Mode – Color :
#ffb791 - Shadow Mode – Color :
#745038
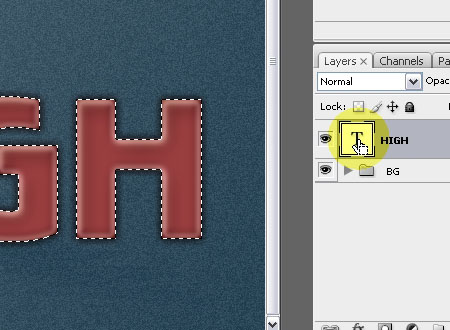
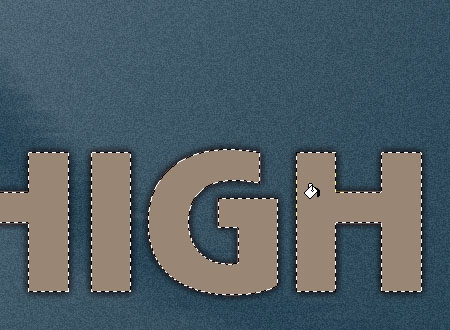
Step 3
Ctrl/Cmd + click the text layer’s thumbnail to create a selection.
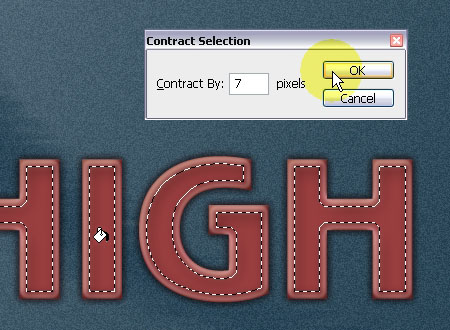
Step 4
Create a new layer on top of the text layer. Go to Select > Modify > Contract, and type in 7. Make sure that Layer 1 is still selected, and fill the selection with the color #9a3e40.
Step 5
Go to Filter > Blur > Motion Blur, change the Angle to 0, and the Distance to 70.
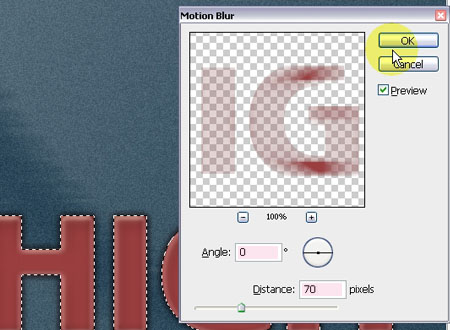
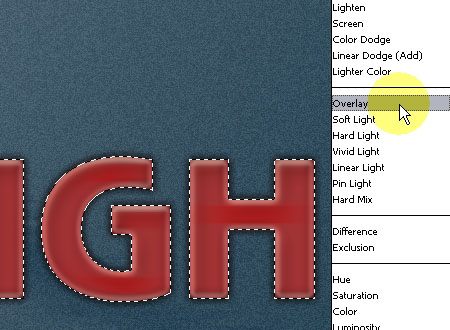
– Change the Layer 1 Blend Mode to Overlay.
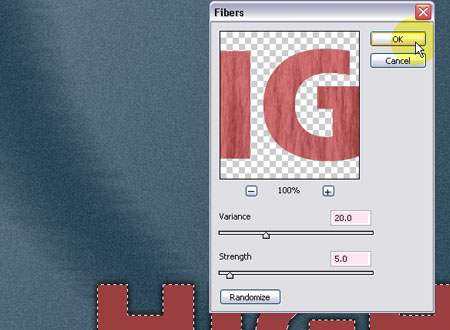
Step 6
Select the text again, and create another new layer on top of Layer 1, then fill the selection with the color #9a3e40.
Make sure that the Foreground color is set to #9a3e40, and the Background color is set to #d47375.
Go to Filter > Render > Fibers. Set the Variance value to 20, and the Strength value to 5. You can press the Randomize button until you like the result, then hit OK.
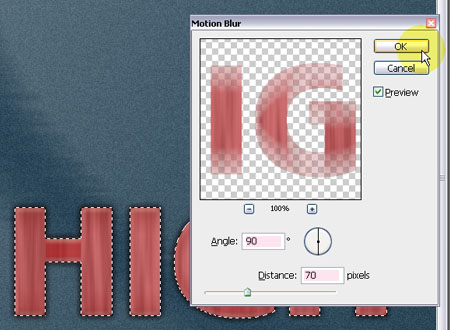
Step 7
Go to Filter > Blur > Motion Blur once again, and apply a vertical blur by changing the Angle to 90.
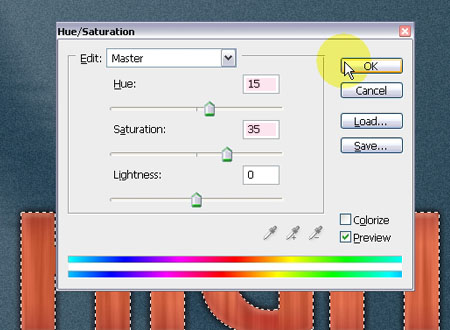
Step 8
With Layer 2 still selected, go to Image > Adjustments > Hue/Saturation, and type in the values 15 for the Hue, and 35 for the Saturation.
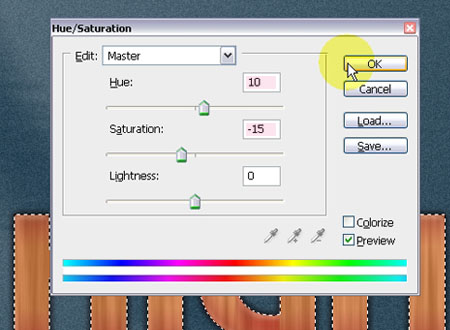
If you still want brighter colors, you can re-open the Hue/Saturation box and use different values, here, the values 10 for the Hue and -15 for the Saturation are used.
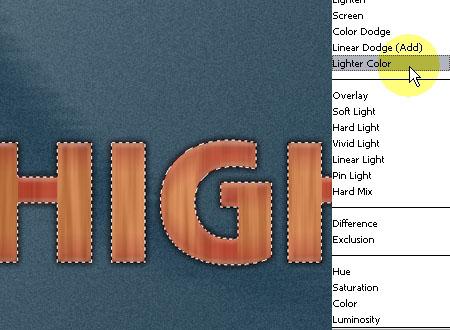
When you’re done changing the colors, change the Layer 2 Blend Mode to Lighter Color.
Step 9
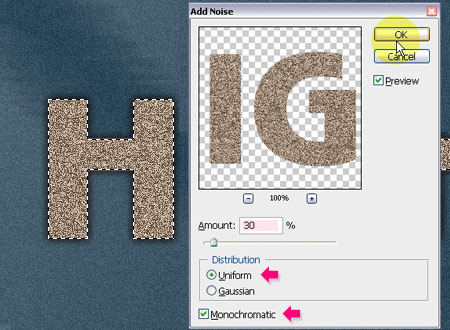
Create yet another new layer, and fill the selection with the color #998675.
– Go to Filter > Noise > Add Noise, change the Amount to 30, the Distribution to Uniform, and check the Monochromatic box.
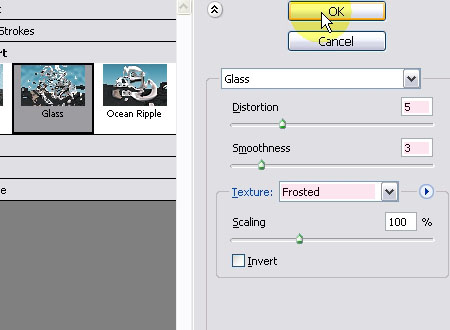
Step 10
Go to Filter > Distort > Glass. Change the Distortion to 5, the Smoothness to 3, make sure that the Texture type is set to Frosted, and that the Scaling is set to 100%.
Step 11
To smooth the “Noise” effect even more, go to Filter > Blur > Gaussian Blur, and change the Radius to 0.3.
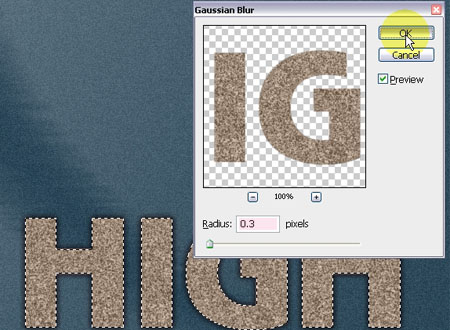
Then, change the Layer 3 Blend Mode to Soft Light.

And that’s it!
Did you enjoy this post? Please consider donating to help us cover our server costs.


Please share font link.
The font is called “Bold”, but I couldn’t find a link to download it. You can use any bold font, something like “Arial Black” for example, or the font in this link http://www.dafont.com/bold-bold.font.
Hope this works.
Thank you..^^
Have a nice day..