
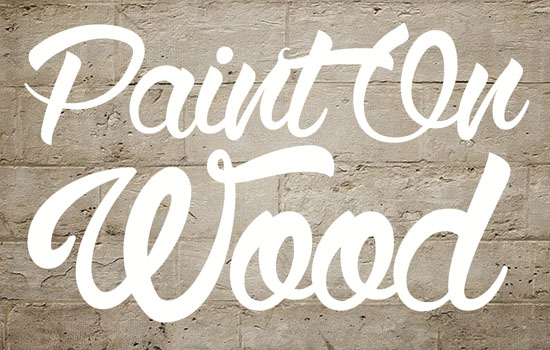
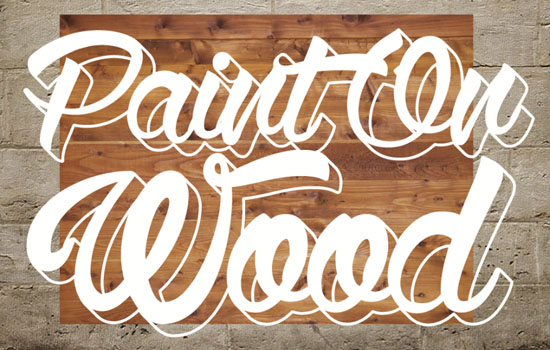
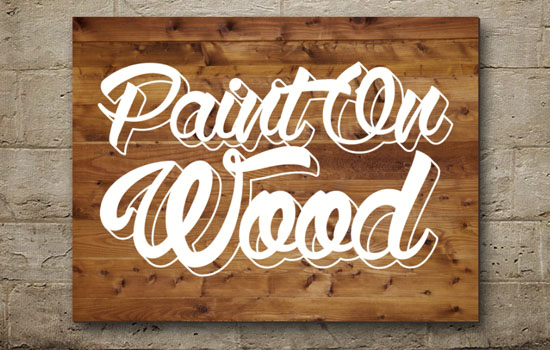
“Painted on Wood” Text Effect
Working with textures can add more depth, life, and uniqueness to almost any design. It’s always fun to use different textures with the many different elements to create more realistic and vivid outcomes.
This tutorial will show you a simple way of using a couple of textures to create a painted-on-wood text effect. It is inspired by the amazing work of Jérémy SCHIAVO, the PULSION CRÉATIVE project.
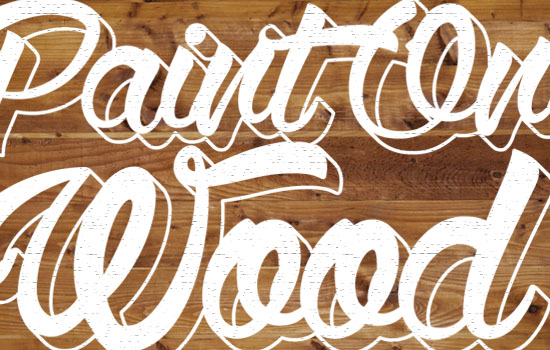
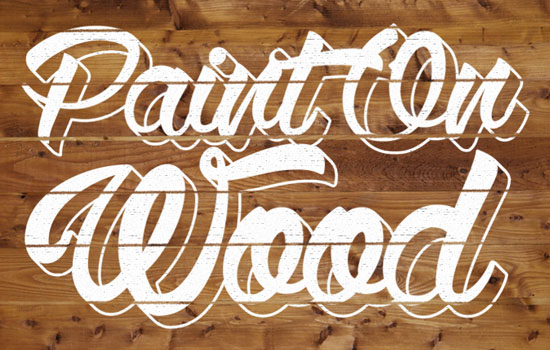
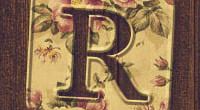
The Final Result

Tutorial Details
- Software Used : Photoshop
- Version : CS6 Extended
- Time : 0:30 – 0:45
Resources
- Wolf in the City font.
This is a Free-for-Personal-Use font, but you can use any other similar font you like as well.
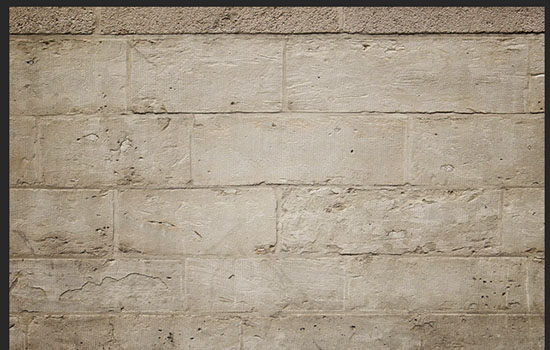
- BrickMedievalBlocks0022 (Image 1 – Medium 1600×1158) .
- WoodPlanksClean0027 (Image 2 – Medium 1600×1200).
Step 1
Create a new 1000 x 718 px document. Place the BrickMedievalBlocks0022 image on top of the Background layer, then resize it until it fits within the document.
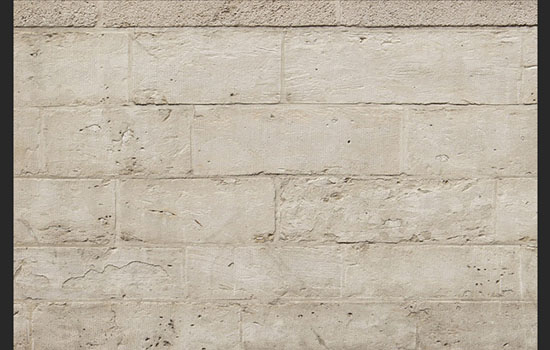
Double click the BrickMedievalBlocks0022 texture layer to apply a Gradient Overlay effect:
- Blend Mode : Soft Light
- Style : Radial
- Scale : 150%
Use a Transparent to Black gradient fill, with Black color stops at both ends of the gradient.
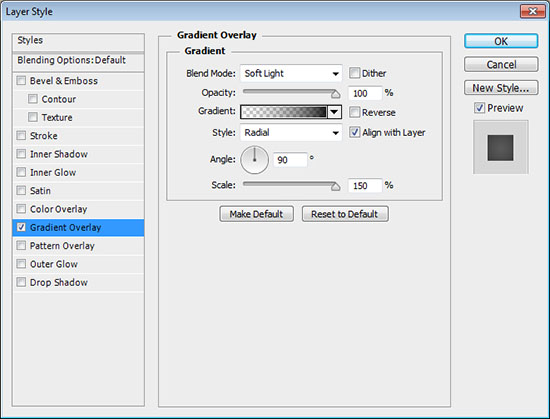
This will darken up the background texture a little bit.
Step 2
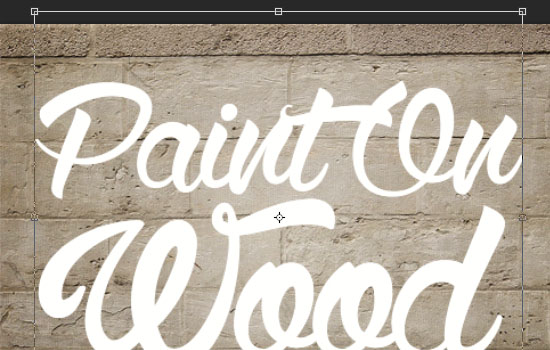
Create the text in White using the font Wolf in the City. You’ll then need to adjust the Size and Leading values to place the text as you like.
Here, the Size values used are 153.7 pt for the first line of text, and 230.5 pt for the second, with the Leading value is set to 107.6.
Duplicate the text layer and drag the copy below the original.
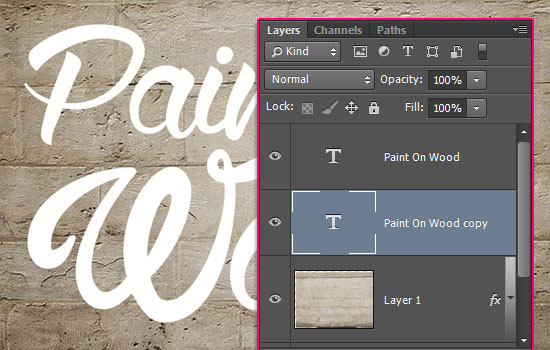
Go to Edit > Free Transform (Ctlr/Cmd + T), then click each of the Down and Right Arrow keys once to move the copy text one pixel downwards and one pixel to the right.
Hit Enter/Return to accept the changes.
Press the Alt + Ctrl + Shift + T or Option + Cmd + Shift + T keys a couple of times to duplicate the layer and the transformation until you like the depth of the extended part. Here, the total number of copies created is 17.
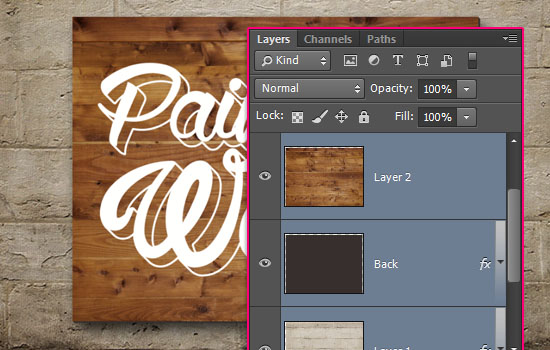
Select all the copy layers (select the layer at the top, press and hold the Shift key, then click the layer at the bottom), and go to Layer > Merge Layers.
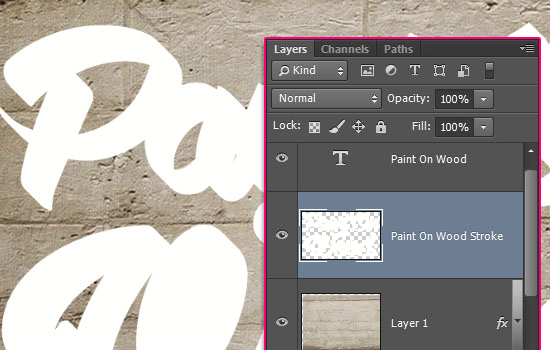
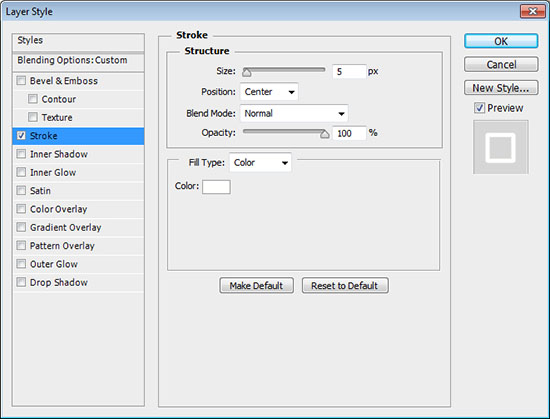
Double click the merged layer to add a Stroke effect:
- Size : 5
- Position : Center
- Color :
#ffffff
Change the merged layer’s Fill value to 0. This will create the stroke part behind the text.
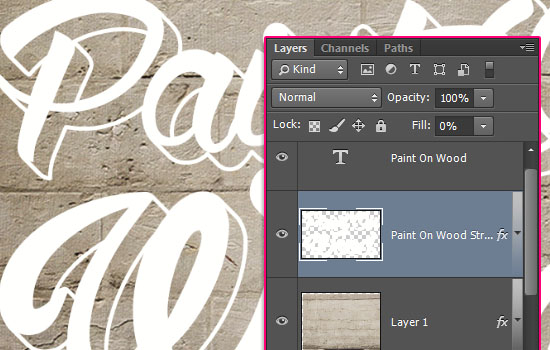
Select both the text and the stroke layers, and merge them.
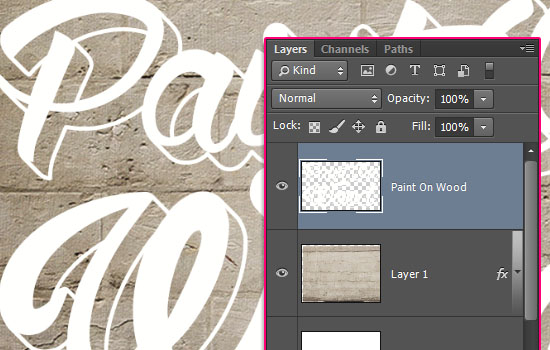
Step 3
Place the WoodPlanksClean0027 texture below the text layer, and scale it down (Edit > Transform > Scale) to a size you like. Don’t forget to hit the Enter/Return key when you’re done.
Then, scale down the text to fit it within the wood texture.
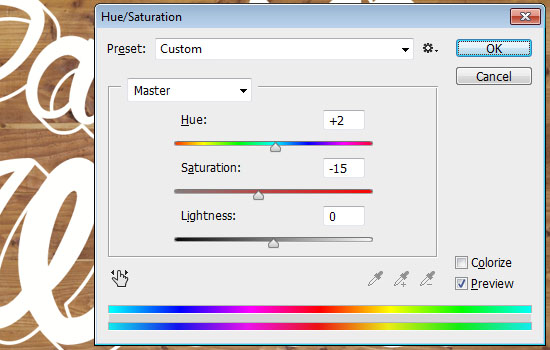
Select the wood texture layer again, and go to Image > Adjustments > Hue/Saturation. Change the Hue value to 2, and the Saturation to -15.
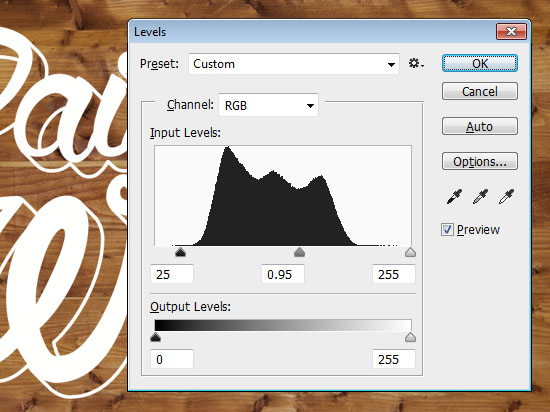
Go to Image > Adjustments > Levels, change the Shadows value to 25 and the Gamma to 0.95. This will adjust the coloring of the wood texture.
Step 4
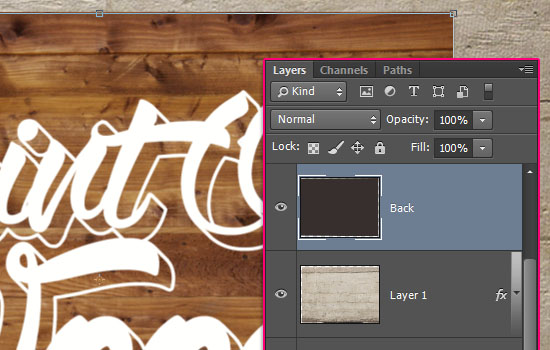
Ctrl/Cmd + click the wood texture layer’s thumbnail to create a selection.
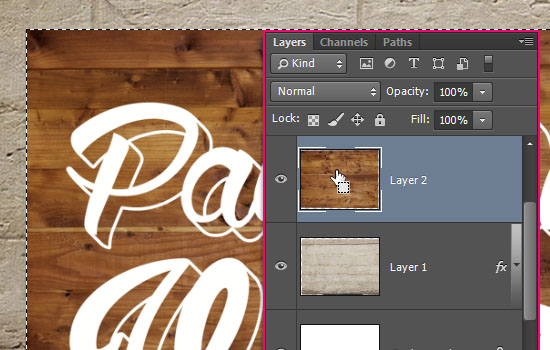
Create a new layer below the wood texture’s layer, call it Back, set the Foreground color to #362f2d, and use the Paint Bucket Tool to fill the selection with that color.
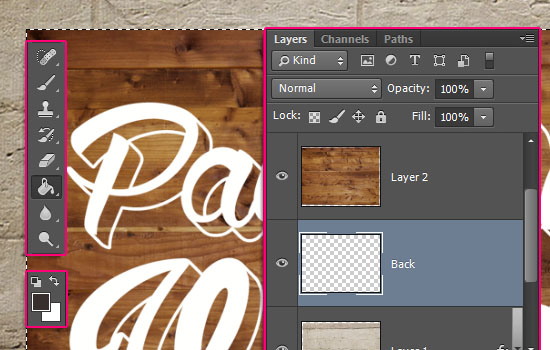
Then go to Select > Deselect to get rid of the selection.
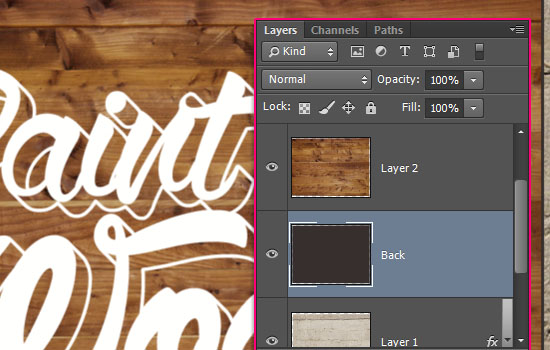
Enter the Free Transform Mode (Ctrl/Cmd + T), and move the filled part 1 px downwards and 1 px to the right. Hit Enter/Return when done.
Repeat the same steps used for creating the text stroke to create two more copies of the Back layer.
This will add a subtle 3D appearance to the wood texture.

Select all the Back layers and merge them.
Double click the merged layer to apply a Drop Shadow effect:
- Distance : 15
- Size : 27
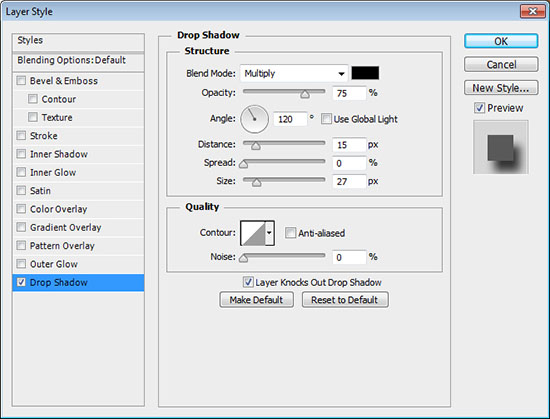
This will make the wood panel look even more 3D.
Step 5
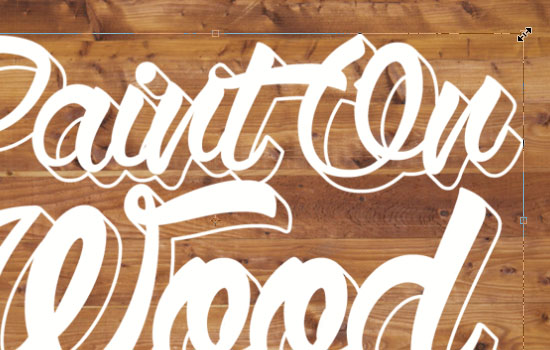
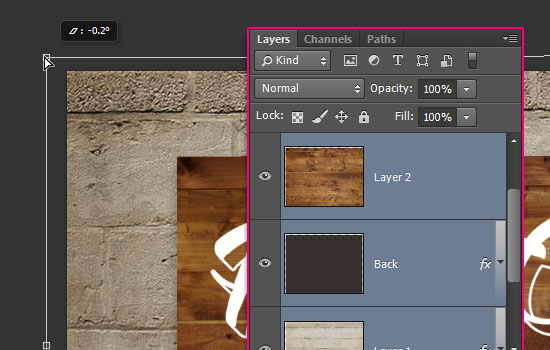
The shadow needs a subtle angle tilt of the design elements to look more realistic. To do that, select all the layers you have, except for the original (empty) background layer.
Go to Edit > Transform > Perspective. Then click the top left corner, and drag it slightly downwards to tilt the selected layers. Hit Enter/Return to accept the changes.
Set the Foreground color to #b6a187 and the Background color to White, and select the text layer.
Go to Filter > (Filter Gallery) > Sketch > Conté Crayon, and use the values shown below:
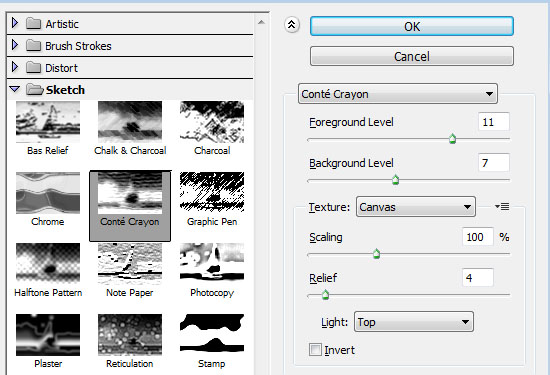
This will add some sketch marks that will help better blend the text with the wooden background.
Go to Filter > Noise > Add Noise, and use the values below to apply some more noise to the text.

Step 6
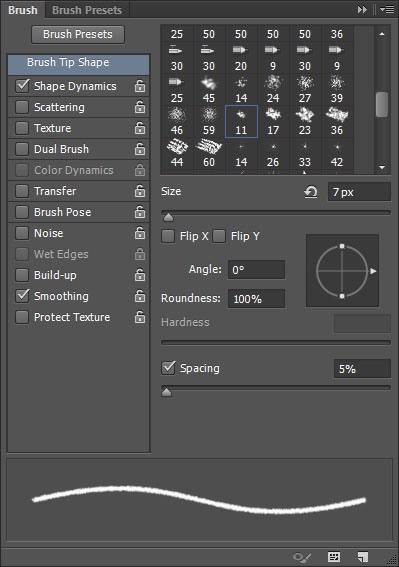
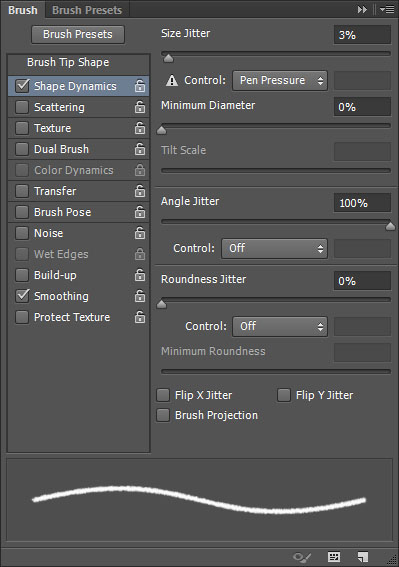
Pick the Eraser Tool, and open the Brush panel (Window > Brush).
Pick the Chalk 11 pixels tip, and modify its Settings as below:
Brush Tip Shape
Shape Dynamics
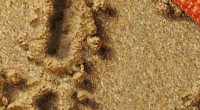
What you’ll need to do next, is find areas where the wood is divided (where there are separating lines), click once at the beginning of each line, press and hold the Shift key, and click again at the end of the line.
This will erase the text where it meets with those lines, again, helping blend it better with the wood itself, and giving a more realistic final result.
It is important to change the Brush tip Size to match the thickness of the line you’re erasing. The sizes used here are 7 px for the biggest line, 5 for the medium ones, and 3 for the smaller ones.
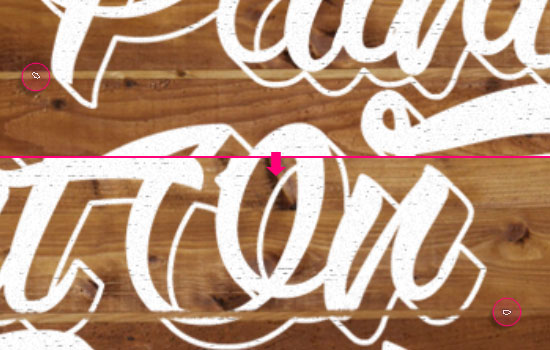
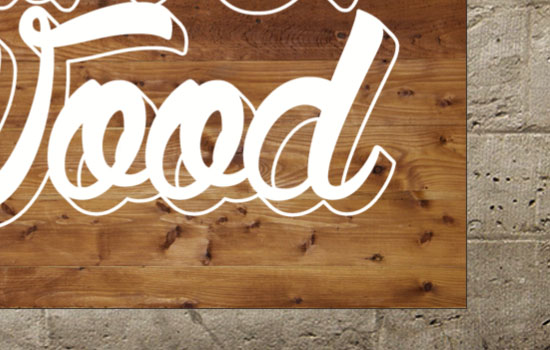
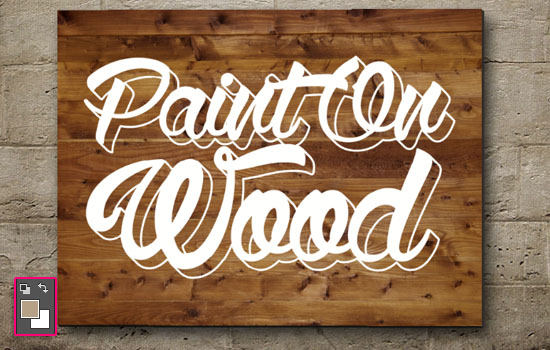
You should get a result similar to the one below when you’re done.
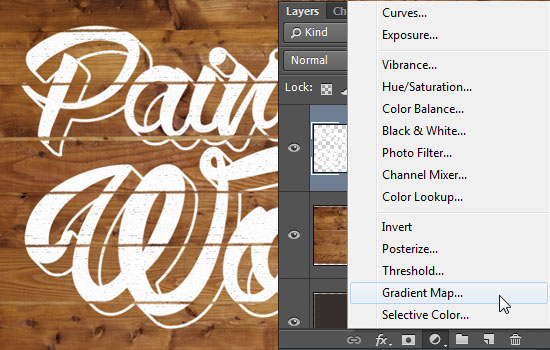
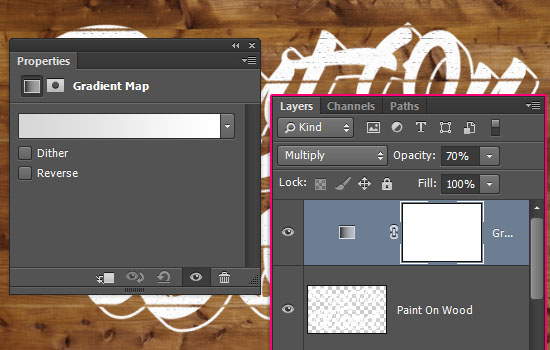
Finally, click the Create new fill or adjustment layer icon down the Layers panel, and choose Gradient Map.
Change the adjustment layer’s Blend Mode to Multiply, its Opacity to 70%, and use the colors #d7d7d7 to the left and #ffffff to the right to create the gradient.
And you’re done!
Hope you enjoyed the tutorial and found the tips and tricks used helpful 🙂
Did you enjoy this post? Please consider donating to help us cover our server costs.


You have done creative work. I love your tutorial.
Photoshop Clipping Path Service
ow Nice Work . this is really creative work that you have done and i also learned it from your post. now I will try. thanks for sharing us.
This is very useful tutorial, I really appreciate it. Looking for the next one!
Thanks!