Note Cards Text Effect
This tutorial will show you a really simple way to create a bunch of note cards, and then add some pins to group them together, using mainly Layer Styles, and some other simple elements as well.
The Final Result
Tutorial Details
- Software Used : Photoshop
- Version : CS6 Extended
- Time : 0:30 – 0:45
Resources
- Bevan font.
- Seamless Paper Patterns by WebTreatsETC.
- Beige paper pattern by Konstantin Ivanov.
- Lined Paper Patterns by kittenbella.
- Ænigma Scrawl font.
Step 1
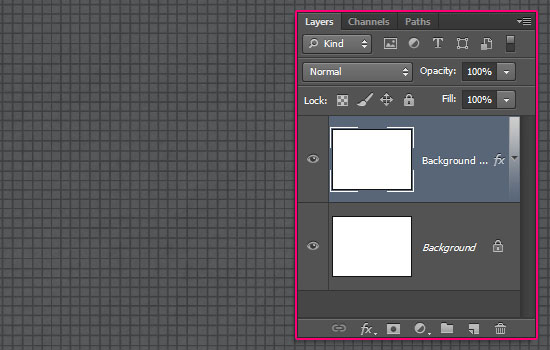
Create a new 1152 x 864 px document. Duplicate the Background layer, then double click the copy to apply the following Layer Style:
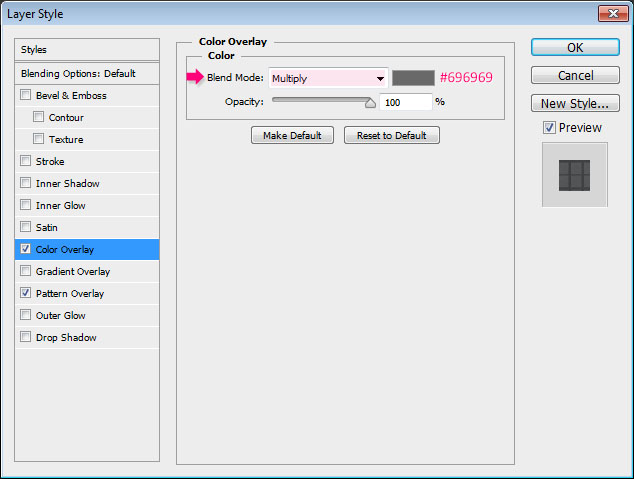
– Color Overlay
- Color :
#696969 - Blend Mode : Multiply
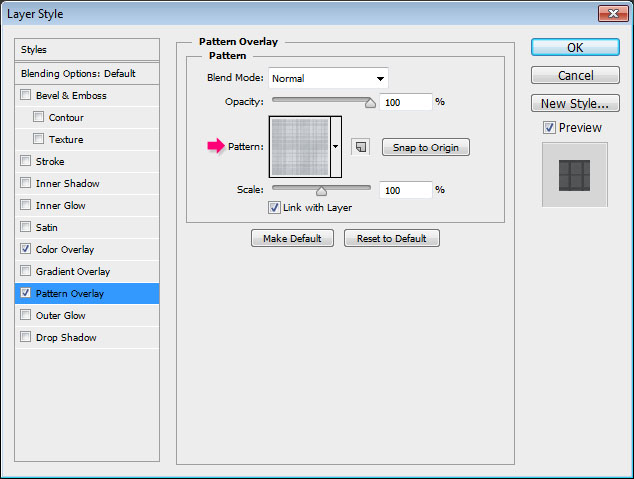
– Pattern Overlay
- Pattern : Choose the Pattern shown below (the 11th pattern) from the Seamless Paper Patterns pack.
This will style the Background.

Step 2
Create the text in All Caps using the font Bevan, the font Size 250 pt, and the color #e2d8ca.


Double click the text layer to apply the following Layer Style:
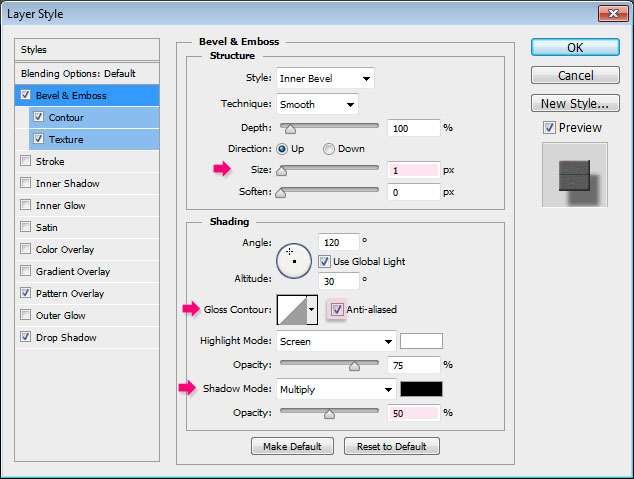
– Bevel and Emboss
- Size : 1
- Check the Anti-aliased box
- Shadow Mode – Opacity : 50%
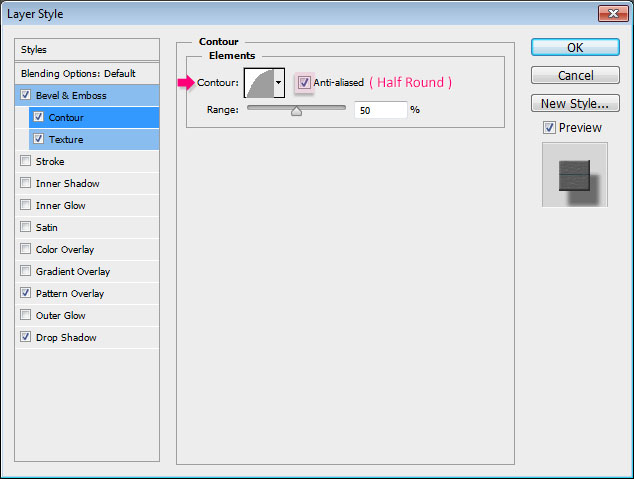
– Contour
- Contour : Half Round
- Check the Anti-aliased box.
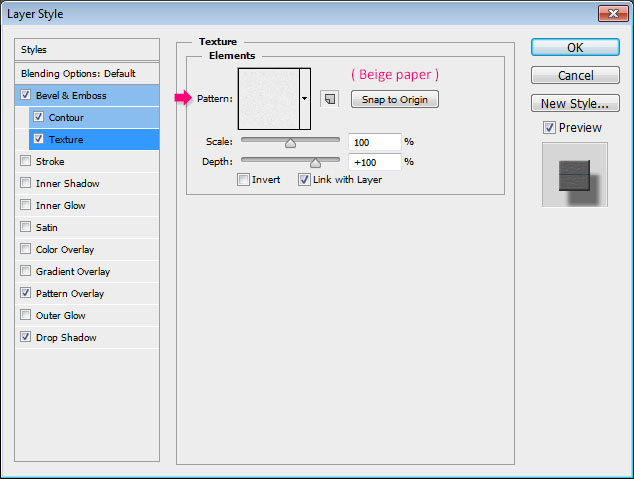
– Texture
- Pattern : Beige paper
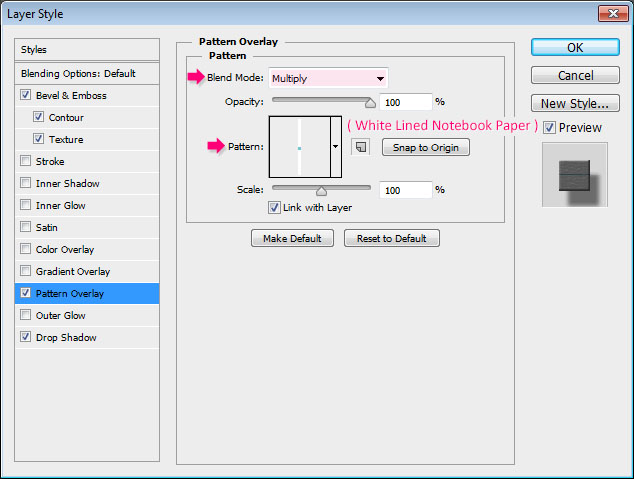
– Pattern Overlay
- Blend Mode : Multiply
- Pattern : White Lined Notebook Paper (from the Lined Paper Patterns pack)
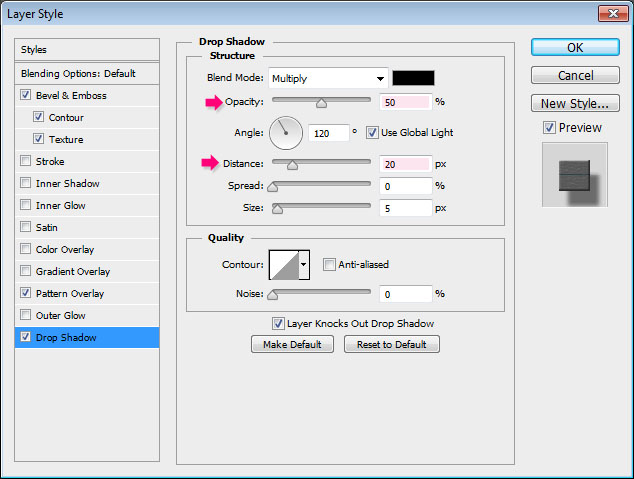
– Drop Shadow
- Opacity : 50%
- Distance : 20
This will style the text.


Step 3
Right click the text layer and choose Rasterize Type.
The text layer will no longer be editable, so you can duplicate it before this step if you want to keep an editable copy.
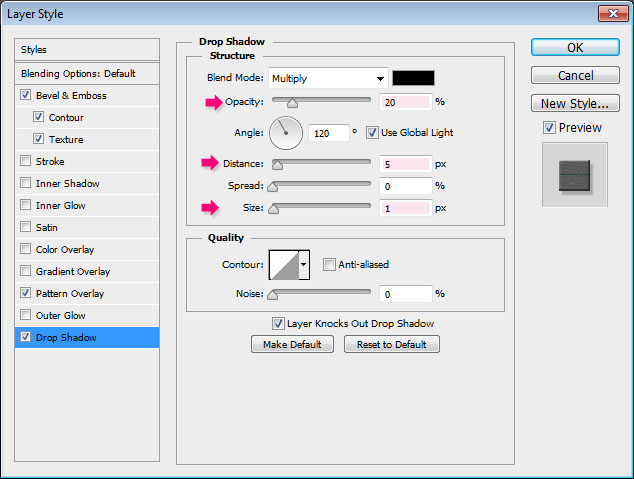
Duplicate the rasterized layer.
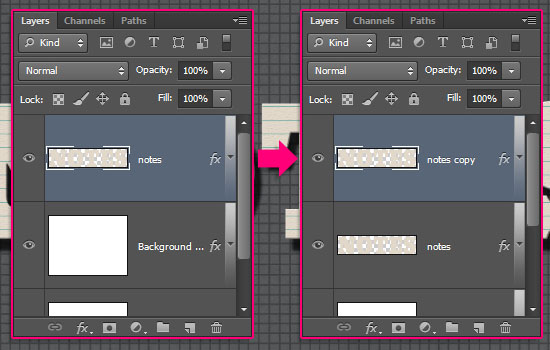

Double click the copy to modify the Drop Shadow effect’s Settings:
- Opacity : 20%
- Distance : 5
- Size : 1
This will make the drop shadow of the layers at the top more subtle.


Duplicate the copy layer four more times.
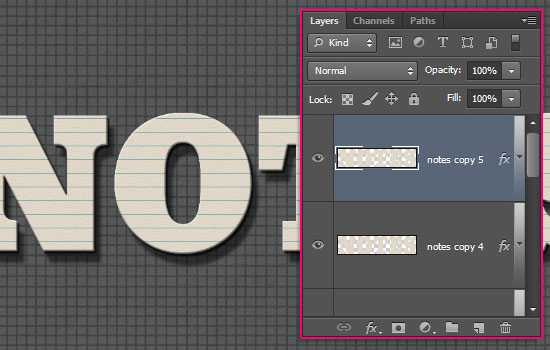

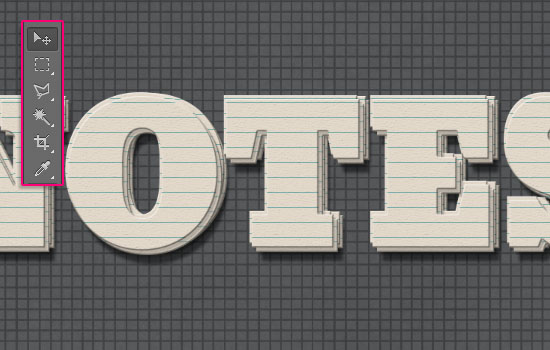
Use the Move Tool to select each layer, then move its text slightly to separate the cards a little bit. You can use the Keyboard’s Arrow Keys for that as well.

Step 4
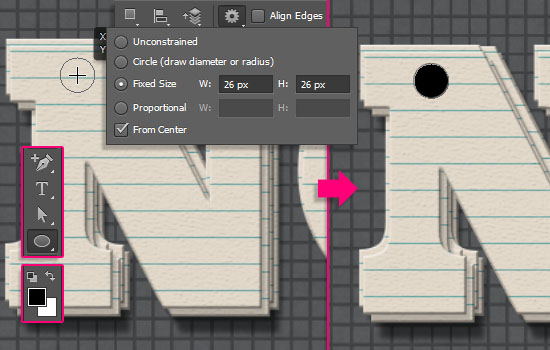
Pick the Ellipse Tool, and make sure that the Shape option is active (in the Options bar). Then, click the Geometry Settings icon, set the Fixed Size dimensions to 26, and check the From Center box.
What this will do, is enable you to create a 26 x 26 px circle from the center. So click and drag slightly to place a circle where you want to add the pin over the first letter you have.

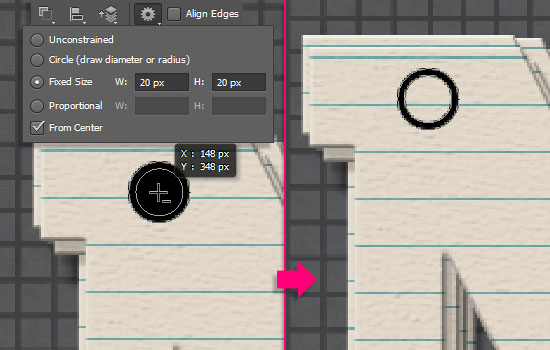
Now, change the Fixed Size dimensions to 20, and click the Subtract Front Shape icon. Then click and drag slightly in the middle of the first circle you created, to subtract the new one from it.
This will simply create a ring shape. You can change the Fixed Size dimensions depending on how big/small or thick/thin you want the ring to be.

Double click the ring shape layer to apply the following Layer Style:
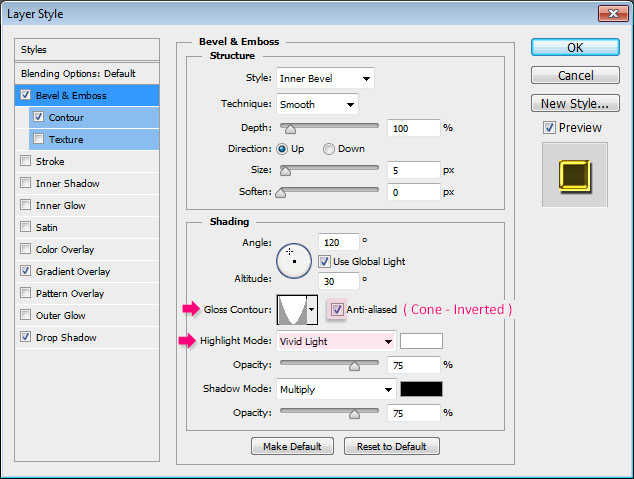
– Bevel and Emboss
- Gloss Contour : Cone – Inverted
- Check the Anti-aliased box
- Highlight Mode : Vivid Light
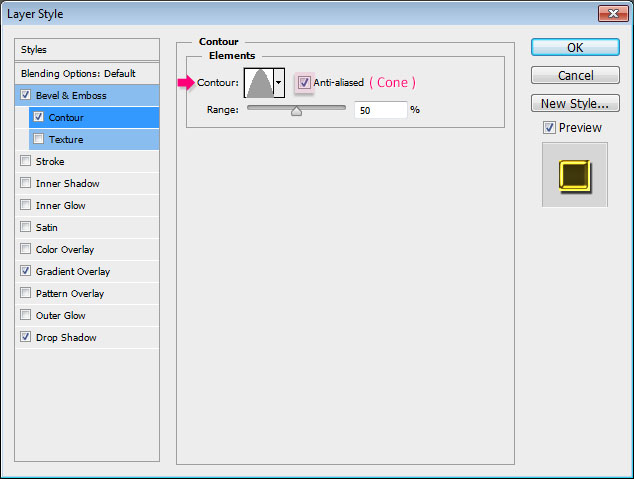
– Contour
- Contour : Cone
- Check the Anti-aliased box
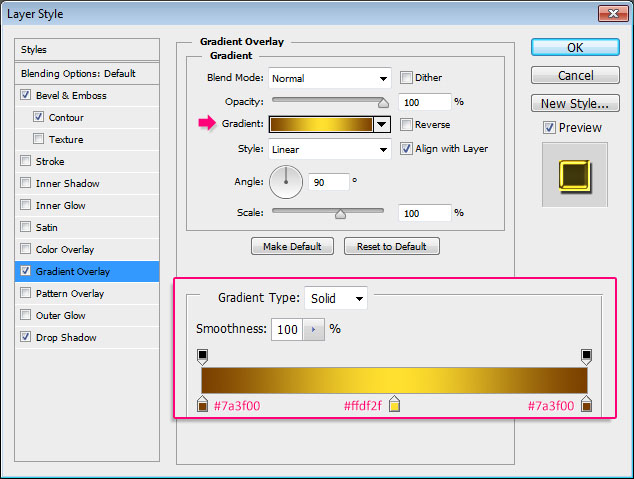
– Gradient Overlay
- Click the Gradient box to create the gradient using the color
#7a3f00to the left and right, and the color#ffdf2fin the middle.
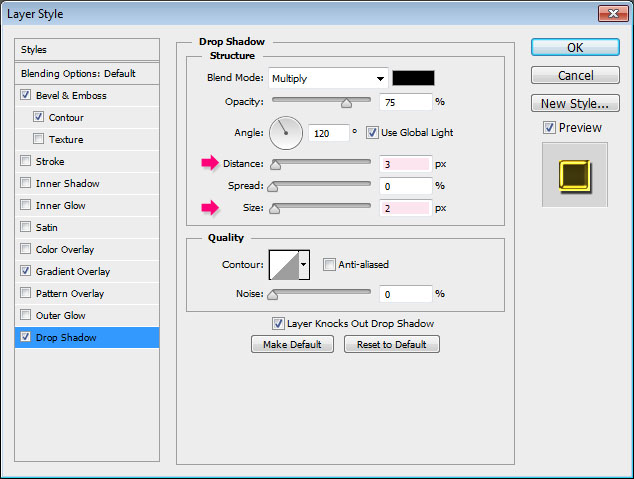
– Drop Shadow
- Distance : 3
- Size : 2
This will style the pin. You can use different gradient colors if you like as well.


Duplicate the ring shape layer, and move each copy to place it on top of a different letter.


Step 5
Pick the Brush Tool, and choose a hard round 23 px brush tip. Create a new layer on top of all layers and call it Brush. Then click once in the middle of each ring to add a circle.
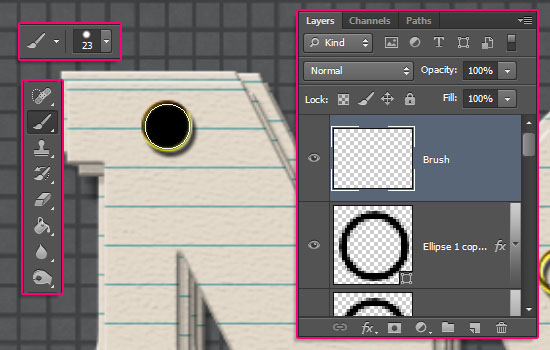



Click and drag the Brush layer right on top of the Background layers. Then Ctrl/Cmd + click its thumbnail to create a selection.
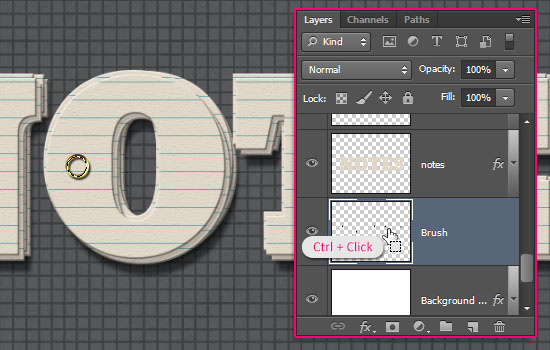

Select each text layer you have, and hit the Delete key on your Keyboard for each one, until you can see the circles once again.
Go to Select > Deselect to get rid of the selection.


Step 6
Change the Brush layer’s Fill value to 0%.
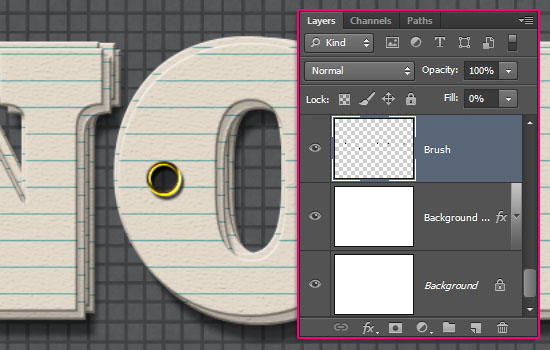

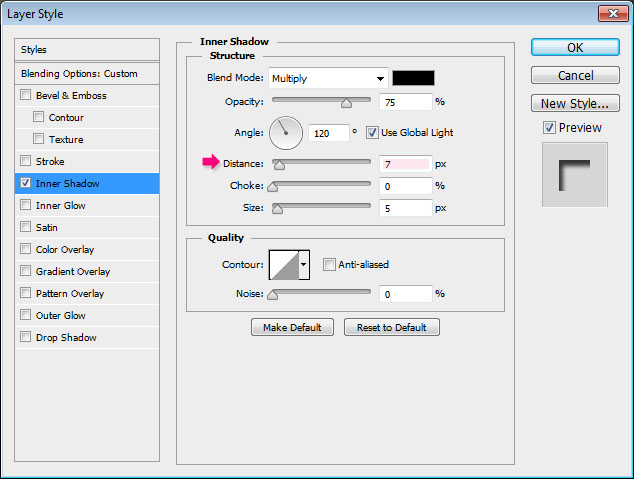
Double click the Brush layer to apply an Inner Shadow effect by changing the Distance to 7. You might need to use a different value, but what you need to get is a shadow that covers 75% of the circle, to give an illusion of depth.
So you can see now how the shadow extends the pin, but you can still see a tiny part of the Background.


Step 7
Set the Foreground color to #272423, then create a new layer on top of all layers and call it Gradient. Pick the Gradient Tool, and in the Options bar, choose the Foreground to Transparent fill, click the Radial Gradient icon, and check the Reverse box.
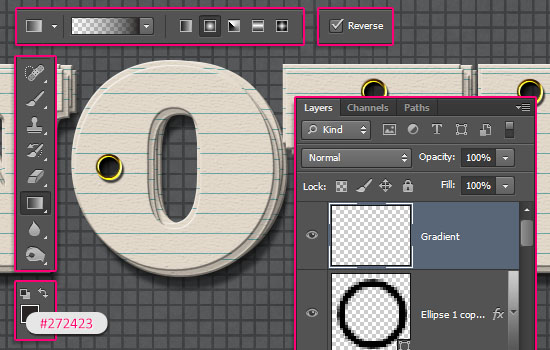

Click and drag from the center of the document to one of the corners to create the gradient.
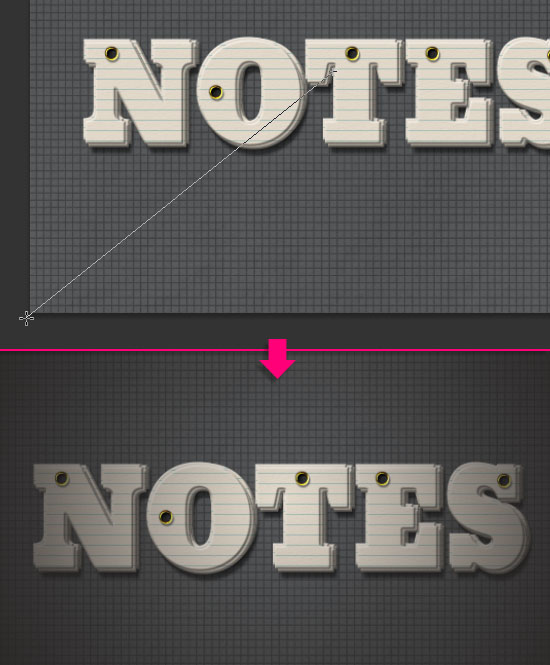

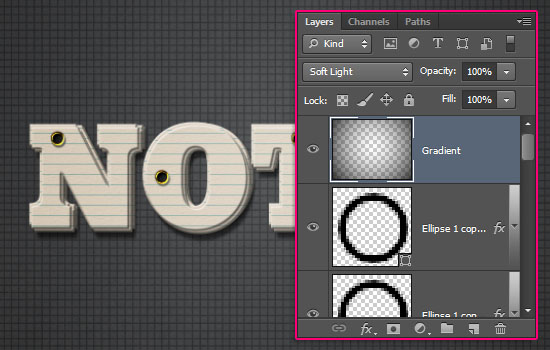
Change the Gradient layer’s Blend Mode to Soft Light.

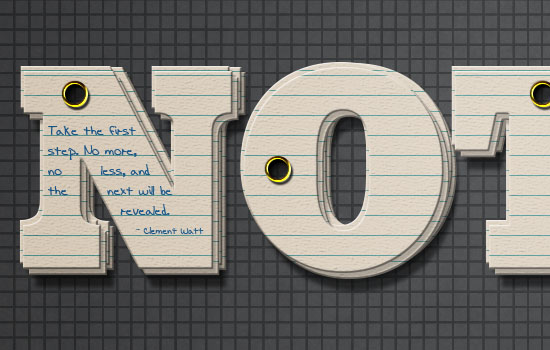
And now that you’re note cards are ready, you can go ahead and write down some text in there 😉
The font used to create the text is Ænigma Scrawl, the Size is 14 pt, and the color is #2571a2.

That’s it!
Hope you enjoyed the tutorial and created your own set of note cards 🙂
Did you enjoy this post? Please consider donating to help us cover our server costs.




Great job! Thanks for sharing.
Glad you like it.
Thanks a lot for the comment.
Wow… Thats the great tuts..
Love it
Thanks for Sharing with us…
Happy you like it 😀
Many thanks for the always amazing comments.
Most Welcome
Because you always share Beautiful Tutorials…
I’m a designer…
I know its value… 😀
That really means a lot!
Thanks a lot once again 🙂
wow that´s so cool, I will have to try this one 🙂
Awesome!
Thanks a lot for the comment 🙂
Hi! This is a very great work. I would like to make it but I have a problem with the Step 5. I dragged the ‘brush’ layer on top of the background layers, then I clicked with Ctrl its tumbnail. It’s OK. But… I deleted the text layers and I can’t see the circles. What’s wrong? Please help me!
Did you press Delete for each text layer? You need to select the first text layer, hit Delete, then select the second text layer, hit Delete again, and so on for all the text layers.
You can try making all the text layers invisible except for one, and hit Delete with that one selected, to see if anything happens or not.
If the problem still exists, please feel free to leave a reply.
Thanks for the kind comment 🙂
same here step 5. i can only see if i make original text layer invisible. But without that nothing happened.
nice one
check out my website
Thanks a lot.
Cool website as well 🙂
cool!O(?_?)O
Thank you! 🙂
It’s easy but freaking cool and awesome!! THANKS A LOT FOR THIS TUTORIAL!! 🙂
Super glad you like it 😀
Thanks a lot for the awesome comment 😉
thank you
it,s little hard to solve.
but i do!
i,ll share this to my site
plz visit my site: pstuts.ir
Unfortunately, PSD files are not available for free download. But please feel free to leave any questions you have in a comment.
I’ve just checked your website as well, and it looks great. It’d be nice if you can link back to the original tutorial please 🙂
Thanks for the comment.
i need download link