Shiny Reflective 3D Text Effect in Photoshop CC 2014
2015 is almost here, so it’s time for the annual New Year’s 3D text effect tutorial 😉 This one will show you how to combine some shape attributes with various 3D settings to create a shiny, reflective, and elegant 3D text effect in Photoshop CC 2014.
The Final Result
Tutorial Details
- Software Used : Photoshop
- Version : CC 2014
- Time : 1:30 – 2:45
Resources
- Titania Regular font.
- Patua One Regular font.
- worn down metal by elvarien.
- Abstract Pattern 8.0 by Sed-rah-Stock.
- Celestial Background 47 by FrostBo.
- Texture 42 by NinjaRabbit-Stock.
Wishing you all a great and marvelous 2015! 😀
Rose
Step 1
Create a new 1000 x 750 px document and fill the Background with Black.
Create the text in two spearate layers. For the year, the font used is Titania Regular, and the Size is 250 pt. For the text below it, the font used is Patua One Regular, the Size is 80 pt, and it is created in All Caps.
Depending on the text you’re creating, you’ll need to adjust the values so that the length of both lines of text is as close as possible.


Right click the year’s text layer thumbnail and choose Convert to Shape.
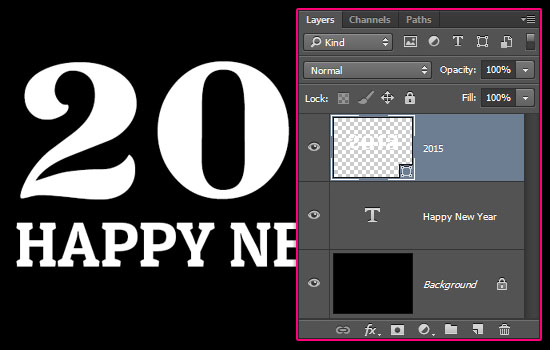

Duplicate the shape layer, then pick the Direct Selection Tool. You’ll notice some shape attributes appear in the Options bar at the top.
Change the Fill to None, the Stoke Width to 3, the Stroke Color to a light gray color, then click the Set shape stroke type icon and choose the Outside option for the Align.
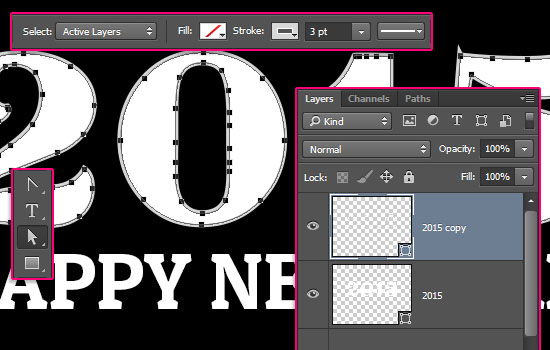

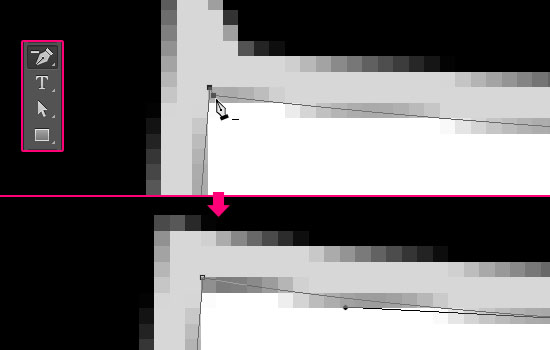
You might see some sharp points sticking out. To get rid of those, pick the Delete Anchor Point Tool, zoom in so that you can see the anchor points causing the problem, then click one of them to delete it. You can undo this step if you didn’t get a result you like an try deleting another point until the problem is solved.
Make sure to delete the same points from the original shape layer as well.

Once you’re done with the stroke, move the text layer so it’s as close as possible to the year’s text, and try to avoid any overlapping.


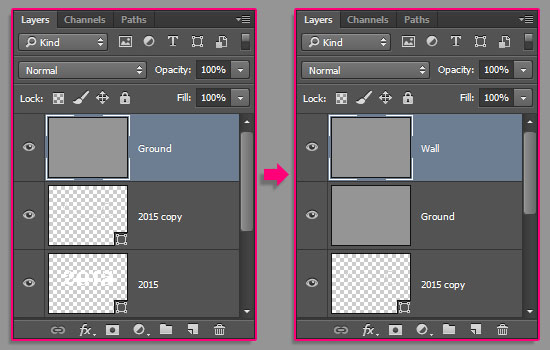
Create a new layer on top of all layers, call it Ground, and fill it with another light gray color. Duplicate that layer and rename the copy to Wall.

Step 2
Next, we’re going to create 3D meshes from the layers we have.
So for the Ground and Wall layers, select each one, then go to 3D > New Mesh from Layer > Postcard.
For the shape layers, select each one and go to 3D > New 3D Extrusion from Selected Path.
And for the text layer, select it then go to 3D > New 3D Extrusion from Selected Layer.
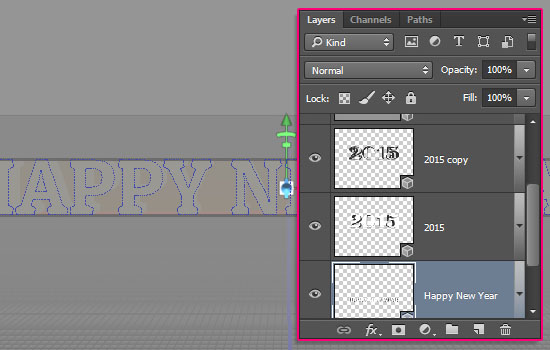

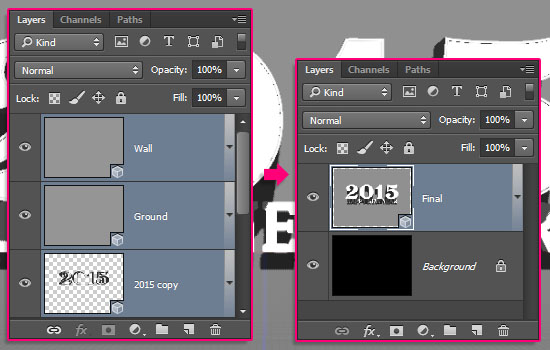
Select all the 3D layers you have then go to 3D > Merge 3D Layers. This will place all the 3D meshes in one scene. Rename the merged layer to Final.

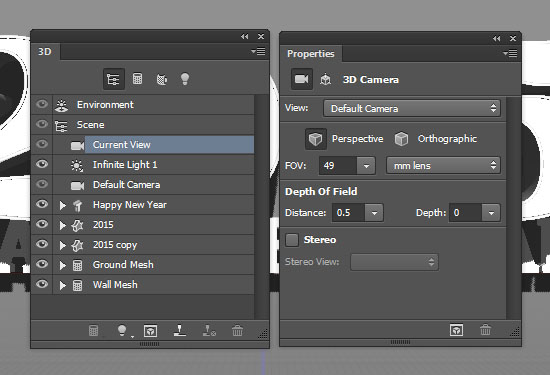
To access the 3D mesh Settings and properties, you’ll need to open two panels: The 3D panel, and the Properties panel (both found under the Window menu).
The 3D panel has all the components of the 3D scene, and when you click the name of any of those, you’ll be able to access its Settings in the Properties panel. So make sure to always select the name of the element you want to modify in the 3D panel before you change its Settings in the Properties panel.

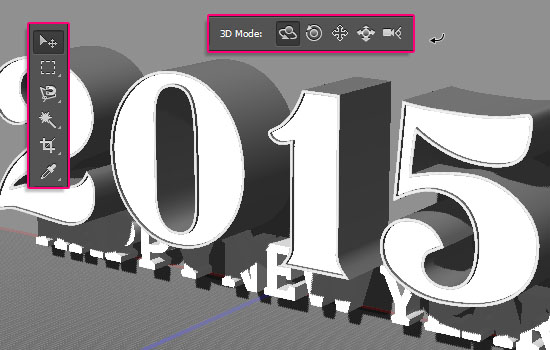
Select the Move Tool and check its Options bar. You’ll find a set of 3D Modes for the tool to the right of the bar. When you choose one of those, you can then click and drag to perform any changes (on the selected element in the 3D panel).
You can change the camera view by clicking the Current View tab in the 3D panel, then you can use the 3D Modes to click and drag in the document to move the camera around.

Step 3
Select the Ground Mesh tab in the 3D panel, then un-check the Cast Shadows box in the Properties panel. Do the same for the Wall Mesh.
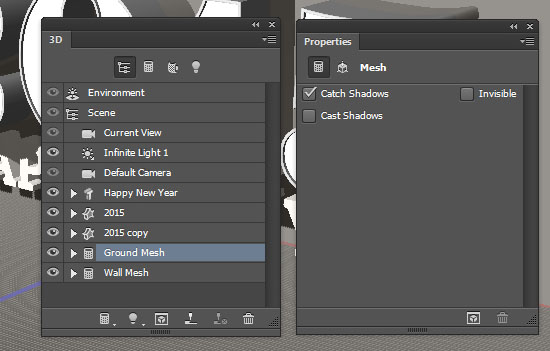

Select the Ground Mesh again, then click the Coordinates icon at the top of the Properties panel and change the X Rotation Angle to 90.
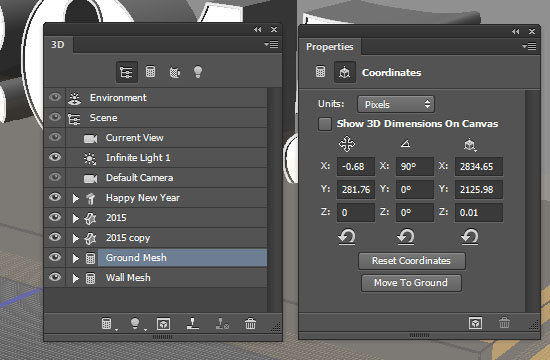

With the Ground Mesh still selected, go to 3D > Move Object to Ground Plane. This will snap it to the ground plane.
You can then use the 3D Axis (with the Move Tool selected) to move, rotate, and scale the meshes in the 3D scene. The arrows at the ends of the 3D Axis move the mesh, the part below them is used for rotation, and the cubes are used for scaling. The cube in the center is used to scale the object uniformly. All you need to do is click and drag the part you need to perform the changes.
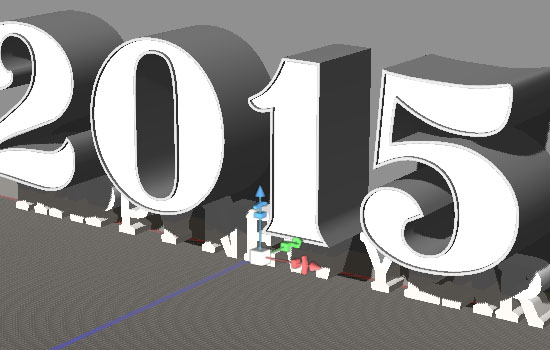

Scale the two planes uniformly to fill the scene. You can come back to this before rendering and after you choose the final camera angle.
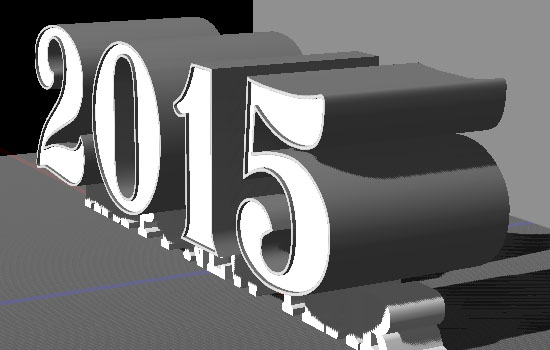

Step 4
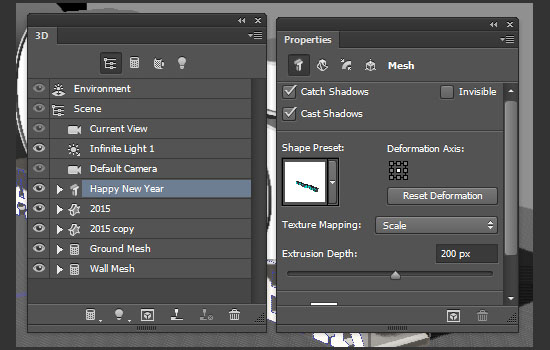
Select the lower text mesh tab, then change its Extrusion Depth to 200.

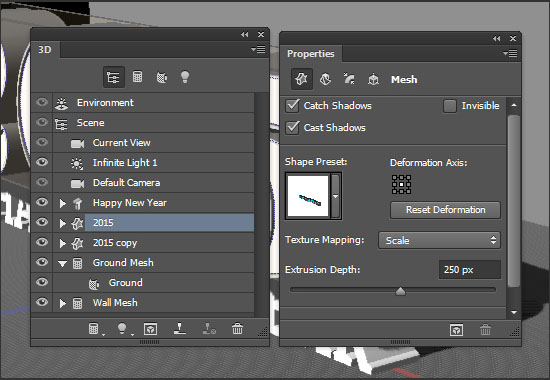
Select the original shape mesh tab, then change its Extrusion Depth to 250.

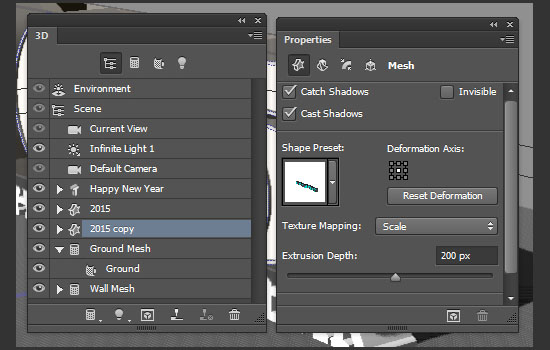
Select the copy shape mesh tab, then change its Extrusion Depth to 200.

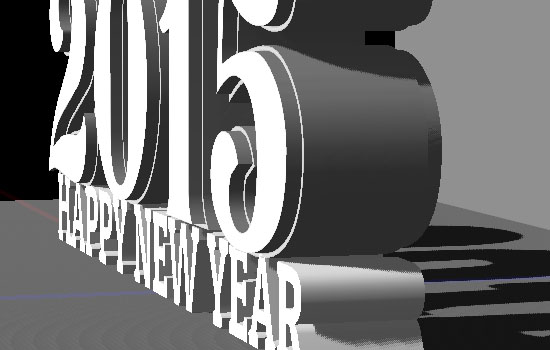
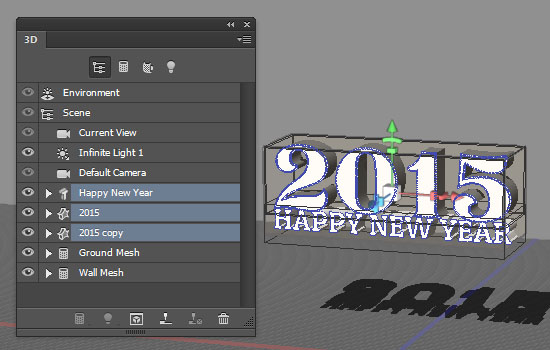
Use the Move Tool and the 3D Axis to place the text and shape meshes you have as shown below.

Select the text and shape meshes’ tabs (Cmd/Ctrl + click them), then scale them down uniformly. This is a better way to make them much smaller than the plane meshes, which will make sure that no reflections of the planes’ edges appear in the text and shape meshes.
After you scale those meshes down, go to 3D > Move Object to Ground Plane to make sure they’re not floating around in the scene, and zoom the camera view in to the scaled down meshes so that they fill up the scene again.

Step 5
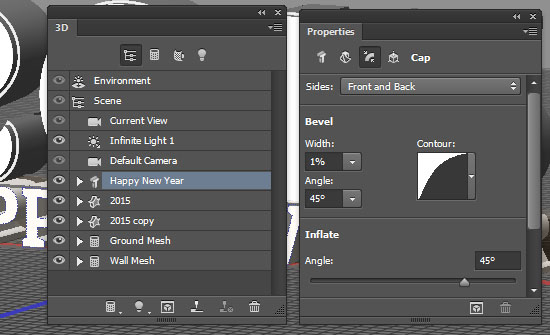
Select the lower text mesh tab again, then click the Cap icon at the top of the Properties panel. Change the Sides option to Front and Back, the Bevel Width to 1, and the Contour to Half Round.

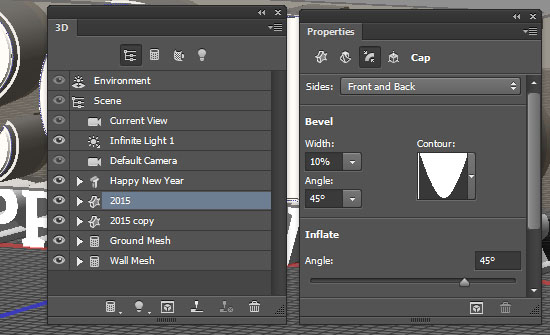
Select the original shape mesh tab, click the Cap icon, change the Sides option to Front and Back, the Bevel Width to 10, and the Contour to Cone – Inverted.

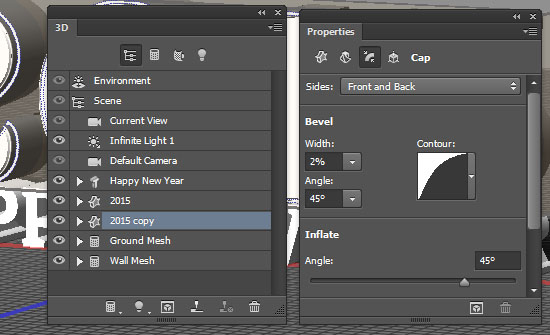
Select the copy shape mesh tab, click the Cap icon, change the Sides option to Front and Back, the Bevel Width to 2, and the Contour to Half Round.

Step 6
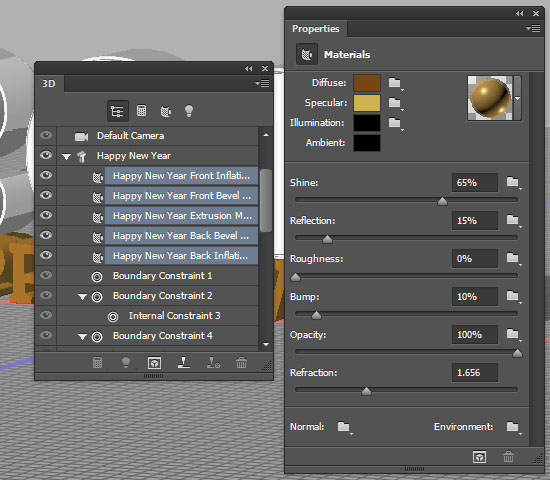
Expand the text mesh tab to see the Material tabs. Select all of the expanded Material tabs then change their settings’ values in the Properties panel as shown below. The color values used in RGB are:
- Diffuse : 119,70,18
- Specular : 207,178,75
- Illumination : 0,0,0
- Ambient : 0,0,0

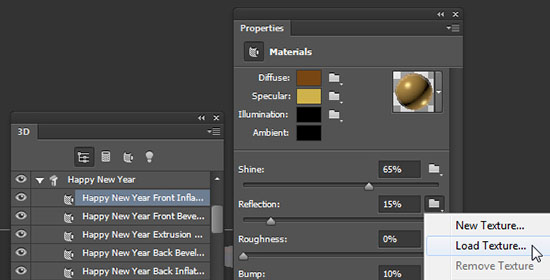
To make the effect a bit more dynamic, select the Front Inflation Material tab, then click the Reflection folder icon and choose Load Texture, then choose the worn down metal image. What this will do is make parts of the front material reflective and others less or not reflective at all, based on the light and dark areas of the texture image used.

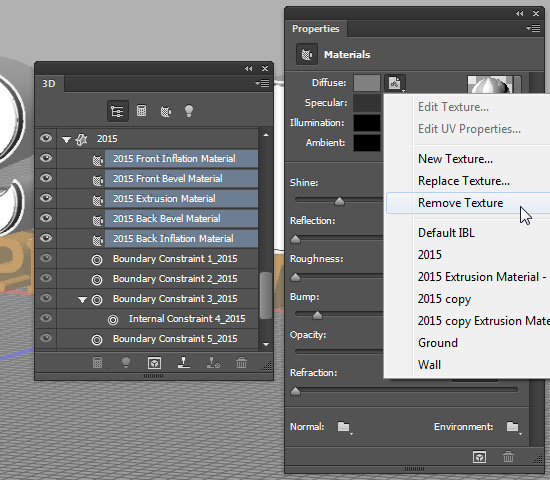
Select all the original shape mesh Material tabs, then click the Diffuse texture icon and choose Remove Texture.

Select the Front Bevel, Extrusion, and Back Bevel Material tabs and apply the same material you applied to the lower text.
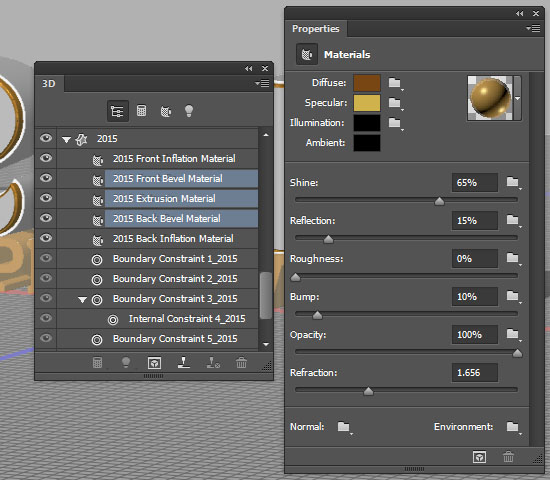

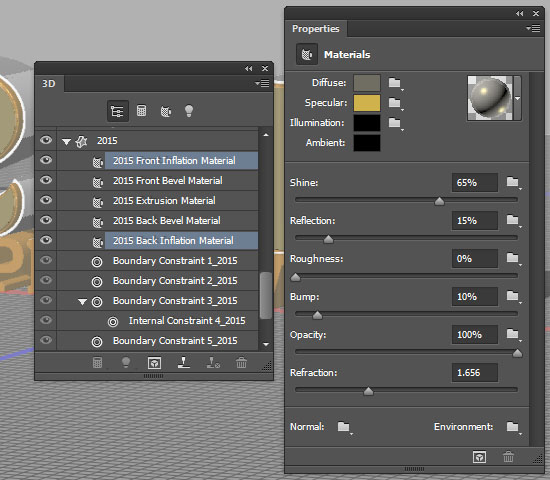
Select the Front and Back Inflation Material tabs then modify their settings as shown below:
- Diffuse : 112,109,99
- Specular : 207,178,75
- Illumination : 0,0,0
- Ambient : 0,0,0

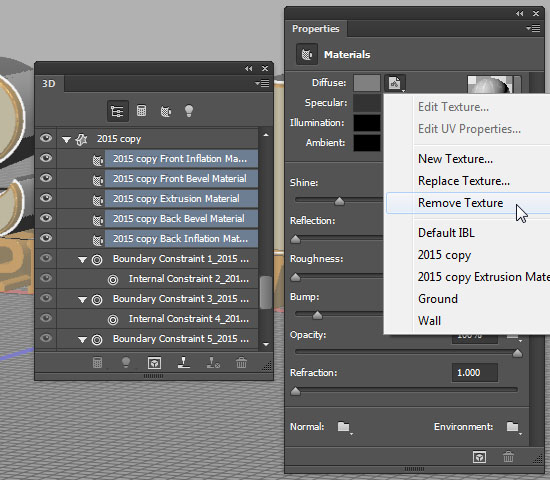
Select all the copy shape mesh Material tabs, then click the Diffuse texture icon and choose Remove Texture.

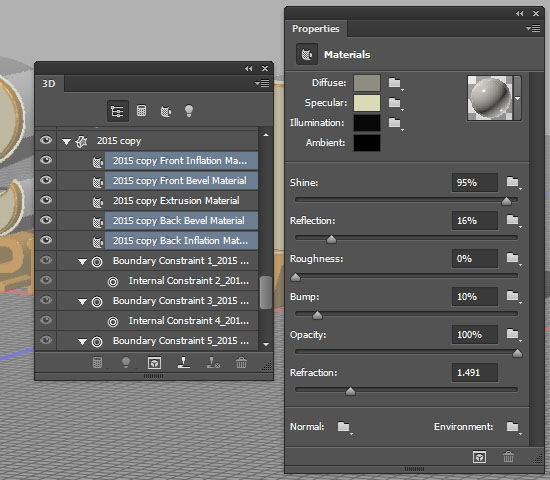
Deselect the Extrusion Material tab, then use the values below for the settings:
- Diffuse : 143,140,128
- Specular : 218,218,183
- Illumination : 191,191,191
- Ambient : 0,0,0

Step 7
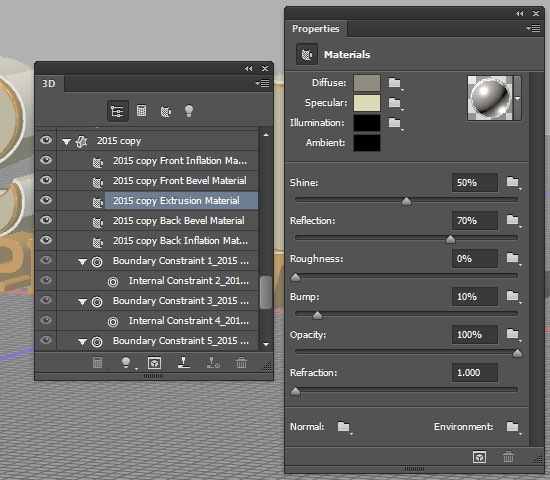
For the copy shape mesh Extrusion Material, the values are:
- Diffuse : 143,140,128
- Specular : 218,218,183
- Illumination : 191,191,191
- Ambient : 0,0,0

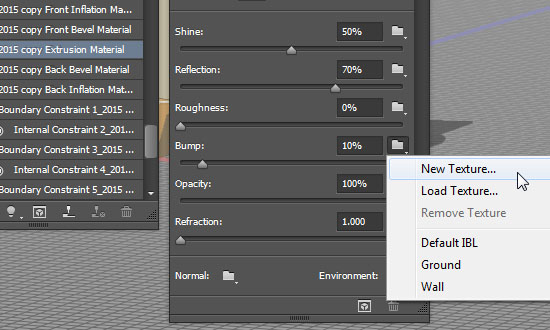
Click the Bump folder icon and choose New Texture.

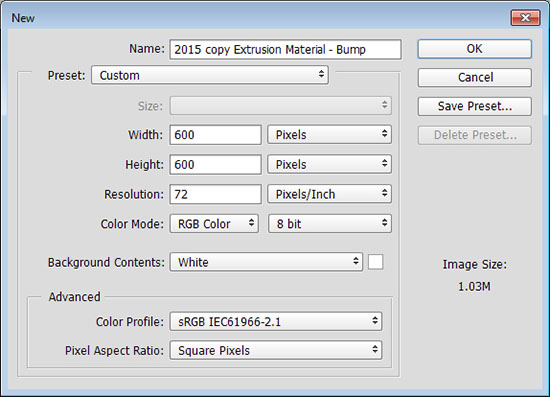
Set the Width and Height values to 600.

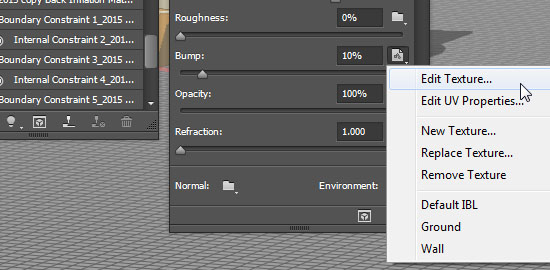
Click the Bump texture icon and choose Edit Texture.

This will open the texture’s document. Duplicate the Background layer.
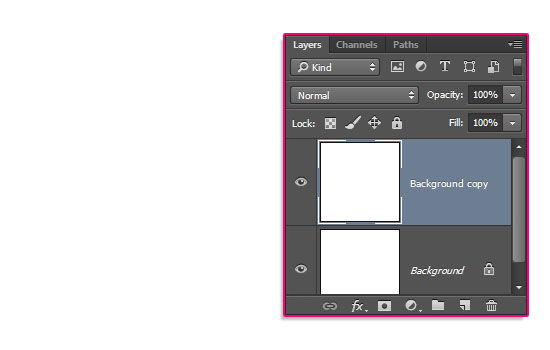

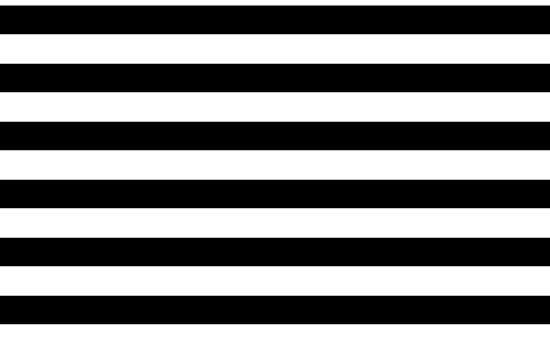
Double click the Background copy layer to apply a Pattern Overlay effect using the Pattern 3 pattern, then change the Scale to 50%.
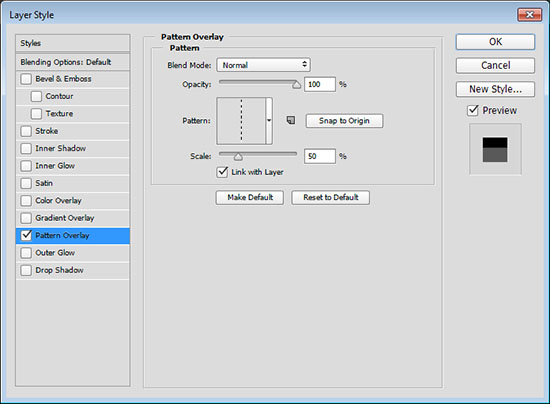

Save the file (File > Save), then close it (File > Close), to go back to the original document.

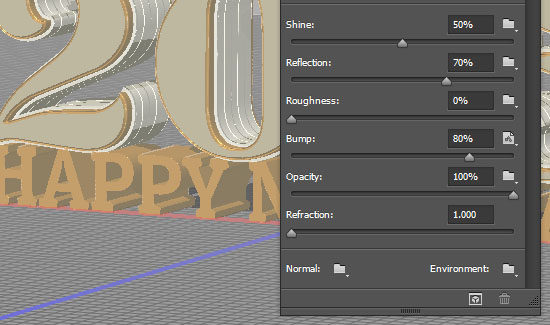
Increase the Bump value to 80.

Click the Bump texture icon again and choose Edit UV Properties.
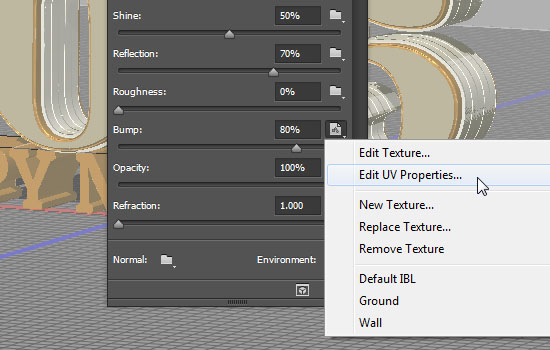

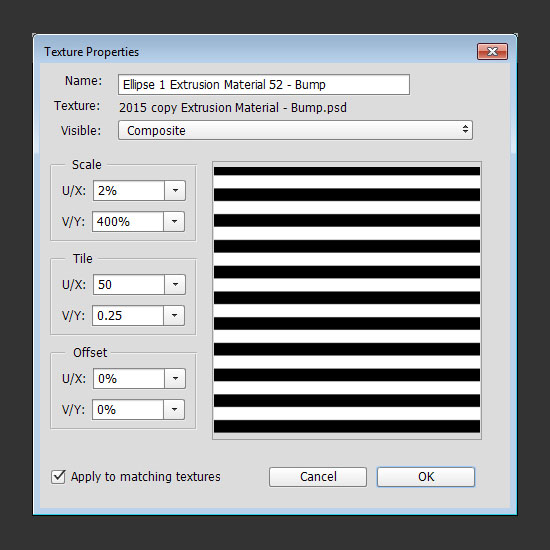
Change the Scale U/X value to 2 and the V/Y value to 400.

Step 8
You can always tweak the values to your own liking. Next, we’re going to modify the planes’ materials.
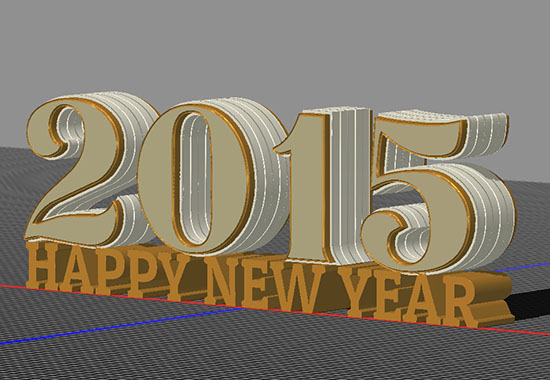

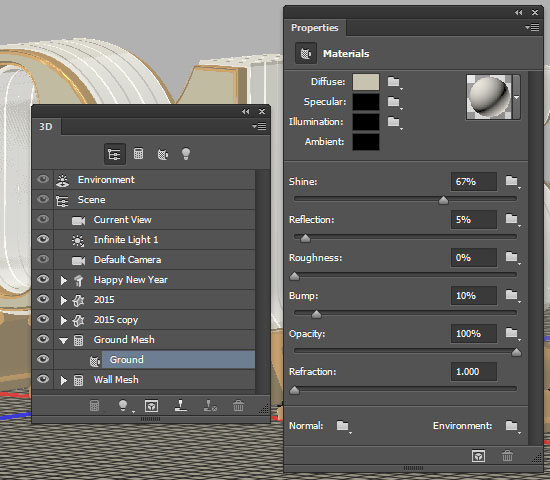
Select the Ground material tab, remove the Diffuse and Opacity textures, and change the settings as shown below:
- Diffuse : 200,194,177
- Specular : 0,0,0
- Illumination : 0,0,0
- Ambient : 0,0,0

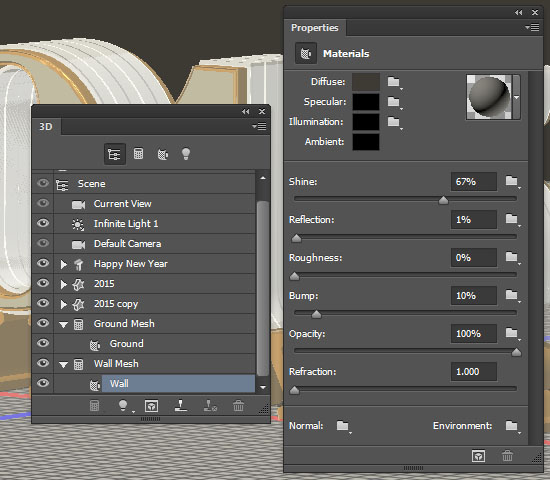
Select the Wall material tab, remove the Diffuse and Opacity textures, and change the settings as shown below:
- Diffuse : 61,59,52
- Specular : 0,0,0
- Illumination : 0,0,0
- Ambient : 0,0,0

Step 9
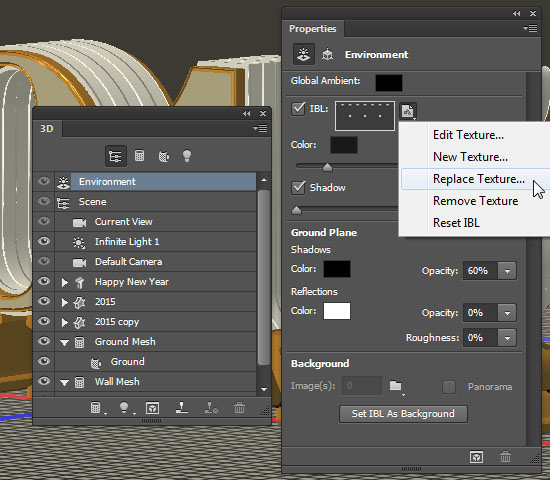
Click the Environment tab, click the IBL texture icon and choose Replace Texture, then choose the Celestial Background 47 image.

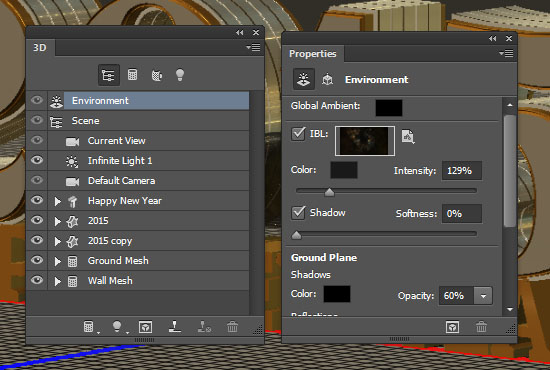
Increase the Intensity to 129.

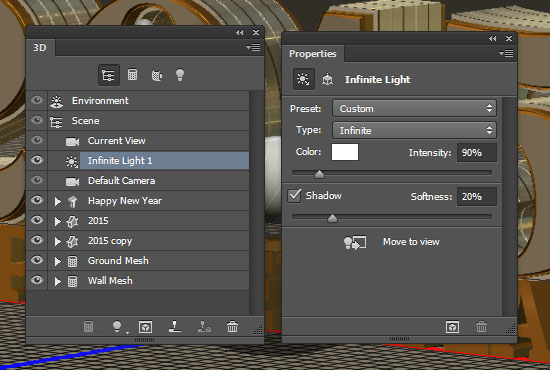
Click the Infinite Light 1 tab, and change its Shadow Softness to 20.

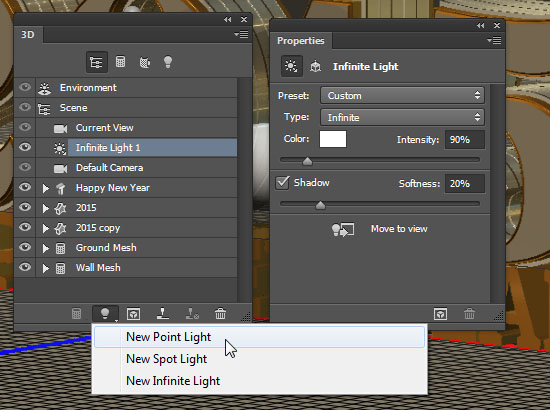
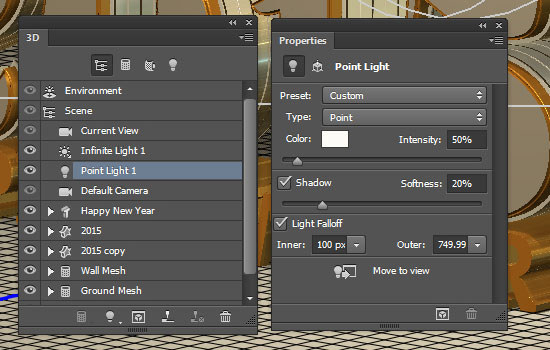
Click the Add new Light to Scene icon at the bottom of the 3D panel and choose New Point Light.

Change the Color to (253, 251, 246), the Intensity to 50% and the Shadow Softness to 20%. Then, check the Light Falloff box, change the Inner value to 100 and the Outer value to 750. This will make the light fade out gradually.

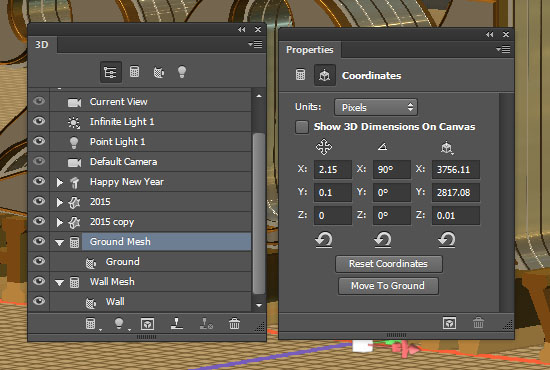
Click the Ground Mesh tab, click the Coordinates icon, and increase the Y Position to 0.1. This is a little something you need to do in order to avoid getting random scratches on the ground when you render the scene.

Step 10
Change the Current View to an angle you like for the final render, scale the planes and the text meshes so that there are no empty areas, zoom in if needed, and find an angle you like.
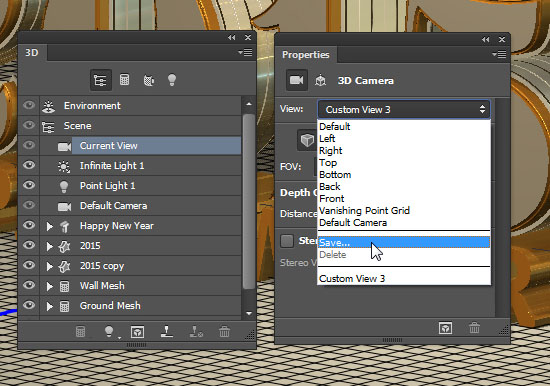
You can save the view you create by choosing the Save option from the View drop down menu in the Properties panel.

Type in a name for the view and click OK.
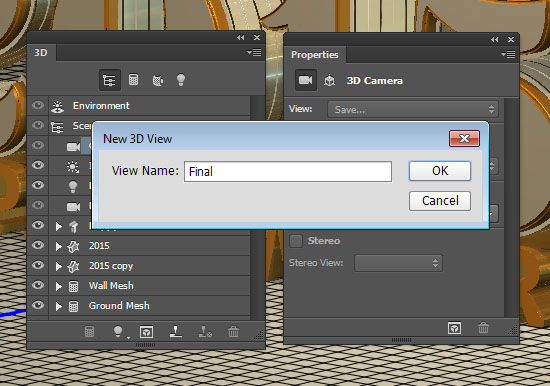

This will add the view to both the 3D panel and the View menu in the Properties panel. So whenever you change the view for any reason, you can get back to the one you saved by clicking its tab or choosing it from the menu.
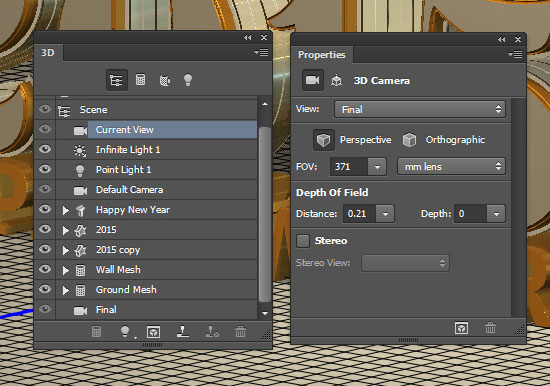

What you need to do next is move the lights around until you like how the scene looks.
You can run quick renders to see the result of what you’re doing by going to 3D > Render, then pressing the Esc key to stop the rendering and make any changes.
This is how the lights are placed in this tutorial.
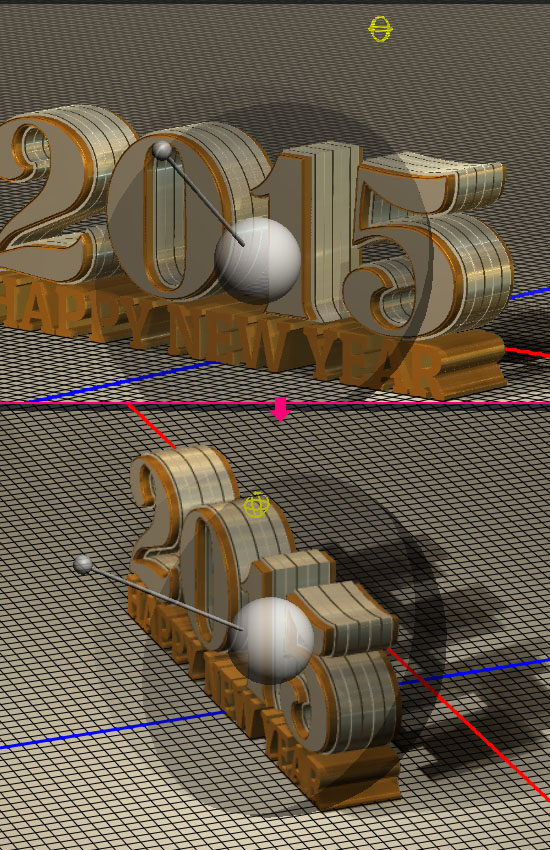

Once you like how everything looks, render the scene.


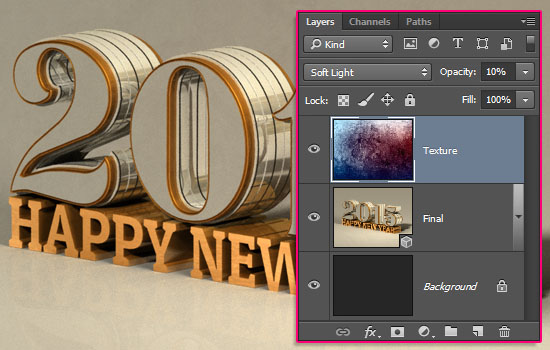
This is totally optional, but you can place the Texture 42 image on top of the 3D layer, resize it as needed, change its Blend Mode to Soft Light, and its Opacity to 10%. Make sure not to duplicate the texture’s layer – you need to either place it (File > Place…) or copy and paste it.

Click the Create new fill or adjustment layer icon at the bottom of the Layers panel and choose Levels.
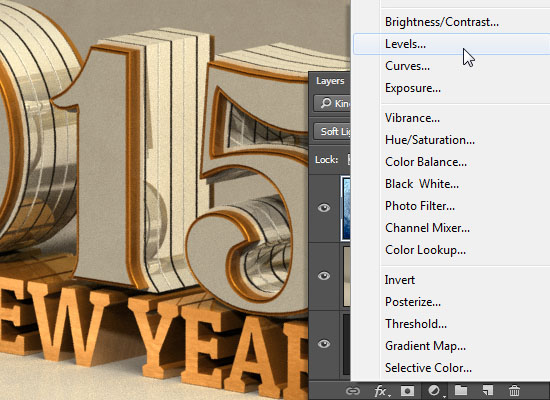

Change the Highlights value to 250 to brighten up the final result a little bit.
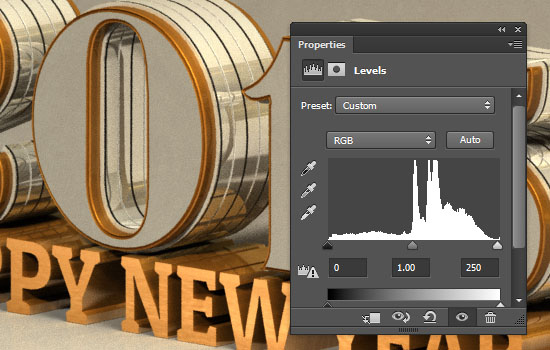

And you’re done!
Hope you enjoyed the tutorial and found it helpful 🙂
Happy New Year! Have a splendid one 😉
Did you enjoy this post? Please consider donating to help us cover our server costs.




Hey Rose! Do you happen to know why Photoshop wont let me access anything 3D related? I’m on a laptop if that matters. Does it have to do with RAM? Is there anything I can do so that I can use the 3D function?
Hey Gabby,
Did you make sure to check if you have the minimum requirements?
You might also need to check your 3D settings under Edit > Preferences > 3D and Edit > Preferences > Performance (make sure that the Use Graphics Processor box is checked).
Hope this helps 🙂
Check that you have selected Image>Mode>RGB… I found those options disabled when I was in cmyk for example 🙂 you can change your mode once yore done playing with 3d if you want.
That’s definitely true as well! Thanks a lot for mentioning it 🙂
this is my work ….it’s not shiny as your …..the sidies of the upper text is not as mirror like yours ..where is the wrong point in my work….thanks for help
It seems like a lighting issue. You might need to move the lights around a bit.
It might take some time to get the best result, as you’ll need to keep changing the lights’ position and run a quick render to see how that looks, until you like the final result.
Hope this helps.
Please feel free to leave any other questions you have.
Thanks for the comment 🙂
I want to learn graphics design. what is the best way for learning graphics design?
Depends on what works best for you. There are some great online courses, YouTube videos, tutorial websites, etc.
You just need to see which of those works best for you, and keep on practicing 😉
Hope this helps 🙂