Smilies Text Effect
This tutorial will explain one of the ways of creating a pattern, and using it to create a nice text effect.
The Final Result
Tutorial Details
- Software Used : Photoshop
- Version : CS5 Extended
- Time : 0:45 – 1:30
Resources
Step 1
We will begin by creating the pattern that we will use later on to create the text effect. So create a new 200 x 200 px document with a White background.
Set the Foreground color to #ffee2e, and pick the Ellipse Tool.
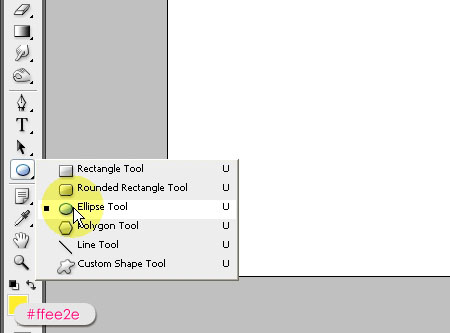

Create a small circle in the middle of the document, and hold the Shift key to get a perfect circle.
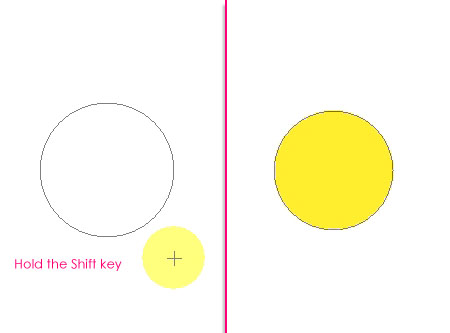

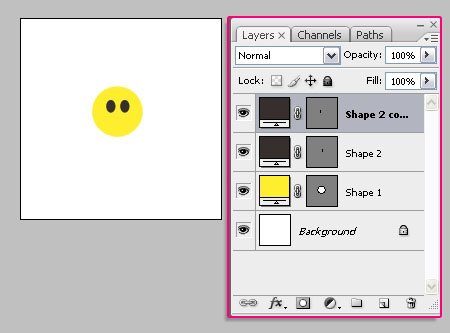
Change the Foreground color to Black, then draw two ellipses for the eyes.

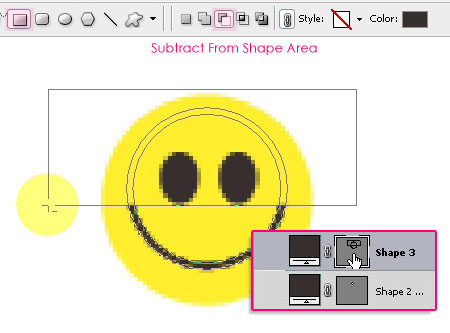
Click on the Custom Shape Tool, then, choose the Circle Thin Frame shape from the pop-up menu. Draw the frame so that you create a ‘smile’.
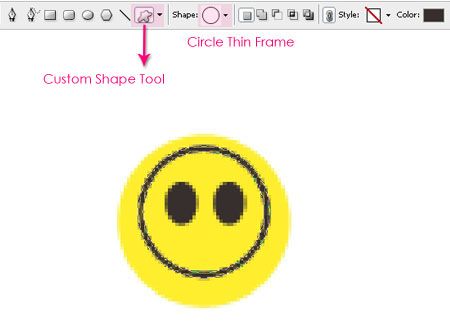

Pick the Rectangle Tool, and click the Subtract From Shape Area icon to remove the upper part of the Thin Frame.

Step 2
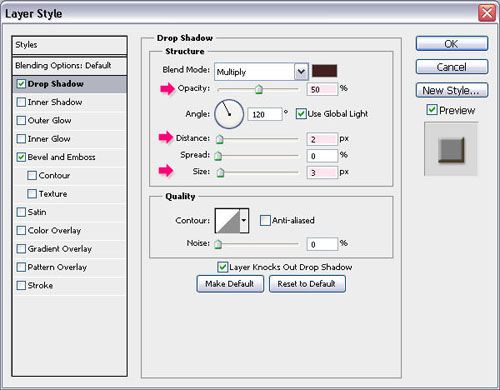
Double click on the yellow circle’s layer to apply the following Layer Styles:
– Drop Shadow
- Opacity : 50%
- Distance : 2
- Size : 3

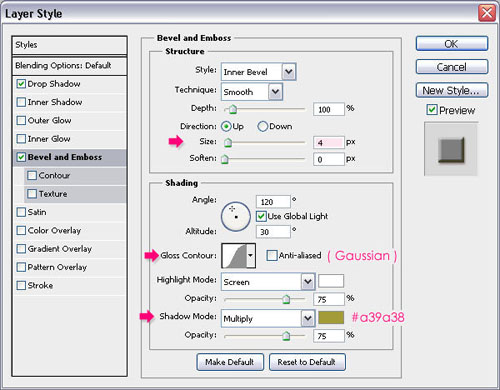
– Bevel and Emboss
- Size : 4
- Gloss Contour : Gaussian
- Shadow Mode – Color :
#a39a38

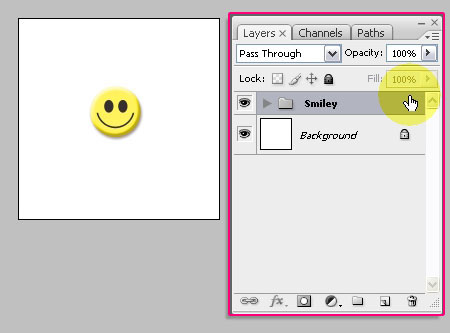
Group all the smileys’ layers and call the group Smiley.

Duplicate the group, press Ctrl/Cmd + T, then rotate and move the new group.
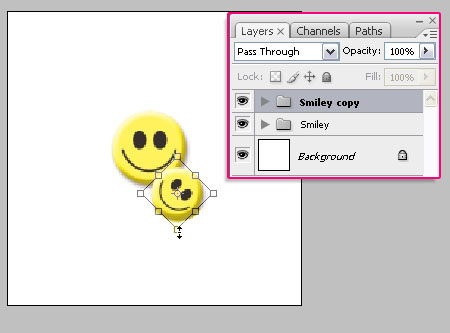

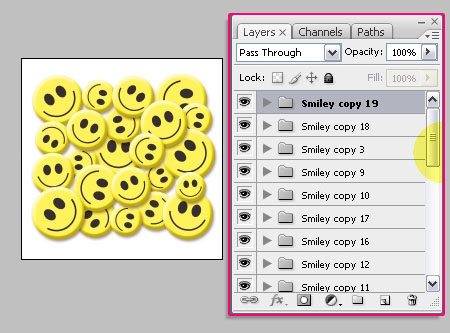
Repeat the previous step until you feel the pattern is good. Leave some empty spaces between the faces, this will give a nice effect when the pattern is used later on.

Step 3
Select the top group, then press Shift and click the last one, then place all the groups in one final group called Smilies_Faces.
It’s always good to keep a copy of the original shapes so that you can modify them easily if needed later on. So duplicate the group you’ve just created, and remove the eye icon next to it to make it invisible.
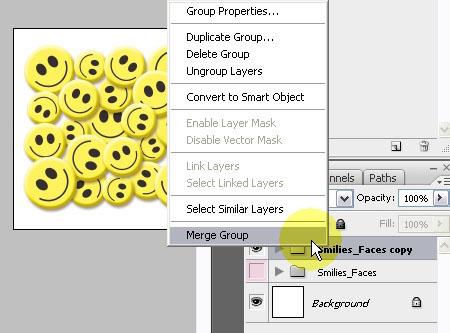
Right click the copy, and choose Merge Group.

Pick the Rectangular Marquee Tool, and create a rectangle that covers approximately 1/4 or 1/5 of the pattern. Press Ctrl/Cmd + X to cut that part, then Ctrl/Cmd + V to paste it in a separate layer.
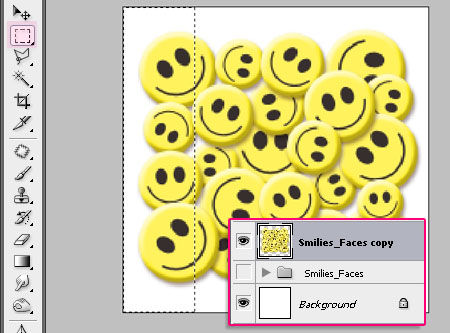

Move the original (Smilies_Faces copy) layer’s content to the left until it touches the edge of the document, and the part you’ve just pasted (Layer 1) to the right until it looks like a part of the pattern.
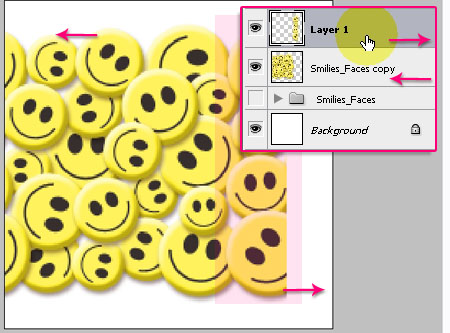

Select Layer 1 then press Ctrl/Cmd + E to merge it with the Smilies_Faces copy.
Then pick the Rectangular Marquee Tool again, but this time, create the selection at the bottom part of the layer. Press Ctrl/Cmd + X to cut it, then Ctrl/Cmd + V to paste it in a separate layer.
(You can make the Background layer invisible if you prefer a transparent background).
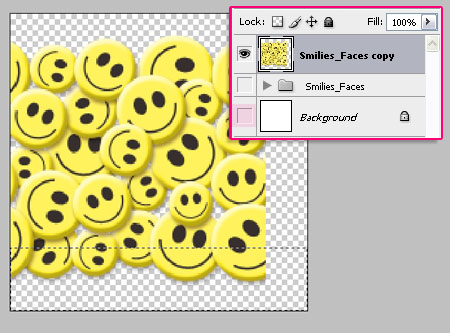

Move the content of Smilies_Faces copy downwards until it reaches the bottom edge, and the Layer 1 upwards until you think it looks good with the pattern.
Merge both layers when done.
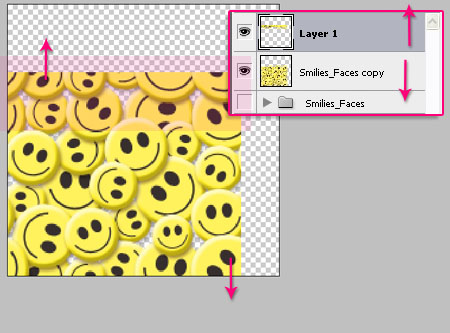

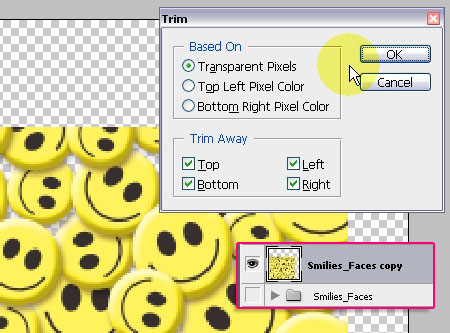
Next, we need to get rid of the extra parts around the pattern, make sure that the background is transparent (make anything else invisible), and go to Image > Trim. Choose Transparent Pixels, and check all the boxes under Trim Away so that no transparent pixels are left.

Step 4
Go to Image > Adjustment > Levels, and change the Shadows value to 50. This will make the pattern more vibrant.
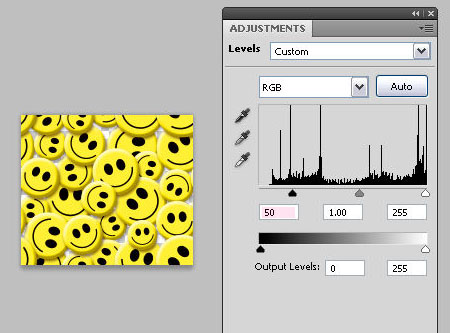

Finally, go to Edit > Define Pattern, and type in a name for the pattern.


Step 5
Now, it’s time to create the text. So go ahead and open the Background image provided at the Resources section at the beginning of this tutorial, or simply create a new 1024 x 768 px document, and fill the background with a red color or gradient, or whatever other color you like.
Create the text using the font Futurama Bold Font, the Size 175 px, and the color #ffee2e.
Duplicate the text layer, then change the Fill value for both layers to 0.
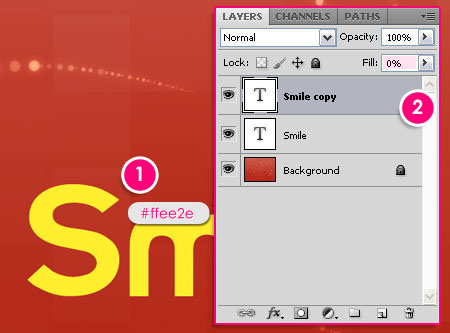

Double click the original text layer, and add a Pattern Overlay using the pattern you’ve just created, which will be available in the pop-up menu.
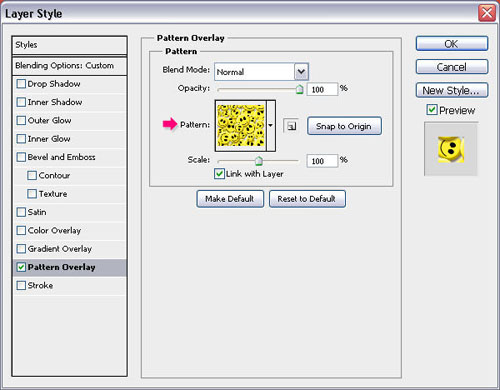

That’s it for this layer.
Step 6
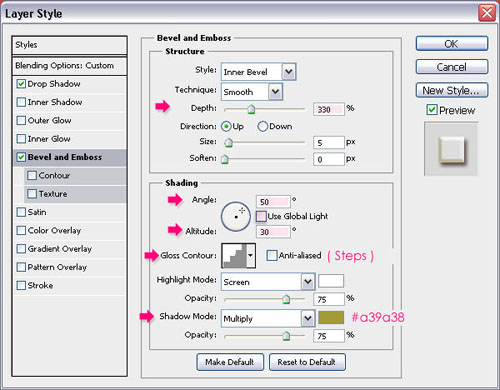
Double click the copy layer, and apply the following Layer Style:
– Drop Shadow
Use the default values.
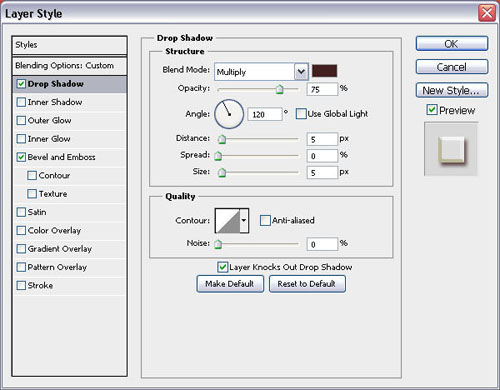

– Bevel and Emboss
- Depth : 330
- Uncheck the Use Global Light box
- Angle : 50
- Altitude : 30
- Gloss Contour : Steps
- Shadow Mode – Color :
#a39a38

And that’s it!
Did you enjoy this post? Please consider donating to help us cover our server costs.




Thank you for your tutorials.
You’re welcome.
cute face.
Glad you liked it!
nice tutorial!
it contains some essential skills.
Thanks for the comment.
i want more effect
Um, so I guess you mean ‘more effects like this’? If so, I’ll hopefully come up with more soon!