
Colorful Retro Text Effect
This tutorial will show you how to use Photoshop brushes and Layer Layer Style to create an awesome colorful retro text effect.
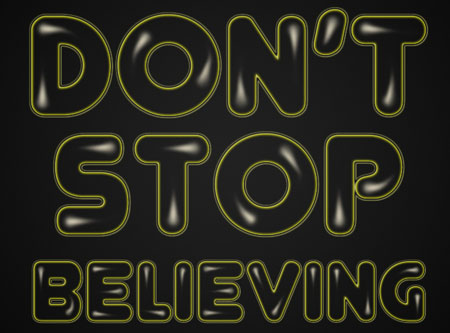
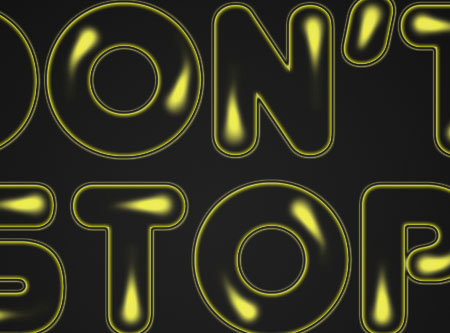
The Final Result

Tutorial Details
- Software Used : Photoshop
- Version : CS5 Extended
- Time : 0:30 – 0:45
Resources
- Junegull font.
Step 1
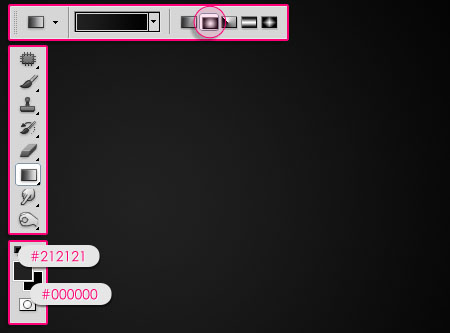
Create a new 1024 x 768 px document. Set the Foreground color to #212121 and the Background color to #000000. Create a Radial Gradient from the center of the document to one of the corners.
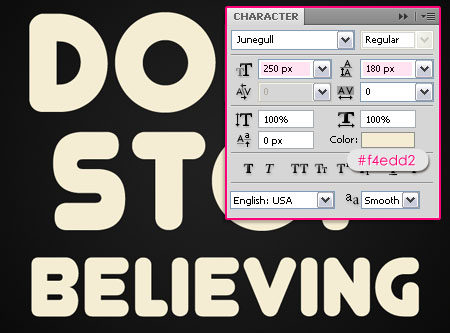
Create the text using the color #f4edd2, and the font Junegull. In this tutorial, two different font sizes will be used. So if you want that as well, create each size of text in a separate layer. The bigger Size is 250 px, and the Leading is 180 (to modify the vertical distance between the lines if necessary).
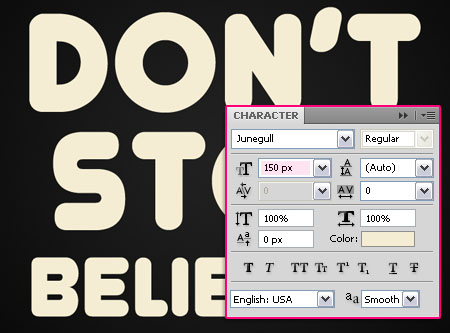
The smaller Size is 150 px.
Step 2
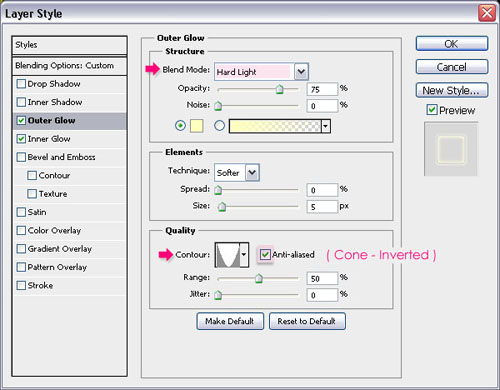
Double click the text layer to apply the following Layer Style:
– Outer Glow
- Blend Mode : Hard Light
- Contour : Cone – Inverted
- Check the Anti-aliased box
– Inner Glow
- Color :
#ffff00
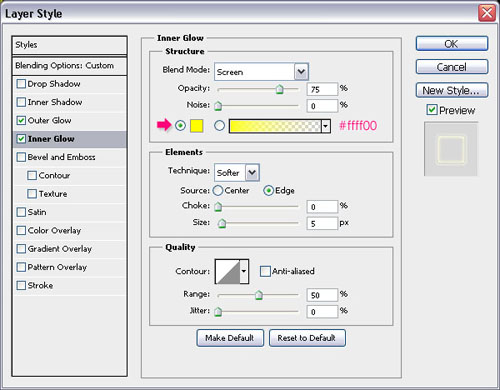
Change the Fill value to 0.
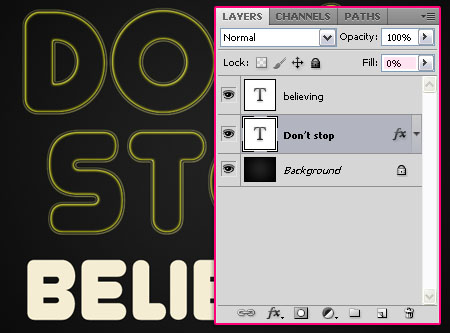
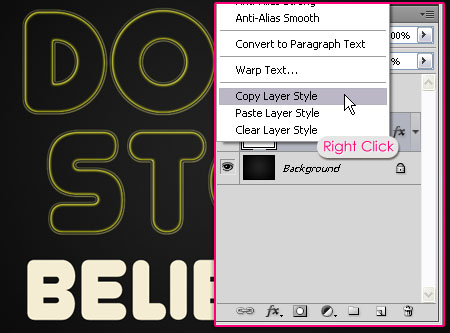
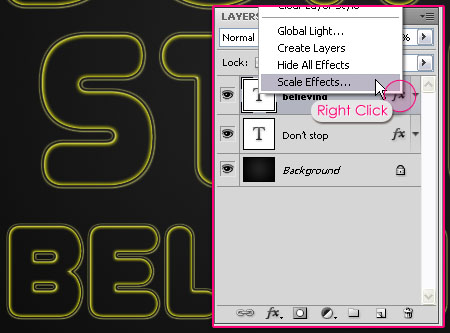
If you have a smaller text size, you need to scale the effect in order to suit the new size. So right click the original text layer, and choose Copy Layer Style.
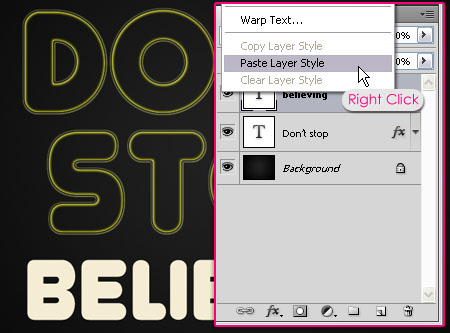
Right click the other text layer and choose Paste Layer Style. This will apply the same Layer Layer Style to the new text layer, with the same values.
To scale the Layer Style, right click the Layer Effects icon, and choose Scale Effects.
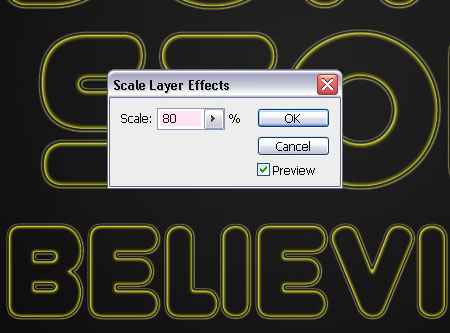
Change the Scale value so that the style suits the text size.
Step 3
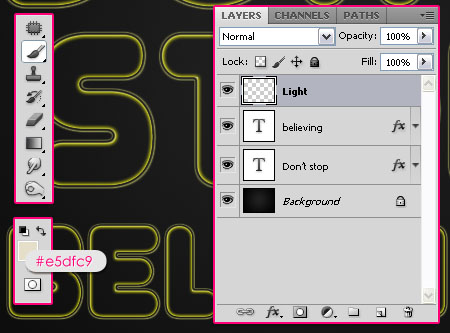
Set the Foreground color to #e5dfc9. Create a new layer on top of all layers and call it Light.
Using the Brush Tool, start adding dots in the tips of the letters. Use a soft round brush, and set its Size to 20 for the larger text size, and 10 for the smaller one.
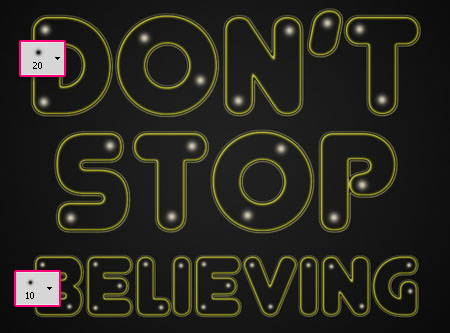
Once you’re done adding the dots, select the Smudge Tool, and set its Strength value to 70%. Start smudging the dots in different directions. Use the same brush sizes (20 and 10).
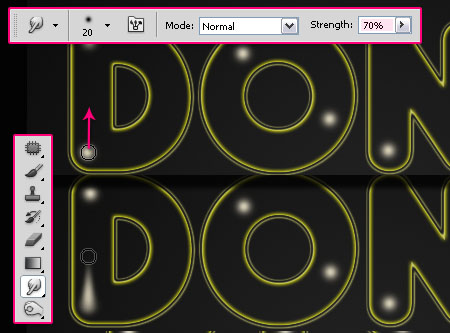
This is what the text should look like:
Step 4
Double click the Light layer to apply the following Layer Style:
– Outer Glow
- Blend Mode : Linear Light
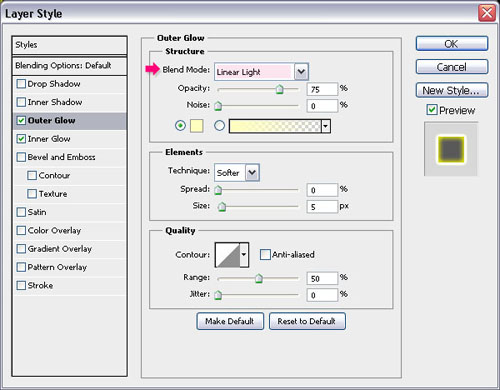
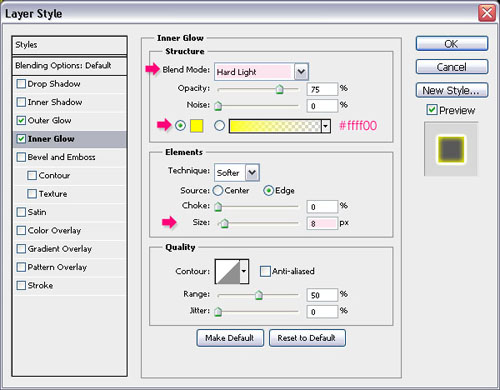
– Inner Glow
- Blend Mode : Hard Light
- Color :
#ffff00 - Size : 8
This will add some glow to the smudged dots.
Step 5
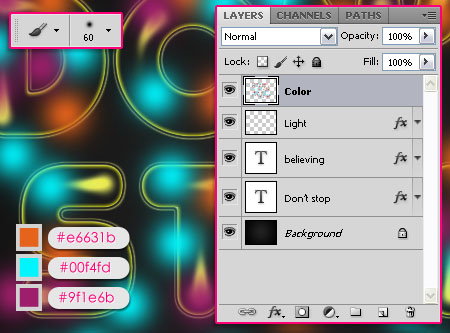
It’s time to add some bright colors! So create a new layer on top of all layers and call it Color. Use a soft round brush, and set its Size to something around 60 px, to paint small colored circles all over the text. Try not over do it, and leave some empty spaces.
The colors used are #e6631b, #00f4fd, and #9f1e6b. But you can choose the colors you like.
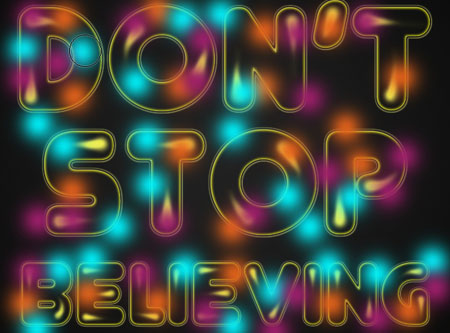
You should get something like this.
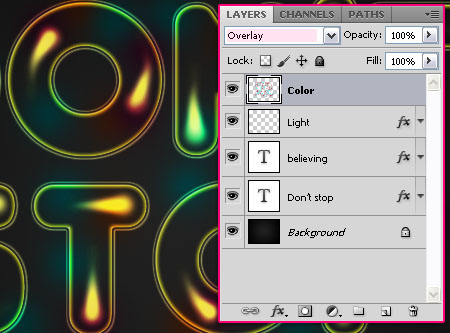
Change the Color layer’s Blend Mode to Overlay.
Step 6
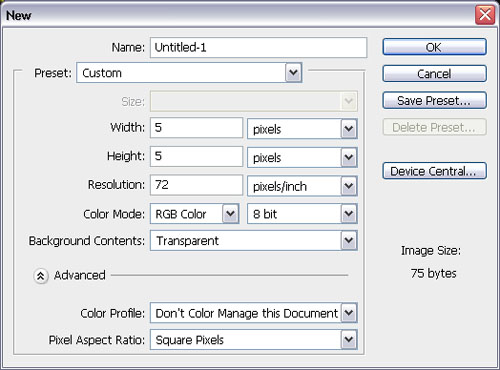
Now, we are going to create the Diagonal Lines Pattern used in this tutorial. Create a new document that is 5 x 5 px, and set the Background Contents to Transparent.
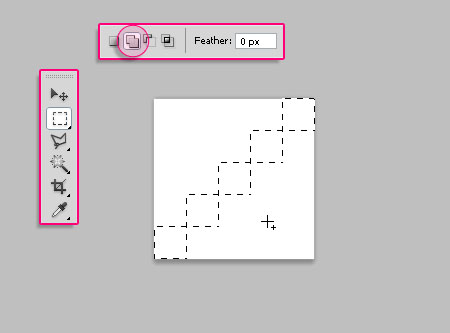
Use the Rectangular Marquee Tool and click the Add to Selection icon to create 5 diagonal squares (1 px for each square, you can zoom in to see the pixels more clearly).
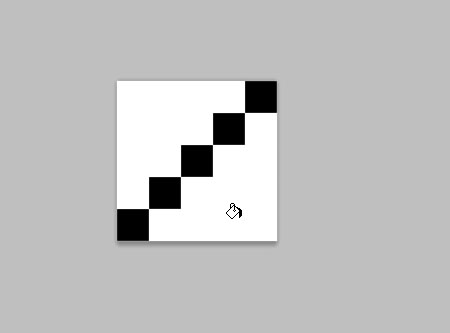
Once you’re done, fill the selection with Black, and press Ctrl/Cmd + D to get rid of the selection.
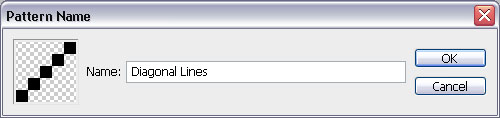
Go to Edit > Define Pattern, and type in Diagonal Lines. That’s it for the pattern!
Step 7
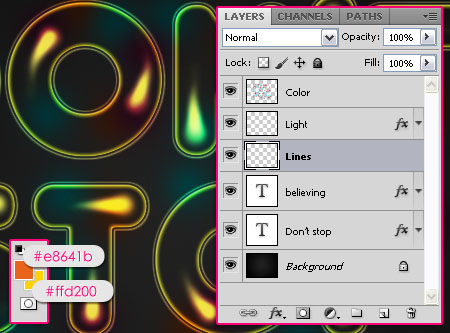
Back to the original document, create a new layer right below the Light layer, and call it Lines. Set the Foreground color to #e8641b, and the Background color to #ffd200.
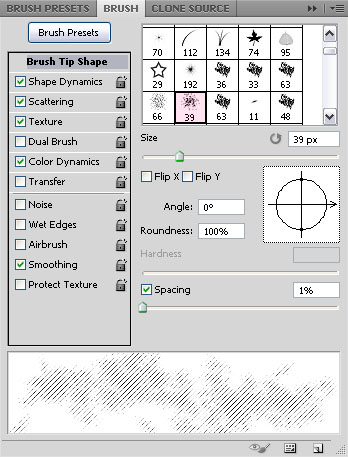
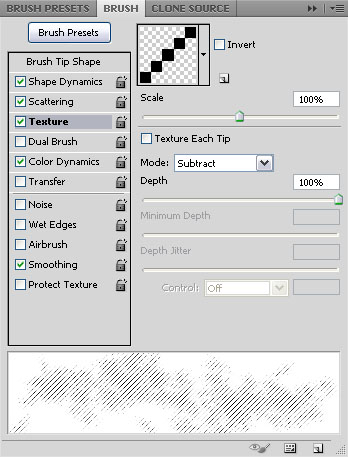
Open the Brush panel (Window > Brush), and choose the Dry Brush (size 39). Change the Settings as shown below:
Brush Tip Shape
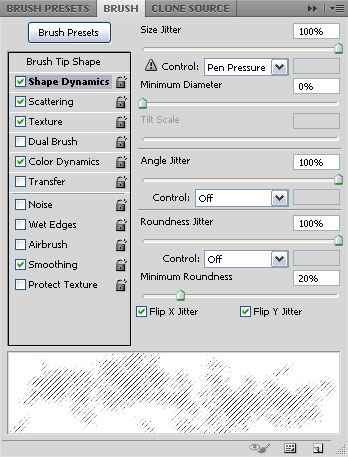
Shape Dynamics
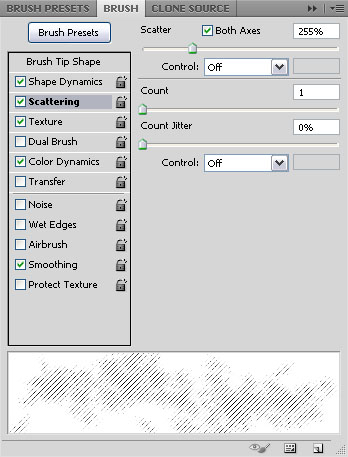
Scattering
Texture
Use the Diagonal Lines pattern you’ve just created).
Color Dynamics
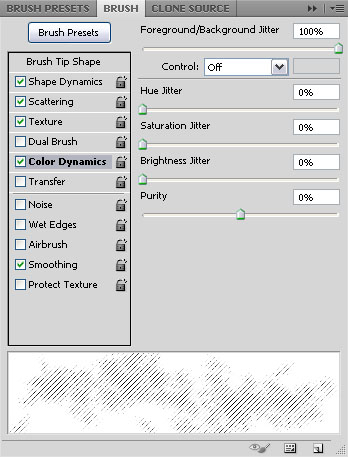
That’s it for the Brush.
Step 8
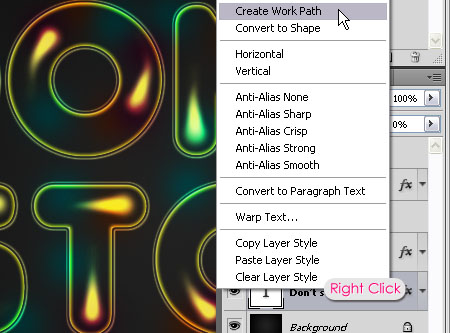
Right click the text layer and choose Create Work Path.
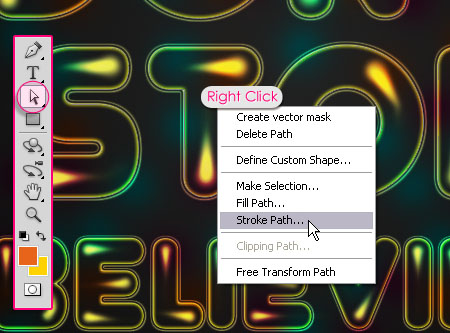
Select the Lines layer, then pick the Direct Selection Tool, Right click the path, and choose Stroke Path.
Choose Brush from the Tool drop down menu, and check the Simulate Pressure box.
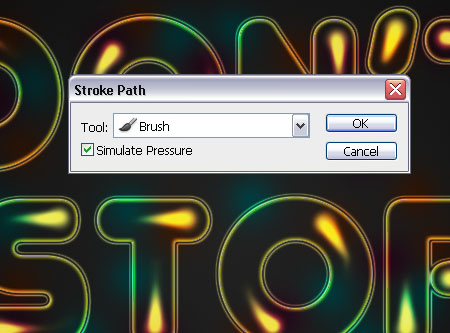
This will stroke the path with the brush you’ve modified. Hit Enter/Return to get rid of the path. (Repeat the same steps to stroke the other text layers you have).
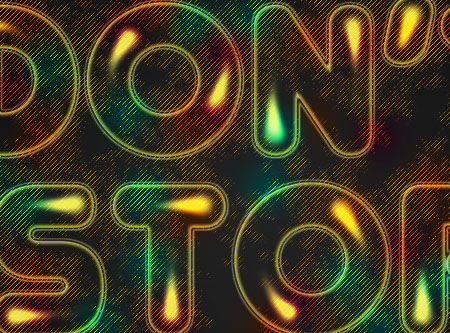
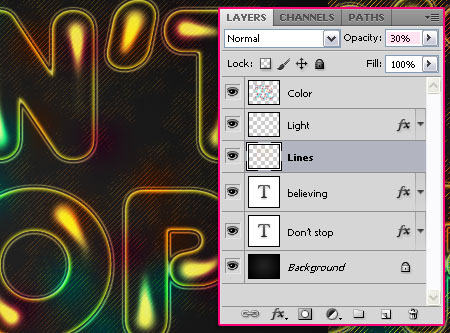
Change the Lines layer’s Opacity value to 30%, or any other value you like, depending on how transparent you want the lines to be.
You can stop here if you like the effect this way, or you can follow the next step to add a glossy effect.
Step 9
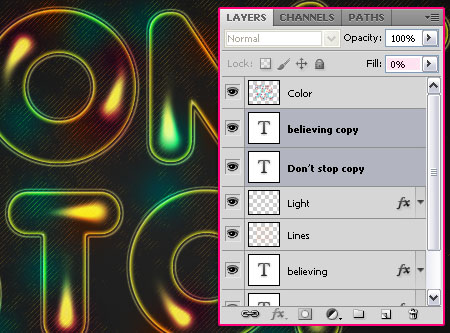
Ctrl/Cmd + Click to select all the text layers you have, and duplicate them placing the duplicated layers right below the Color layer and on top of the “Light” layer. Then, Right click one of them and choose Clear Layer Style.
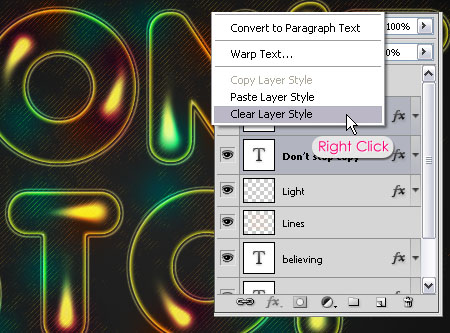
Set the duplicated text layers’ Fill values to 0.
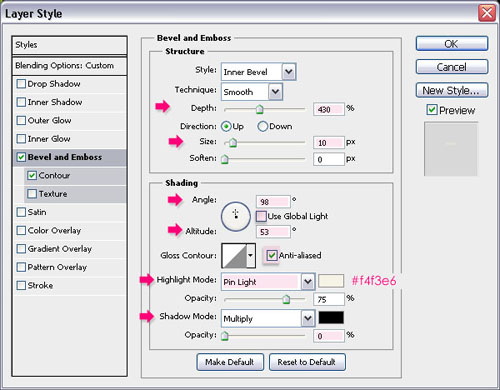
Double click the larger size text layer to apply the following Layer Style:
– Bevel and Emboss
- Depth : 430
- Size : 10
- Uncheck the Use Global Light box
- Angle : 98
- Altitude : 53
- Check the Anti-aliased box
- Highlight Mode : Pin Light
- Color :
#f4f3e6 - Shadow Mode – Opacity : 0%
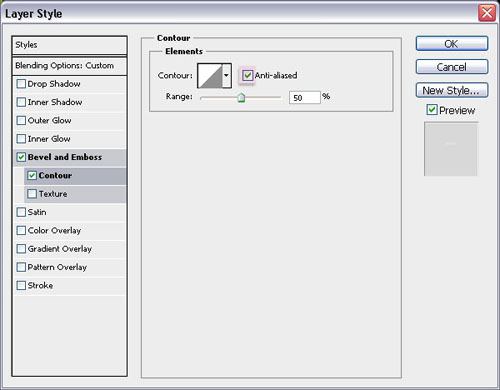
– Contour
Just check the Anti-aliased box.
Copy and Paste the same Layer Style to the other text layers, and just change the Bevel and Emboss Size value to 7 for the smaller text size.
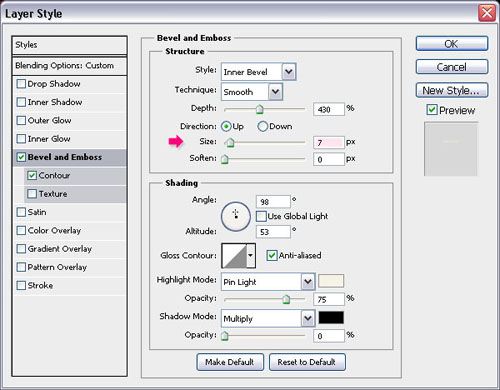
This will add a nice glossy effect to the text, and make it pop out even more.
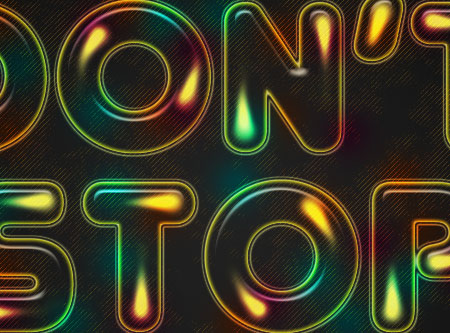
And we’re done!
Hope you enjoyed this tutorial.
Did you enjoy this post? Please consider donating to help us cover our server costs.


Good tutorial. Thanks for share it
You’re welcome.
Thanks for the comment.
I run on a slow computer and doing 1024×768 on 72 dpi forces the the gradient to have a loading bar. Should I go with half of about everything except dpi?
You sure can. Just always make sure when you use a different font size to change the layer styles values accordingly.
Hope this helps.
Can you provide a .PSD file?
Hello Pavel,
I’m really sorry, but PSD files are not provided at the moment. If you have any questions regarding the tutorial you can post them and I’ll try my best to answer them.
Best regards.
really that’s great tutorial. Thanks for share!! 🙂
Thank you so much for the comment.
Thanks..!!! Bro
Thanks Moai.
I’m a girl by the way 🙂
how can i get to make a stroke path?
because when i tried it, its not available to choose
Hello samalnun,
Make sure that you select the “Lines” layer before right clicking, so that the “lines” layer is the active layer, not the text layer.
Hope this helps.
* I’m going to add this note in the tutorial.
ficei sabendo que fala português,então:otimo trabalho,ficou bastante bonito,vou tentar alguma hora,obrigado por ter postado ;D
Glad you liked it!
Muito obrigada 🙂
Nice effect and very easy tut to follow. Really liked my final result and once again toda for sharing. As I was doing this tut I thought about how much time you must have put into creating this tutorial. Enjoy doing the tuts that you post and your creativity.
Shalom Tehillah-Lilly
Thank you so much Lilly, your words really mean a lot!
I’m so glad you’re enjoying the tutorials, thanks for the support.
Shalom 🙂
very nice..the instructions are so clear that I actually got it even though this is my first time doing photoshop…thnx a lot, friend.
Hello gibbson,
That’s great to know!
Thank you so much for the comment.
Wow..and you`re a girl..I bet your very beautiful regarding your creativity..
Oh .. Thank you so much for the lovely comment! We are all beautiful in our own way 🙂
This really means a lot, so thanks once again.
Hello every one,
i totally agreed with u gibbson Wow..and you`re a girl..I bet your very beautiful regarding your creativity..
Hello Vicky,
I really appreciate it, thanks a lot 🙂
Very nice tutorial, thanks a lot! 🙂
You’re welcome, glad you liked it.
Thanks for the comment 🙂
Retro is one of my fav style 🙂
Simple technique and easy to follow with great outcome.
Thanks for sharing the knowledge.
It is one of my favorite styles as well, I just adore it 🙂
Glad you liked the outcome.
Thank you so much for the comment.
Very nice tutorial. I’m Polish and I had no problem fallowing it. Great job!
And here’s my result 🙂
http://lukasz-palubicki.home.pl/dontstopbelieving.jpg
Hello Lukas,
Awesome result indeed!
Glad you enjoyed the tutorial, thanks for the comment.
Cheers 🙂
Great tutorial… I like it very much…
Keep up the good works!
Glad you liked it.
Thanks for the comment 🙂
Awesome, I thought this is harder but is really simple to do, thanks so much for this tutorial.
You’re welcome! Glad you found it easy to follow.
Thanks for the comment.
apik gan
Terima kasih 🙂
are you an indonesian ?? waw..
bagus sist, kreatif.. tekniknya ijin ya buat di praktekin.. 🙂
Nope, I’m not 🙂
But thanks for the comment, hopefully I understood what you meant right 😉
AWESOME!!!! thumbs up! great learning for me!! thanks!!
Glad you found it useful.
Thank you so much for the comment 🙂
Very Nice….
Thnku
You’re welcome.
Thanks for the comment.
Please mention that when using smudge tool “Sample all layers” should be unchecked otherwise after you apply outer and inner glow the result will look like this http://www.imagebam.com/image/b44f5f142929475 😮
Sometimes its hard to jot down all the settings, so I usually mention the non-default values only.
But thank you so much for pointing this out, I’ll leave the comment so that others can refer to it if they have the same problem 🙂
very nice effect and an easy-to-follow tutorial.
here is my result;
http://copyismyright.blogspot.com/2011/08/colorful-retro-text-effect.html
thanks..
Awesome! A very neat and nice result indeed.
Thanks a lot for leaving a comment.
Cheers 🙂
makasih, bagus.
dicoba ya…
You’re welcome.
Terima kasih for the comment.
Thanks for this tut.
My try:
http://i56.tinypic.com/2rzzxtz.png
Cool! Seems like you used different contours for the Bevel and Emboss, which is nice as it gives the text a glass-like effect.
Thanks for the comment and the link 🙂
such an active site and authot..
great tut!
Thanks a lot 🙂
Nice tut
🙂
Thanks 🙂
Gracias, es la primera vez que lo hago y no salio tan mal.
buenas explicaciones.
Glad you found it easy to follow.
Muchas gracias for the comment 🙂
thanks! so wonderful tutorial 🙂
You’re welcome.
Thanks for the comment 🙂
Thankx man…i really love this Tutorial, its so great. keep up the good work. 🙂
Glad you liked the tutorial.
Thanks for the comment, I’m a girl though 🙂.
Thank for this tutorial.
I love this font style.
🙂
Thanks a lot for the comment 🙂
very nice tutorials..and easy to learn…thnx 🙂
Thank you very much 🙂
Thanx to share, i’ve dont this thank u so much
You’re welcome.
Thanks a lot for the comment 🙂
Very Good, I did this example now…
Awesome!
Thanks for the comment 🙂
Very nice use of outer glow and Inner glow can make difference for text if you make fill to zero and Overlay is one of my favorite blending mode. Most important is all about smudge tool and Overlay can create awesome effect.I thank you very very much for such a nice tutorials.
Kind Regards
Ajay
Glad you enjoyed it.
Thanks a lot for leaving a comment.
thank u very much!
that was really useful.
So glad you found it useful.
Thanks a lot for the comment 🙂
While I’m not as fond of the style, this looks great and it seems really easy to accomplish. Thanks for doing this one. One thing I would ask for future tuts is that you give a short explanation as to WHY the certain values, etc. so I can easily apply the effects on other things.
Also, can this be used on any color background or does it have to be black?
Thanks again.
Glad you liked the outcome 🙂
I try to include an explanation to why the values are used whenever the reason is important, as usually you can notice the difference if you change those values. But I’ll also try my best to give a simple explanation when possible to clarify some points.
As for the Background, just make sure it is as dark as possible, because the layer styles applied and the blend modes used need a dark color to work properly.
Thanks a lot for the feedback and the comment. I really appreciate them.
Regards.
wow this one is really cool i want to learn more from you.you are a god in photoshop. i also like your 3d tutorial before i had fun doing it but i’m just wondering how long does it take to render?
Thank you so much for the comment, I really appreciate it.
As for the 3D text effect, the rendering time depends on your computer, but it tends to take a while.
If you want to add more details, please feel free to leave a comment on the 3D text effect tutorial you’re referring to so that I can help.
Thanks once again.
Superb but hw to make in other fonts and can we change the colour???
You can definitely choose any font or colors you like. The only thing you might need to adjust is the size values of the layer styles depending on the font you’re using. But other than that, you can have fun with the text effect 🙂
Thanks for the comment.
Hello dear , i’m using CS3 photoshop . However , i do not have . The part where it says Create work path on the Text style . So can you please Advise ? 😀 Thanks a lot love your tutorial
Did you make sure you right click the text layer itself? And if so, can you see the option “Create Work Path” grayed out or you just can’t find it at all?
Thanks a lot for the comment 🙂
Thanks for this great tutorial !
You’re welcome.
Thank you for the comment.
WOW!WOW!WOW!
I’ve never enjoyed a tutorial as much as I enjoyed this.
I think I’ve just started using Photoshop.
You are the best 🙂
Thank you so very much, I’m really glad to know that you did 😀
Your comment just made my day.
Hopefully you’ll enjoy the other tutorials as well 😉
Thanks once again.
thats amazing . lol xD
Thank you 🙂
I’m stuck in the part we are suppose to select de diagonal squares, i cant do it, i dont know how to select them :/
What step exactly? If you mean using the Rectangular Marquee Tool, you just need to click and drag to create a selection, one square at a time.
If the problem is something else please feel free to add a reply.
Please I need your help!!!! I am stuck in step 8. “Right Click on the text layer and choose Create Work Path”
An error is showing: “could not complete your request because the type layer uses a faux bold style.”
What to do???? Please help!!!
You need to go to Window -> Character to open the Character panel, then un-click the “Faux Bold” icon. Check this image please.
Hope this helps.
Thanks!!! I will try again from the beginning.
No problem.
Hopefully things will work out great this time 🙂
its nice tutorial…
can you please provide us pdf for this?
Thanks
Thank you for the comment:) But unfortunately, no pdf version is available.
Thanks once again.
Awesome! wish all tuts were as easy to follow and well instructed as this one is. =]
Glad you found it so.
Thanks a lot for the comment, appreciate it 🙂
I can’t find DRY BRUSH in photoshop cs5 ?
Can u help me pls ?
This brush comes with Photoshop, so you should have it by default. Maybe you need to scroll down to find it?
You can also try resetting the brushes as shown here. Hope this helps, but if the problem still exists please feel free to add a reply.
Regards.
that was an awesome effect showcased in a very easy manner. Thanks a lot 😀
That’s great to know!
Thank you very much for the kind comment 🙂
it is a good tutorial,but I stuck in step 8,it’s can’t create a work path because the type layer uses a faux bold,would you like to help me?
thankyou so much.
To solve the problem, go to Window -> Character to open the Character panel, and un-click the Faux Bold icon if it’s clicked. Check this image please.
Hope this helps.
Thanks a lot for the comment.
Great tutorial, very well explained and easy to follow.
Thanks for sharing it, I learned a lot. 🙂
Super glad to know that, it means so much!
Many thanks for the amazing comment 🙂
Wow Perfect 🙂
Thank you very much 🙂
Awesome! Thanks for the great, detailed tutorial 🙂
You’re very welcome!
Many thanks for the kind words 🙂
Happy you do 🙂
Gracias again for the kind words 😉
What is the reminder you get please? Can you upload a screenshot of the issue?
Did this one (:
Thanks for the tutorial!
Good job!
Thanks for sharing your work 🙂
Amazing Tutorial!…….Thank You Very Much.
Tried My Best And It Worked For Me
Looks nice!
Very glad you liked it.
Many thanks for the kind words 🙂