
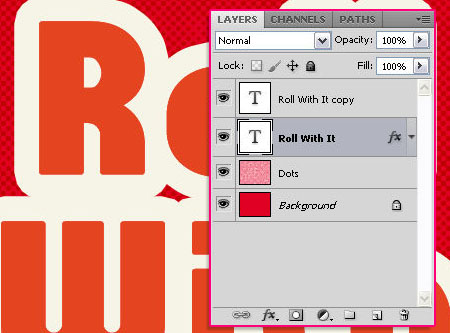
Halftone Text Effect
In this tutorial, we are going to use some Photoshop filters and apply some Layer Styles to create a cool halftone-like text effect.
The Final Result

Tutorial Details
- Software Used : Photoshop
- Version : CS5 Extended
- Time : 0:30 – 0:45
Resources
- Familian font.
Step 1
Create a new 1024 x 768 px document. Set the Foreground color to #df0024 and the Background to #ffffff. Fill the Background with the Foreground color.

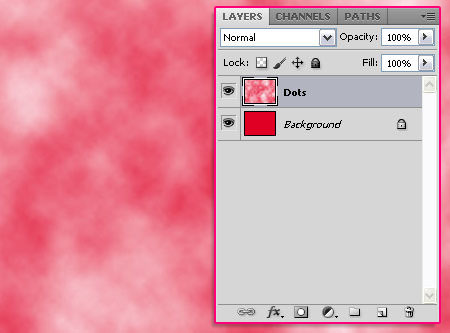
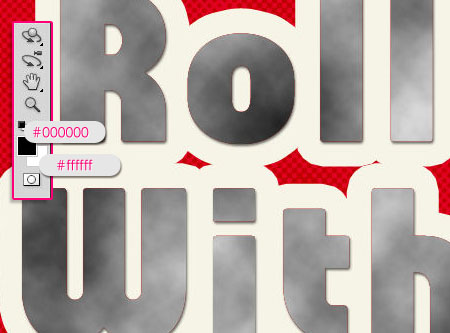
Create a new layer and call it Dots, then go to Filter > Render > Clouds.
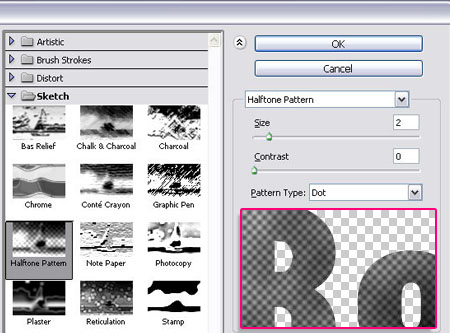
Go to Filter > Sketch > Halftone Pattern, and set the Size to 2, the Contrast to 0, and the Pattern Type to Dot.

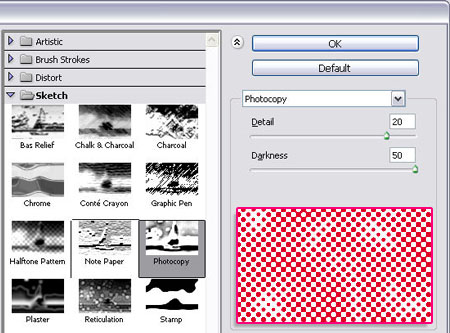
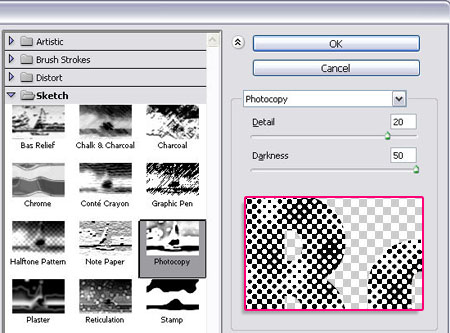
Go to Filter > Sketch > Photocopy, change the Detail value to 20 and the Darkness to 50.
Once you hit OK, change the Dots layer’s Blend Mode to Linear Burn.

Step 2
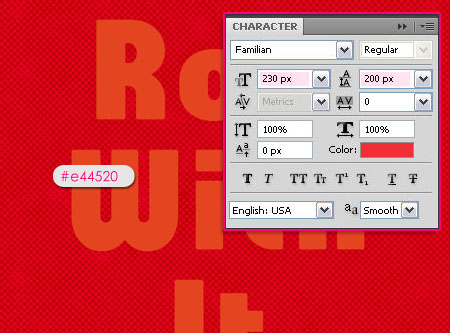
Type your text using the color #e44520 and center-align it if needed. The font used is Familian, and the Size is 230px.
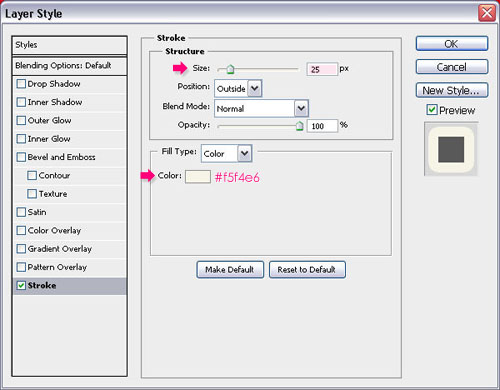
Duplicate the text layer, then double click it to apply a Stroke effect. Change the Size to 25, and the color to #f5f4e6.
You can adjust the size until you like the result.
Step 3
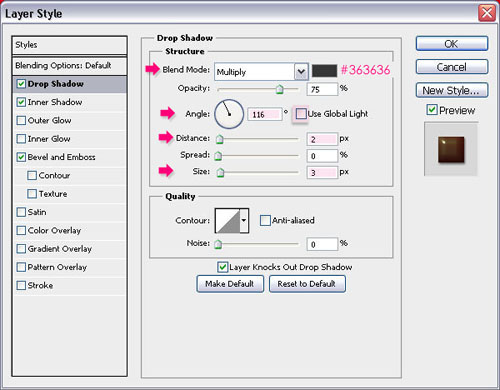
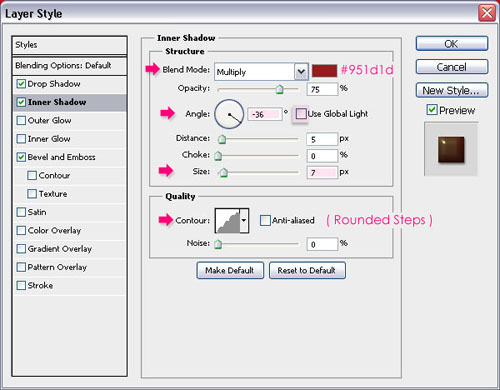
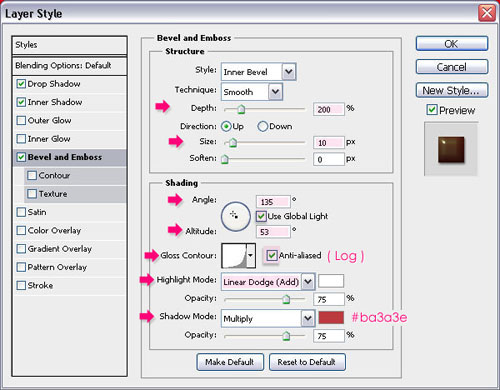
Now, double click the duplicated (copy) text layer to apply the following Layer Style:
– Drop Shadow
- Color :
#363636 - Uncheck the Use Global Light box
- Angle : 116
- Distance : 2
- Size : 3
– Inner Shadow
- Color :
#951d1d - Uncheck the Use Global Light box
- Angle : -36
- Size : 7
- Contour : Rounded Steps
– Bevel and Emboss
- Depth : 200
- Size : 10
- Uncheck the Use Global Light box
- Angle : 135
- Altitude : 53
- Gloss Contour : Log
- Check the Anti-aliased box
- Highlight Mode : Linear Dodge (Add)
- Shadow Mode – Color :
#ba3a3e
You should get a result similar to this. You can stop here if you like the effect, or you can move forward to add the halftone effect to the text.

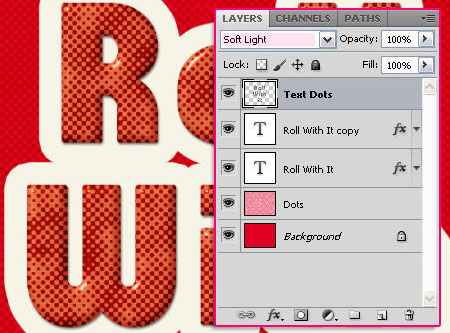
Step 4
To create the halftone effect for the text, create a new layer and call it Text Dots, then Ctrl/Cmd + click the text layer’s thumbnail to create a selection.
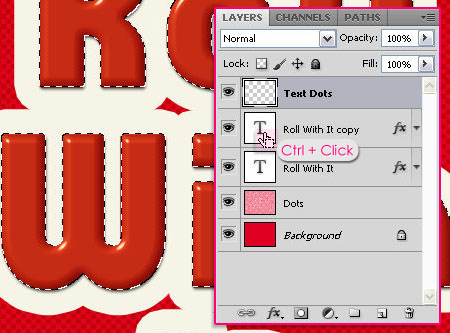
Set the Foreground and Background colors to Black and White, then go to Filter > Render > Clouds. Press Ctrl + D to get rid of the selection.
Go to Filter > Sketch > Halftone Pattern, and make sure that the Size is still set to 2, the Contrast to 0, and the Pattern Type to Dot.
Go to Filter > Sketch > Photocopy, make sure that the Detail value is still set to 20 and the Darkness to 50 as well.
Once you’re done, change the Text Dots layer’s Blend Mode to Soft Light.
You can play around with the colors, this effect looks really cool in different colors as well!

Did you enjoy this post? Please consider donating to help us cover our server costs.


Thanks…^^
You’re welcome 🙂
mui bueno kkk
gostei demais
Glad you did!
Thanks for the comment.
WOW, THIS IS AMAZING TUTORIAL.. THANKS THE IDEA.. 🙂
you’re welcome!
Thanks for the comment.
Nice!!
Thanks!
I loved this! thanks!!
Great!
Thanks for the comment.
WOW!! This is so easy tutorial!! Finished in 15 mins!
Hi there,
This tutorial is awesome! The result is very spectacular. Please look at my work here:
http://kepfeltoltes.hu/120911/halftone_text_effect_www.kepfeltoltes.hu_.jpg
Amazing outcome, well done 🙂
Thanks a lot for the comment and the link.
Thanks textuts … your all tutorial are amazing super cool … i love them all … thanks man u explain in nice way ..everything step by step .. 🙂 keep it up all of you .. 🙂
Very happy you do 😀
Thank you so very much for the amazing comment and for the support, really means a lot.
Cheers 🙂