Purple Glow Text Effect
This tutorial explains how to use simple Shadow, Glow, and Satin layer effects with a simple brush to create a hazy bright purple glow text effect.
The Final Result
Tutorial Details
- Software Used : Photoshop
- Version : CS6 Extended
- Time : 0:30 – 0:45
Resources
- Franks font.
- Texture 206 by Sirius-sdz.
Step 1
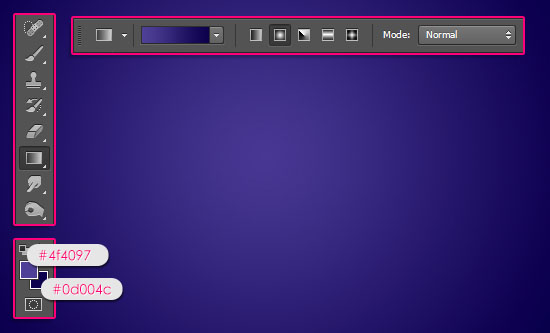
Create a new 1152 x 864 px document. Set the Foreground color to #4f4097 and the Background color to #0d004c, pick the Gradient Tool, click the Radial Gradient icon in the Options bar, then click and drag from the center of the document to one of the corners.

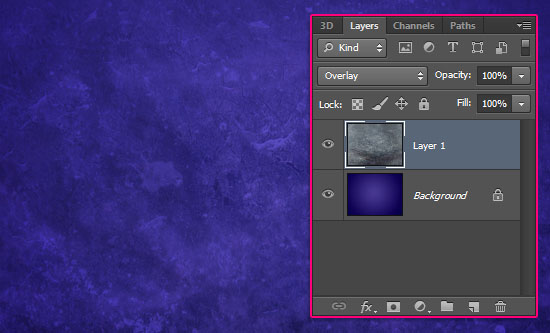
Place the Texture 206 image on top of the Background layer, resize it as needed, then change its layer’s Blend Mode to Overlay.

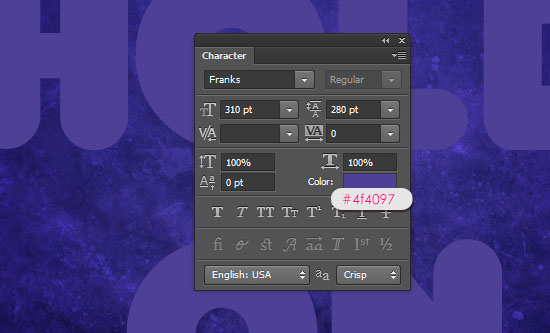
Create the text using the color #4f4097. The font used is Franks, the Size is 310 pt, and the Leading is set to 280 pt.

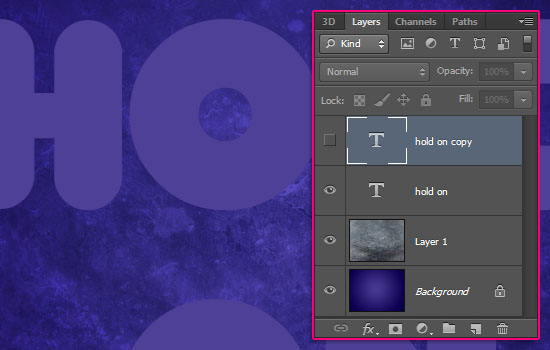
Duplicate the text layer then make the copy invisible by clicking the eye icon next to its layer.

Step 2
Double click the original text layer to apply the following Layer Style:
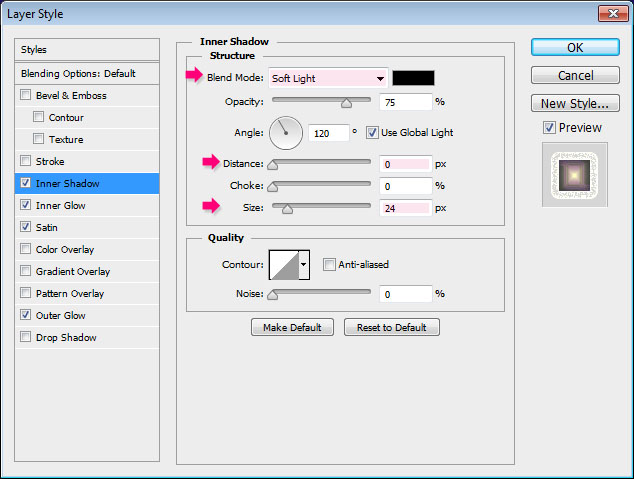
– Inner Shadow
- Blend Mode : Soft Light
- Distance : 0
- Size : 24
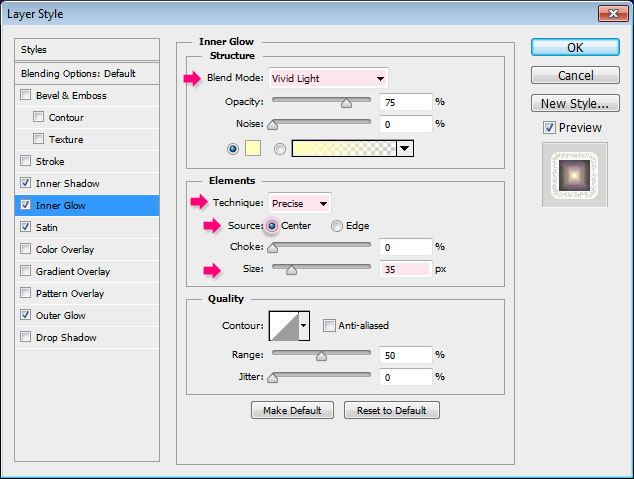
– Inner Glow
- Blend Mode : Vivid Light
- Technique : Precise
- Source : Center
- Size : 35
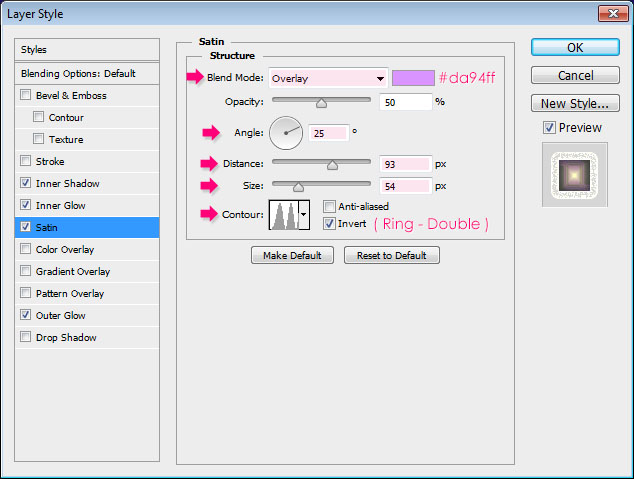
– Satin
- Blend Mode : Overlay
- Color :
#da94ff - Angle : 25
- Distance : 93
- Size : 54
- Contour : Ring – Double
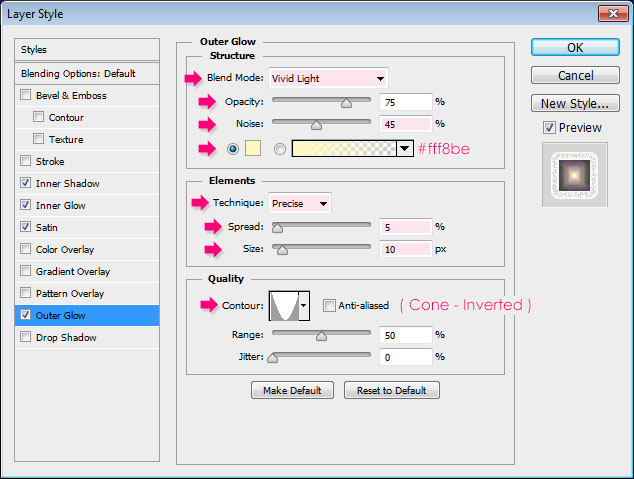
– Outer Glow
- Blend Mode : Vivid Light
- Noise : 45%
- Color :
#fff8be - Technique : Precise
- Spread : 5
- Size : 10
- Contour : Cone – Inverted
This will create a bright glowing text.


Step 3
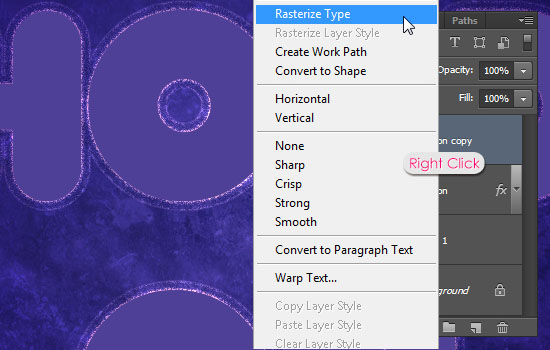
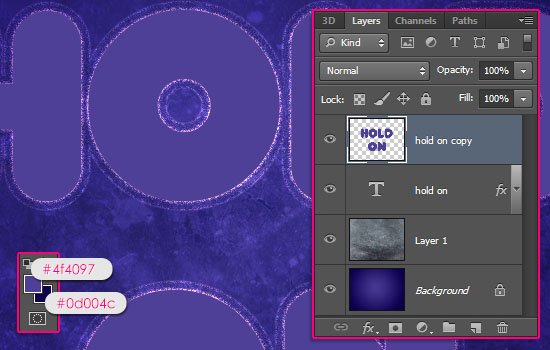
Make the copy text layer visible by clicking the empty box next to it, then right click that layer and choose Rasterize Type.

Make sure that the Foreground and Background colors are still set to #4f4097 and #0d004c.

Step 4
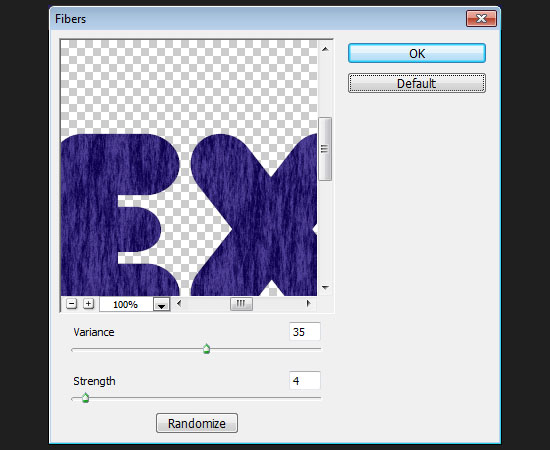
Go to Filter > Render > Fibers, then change the Variance to 35 and the Strength to 4.

You should get a result similar to this.
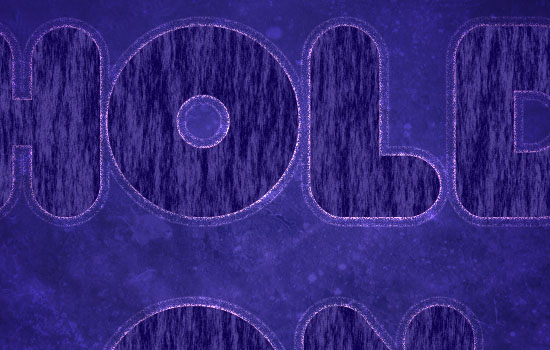

Go to Filter > Brush Strokes > Accented Edges, then change the Edge Width to 2, the Edge Brightness to 38, and the Smoothness to 5.
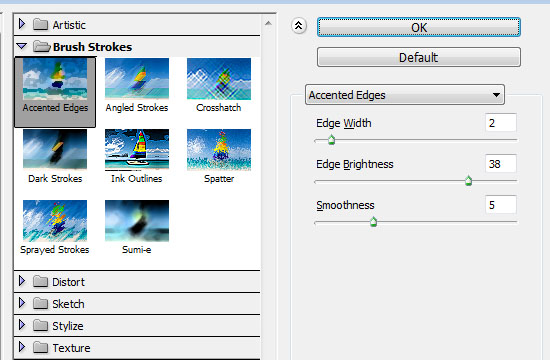

This will make the fibers texture more blurred and slightly glowing at the edges.
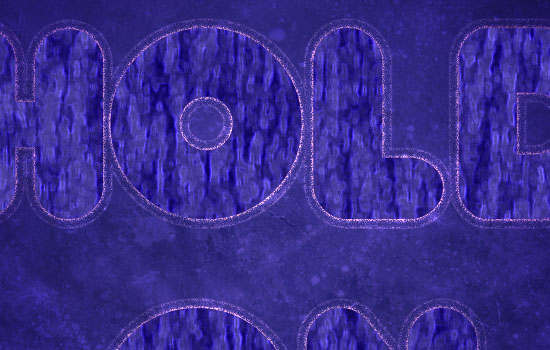

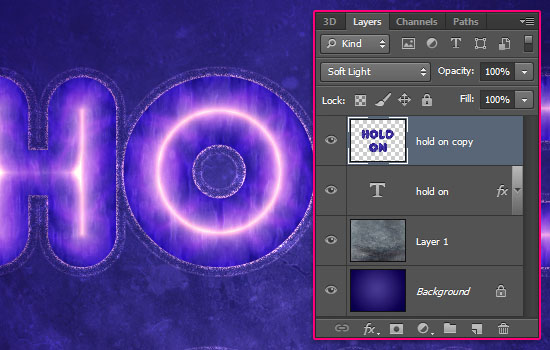
Change the rasterized layer’s Blend Mode to Soft Light. This will add a nice texture to the original text.

Step 5
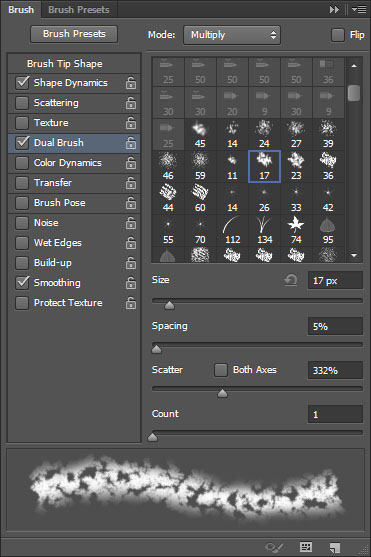
Pick the Brush Tool and choose a soft round brush tip, then open the Brush panel (Window > Brush) to modify the brush’s Settings as below:
Brush Tip Shape
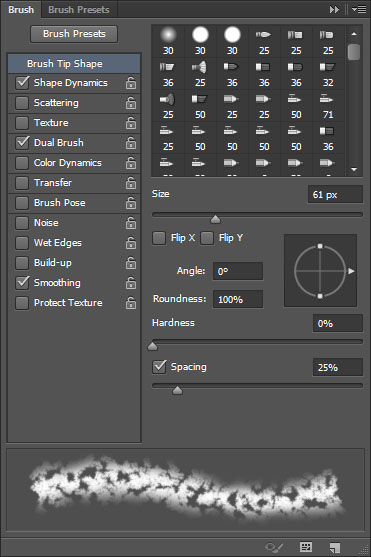

Shape Dynamics
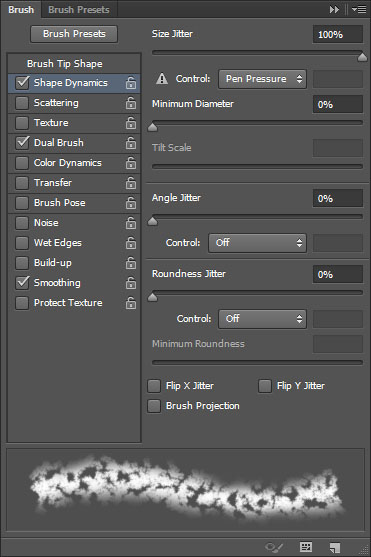

Dual Brush
Choose the Chalk 17 pixels brush.

Step 6
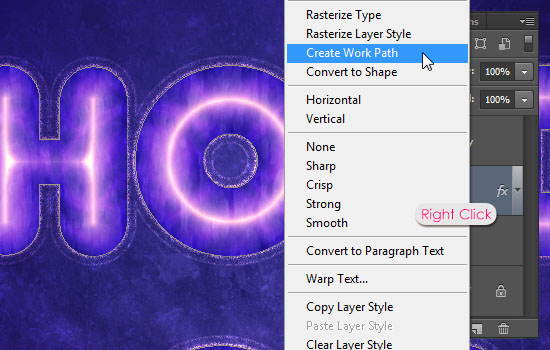
Right click the original text layer then choose Create Work Path.

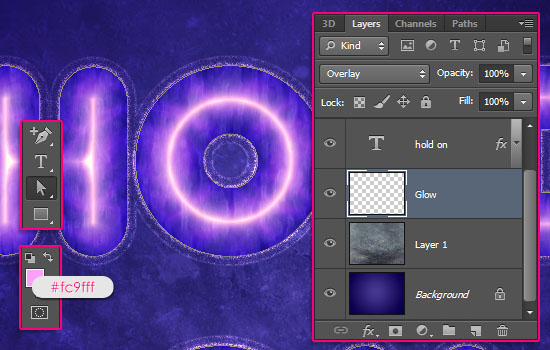
Create a new layer right below the text layer and call it Glow, then change its Blend Mode to Overlay. Set the Foreground color to #f9cfff and pick the Direct Selection Tool.

Right click the work path then choose Stroke Path.
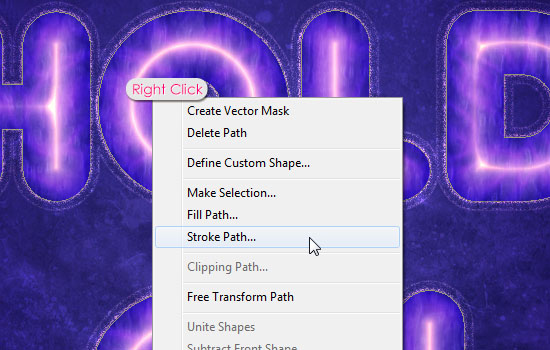

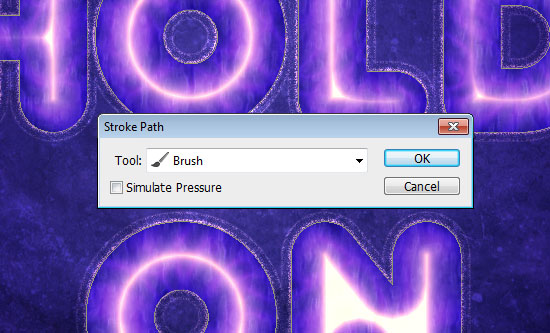
Choose the Brush option from the Tool drop down menu, and make sure that the Simulate Pressure box is un-checked.

Press Enter/Return to get rid of the path.


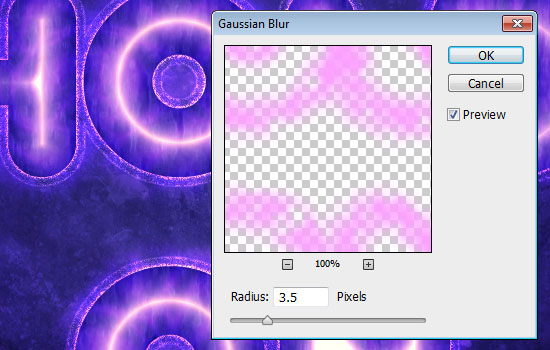
Go to Filter > Blur > Gaussian Blur, and set the Radius to 3.5. This will smoothen the stroke while keeping its subtle texture.

Your purple glow text is now ready!
Did you enjoy this post? Please consider donating to help us cover our server costs.





Following this tutorial step for step the main text layer styles does not have the same look as yours it is far too dull I’ve gone over the style settings a lot and there is no difference in the style settings. However mine compared to yours has a significance light intensity too much to be a monitor calibration difference.
Usually, Layer Style problems occur because of different fonts or font sizes, so did you use the same font and font size as in the tutorial?
If you are, Can you please upload an image of your result to tinypic.com so that I check out what the layer styles look like?
Beautiful text effect, I will try it for sure! thanks
Awesome!
Thanks a lot for the comment.
A very nice tutorial for a cool type effect. It’s been a while since I’ve looked at any PS tutorials and I’m nicely surprised at the quality and clarity of what I’m seeing here. Followed along easily, saw variations that can be done and was very entertained. Well done and thank you. Nice site all around.
Your words just made my day. I’m so glad you’ve enjoyed the tutorials and found them useful … Means a lot.
Thank you very much for the kind comment 🙂
Regards.
good effect bro
Thanks a lot!
(I’m a girl ^_^)
Awesome tutorial! I did it in lime green and it came out great!!!
That’s so cool! Would like to see your outcome.
Thanks for the comment.
6. This info is quite interesting. Thanks! Indeed, you know how to create something special and share your knowledge with other specialists. I am in search of the company that can provide good digital photo retouching services and editouch & fixthephoto.com seem to be the good choice. Photo art edit is the difficult task for me, and I need well-qualified retouch artists.