
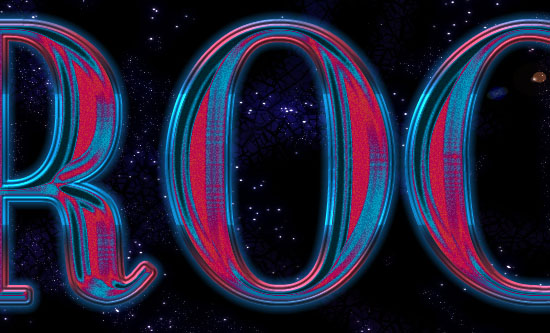
Retro Space Text Effect
This tutorial explains how to use Layer Styles with simple brushes to create a retro space-inspired text effect. Layer styles will be used to create the main text effect and the outer stroke, then, two brushes will be used to add a glow stroke and some sparkles.
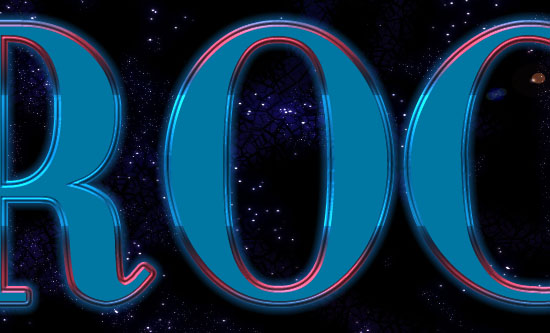
The Final Result

Tutorial Details
- Software Used : Photoshop
- Version : CS5 Extended
- Time : 0:30 – 0:45
Resources
- New Yorker font.
- The Empty Starfield by Wyldsoul.
- Sparklies Photoshop Brushes by redheadstock.
Step 1
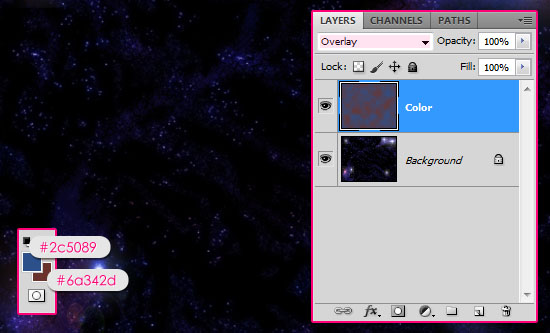
Open the The Empty Starfield image, then, set the Foreground color to #2c5089 and the Background color to #6a342d.
Create a new layer on top of the Background layer and call it Clouds then change its Blend Mode to Overlay. Go to Filter -> Render -> Clouds. This will add subtle coloring to the texture.
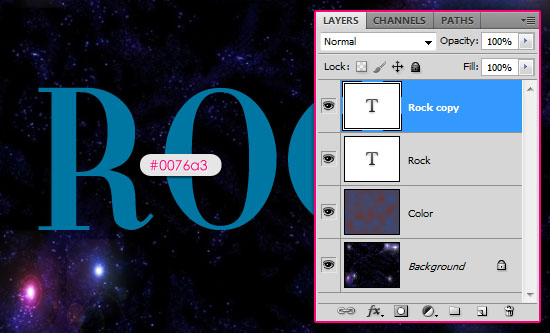
Create the text in All Caps using the color #0076a3. The font used is New Yorker, and the Size is around 342 pt.
If you want to add more than one line of text, create each line in a separate text layer. Duplicate the text layer(s) when you’re done.
Step 2
Double click the original text layer to apply the following Layer Style:
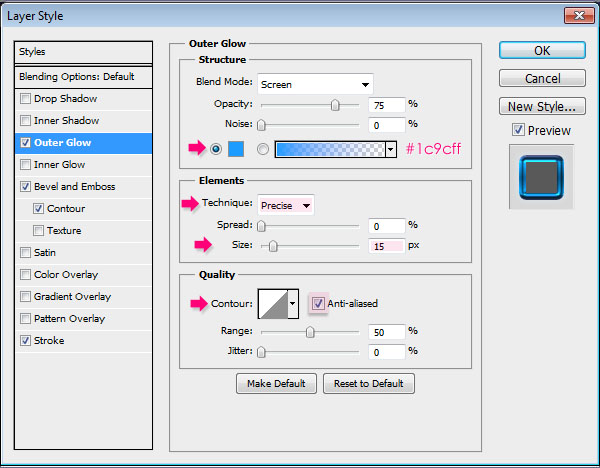
Outer Glow
- Color :
#1c9cff - Technique : Precise
- Size : 15
- Check the Anti-aliased box
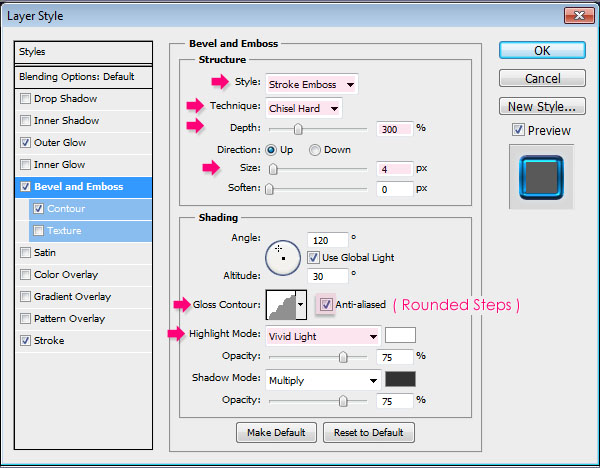
– Bevel and Emboss
- Style : Stroke Emboss
- Technique : Chisel Hard
- Depth : 300
- Size : 4
- Gloss Contour : Rounded Steps
- Check the Anti-aliased box
- Highlight Mode : Vivid Light
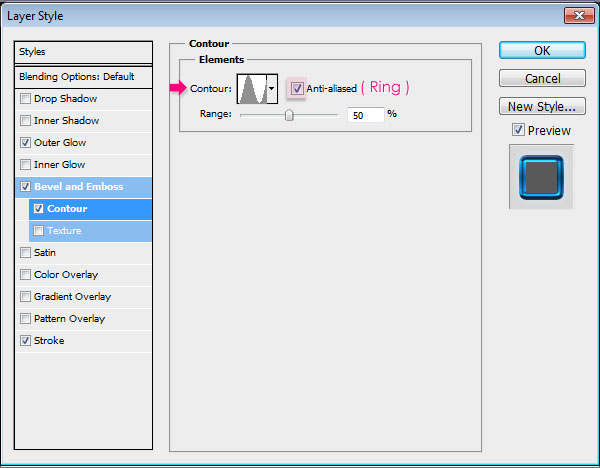
– Contour
- Contour : Ring
- Check the Anti-aliased box.
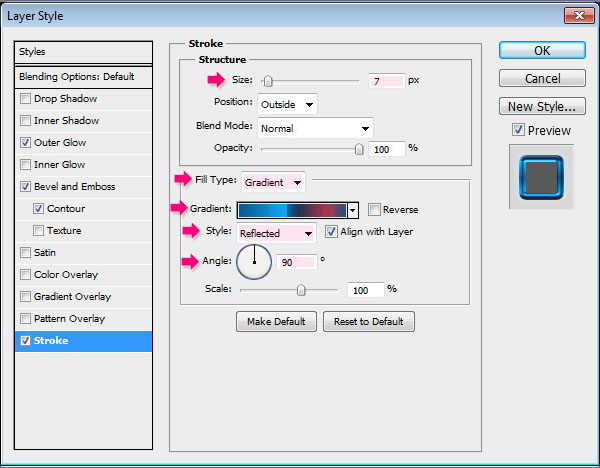
– Stroke
- Size : 7
- Fill Type : Gradient
- Style : Reflected
- Angle : 90
- Click the Gradient box to create the gradient
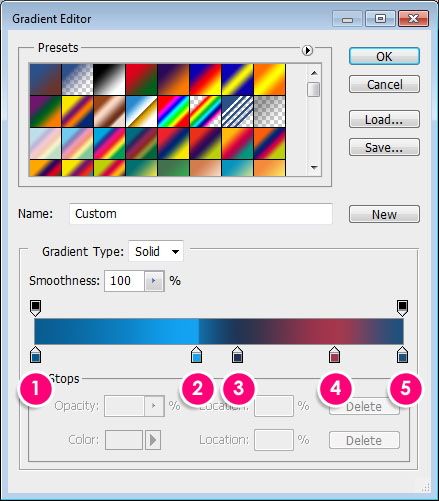
The gradient is a bit tricky. Start by adding the colors in the locations shown below:
# Color – Location
- 1 –
#095c91– 0 - 2 –
#14a2f1– 44 - 3 –
#223455– 55 - 4 –
#a4374c– 82 - 5 –
#1a527e– 100
As for the second color, you’ll need to click it (its stop), and two handles will appear on both sides. Click and drag the right handle and place it on top of the color stop to create a sharp edge.
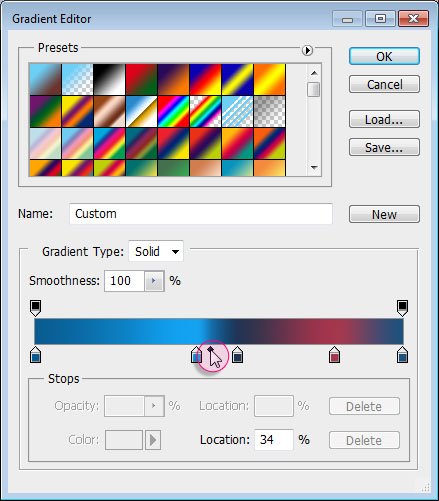
This will create the stroke.
Step 3
Double click the copy text layer to apply the following Layer Style:
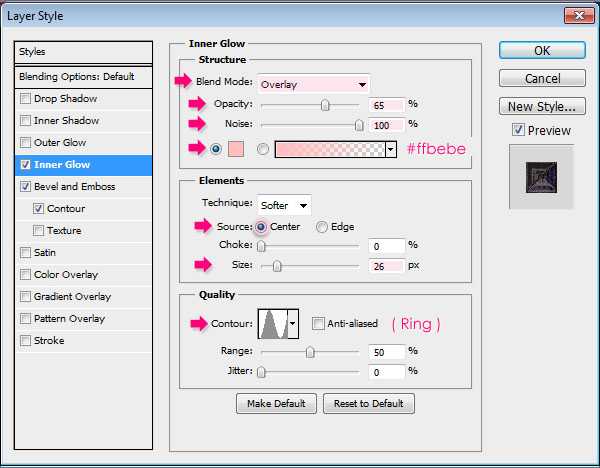
– Inner Glow
- Opacity : %65
- Noise : 100%
- Color :
#ffbebe - Source : Center
- Size : 26
- Contour : Ring
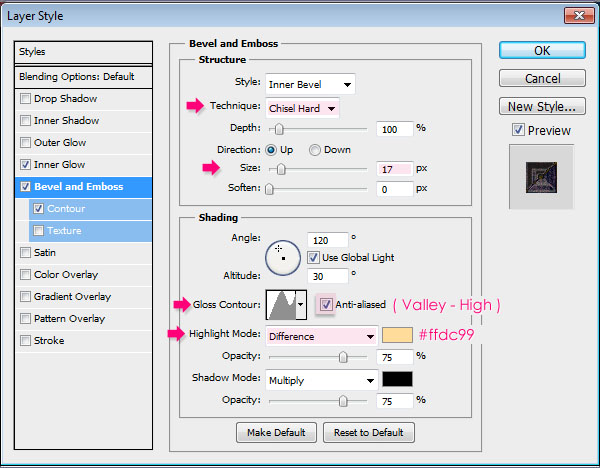
– Bevel and Emboss
- Technique : Chisel Hard
- Size : 17
- Gloss Contour : Valley High
- Check the Anti-aliased box
- Highlight Mode : Difference
- Color :
#ffdc99
The Difference Blend Mode will create the nice crimson color and blend it beautifully with the blue colors.
– Contour
- Contour : Guassian – Inverse
- Check the Anti-aliased box.
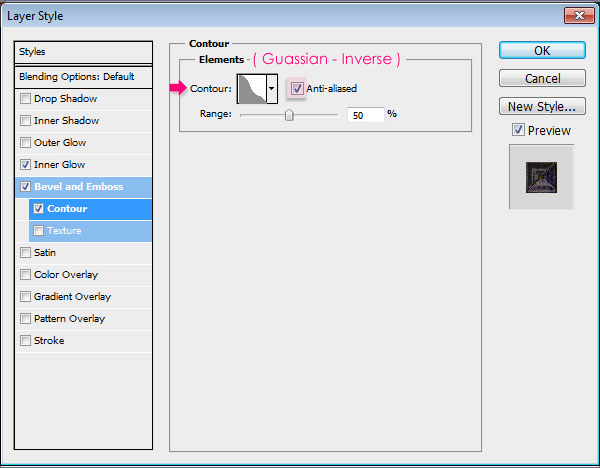
This will create the main effect.
Step 4
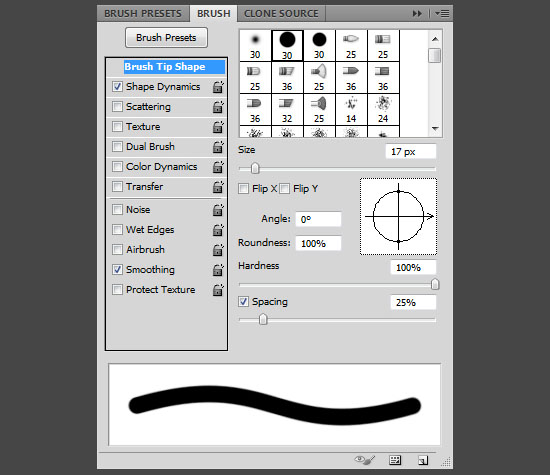
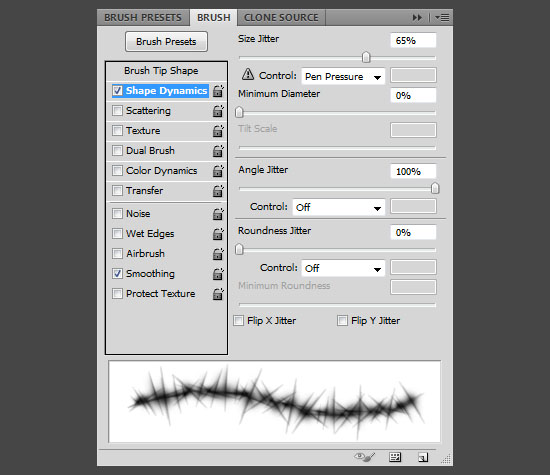
Pick a 17 px hard round brush and open the Brush panel (Window -> Brush) to modify the brush’s Settings as below:
Brush Tip Shape
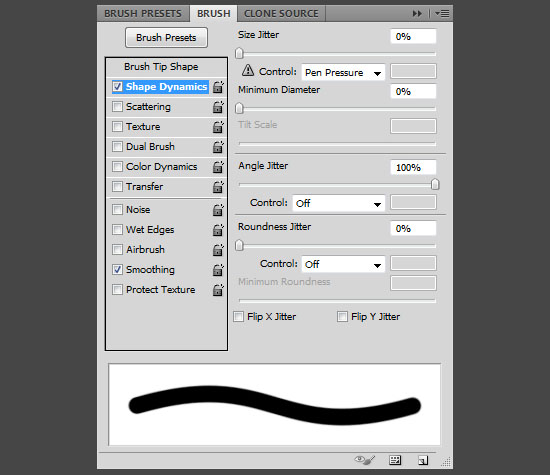
Shape Dynamics
It’s important to choose Pen Pressure from the Control drop down menu.
Right click any text layer and choose Create Work Path.
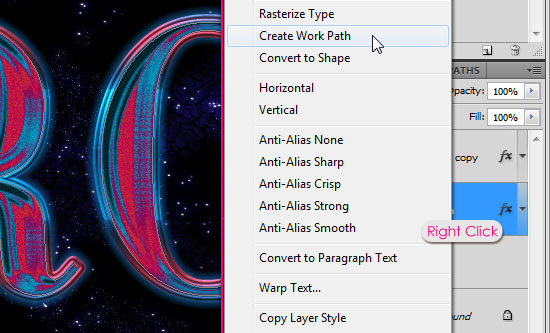
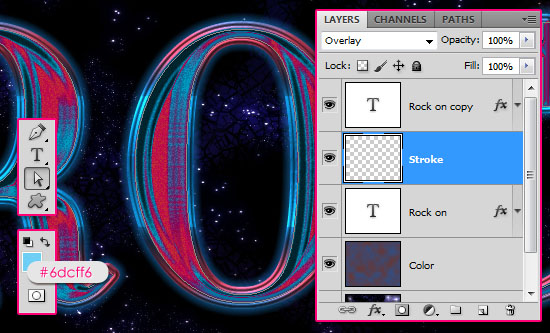
Set the Foreground color to #6dcff6, pick the Direct Selection Tool, create a new layer between the two text layers and call it Stroke, then change its Blend Mode to Overlay.
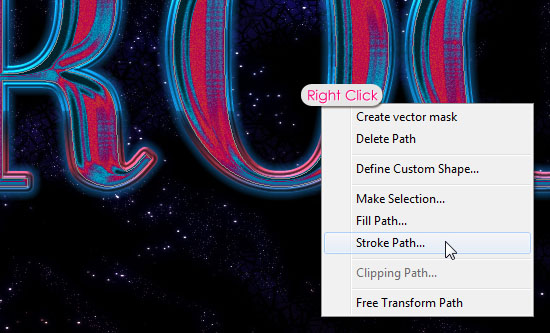
Right click the work path and choose Stroke Path.
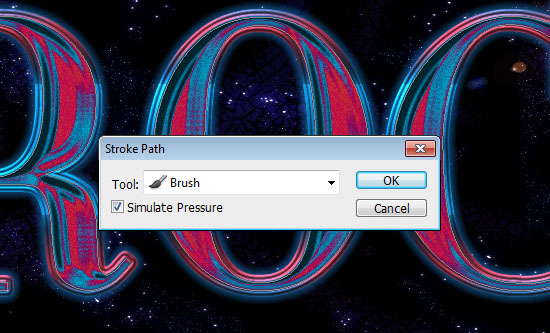
Choose Brush from the Tool drop down menu, and check the Simulate Pressure box.
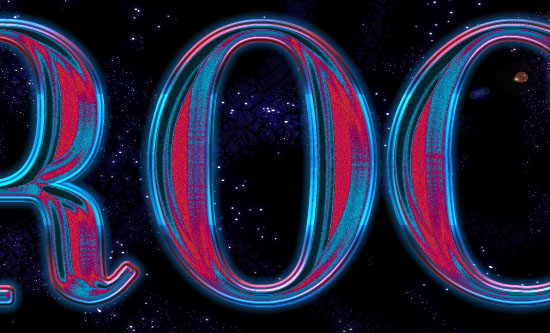
This will brighten up the stroke.
Step 5
Pick a brush from the Sparklies Photoshop Brushes set, and open the Brush panel (Window -> Brush) to modify the brush’s Settings as below:
Brush Tip Shape

Shape Dynamics
The Size and Angle Jitter help create sparkles with different sizes and angles in every click.
Set the Foreground color to #9ffcff, create a new layer on top of all layers and call it Sparkles.
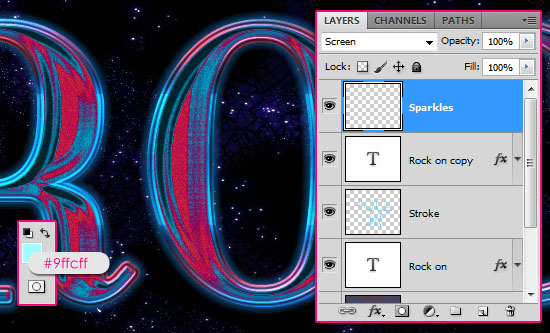
Click to add some sparkles on the text’s stroke, one or two for each letter is good.

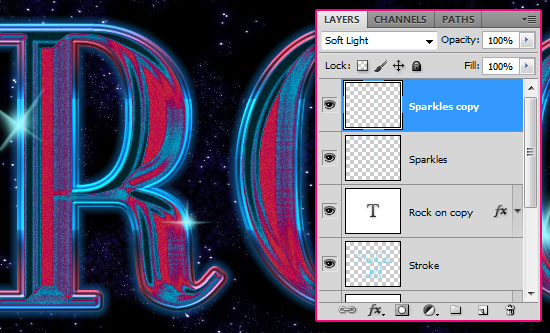
Duplicate the Sparkles layer and change the copy’s Blend Mode to Soft Light.
Step 6
Click the original Sparkles layer so that it is the active layer, then go to Filter -> Blur -> Gaussian Blur, and type in 5 for the Radius.
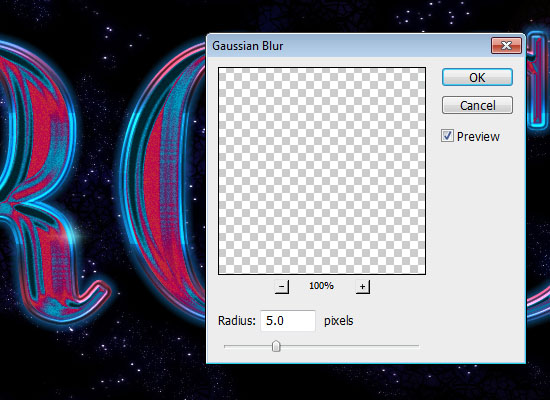
Finally, go to Image -> Adjustments -> Hue/Saturation, and change the Hue value to 130.
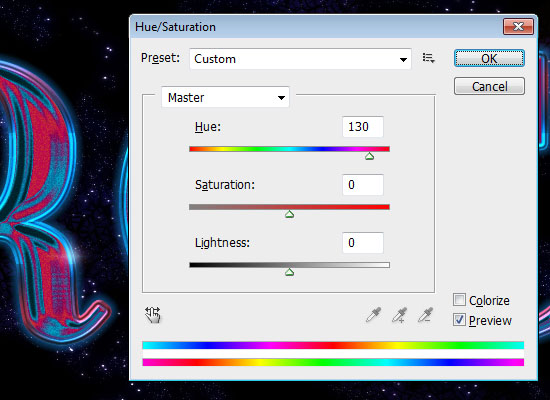
The sparkles will add a cool final touch to the effect.
Did you enjoy this post? Please consider donating to help us cover our server costs.


THe effect is so nice, I will try it later
Hope it turns out great 😉
Thanks for the comment.
It is very nice i like it.
Glad you do.
Thanks for the comment.
“…set the Background color to #2c5089 and the Background color to #6a342d.”
Foreground color should be #2c5089 and background color is #6a342d. You mentioned them both as background color.
Great tutorial by the way.
Fixed! Thanks for pointing it out.
And thanks for the comment as well 🙂
Nice, Great, now I can make names more often using this technique.
That’s great to know!
Thanks a lot for the comment.
Hi
Thank you.you have a good web site and i’ll wish you better and better in your job.
Thanks so much
That’s so kind of you to say.
Thank you very much for the comment.
i’m on a Mac Computer and for some Reason the new yorker font. will not show up in Photoshop for me but it does show up. where i have my fonts. any Ideals as what to do to get this to work ?
Does the font show in other applications? This could be a TTF (TrueType font) Win/Mac issue though, so the font can’t be installed on Mac. You can use any other similar font you like.
Please check out this link for more info.
Hope this helps.
Regards.
Awesome
Thank you!
Never ceases to amaze, many thanks
Thanks a lot for the kind words, appreciate it.
really great~!
love it ~!
Glad to know you do 🙂
Thanks a lot for the comment.
Thank you! Nice effect, very useful.
just some notes…
Step 3 – Outer Glow in text but Inner glow in picture.
Final Hue/Saturation in CS6 makes strange effect. It works if you create clipping mask of it to “sparks Soft Light” layer.
And I advise you to point in the beginning that this effect works better for just one line of text (because of gradient in stroke effect of step 2).
For two lines we need to copy our text layers and type the second text for each of them and then recreate outline layer between (I mean stroke path for second text) BEFORE add sparkles.
Fixed the Outer Glow part, sorry about that 🙂
As for the Hue/Saturation, no adjustment layer is added. The changes are applied directly to the layer. But if you want to add an adjustment layer, then you’ll definitely need to add a clipping mask.
Separating lines of text is already mentioned in Step 1, right on top of the second image (If you want to add more than one line of text, create each line in a separate text layer.)
Thanks a lot for the comment 🙂
i dont have those countor effects
You’ll need to load them. Please check this image to see how to do so.
I had a couple of problems following the instructions as I haven’t played with photo shop for a while, but I’m going to give it another go