
Snowy Festive Text Effect
This tutorial will show you how to use a couple of layer styles, different brush settings, and some simple tricks to create a snowy text effect, with dazzling tinsels and shiny stars.
The Final Result

Tutorial Details
- Software Used : Photoshop
- Version : CS6 Extended
- Time : 0:45 – 1:45
Resources
- Rounded Informal font.
- Rough Cloth pattern by Bartosz Kaszubowski.
- White Texture pattern by Dmitry.
- Stucco pattern by Bartosz Kaszubowski.
- Glitter 12 – Starfeild by acheronnights.
Step 1
Create a new 1152 x 864 px document. Set the Foreground color to #5b5b5b and the Background color to #343434. Pick the Gradient Tool, choose the Foreground to Background gradient fill, and click the Radial Gradient icon.
Then, click and drag from the center of the document to one of the corners to create the background gradient, and duplicate the Background layer.
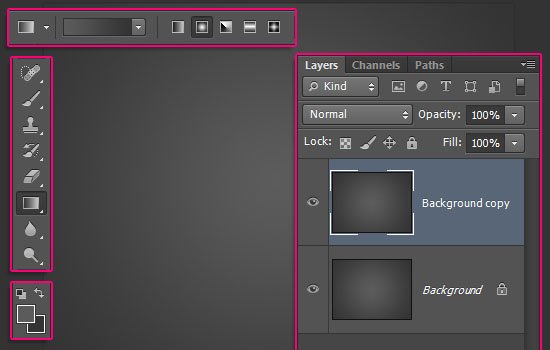
Double click the Background copy layer to apply a Pattern Overlay effect:
– Pattern Overlay
- Blend Mode : Color Burn
- Pattern : Rough Cloth
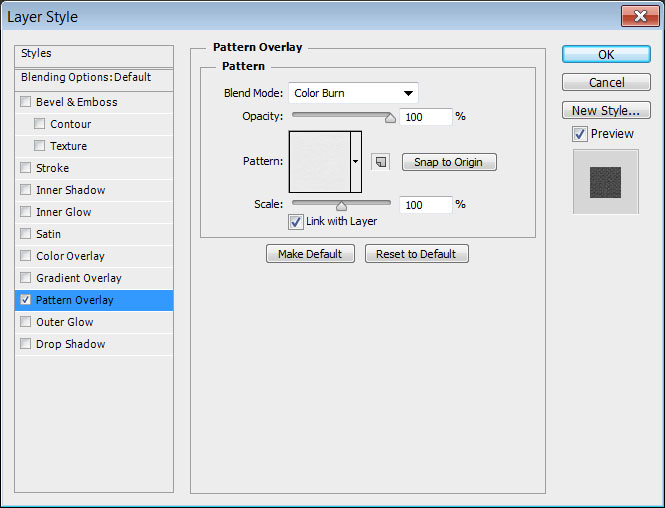
This will add subtle texturing to the background.

Click the Create new fill or adjustment layer icon down the Layers panel and choose Hue/Saturation.
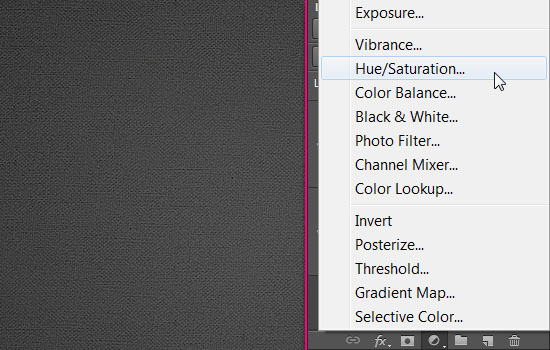
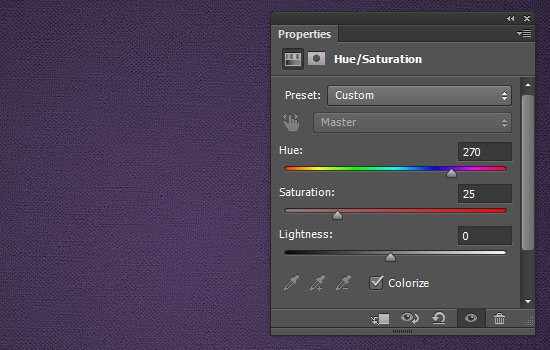
Check the Colorize box, and change the Hue value to 270. Using an adjustment layer enables you to go back and change the values anytime you need to.
Step 2
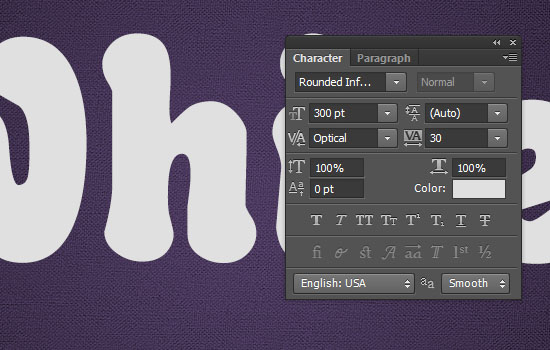
Create the text using the font Rounded Informal, the font Size 300 pt, and the color #e0e0e0. Then, change the Kerning to Optical, and the Tracking value to 30.
You can read more about Kerning and Tracking here.
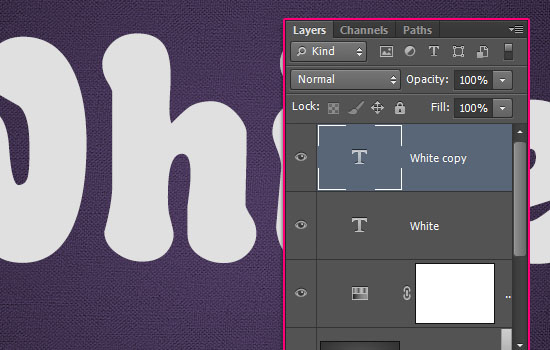
Duplicate the text layer so that you have the original one, and a copy.
Step 3
Double click the copy text layer to apply the following Layer Style:
– Bevel and Emboss
- Depth : 215
- Size : 35
- Gloss Contour : Gaussian
- Check the Anti-aliased box
- Highlight Mode : Vivid Light
- Shadow Mode – Color :
#c4c4c4

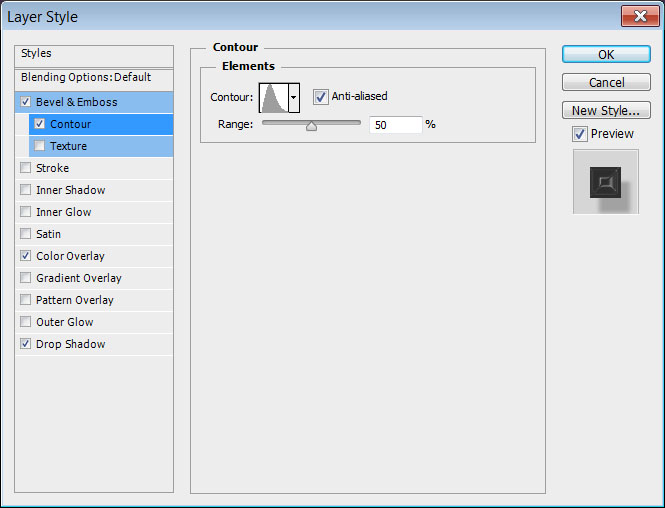
– Contour
- Contour : Half Round
- Check the Anti-aliased box.

– Texture
- Pattern : White Texture

– Inner Shadow
- Distance : 0
- Size : 10

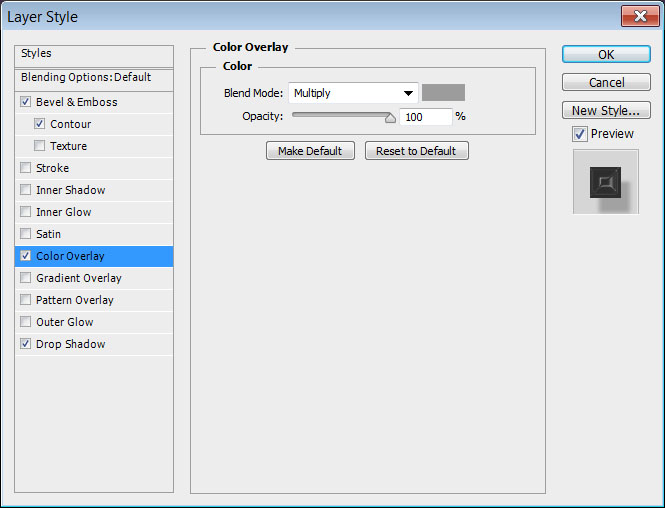
– Color Overlay
- Color :
#d8d8d8 - Blend Mode : Multiply

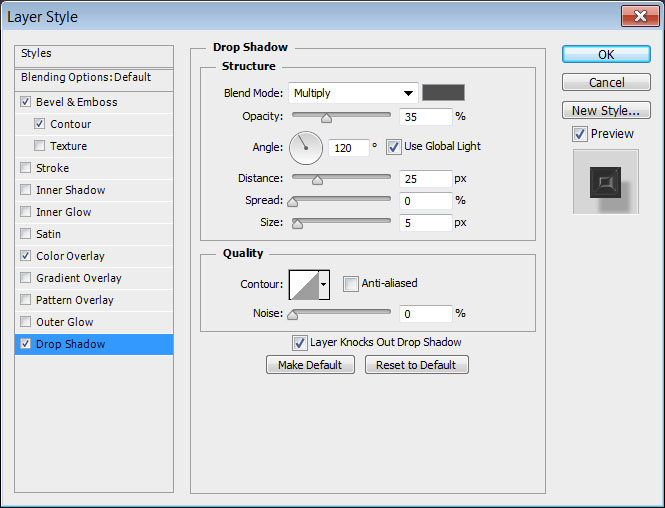
– Drop Shadow
- Opacity : 27%
- Distance : 9
- Size : 13
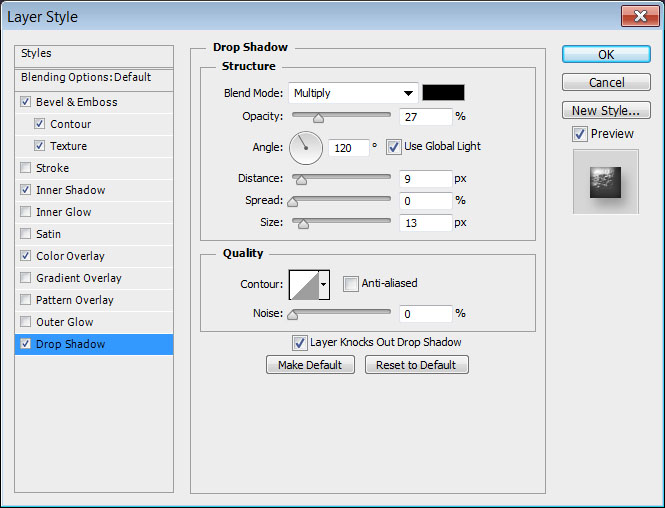
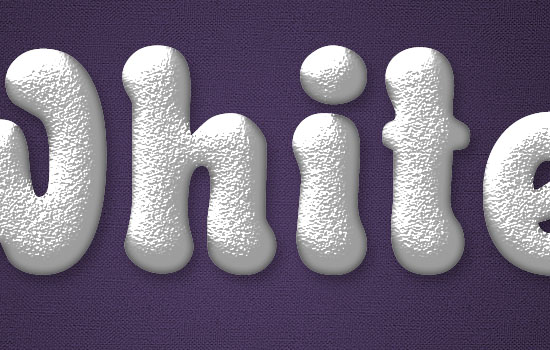
This will style the snowy text.
Step 4
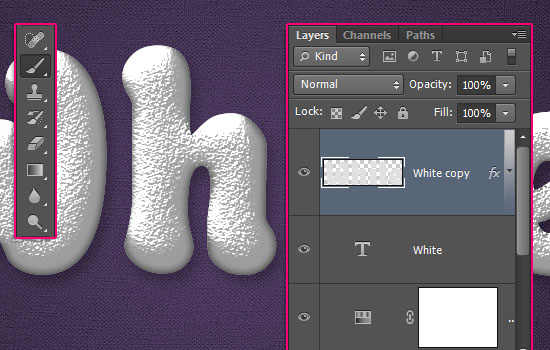
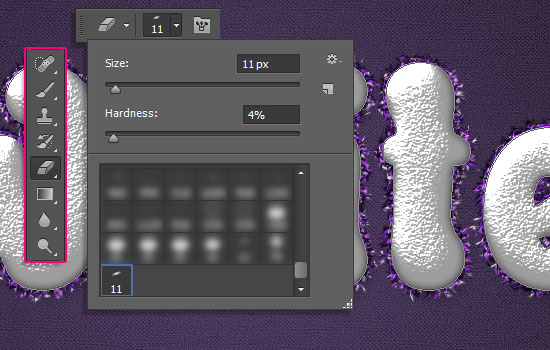
With the copy text layer selected, right click it and choose Rasterize Type. Then, select the Brush Tool and open the Brush panel (window > Brush).
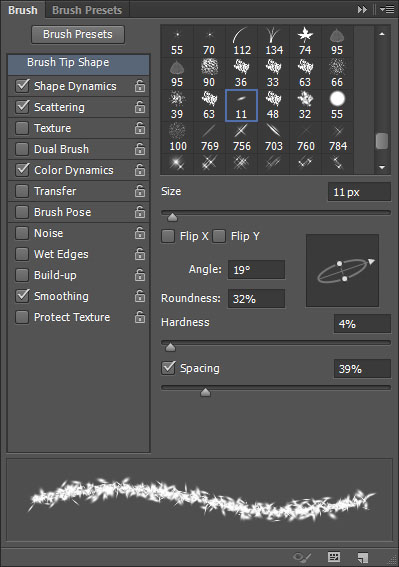
Choose the Soft Elliptical 11 brush tip, and modify its Settings as below.
Brush Tip Shape
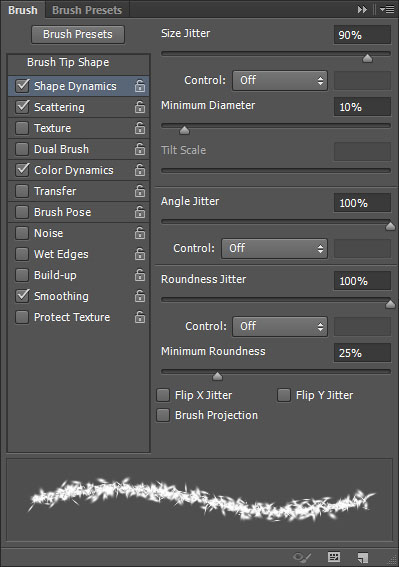
Shape Dynamics
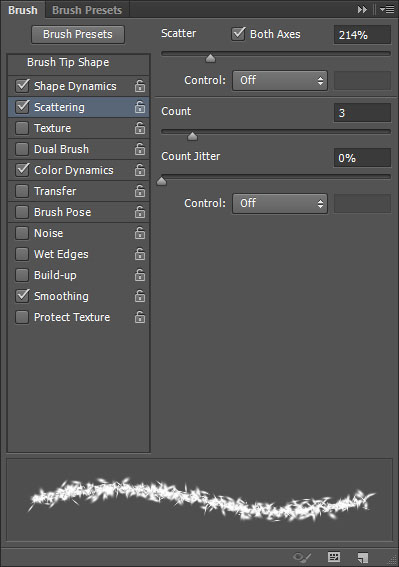
Scattering
Color Dynamics
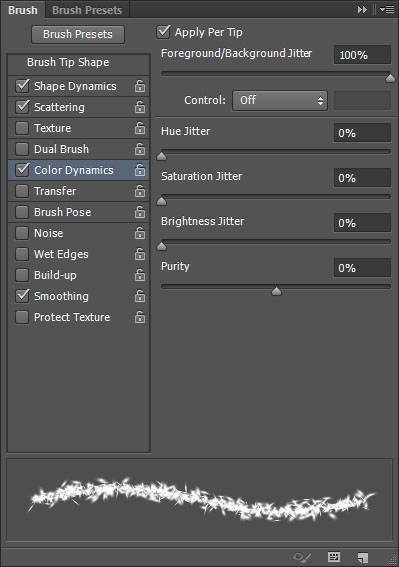
At the bottom of the Brush panel, click the Create new brush icon, and type in a name for the modified brush to add it to the other brushes so that you can use it later.

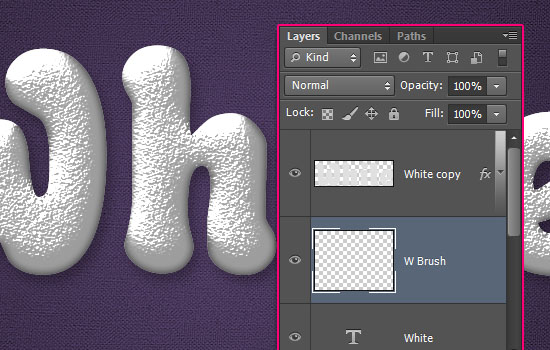
Step 5
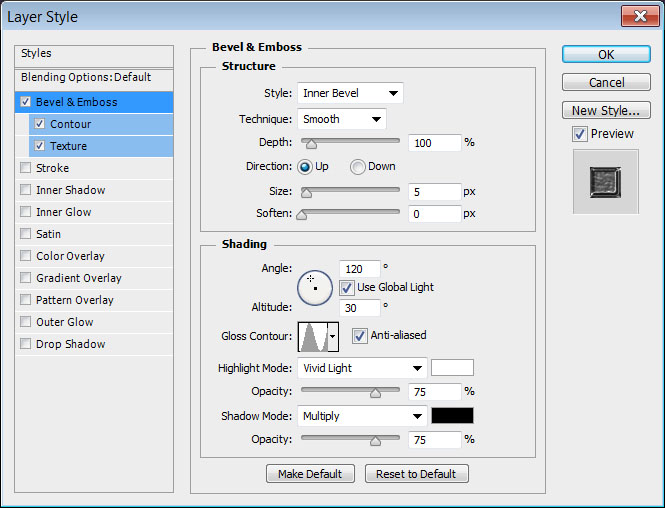
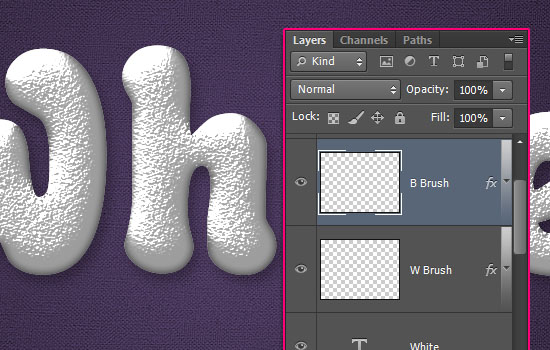
Create a new layer between the two text layers and call it W Brush, then double click it to apply the following Layer Style:
– Bevel and Emboss
- Gloss Contour : Ring
- Check the Anti-aliased box
- Highlight Mode : Vivid Light
– Contour
- Contour : Cone – Inverted
- Check the Anti-aliased box.

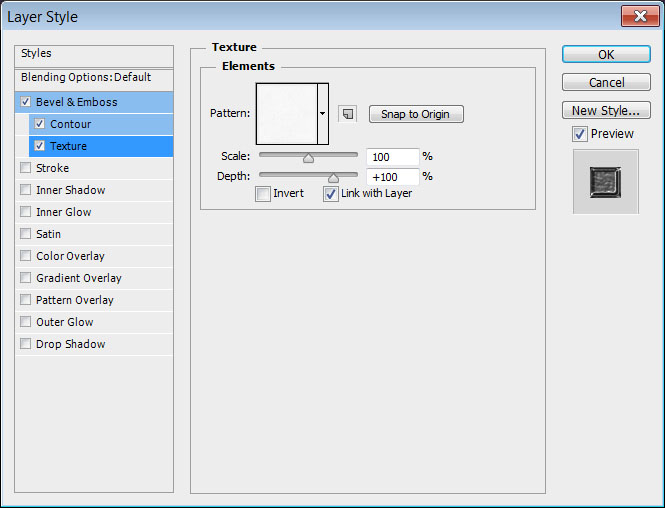
– Texture
- Pattern : Stucco
Duplicate the W Brush layer and rename the copy to B Brush. The W and B stand fro White and Black, which will be used as the brush tip’s Background colors next.
Step 6
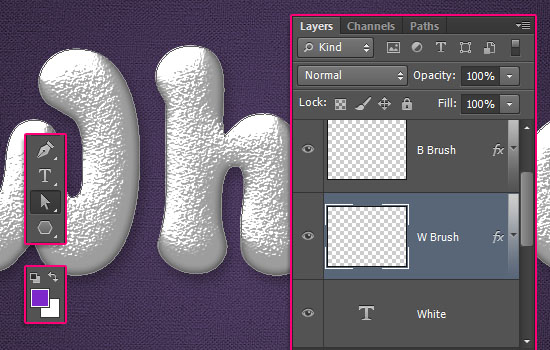
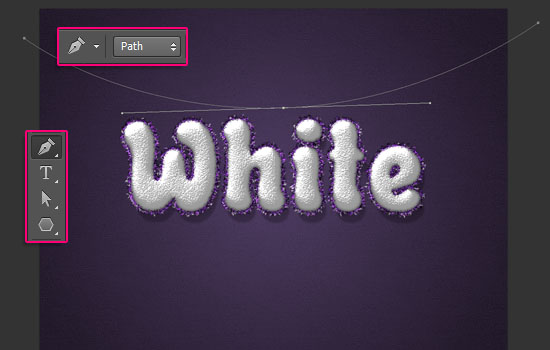
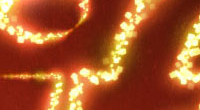
Right click the original text layer and choose Create Work Path. Select the W Brush layer, set the Foreground color to #7c28ca, the Background color to #ffffff, and pick the Direct Selection Tool.
Right click the work path and choose Stroke Path. Then, choose Brush from the Tool drop down menu with the Simulate Pressure box un-checked.
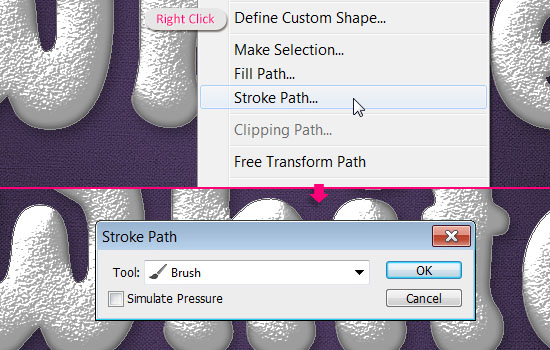
This will stroke the path with the purple and white layer of the tinsel stroke.

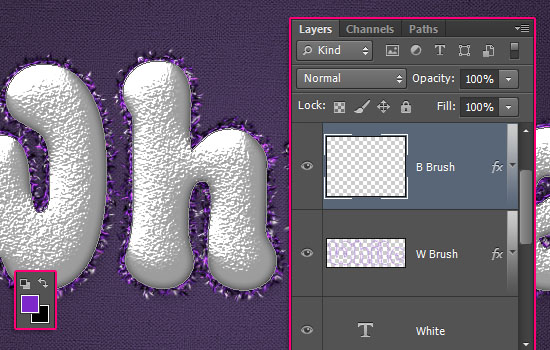
Change the Background color to Black, select the B Brush layer, then stroke the path just like you did in the previous step. This will create the purple and black layer of the tinsel, but some of the white will still show through, creating an illusion of a 3D stroke.
Step 7
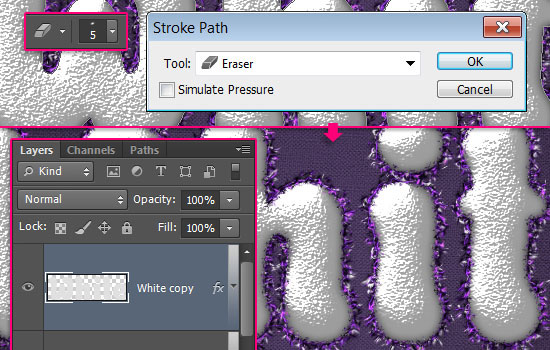
Pick the Eraser Tool, then choose the Stroke Brush tip you defined in Step 4.
Change the brush Size to 5, select the copy (rasterized) text layer, then right click the path and choose Stroke Path again. This time though, choose Eraser from the Tool drop down menu. This will erase around the edges a little bit to give the illusion of the tinsel covering those edges from below.
Step 8
Pick the Move Tool, then select the original text layer. Move the text 6 px to the left and 6 px down using the Left and Down Arrow keys. This will make the text look more 3D.
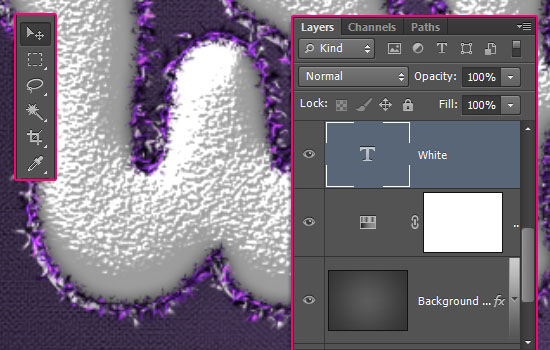
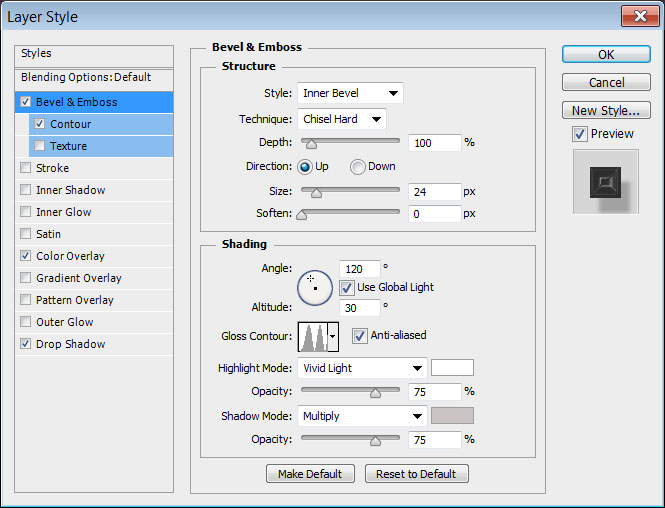
Double click the original text layer to apply the following Layer Style:
– Bevel and Emboss
- Technique : Chisel Hard
- Size : 24
- Gloss Contour : Ring – Double
- Check the Anti-aliased box
- Highlight Mode : Vivid Light
- Shadow Mode – Color :
#cbc4c4
– Contour
- Contour : Cone – Asymmetrical
- Check the Anti-aliased box.
– Color Overlay
- Color :
#9c9c9c - Blend Mode : Multiply
– Drop Shadow
- Color :
#4f4f4f - Opacity : 35%
- Distance : 25
This will style the nudged part and add the drop shadow to the text.

Step 9
Pick the Pen Tool, choose the Path option in the Options bar, then create a curve over the text. Click to add points, click and drag to create curves.
Create two new layers: Rope W and Rope B right on top of the Hue/Saturation adjustment layer.
Using the same tinsel brush (Step 4), stroke the Rope W layer with the Purple and White colors, and the Rope B layer with the Purple and Black colors.
Right click the W Brush layer, choose Copy Layer Style, then right click each of the two new layers and choose Paste Layer Style.
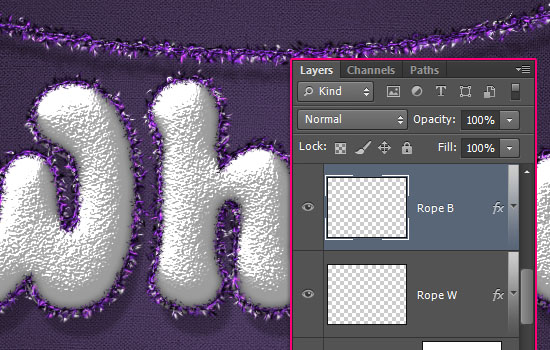
Double click the Rope W layer and add a drop shadow effect by changing the Opacity to 33% and the Distance to 25.

This can be a bit tricky, so make sure to be careful with the names and order of the layers.
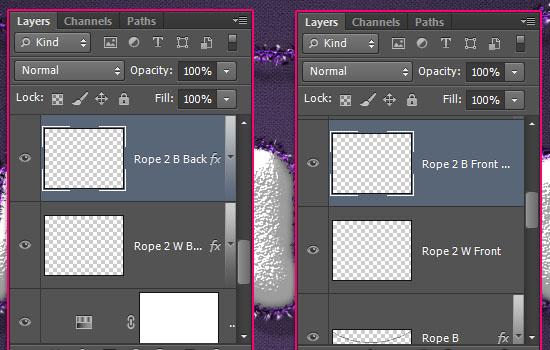
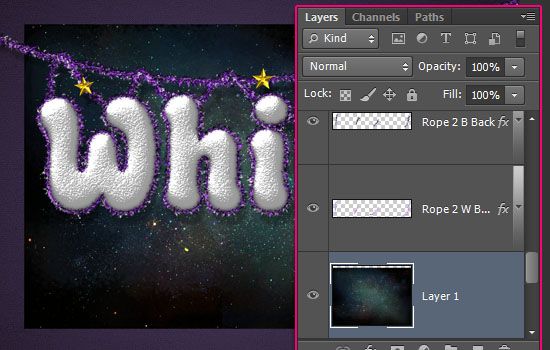
Create two new layers below the Rope W layer, and call them Rope 2 W Back and Rope 2 B Back. Then create two more layers on top of the Rope B layer and call them Rope 2 W Front and Rope 2 B Front.
So the order of the rope layers will be:
Rope 2 B Front
Rope 2 W Front
Rope B
Rope W
Rope 2 B Back
Rope 2 W Back
Apply the same Layer Style you copied to all of the new layers, then add the Drop Shadow to the Rope 2 W Back layer just like you did for the Rope W layer.
What you need to do next, is add the back and front tinsel parts.
The pink line represents the Back tinsel, the blue line represents the Front tinsel, and the dashed parts are actually not supposed to be visible, but they will help you understand the flow of the curve.
So using the tinsel brush, with the Purple and White colors, select the Rope 2 W Back layer, and click and drag to add the back parts.
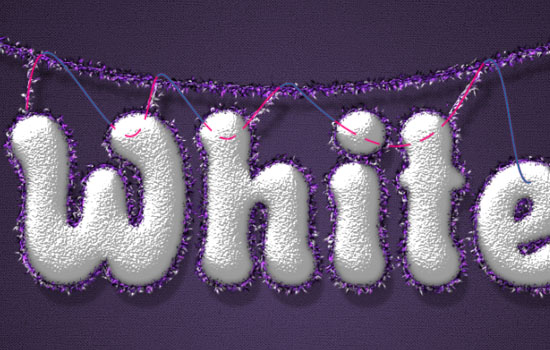
Then, select the Rope 2 W Front layer, and create the front parts.

When done, use the Purple and Black colors to trace over those parts, making sure to select the corresponding layer (Rope 2 B Back and Rope 2 B Front).
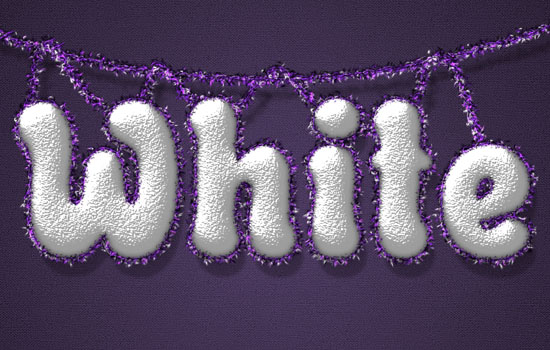
Step 10
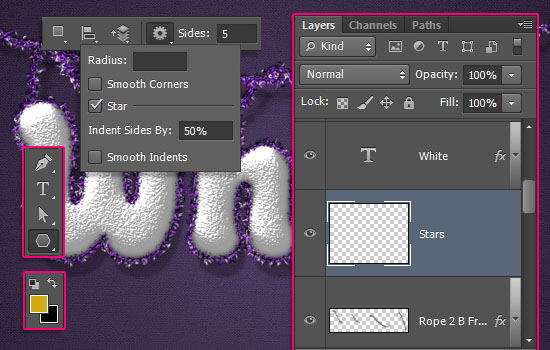
Pick the Polygon Tool, and in the Options bar, set the Sides to 5, click the Geometry Settings icon, check the Star option, and set the Indent Sides By: to 50%.
Create a new layer between the original text layer and the Rope 2 B Front layer, call it Stars, and change the Foreground color to #d4aa19.
Click and drag to create a small star on top of the left part of the tinsel, then click the Combine Shapes icon in the Options bar.
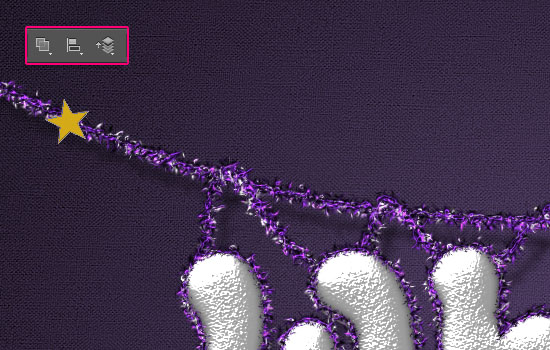
Keep adding more stars along the tinsel.

Double click the Stars layer to apply the following Layer Style:
– Bevel and Emboss
- Technique : Chisel Hard
- Gloss Contour : Ring
- Check the Anti-aliased box
- Highlight Mode : Vivid Light
- Shadow Mode – Color :
#704a1d

– Contour
- Check the Anti-aliased box.

– Drop Shadow
- Opacity : 50%
- Distance : 25
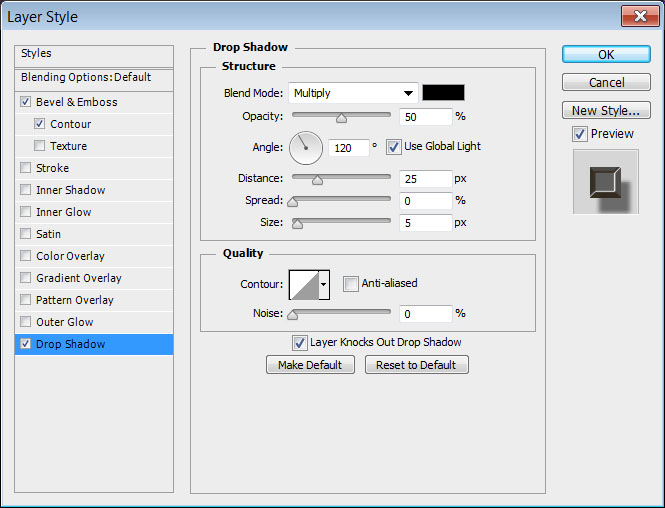
This will style the shiny golden stars.

Step 11
Place the Glitter 12 – Starfeild image on top of the Hue/Saturation adjustment layer, and resize it as you like (Here, I’m using the small image saved directly from the link’s page, without downloading the high resolution image).
Go to Image > Adjustments > Hue/Saturation, and change the Hue value to 75.

Change the texture layer’s Blend Mode to Lighten.
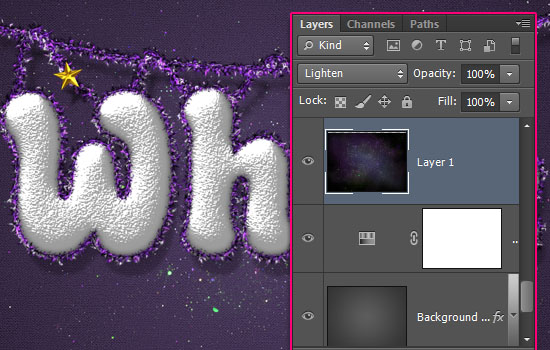
Create a new layer on top of all layers and call it Edges. Pick a big soft round brush, set the Foreground color to Black, then start clicking around the canvas edges to create a dark frame.
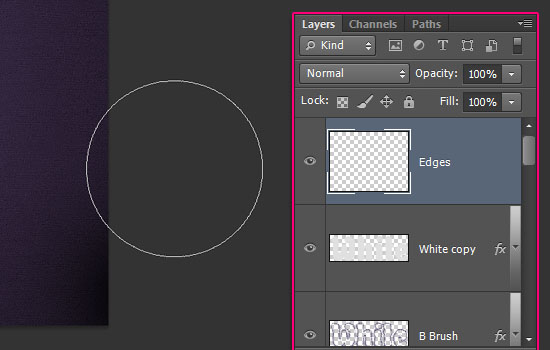
You can control the shape of the frame as you’re creating it.

And that’s it. Hope you enjoyed the tutorial and found it helpful 🙂
Did you enjoy this post? Please consider donating to help us cover our server costs.


Wow! Its really beautiful!
I Ultimate love it! Thanks tuts..
Super glad you do 😀
Thanks a lot for the awesome comment.
WOW this is so awesome 🙂 thanks once again for your great tutorials. Now I have a little promblem LOL not for the first time though – when I go and get the patterns I always get them as .png and not one that I can load in my patterns pallet – can you help me out here?
Hugs
Tora
@Tora
You can open the png in Photoshop, then click Edit -> define pattern.
You’re done 🙂
Thank´s why did I not think of that LOL
You may open the .png image with Photoshop, then:
1) Clic Edit menu;
2) Clic Define pattern;
3) Key any name you want to define your pattern;
4) Clic OK.
After that, at the bottom of your pattern palette, you should find the new pattern just created … I hope that I was able to help you!! ;=)
Many thanks for the nice comment Tora 🙂
And thanks to ashyda and Luca for the replies as well 😉 As they mentioned, you need to define the image as a pattern.
Regards everyone.
Hallo!! A little-big problem this tutorial shares with almost any other tutorials we can find on the web: the font dimensions in POINTS … How is it possible to fit a font with those huge dimensions into a canvas with PIXEL dimensions relatively small??!! Thank you very much for your reply!!
So did you try using the same values and they didn’t work out? If your text is in pixels, you can change it to points by going to Edit -> Preferences -> Units & Rulers, then choose Points from the Type drop down menu under the Units tab.
One other thing that might cause a problem is the document’s Resolution value, which can be set in the “New” dialog box when creating the document.
The Resolution used here is 72. But if it is set to a value like 300, then the text will definitely be humongous!
So that might be the problem that causes your test to look big.
If that still doesn’t solve the problem, please feel free to leave a reply with a screenshot of the issue.
Many thanks for the comment 🙂
You’re right!! Changed the resolution from 300 to 72 … et voilà … Le jeux sont fait!! ;=)
Glad the problem was solved 🙂
????
Hello Luna 😎
Hi,
which is the beautiful (curly) font used for the text “just like the snow”, please ?
Thanks
At first thank you for your amazing design. I always wait for your new tips and design. U are super amazing man.. Love it.
That’s really nice of you to say, and it means a lot.
Thank you very much 🙂
I’m a girl though ^_^
Hi,
Great tuto !
You can say to me what is the beautiful font used for your text “Just like the snow” ? Please !
It’s called “ZnikomitNo24”. You can find its free download link at the very end of the 35 Best Free Holiday / Special Occasions Fonts collection.
Thanks a lot for the kind comment 🙂
Thank you for this tutorial.
Here’s what I played to make using your technique.
http://www.chez-mireilled.com/article-fond-d-ecran-noel-2013-pour-enfants-121306553.html
That’s really cool! Nice to see your take on the concept.
Thank you very much for the comment and for sharing your work 🙂
Awesome. Thanks so much for your great tutorials 🙂
Very glad you like them 🙂
Many thanks for the kind comment.
Hi Rose, can you please, PLEASE do a tutorial on how to understand the gloss contour and contour editor (including making your own contours)? I don’t understand at all how to know which contour would give me the effect I need and it is explained nowhere on the internet properly or in the Photoshop text book I have. You explain things so well and I know I will understand from you.
This guy tried to explain it here and almost does well, but because of the language barrier, it is still not clear:
http://www.graphic-design.com/photoshop/tutorial/photoshop-tutorial-misunderstood-emboss-and-contour-now-made-easy
First of all, thank you very much for the kind words. I really appreciate them 🙂
I have received a couple of requests for a Contours tutorial, but haven’t got the chance to work on one yet. So I will make sure to list that down for sometime soon, hopefully early next year 😉
Thank you for the suggestion and for the comment once again.
Amazing! Very good!
I don’t know why my reply got deleted, but many thanks for the kind words once again 🙂
Parabens pelo excelente tutorial. Carlos – Cidade do Rio de Janeiro – Brasil .
Glad you enjoyed the tutorial.
Obrigada for the nice comment 🙂
Amazing! very very good tutorial
Nice outcome, well done indeed!
Thanks a lot for the comment and for sharing your work 🙂
Thanks for the great site and tutorials.
Wonderful outcome! Really well done.
Thank you very much for the comment and for sharing your work 🙂
Hi Rose….thank you very much….your tuts ROCK…xoxox
Very nice variation!
Thank you very much for the sweet comment and for sharing your work 🙂