
Soft Sleek Text Effect
This tutorial explains how to create an easy yet elegant text effect, using a couple of Layer Style to create the glossy sleek look, and then applying some Filters to add a soft marble-like texture.
The Final Result

Tutorial Details
- Software Used : Photoshop
- Version : CS5 Extended
- Time : 0:30 – 0:45
Resources
- Sail font.
- Purple grit tileable texture by thespook.
Step 1
Create a new 1024 x 768 px document. Set the Foreground color to #c577a4 and the Background color to #713c5c. Pick the Gradient Tool, choose the Foreground to Background gradient, and click the Radial Gradient icon in the Options Bar. Then create a radial gradient from the center of the document to one of the corners.
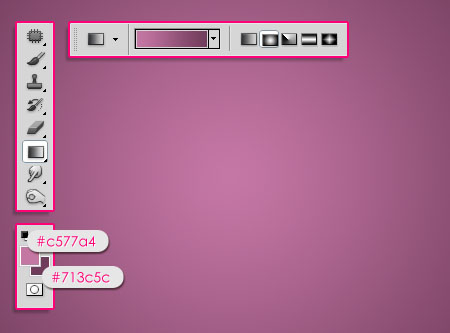
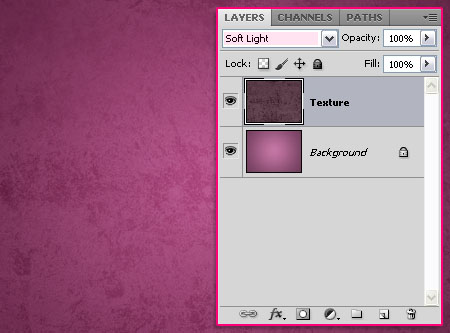
Place the Purple grit tileable texture on top of the Background layer, and change its layer’s Blend Mode to Soft Light. This texture is tileable, so you can apply it as a pattern as well.
Step 2
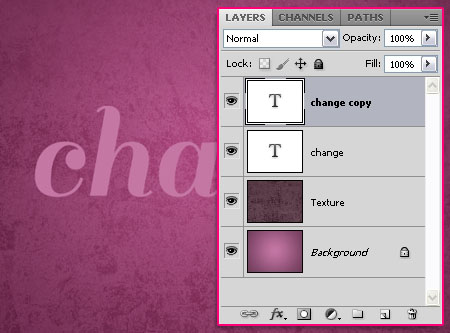
Create the text using the Foreground color. The font used is Sail and the Size is 250 pt.

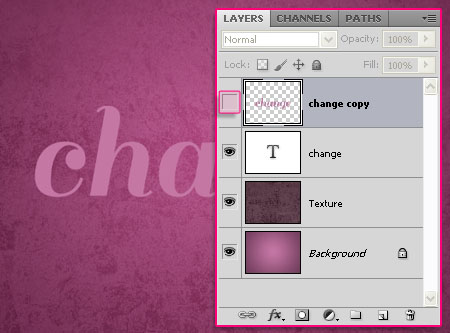
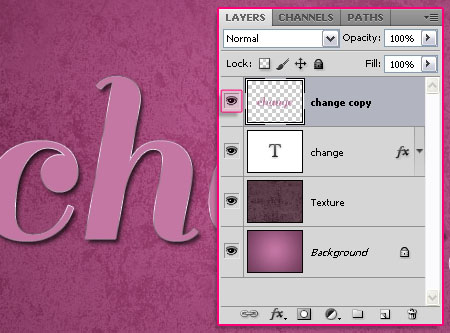
Duplicate the text layer.
Right click the copy text layer, and choose Rasterize Type.
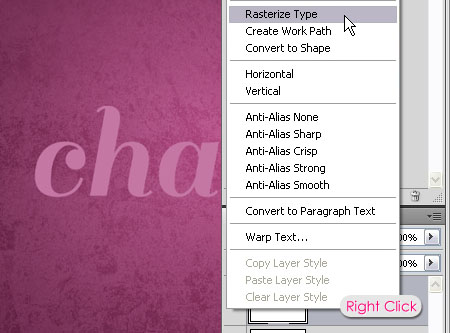
Make this layer invisible by clicking the eye icon next to it. We’ll get back to it later to create the texture.
Step 3
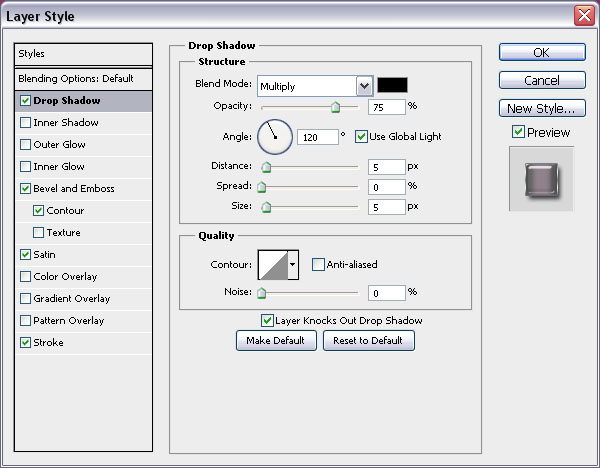
Double click the original text layer to apply the following Layer Style.
Drop Shadow
Use the default values.
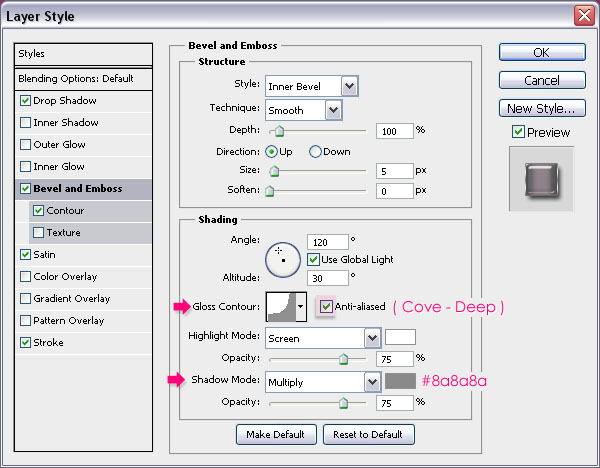
– Bevel and Emboss
- Gloss Contour : Cove – Deep
- Check the Anti-aliased box
- Shadow Mode – Color :
#8a8a8a
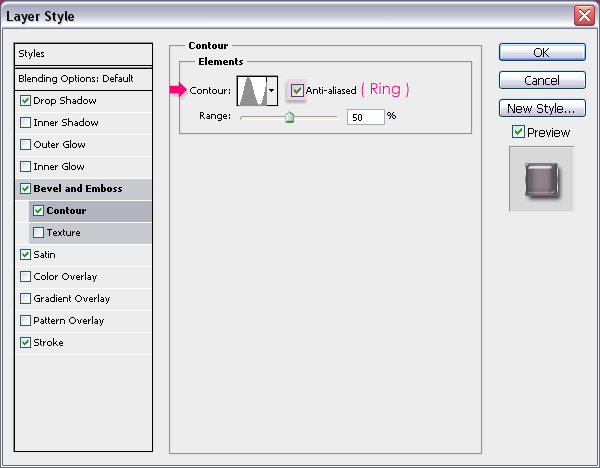
– Contour
- Contour : Ring
- Check the Anti-aliased box.
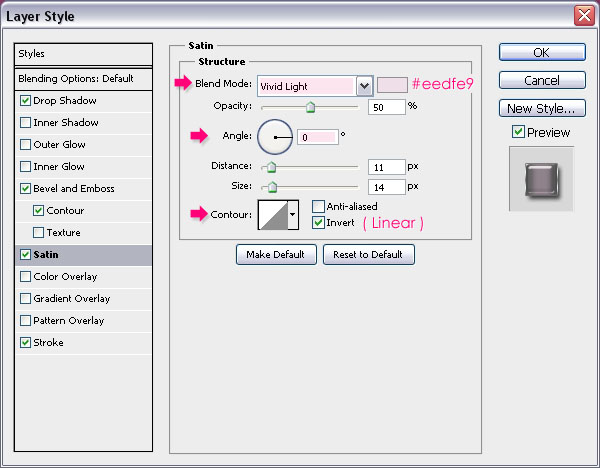
– Satin
- Blend Mode : Vivid Light
- Color :
#eedfe9 - Angle : 0
- Contour : Linear
– Stroke
- Size : 1
- Fill Type : Gradient
- Angle : 90
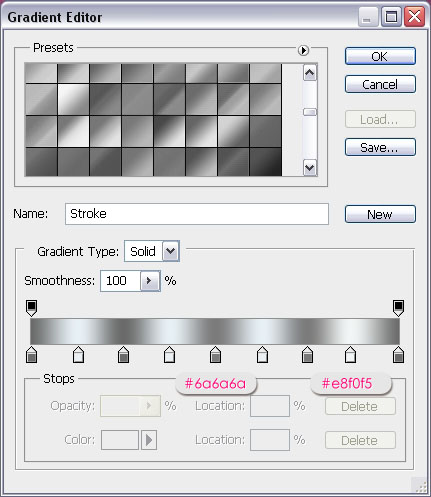
- Click the Gradient box to create the gradient

The gradient uses two colors#6a6a6a and #e8f0f5. Add five stops for the first color and four for the second, and place them as shown below:
This will add a very nice and elegant effect to the text.

Step 4
Make the copy text layer visible again by clicking the empty box next to it.
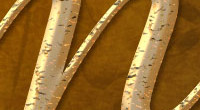
Go to Filter -> Texture -> Craquelure and modify the values as shown below:
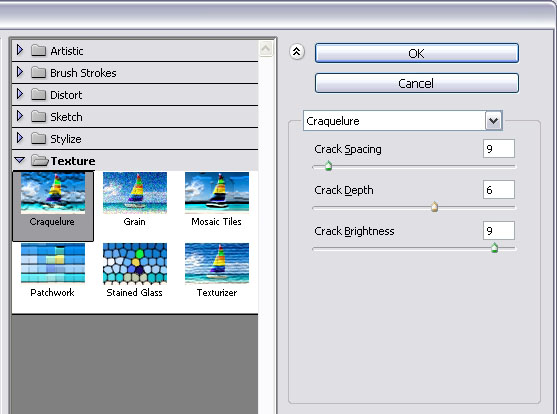
This is what you should get:

Then, go to Filter -> Distort -> Glass and modify the values as shown below as well:
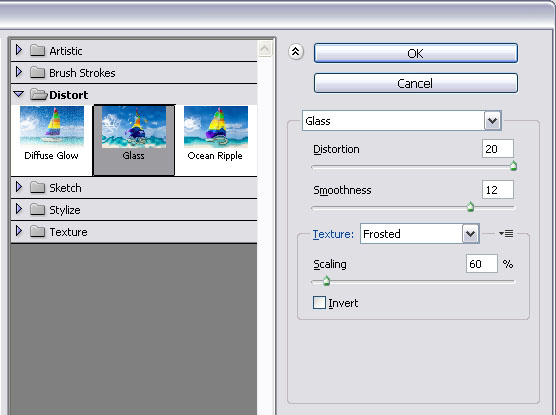
This will create a simple marble-like texture.

Step 5
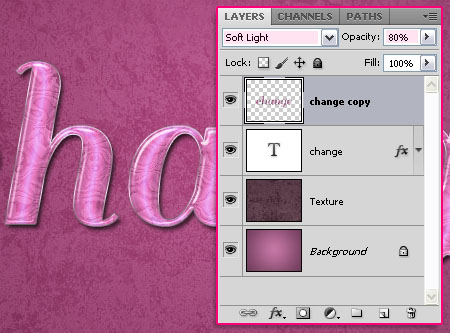
The last step is changing the Blend Mode. The Blend Mode used here is Soft Light, and the layer’s Opacity is 80%, but you can go ahead and try some other Blend Modes as well. A couple of them will give different nice results.
Hope you liked the tutorial and found it useful.
Did you enjoy this post? Please consider donating to help us cover our server costs.


nice
Thanks!
As usual a fantastic tutorial .
Thank you so much.
Greetings from Sweden.
Thanks a lot for the nice comment, I really appreciate it 🙂
All your tutorials are just amazing 🙂
Thank you very much, so glad you enjoy them 🙂
thanks
You’re welcome.
thanks. you give the best tutorials
Thank you so much, I really appreciate it 🙂
This site is very useful, I learned a lot, thanks, I´m going to do all the simple ones an then move on the others
Really glad you found it useful.
Hope you enjoy the other tutorials as well.
Thanks a lot for the comment.
Nice soft touch. I am shore female will like this effect more then men.
It is a soft effect after all 🙂
Thanks for the comment.
fantastic! so many amazing design and i really pleasure with easy explanation. some website give too simple tutor but hard to understanding it.. thx and sorry for my poor english, hope you understanding 😀
Really glad you found the tutorial easy to follow.
Thank you very much for your kind words and for leaving a comment 🙂
maybe i’m new in 3D for photoshop but i enjoyed with it…i hope u post some more link like this, https://textuts.com/create-glossy-plastic-3d-text-in-photoshop-cs5-extended/ . <–totally skilful 😀
Sure will try to.
You can as well check the other 3D tutorials if you like, and hopefully you’ll find them useful 🙂
Thanks once again.
Wonderful tutorial! Was simple and easy to follow. Thank you so much!!!
Very glad you found it so!
Thank you very much for the nice words.
it is simple but the results are incredible
especially if developed further results will be better again
Very glad to know you like it.
The effect can definitely be modified into as many different outcomes as you like.
Thank you very much for the kind words.
Thank you so much this is so beautiful.
Very glad you like it 🙂
Thanks a lot for the comment.