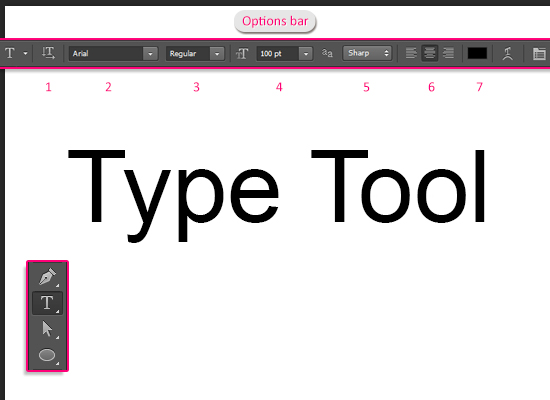
Type Tool in Photoshop CS6+ – The Options Bar
When the Type Tool is selected, a couple of text formatting related settings appear in the Options bar. Those include font family, text color, and alignment options.
Here’s a closer look at those options.
Introduction
The Options bar is the bar at the top of the screen right below the Menu bar. It displays options and settings that change based on the selected (active) tool.
For the Type Tool, the Options bar include many quick access basic formatting settings. The ones that will be discussed in this article are:
1- Toggle text orientation.
2- Set the font family.
3- Set the font style.
4- Set the font size.
5- Set the anti-aliasing method.
6- Alignment options.
7- Set the text color.
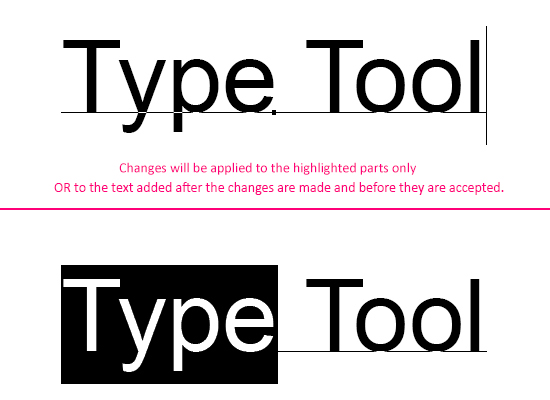
If you don’t click anywhere inside the text (meaning that the I-beam pointer doesn’t exist), then any changes will be applied to the whole text in the selected Type layer.
But if you actually click inside the text, and the I-beam pointer becomes active, then you need to highlight the text you want to apply the changes to.
Otherwise, the changes will only be applied to the text created after making those changes, and before they are accepted.
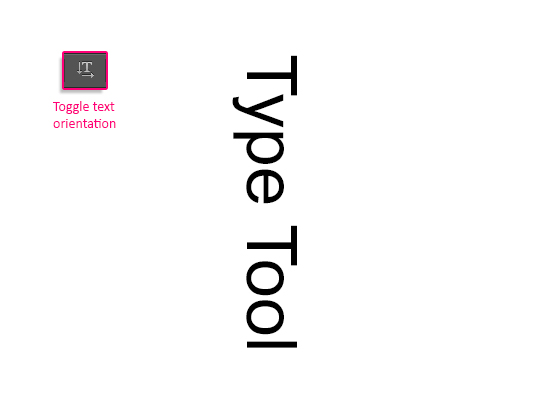
1- Toggle text orientation
This will change the text orientation each time it is clicked, from Horizontal to Vertical and vice versa.
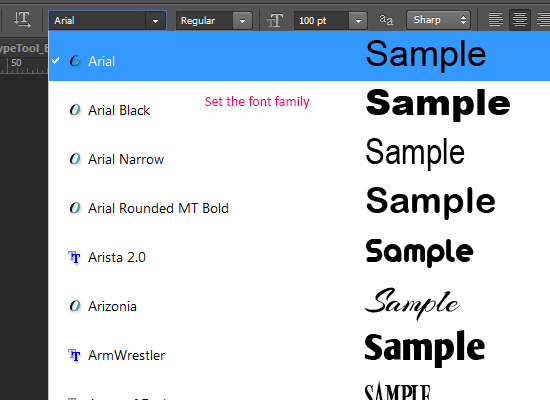
2- Set the font family
This drop down menu displays all the fonts you have on yourr PC inside the system’s Fonts folder. So you can scroll through those fonts, and click the one you like to apply it to the selected text.
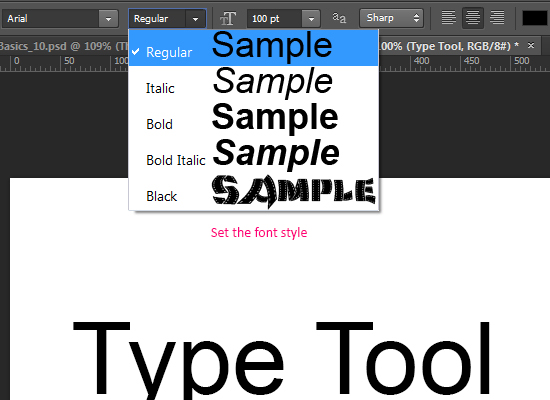
3- Set the font style
This menu has the font styles and weights built into the font itself. It includes options like Regular, Italic, Bold, Condensed, Expanded, and combinations of those options, such as Bold Italic.
If the font has only one weight and style, the menu will be grayed out.
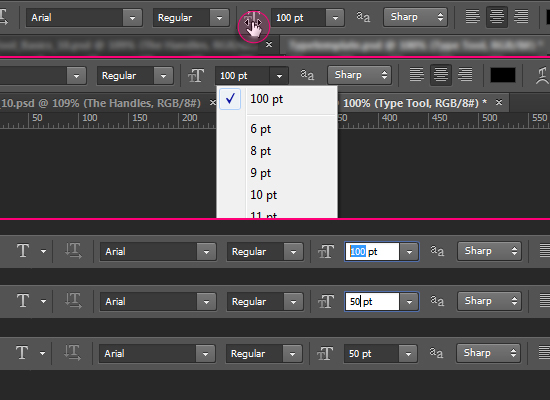
4- Set the font size
There are three main ways to change the font size:
1- Clicking and dragging the icon next to the font size box. Dragging to the right increases the value, while dragging to the left decreases it.
2- Choosing a pre-determined value from the drop down menu (only a couple of selected values are available).
3- Selecting the existing value, then typing a new one over it. This method works best if you want an exact value.
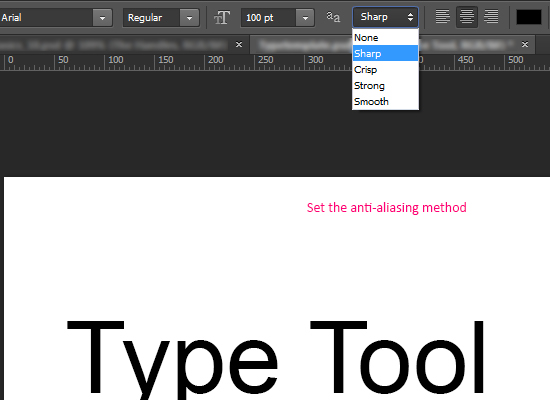
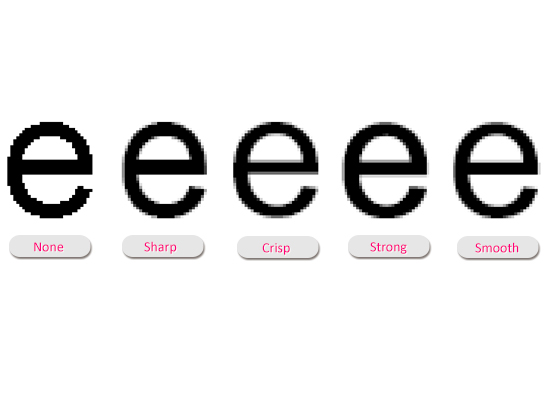
5- Set the anti-aliasing method
Anti-aliasing is a technique for rendering smooth edges of the text (or bitmap images). It works by adding semi transparent pixels that reduce the jagged edges.
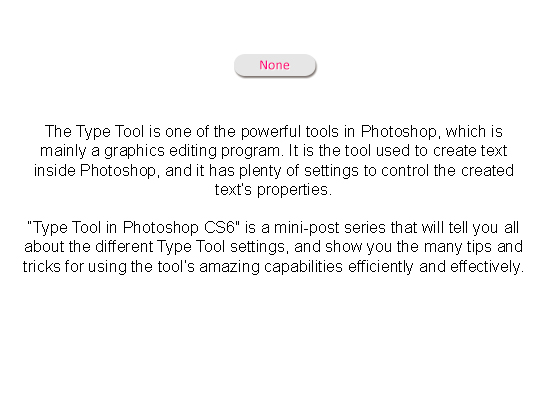
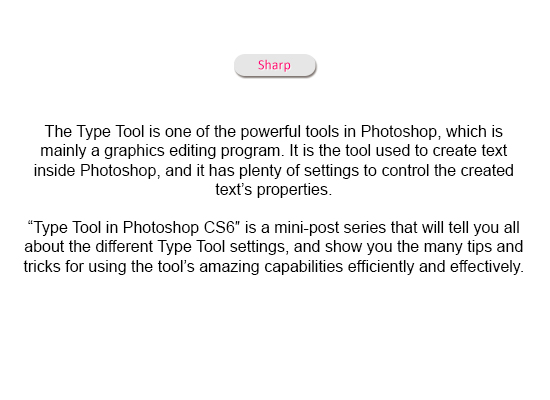
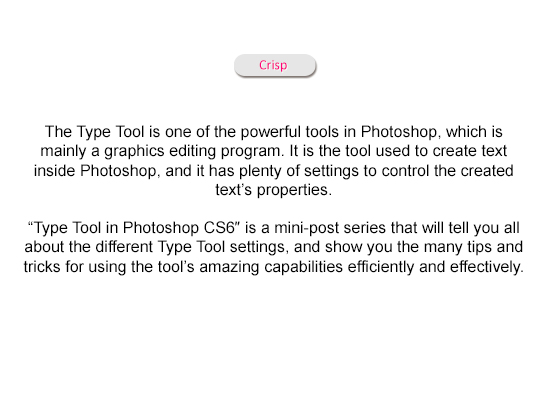
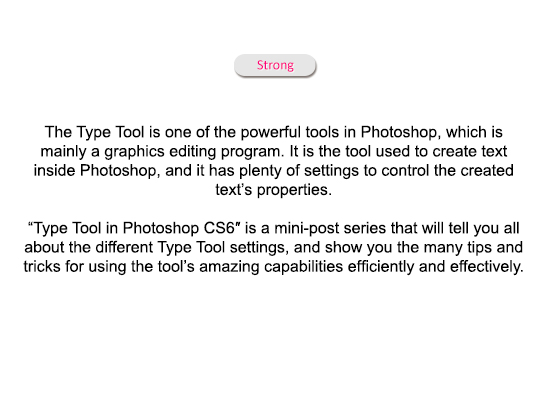
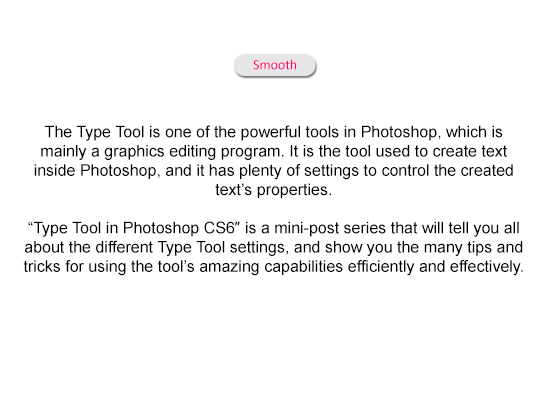
In Photoshop, there are four levels for anti-aliasing, as well as the option of not performing any anti-aliasing at all.
The levels are: Sharp, Crisp, Strong, and Smooth.
What anti-aliasing method to use?
There is no exact answer to this question. It depends on so many factors, such as the font family, the size, the colors, the background colors, and the amount of text created.
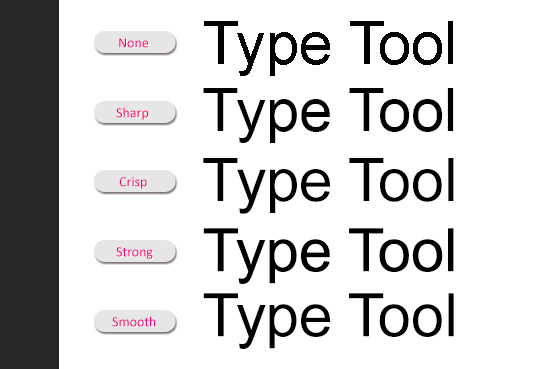
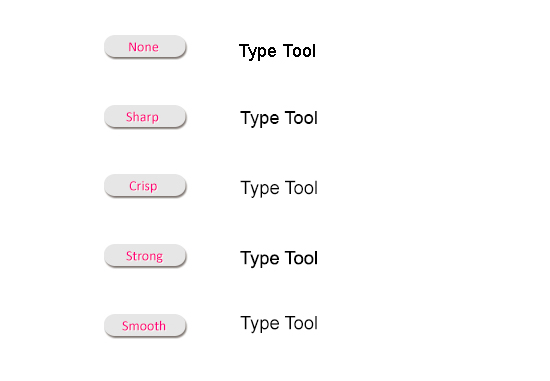
Most of the time, the anti-aliasing is more important of an issue for smaller font sizes.
Below are examples of each anti-aliasing method applied to the same block of text.
So basically, the best thing to do is try the different options and see what works best.
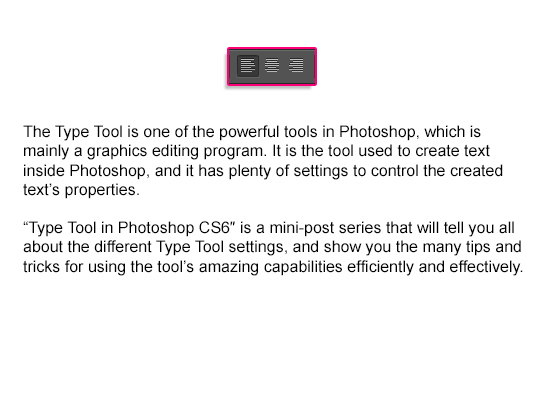
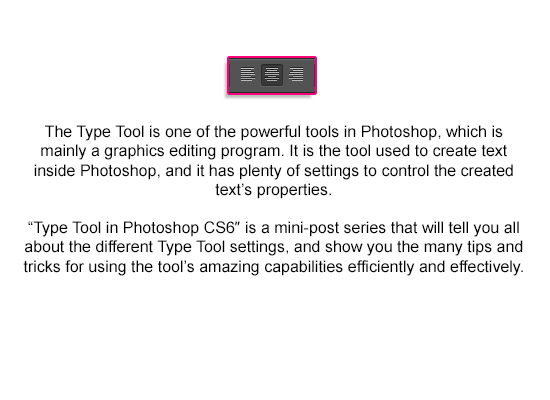
6- Alignment Options
The familiar “Left align text”, “Center text”, and “Right align text” options.

7- Set text color
When you click the icon, the Color Picker dialog box will appear so that you can choose any color you like.
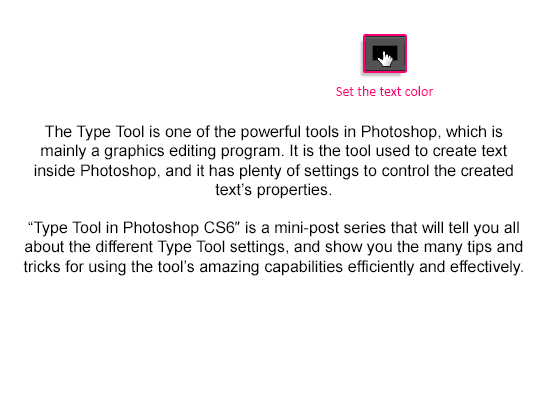
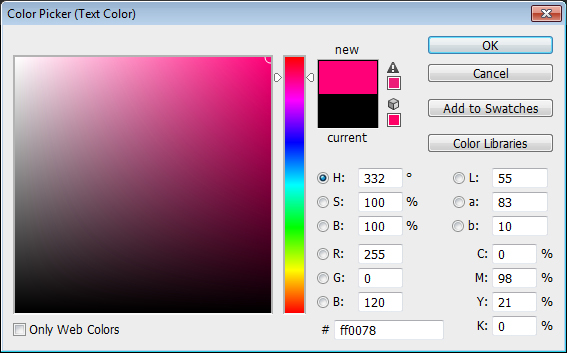
Once you choose the color and click OK, the new color will be applied to the text.
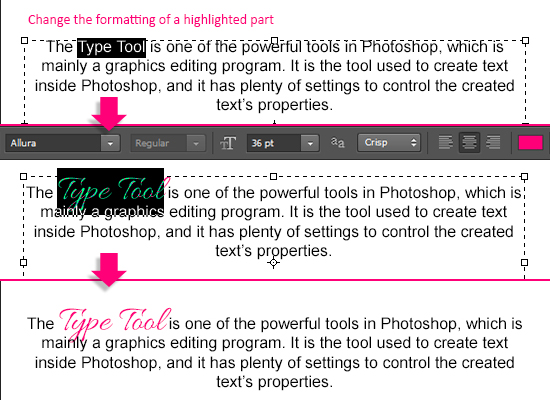
8- Applying changes to a selected text
You can change the formatting of a selected (highlighted) part of the text.
All you need to do is simply select the text, then change the values you want to change, and accept the changes.
But keep in mind that the settings that you can change are the Font Family, the Font Size, and the Text Color.
That means that you can’t change the Orientation, the Anti-aliasing method, or the Alignment of a selected part. Those are applied to the text as a whole.
This is it for this part. Hope you found it helpful.
Next, we’ll discuss warping and transforming the text. Stay tuned 🙂
Did you enjoy this post? Please consider donating to help us cover our server costs.