
Sparkling Iron Text Effect
This tutorial explains how to create a vivid sparkling iron text effect. Many elements will be used, like Layer Styles, brushes, filters, adjustment layers, and some images as well. This tutorial is full of useful tips and tricks for Photoshop users, and it introduces helpful techniques too.
The Final Result:

Tutorial Details
- Software Used : Photoshop
- Version : CS6 Extended
- Time : 0:30 – 0:45
Resources
- Age font.
- White diamond plate by enframed.
- Texture7 by MindfulArray.
- Seamless metal texture smooth by hhh316.
- Sparkler4 by AllehNelleh-Stock.
- Sparkler 2 by mystical-stock.
- Sparkler by mystical-stock.
Step 1
Create a new 1024 x 786 px document. Set the Foreground color to #464646 and the Background color to #363636, pick the Gradient Tool, click the Radial Gradient icon in the Options bar, then click and drag from the center of the document to one of the corners.

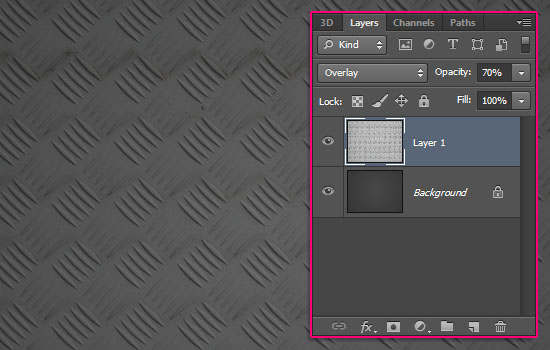
Place the White diamond plate texture on top of the gradient background then change its layer’s Blend Mode to Overlay and its Opacity to 70%.
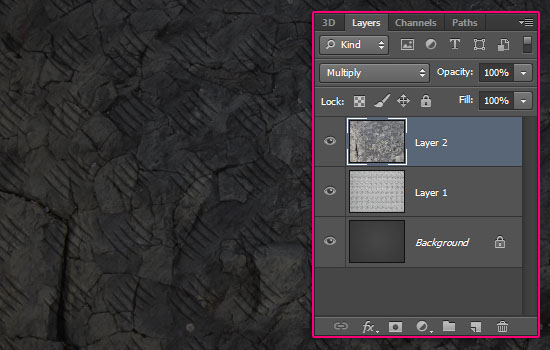
Place the Texture7 on top of both layers, and change its layer’s Blend Mode to Multiply.
Step 2
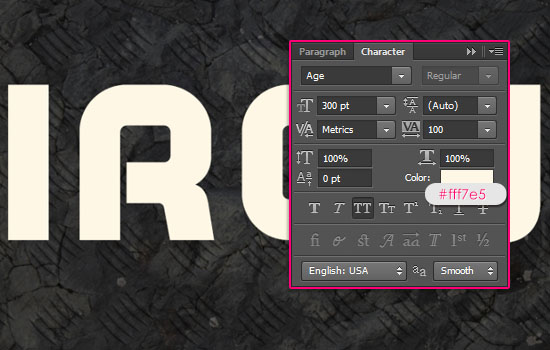
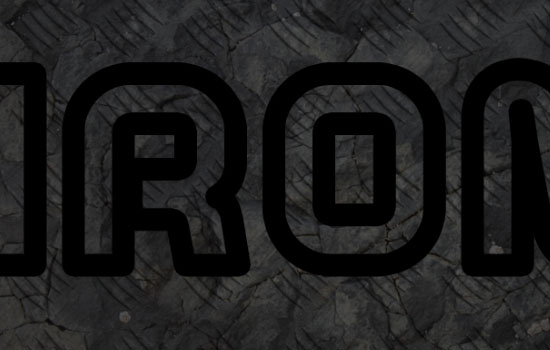
Create the text in any light color using the font Age. The Size is 300 pt and the text is in All Caps. Also, change the Tracking value to 100 to increase the space between the letters.
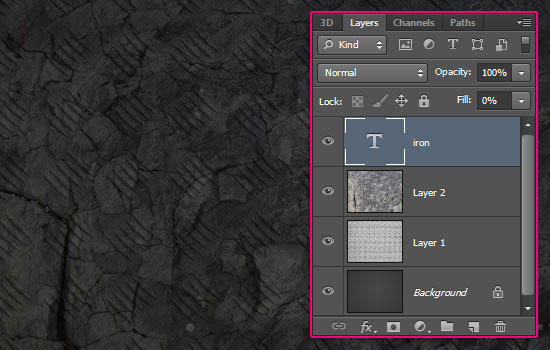
Change the text layer’s Fill value to 0.
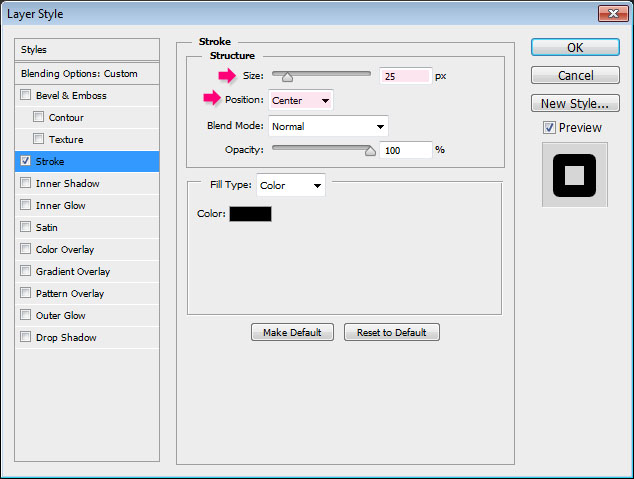
Double click the text layer to apply a Stroke effect:
– Stroke
- Size : 25
- Position : Center
- Color :
#000000
Make sure to increase the Tracking value if you are using a bigger font or Stroke sizes.
Step 3
Duplicate the text layer then make it invisible by clicking the eye icon next to it.
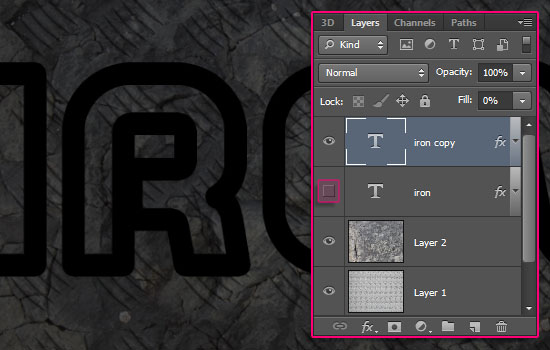
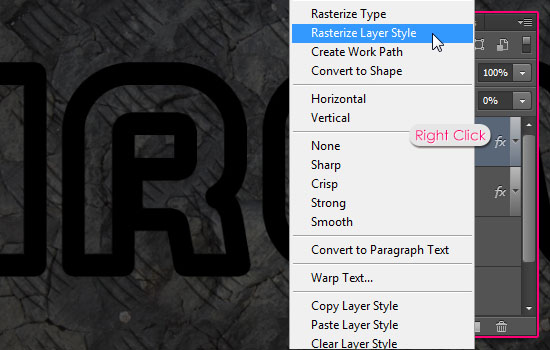
Next, we want to rasterize the copy text layer AND its Layer Style. In Photoshop CS6, you can right click the layer and choose Rasterize Layer Style, which is a new cool feature in CS6.
In older versions, you’ll need to group the layer, then right click the group and choose Merge Group.
Duplicate the rasterized layer.

Step 4
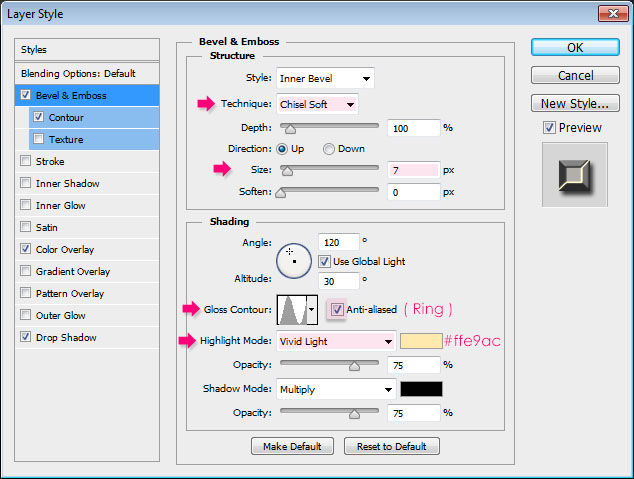
Double click the copy (copy 2) rasterized layer to apply the following Layer Style:
– Bevel and Emboss
- Technique : Chisel Soft
- Size : 7
- Gloss Contour : Ring
- Check the Anti-aliased box
- Highlight Mode : Vivid Light
- Color :
#ffe9ac
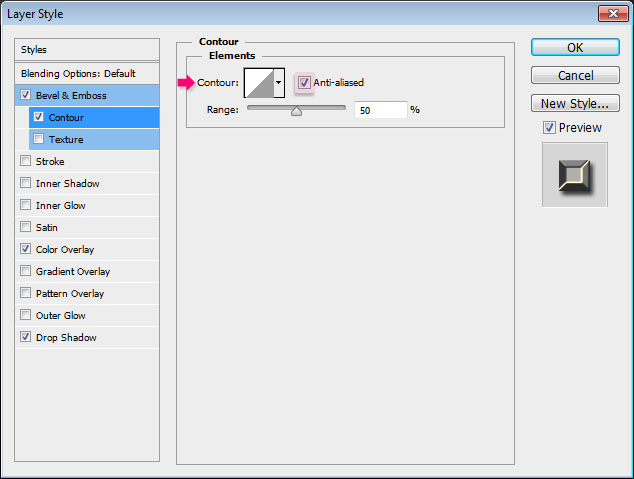
– Contour
- Check the Anti-aliased box.
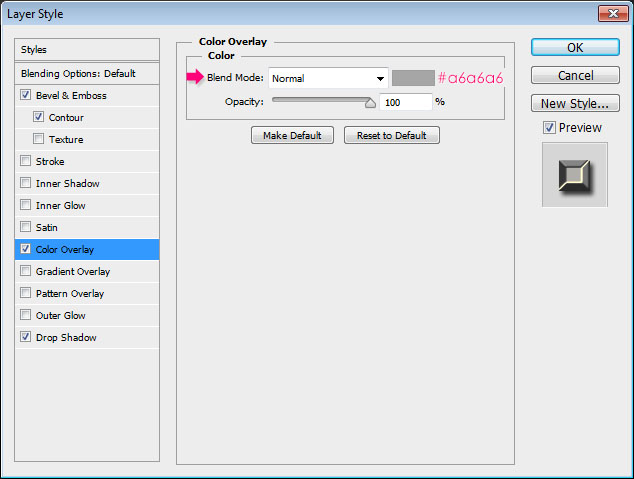
– Color Overlay
- Color :
#a6a6a6 - Opacity :
– Drop Shadow
Use the default values.
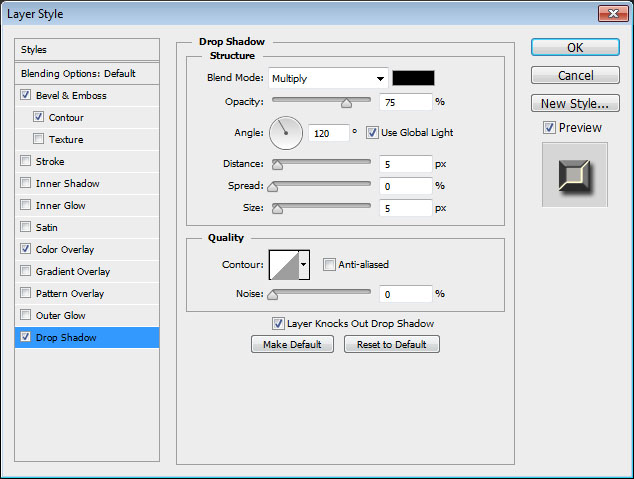
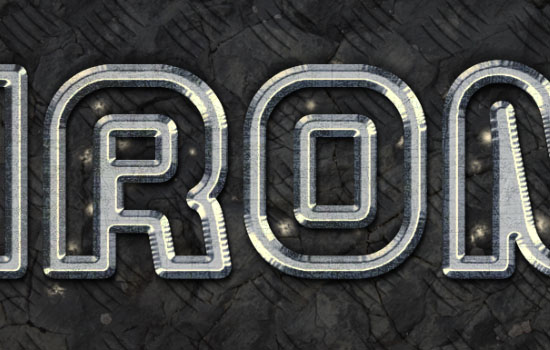
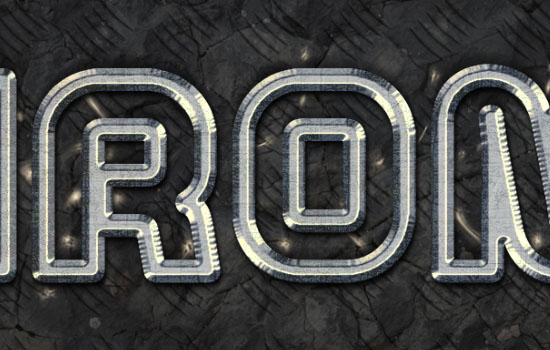
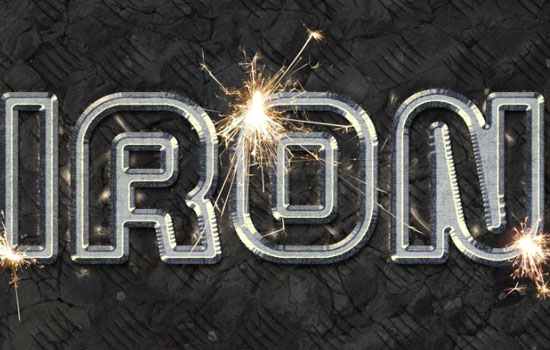
This will create the shiny iron effect.

Step 5
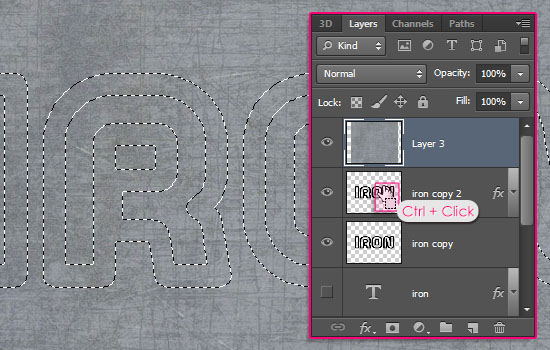
Place the Seamless metal texture smooth image on top of all layers, then Ctrl/Cmd + click the rasterized layer’s thumbnail to create a selection.
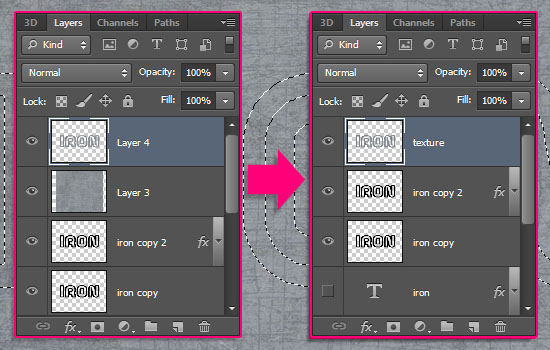
Press Ctrl/Cmd + J to duplicate the selection in a new layer (copy and paste). Then, delete the original texture layer as we don’t need it.
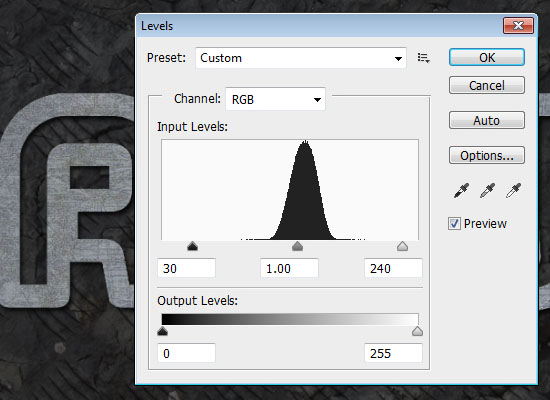
Go to Image > Adjustments > Levels, then change the Shadows value to 30 and the Highlights value to 240.
Change the texture layer’s Blend Mode to Hard Light. This will add a nice texture to the iron text, making it look more realistic.
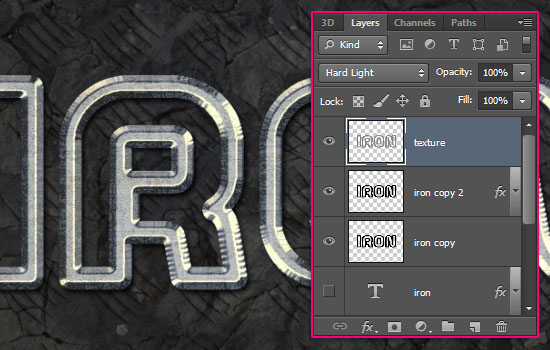
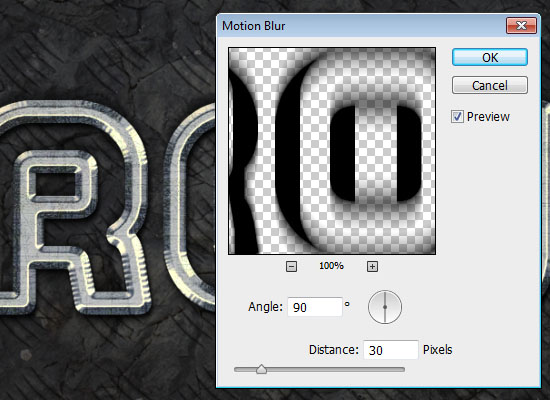
Click the original rasterized layer (copy) so that it is the selected layer. Then go to Filter > Blur > Motion Blur, and set the Angle to 90° and the Distance to 30. This will intensify the shadow vertically, adding more depth to the text.
Step 6
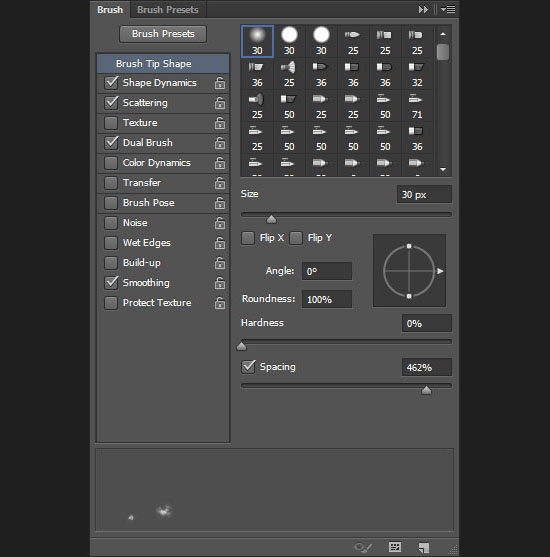
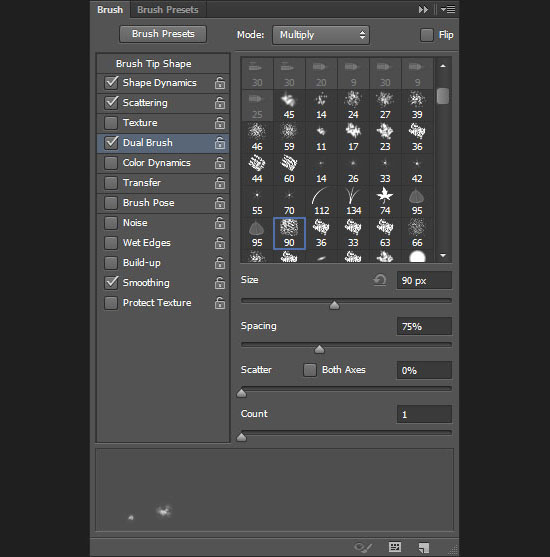
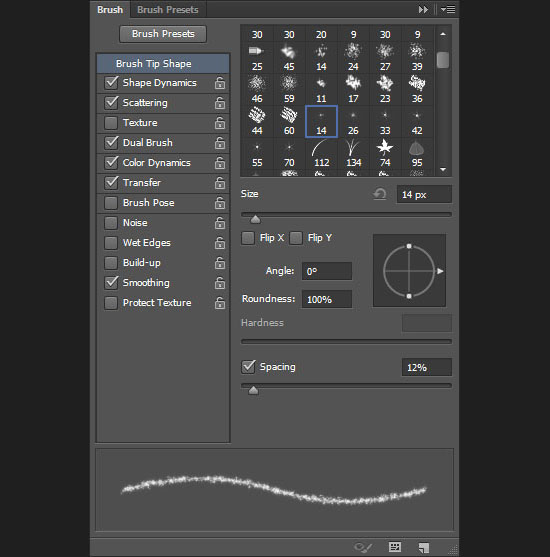
Open the Brush panel (Window > Brush) and choose a soft round brush. Modify its Settings as shown below:
Brush Tip Shape
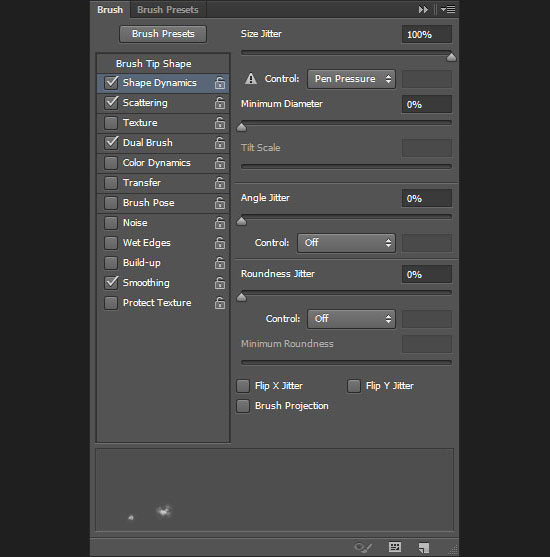
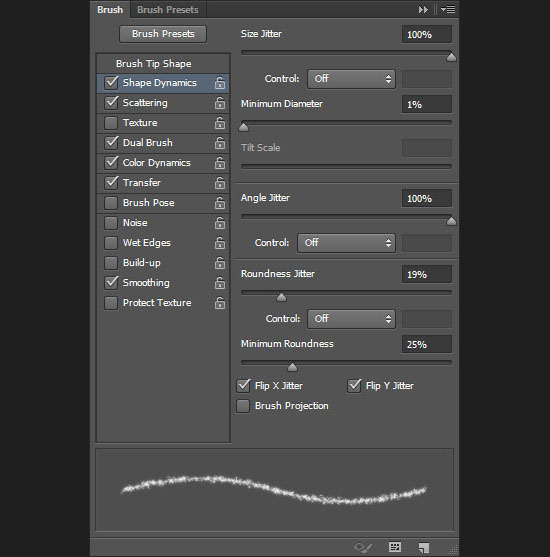
Shape Dynamics
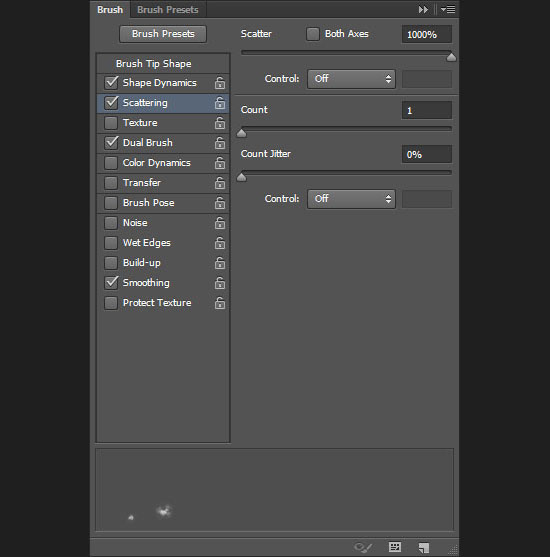
Scattering
Dual Brush
Choose the 90 px Sampled Tip brush.
Step 7
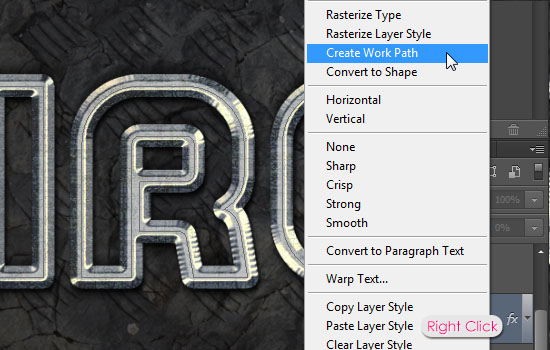
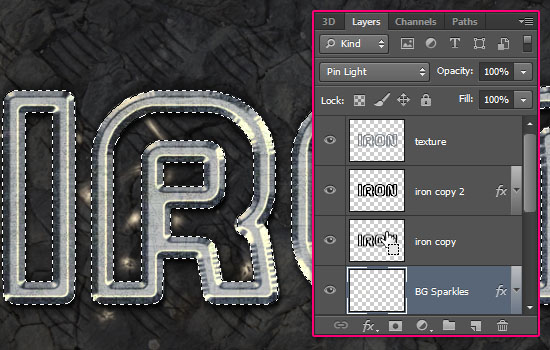
Right click the original text layer (not the rasterized ones) and choose Create Work Path.
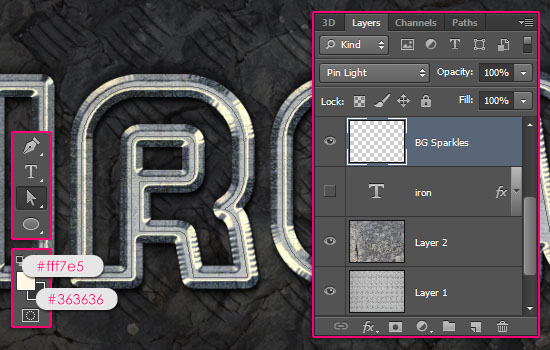
Create a new layer right on top of the original text layer and below the two rasterized layers, rename it to BG Sparkles, and change its Blend Mode to Pin Light. Then, pick the Direct Selection Tool, and set the Foreground color to #fff7e5 and the Background color to #363636.
Right click the Work Path and choose Stroke Path.
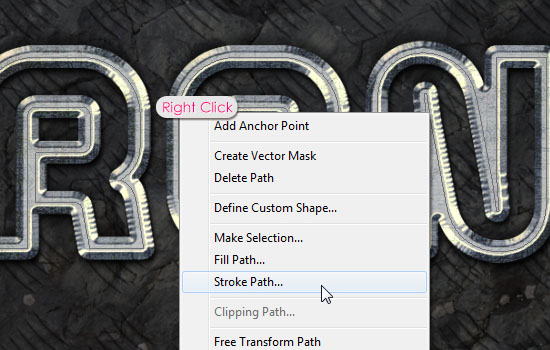
Choose Brush from the Tool drop down menu, and make sure that the Simulate Pressure box is un-checked.
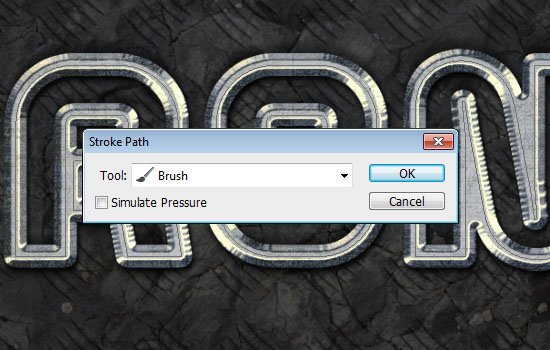
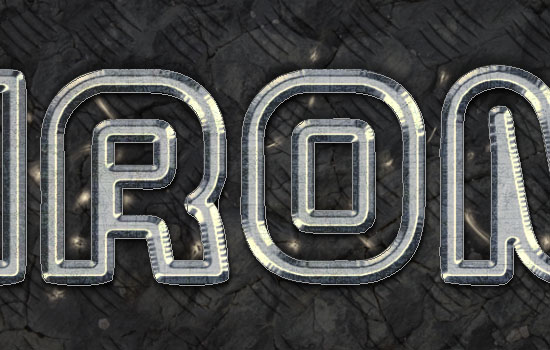
This will stroke the path with some splattered sparkles. Hit Enter/Return to get rid of the path.
Step 8
Double click the BG Sparkles layer and apply an Outer Glow effect:
– Outer Glow
- Blend Mode : Overlay
- Color :
#ffd3be - Size : 10
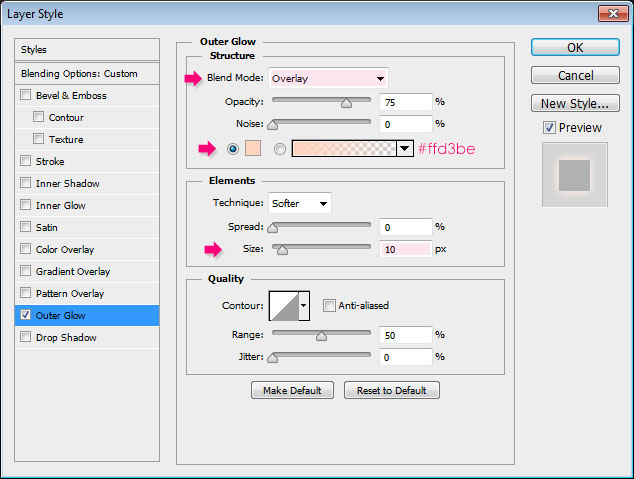
This will apply a nice subtle glow to the sparkles.
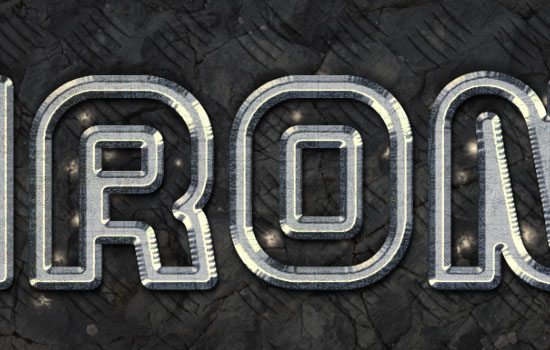
Go to Filter > Distort > Wave, and change the values as below:
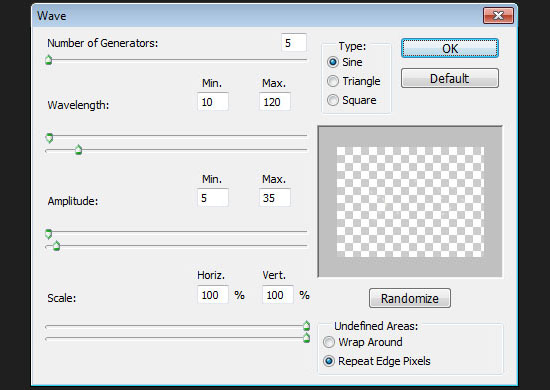
This will scatter and smudge the sparkles a bit more.
Step 9
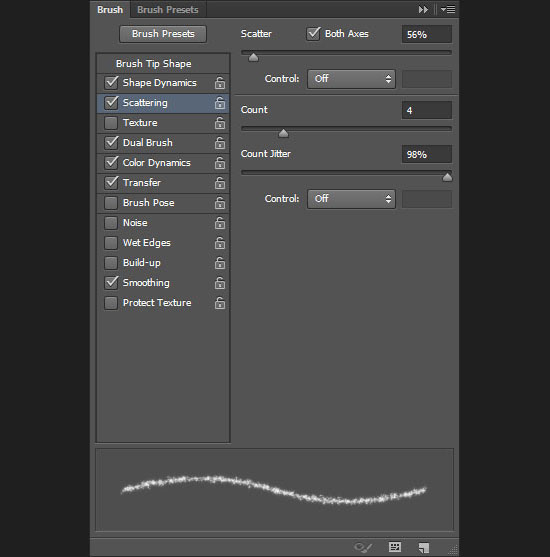
Open the Brush panel (Window > Brush) and choose the Star 14 pixels brush. Modify its Settings as shown below:
Brush Tip Shape
Shape Dynamics
Scattering
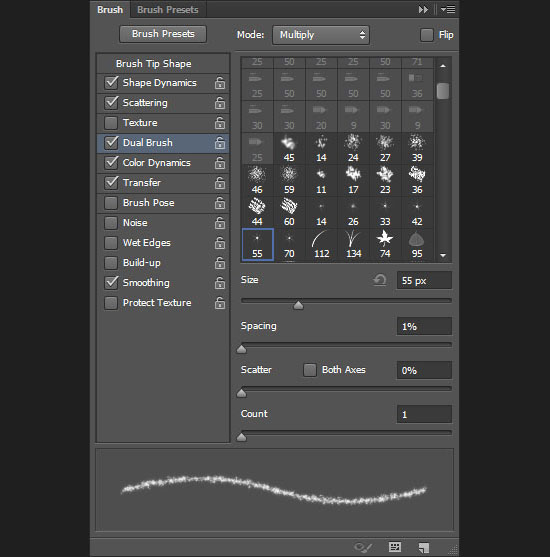
Dual Brush
Choose the Star 55 pixels brush.
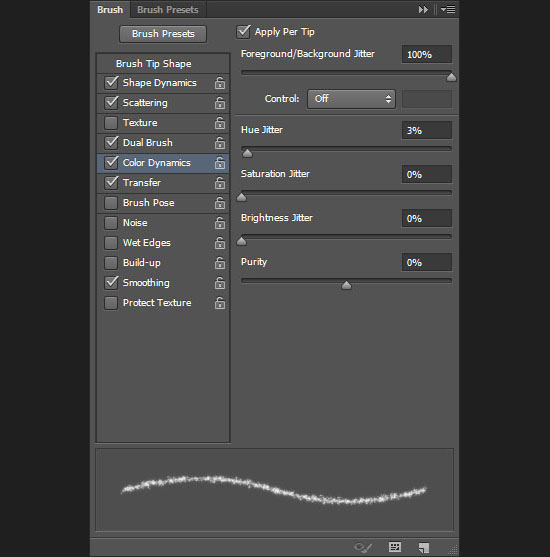
Color Dynamics
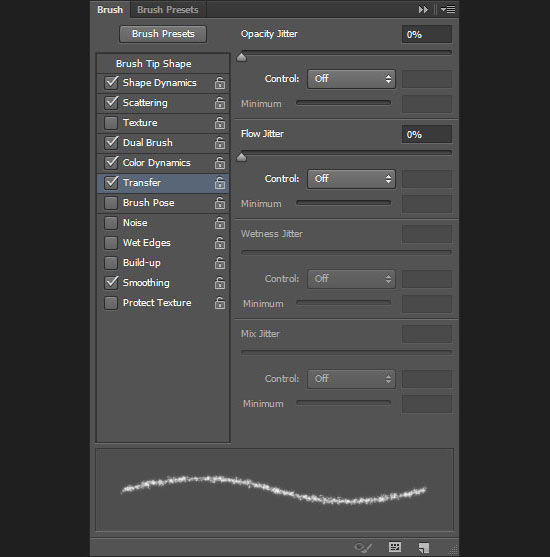
Transfer
Step 10
Ctrl/Cmd + click one of the rasterized layer’s thumbnail to create a selection.
Open the Paths panel (Window > Paths), then Alt/Option + click the Make work path from selection icon down the panel. This will open the Make Work Path dialog box. Enter 1 for the Tolerance value and click OK. Lower values give more precise paths.

This will convert the selection to a work path.
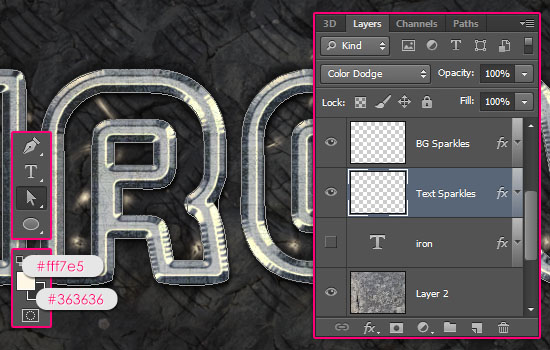
Create a new layer below the BG Sparkles layer and call it Text Sparkles. Right click the BG Sparkles layer, choose Copy Layer Style, then right click the Text Sparkles layer and choose Paste Layer Style. Then, change the Text Sparkles layer’s Blend Mode to Color Dodge.
Make sure that the Foreground and Background colors are still set to #fff7e5 and #363636, and pick the Direct Selection Tool.
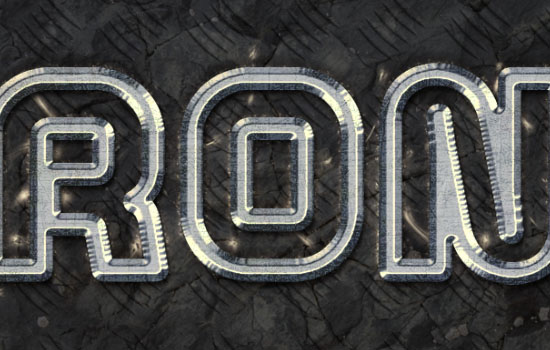
Stroke the path just like you did before, and don’t forget to hit Enter/Return to get rid of the path when you’re done.
The stroke is subtle for now, but it will be brighter after we add some adjustment layers later on.
Step 11
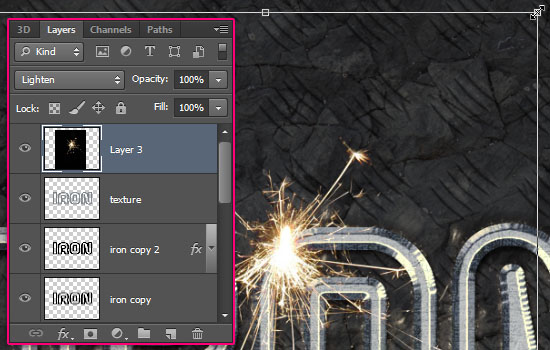
Place one of the Sparkles images (found in the Resources section in the beginning of the tutorial) on top of all layers.
Here’s a cool trick to get rid of the background. We are not going to delete it, instead, we’ll just change the layer’s Blend Mode to Lighten. This will work because the background is very dark, and the sparkles are very bright.
Press Ctrl/Cmd + T to enter the Free Transform Mode, then resize, rotate, and move the sparkle to place it on top of any of the letters as you like.
Do the same with the other two sparkles images.
You can as well use the Hue/Saturation to change the sparkles color if you like (Image > Adjustments > Hue/Saturation).
Step 12
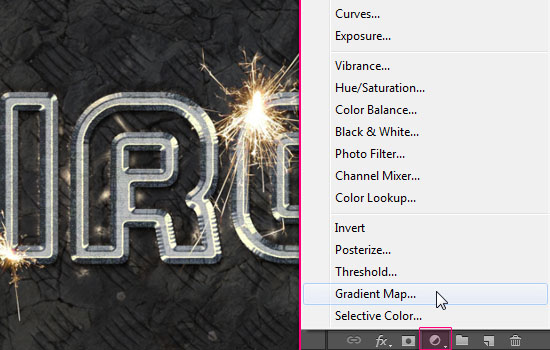
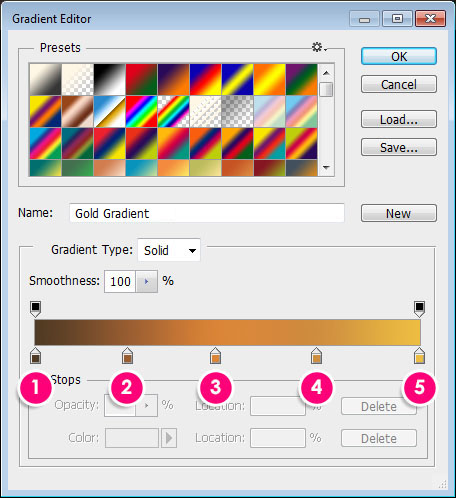
Click the Create new fill or adjustment layer icon down the Layers panel and choose Gradient Map.
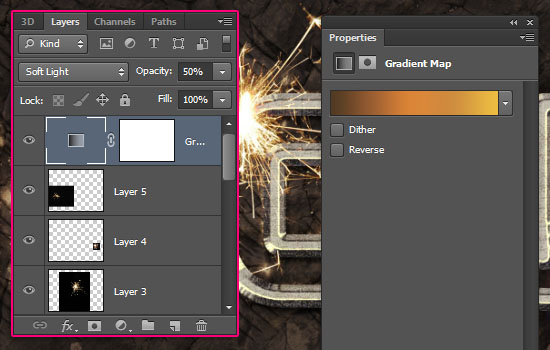
Make sure that the adjustment layer is on top of all layers, then change its Blend Mode to Soft Light, and its Opacity to 50%. Click the Gradient box in the Adjustments panel (Window > Adjustments) to create the gradient used.
Click below the gradient bar to add each color stop:
# – Color – Location
- 1 –
#503a23– 0 - 2 –
#985d31– 24 - 3 –
#da8437– 47 - 4 –
#cf8d3f– 73 - 5 –
#edbd41– 100
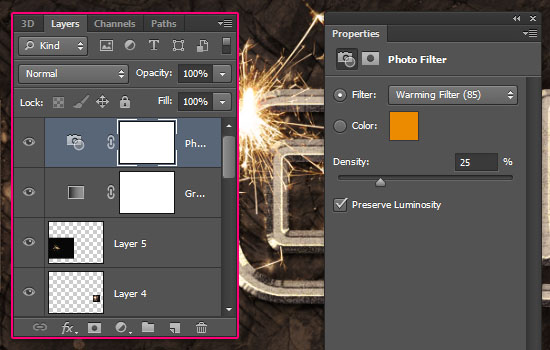
– Click the Create new fill or adjustment layer icon once again, but choose Photo Filter this time.
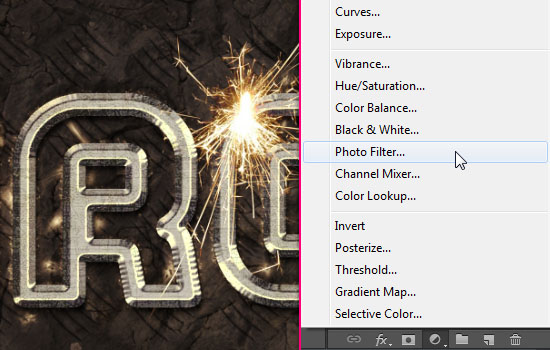
Choose the Warming Filter (85). The Adjustment Layers will add very nice coloring to the effect, making it look brighter and more vivid. They also help blend the different elements together nicely.
Step 13
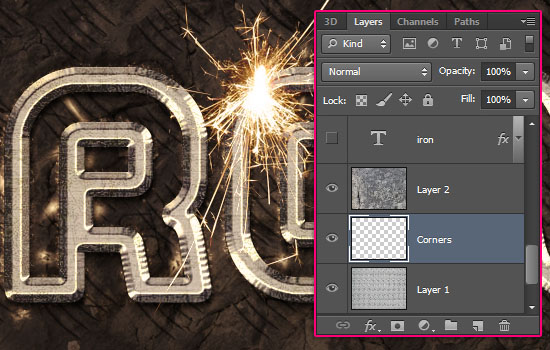
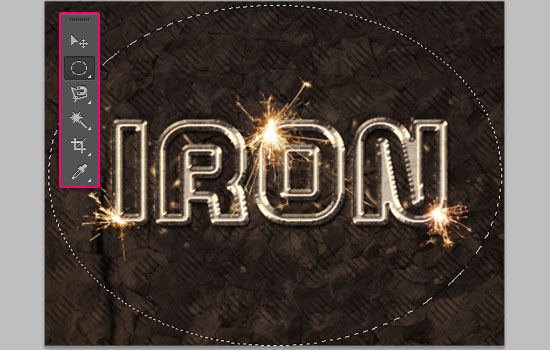
Create a new layer between the two background texture layers and call it Corners.
Pick the Elliptical Marquee Tool and draw an ellipse that intersects with the edges of the document.
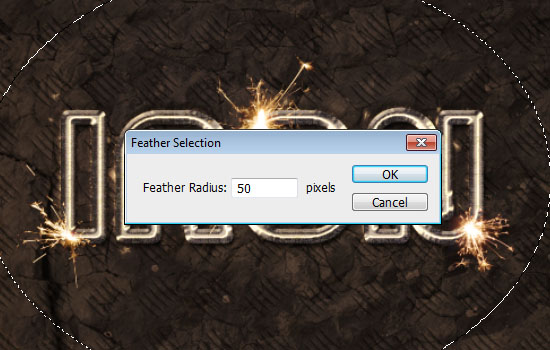
Go to Select > Modify > Feather, and change the Feather Radius value to 50. This will create nice smooth edges for the selection instead of harsh ones.
Go to Select > Inverse to invert the selection.
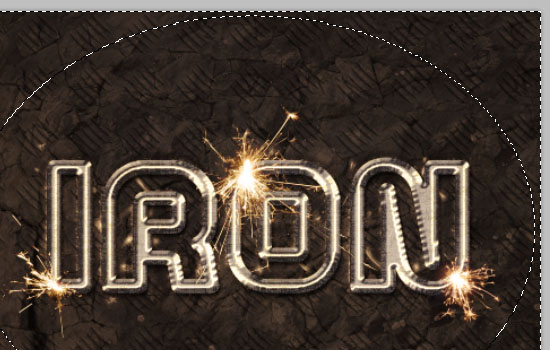
Fill the inverted selection with Black.

Go to Select > Deselect to get rid of the selection. This will add depth to the corners instead of creating a flat final result.
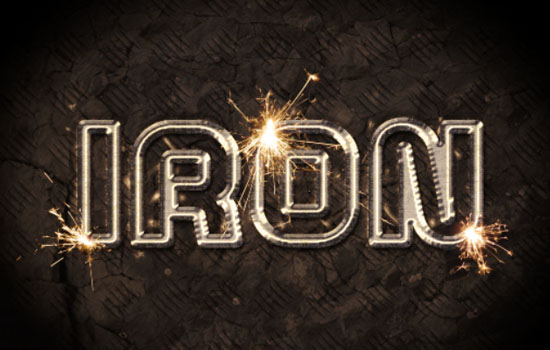
And this is the final result. Hope you liked the effect and found the tutorial helpful.
Did you enjoy this post? Please consider donating to help us cover our server costs.


keep up the great work 😉
Thanks for the comment and the support 🙂
It looks great, very realistic!
Thanks a lot! Appreciate it.
I like the overall effect of this and I think it’s a great tutorial!
A few suggestions: perhaps an overlay of the sparks onto the text itself to add some depth (reflections other than just the layer styles) and some dodge burn as well. If you need an example – just look at welding photos and such. Anything chrome like that always has a very noticeable reflection of the sparks. Plus if it’s supposed to look like it was welded or freshly created from the forge – some darkening would occur in spots.
There’s always more that can be done, and I really like all the ideas you suggested. The small details can definitely make a difference. But this is the basic idea that you can modify as you like.
Hope this will also inspire anyone who’s creating the text effect to take it to another level.
Thanks once again for sharing your tips.
Regards.
mükemmel bir tasar?m… psd dosyas?n? nerden indirebiliriz?
Unfortunately the PSD files are not available for download at the moment.
But please feel free to leave your questions if you have any.
Te?ekkür ederim for the comment 🙂
Thank you wonderful tutorial, I slightly adapted it and used 2 words,and slightly over lapped them top and bottom, then rasterized & merged the 2 text layers. I loved the outcome, thank you!!
It’s always great to know that the concept and the techniques are used in different ways. Glad you liked your outcome too 🙂
Thanks a lot for the comment.
awesome, thankssss
You’re welcome 🙂
Thanks for the comment.
thanks ,i like it keep up your good work,i realy impression
Glad you like it.
Thank you very much for the comment and the support 🙂
Step 6
Dual Brush:
Choose the 90 px Sampled Tip brush
I don’t have this brush nor do you provide a link to it. Is this something that should be in my brushes CS3 or is it an add on?
Can you find it under the name “Sponge Brush Projection”? I’m not really sure if it is available as a default brush in CS3, but it is in CS6.
If you can’t find it you can use any of the similar available brushes. It’s just used to make the edges kind of splattered a bit, so any other similar brush should work just fine.
If the problem still exists, please feel free to add a reply.
Hi !
I am trying your tutorial. However, I am having a lot of trouble with Step 10. (I’m a beginner …).
First, I make the selection on the rasterized layer. Then, I make it a work path (tolerance 1.0).
Afterwords, I create the ‘Text Sparkles Layer”. But when I right click the work path, I only get the name of the layers (Layer 4 / Iron Copy 2 / Iron copy 1 / Layer 2 / Layer 1 / Layer 0). I can’t stroke the path …
Can someone help ?
Thanks !
I’m not very familiar with paths …
Great tutorial anyways. 🙂
Nevermind I found out the problem ^^’
Your tutorial is wonderful, thanks !
Glad you did!
Thank you for the kind words 🙂
thats awesome!!! It helped me a lot. thank you so much. 🙂
Very glad to know that.
Thanks a lot for the kid words 🙂
Fantastic—————–learn’t a lot
That’s great to know!
Thank you for the comment.
sangat membatu saya dalam berinspirasi
Glad you like it.
Terima kasih for the comment 🙂
Lovely tutorial! Only i have a problem with my elleptic marquee tool.. i keeps changing size? Happens every time and can’t find any help anywhere 🙁
Maybe u guys can help?!
When you pick the Elliptical Marquee Tool, please check the Feather value in the Options bar, and make sure that it is set to 0.
Hope this helps.
If the problem still exists, please feel free to leave a reply.
Thanks for the comment 🙂
Thank you for such well written tutorials and explaining what each step is accomplishing! That is how I learn instead of just following steps blindly. 🙂 Great job!
That’s very nice of you to say, and it means so much 🙂
Thank you for the wonderful comment.