
Glowing Polkadots Text Effect
In this tutorial, we are going to create a simple “polkadots” pattern, and use it with a brush to stroke the text, then, apply some simple layer Layer Styles to add the glow.
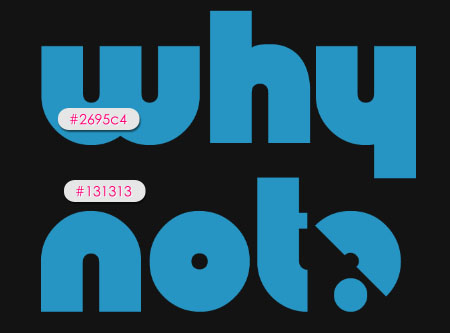
The Final Result

Tutorial Details
- Software Used : Photoshop
- Version : CS5 Extended
- Time : 0:30 – 0:45
Resources
- Knuckle Down font.
Step 1
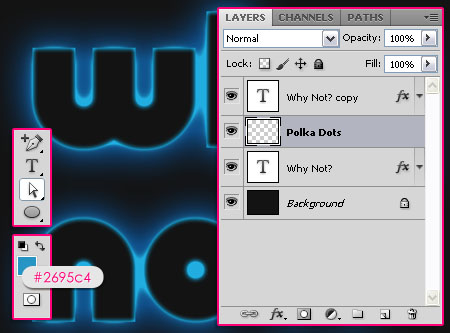
Create a new 1024 x 768 px document, and fill the Background with the color #131313, then, create the text using the color #2695c4. The font used is Knuckle Down, and the Size is 250 px.
Change the text layer’s Fill value to 0.
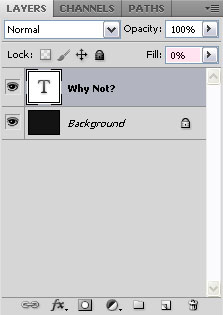
Duplicate the text layer.

Step 2
Double click the original text layer to apply an Outer Glow effect:
– Outer Glow
- Blend Mode : Hard Light
- Color :
#4ea6d0 - Size : 65

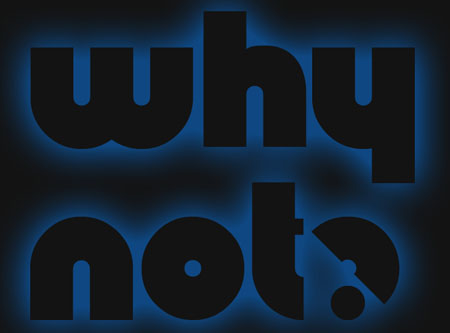
This will add the first layer of glow to the text.
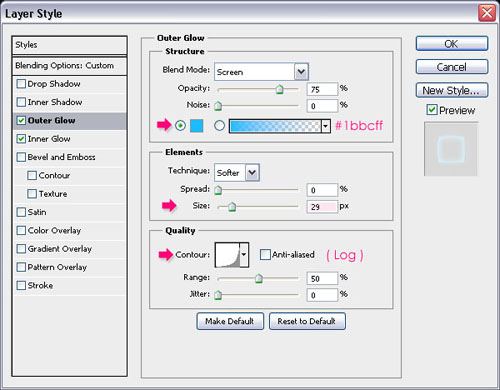
Now, double click the copy text layer, and add the following Layer Styles:
– Outer Glow
- Color :
#1bbcff - Size : 29
- Contour : Log
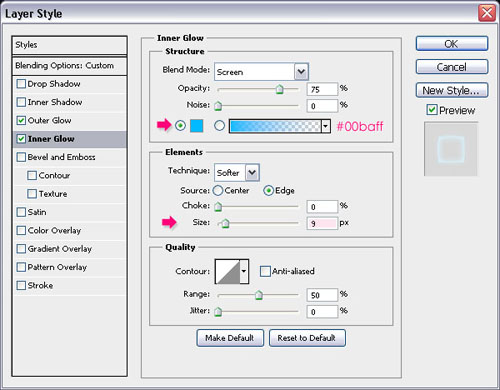
– Inner Glow
- Color :
#00baff - Size : 9
Another layer of glow will be added to the text.

Step 3
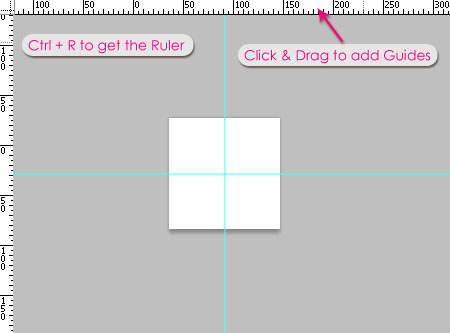
It’s time to create the Polkadots pattern. So open a new 32 x 32 px document, and go to View > Rulers, or simply press Ctrl/Cmd + R to show the Rulers.
Make sure that the View > Snap option is checked (so the the Guides created will snap to the center of the document), then click the Ruler at the top of the document and drag a new Guide. While you’re dragging the Guide, it will snap to the center of the document when you’re near that point. When it does, leave the Guide there.
Do the same for the Ruler to the left.
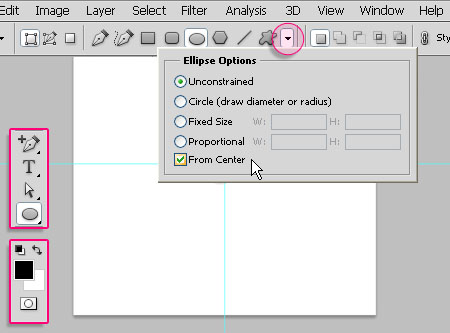
Set the Foreground to Black. Pick the Ellipse Tool, and check the From Center box under the Shape Tool Options in the Options bar at the top. This will help create the circle form the center.
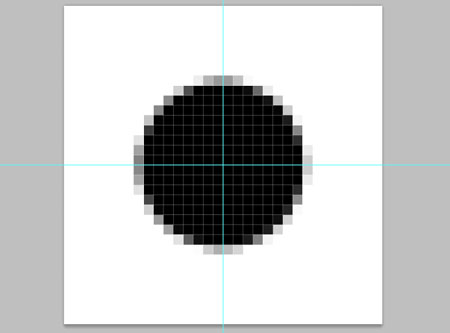
Zoom in if you like, and place the cursor in the center of the document (where the two Guide lines meet), press and hold the Shift key (to create a perfect circle), and drag the shape outwards.
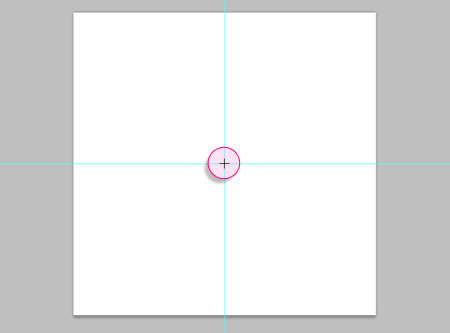
The size should be close to the one shown below. You need to leave enough space in the corners of the document.
If you draw a smaller circle, there will be more empty spaces between the circles in the pattern, (and less spaces if your circle is bigger).
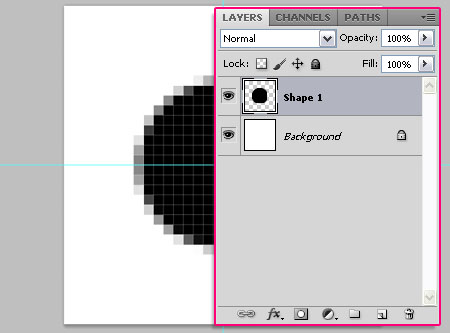
Right click the Shape layer, and choose Rasterize Layer.

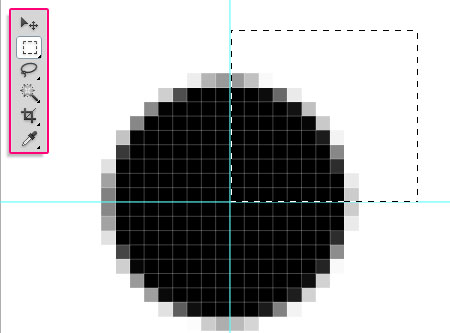
Pick the Rectangular Marquee Tool, and starting from the center of the document, draw a Rectangle that covers a quarter of the circle.
Copy (Ctrl/Cmd + C) and Paste (Ctrl/Cmd + V) the selected part. It will be pasted in a new layer. Using the Move Tool, move the pasted part to the opposite corner.
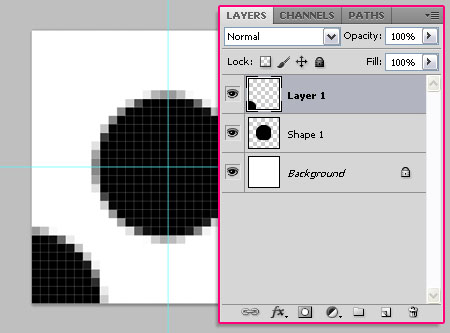
Repeat the same steps for the remaining corners, and make sure to re-select the original circle’s layer after each paste, as the parts are pasted in new layers, and you need to copy from the original one.
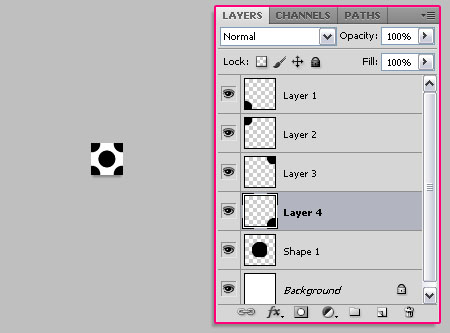
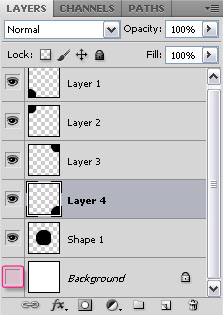
Remove the eye icon next to the white Background so that the Background is Transparent.
Go to Edit > Define Pattern, and type in a name for the pattern.
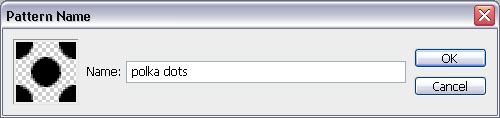
And that’s it for the Pattern! Next, we are going to create the brush.
Step 4
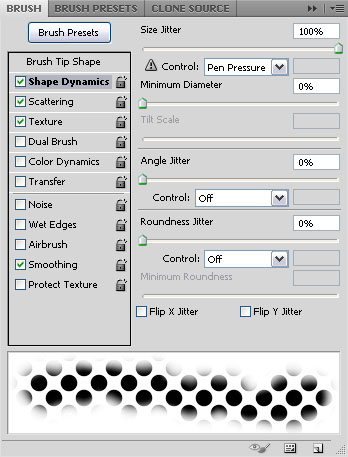
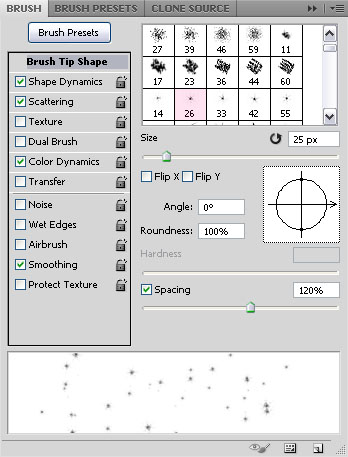
Go back to the original document, and open the Brush panel (Window > Brush). Choose a soft round brush, and modify its Settings as shown below:
Brush Tip Shape
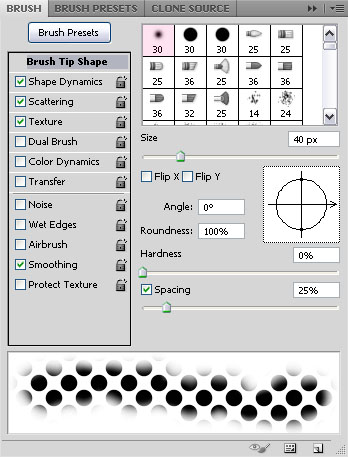
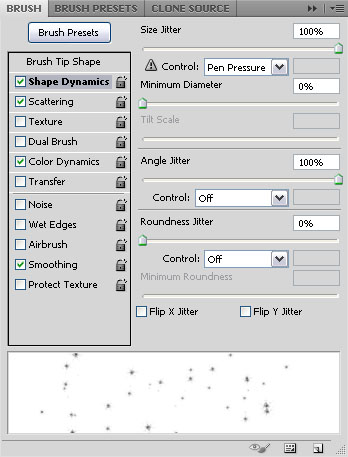
Shape Dynamics
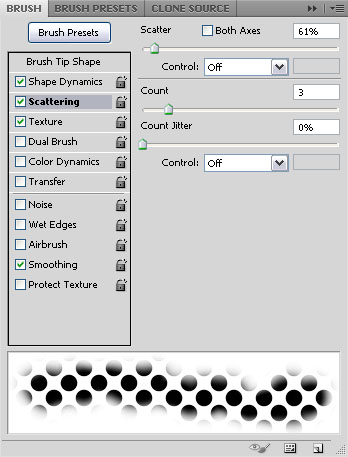
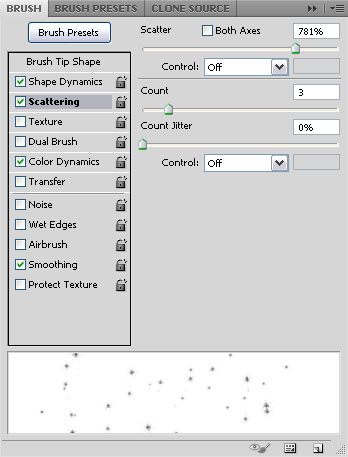
Scattering
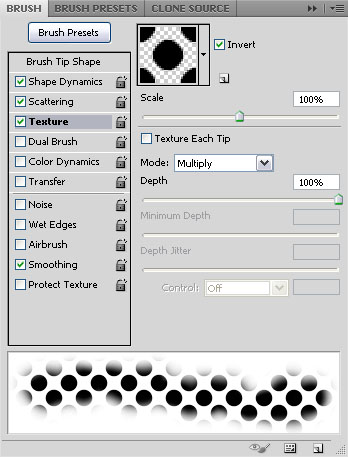
Texture
This is where we will use the polkadots pattern, make sure to check the Invert box, and to set the Mode to Multiply.
Step 5
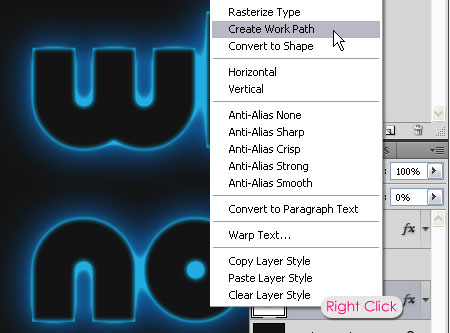
Right click the text layer, and choose Create Work Path.
Set the Foreground color to #2695c4, and grab the Direct Selection Tool.
Create a new layer between the two text layers, and call it Polka Dots.
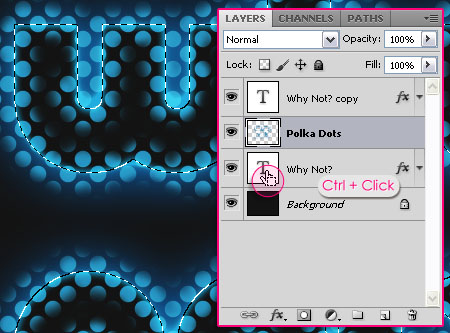
Right click the Work Path, and choose Stroke Path.
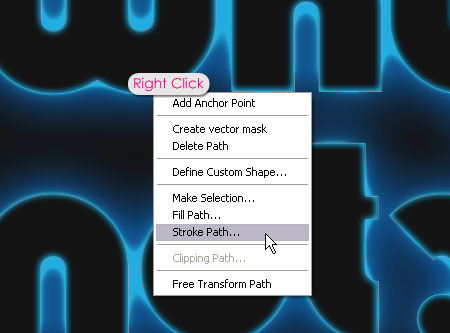
Choose Brush from the Tool drop down menu, and un-check the Simulate Pressure box.
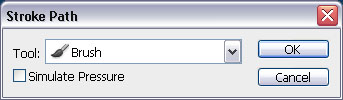
This will stroke the path with the Brush. Hit Enter/Return to get rid of the path.

Ctrl/Cmd + click a text layer’s thumbnail to create a selection. Make sure that the Polka Dots layer is selected, and press Delete to get rid of the inner parts of the Stroke.
Go to Select > Deselect to get rid of the selection.

Double click the Polka Dots layer to apply an Inner Glow effect:
– Inner Glow
- Blend Mode : Vivid Light
- Color :
#65f2ff - Source : Center
- Size : 10
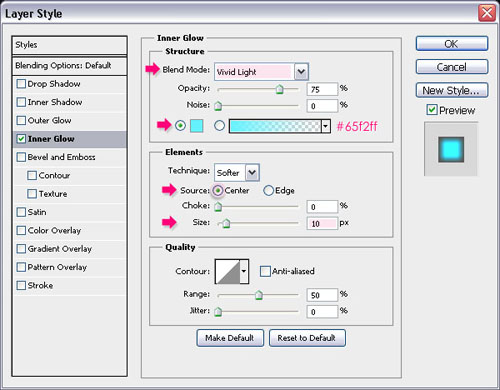
This will add a very nice glow in the center of the polkadots.

Step 6
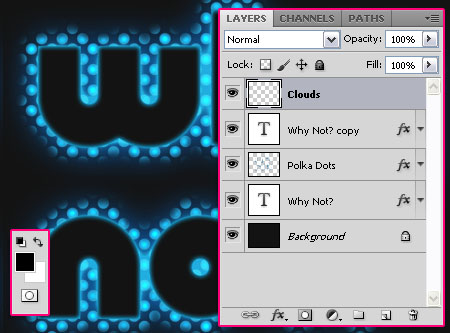
Set the Foreground and Background colors back to Black and White, and create a new layer on top of all layers and call it Clouds.
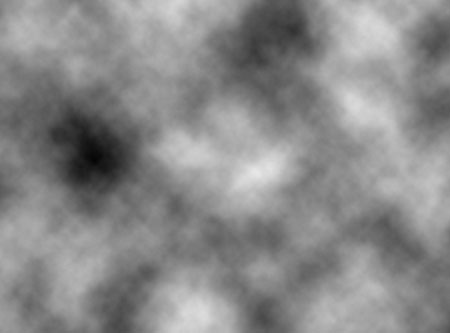
Go to Filter > Render > Clouds.
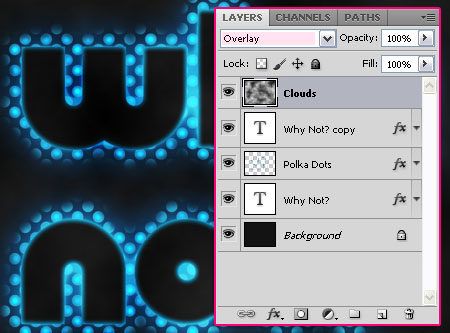
Change the Clouds layer’s Blend Mode to Overlay. This will add some nice variations to the glow intensity in the Stroke.
Step 7
The following steps are optional. We are going to add some nice blurry sparkles around the text to give a space-like feel.
From the Brush panel, choose the Star 26 pixels brushtip, and modify its Settings as shown below:
Brush Tip Shape
You can increase the Spacing value if you want more space between the sparkles.
Shape Dynamics
Scattering
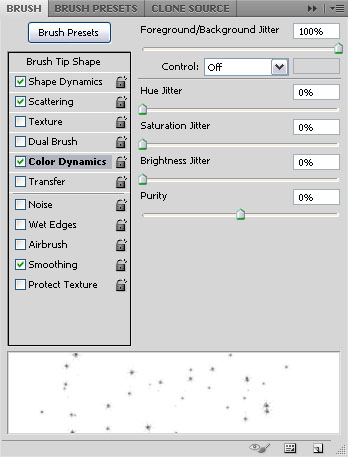
Color Dynamics
Step8
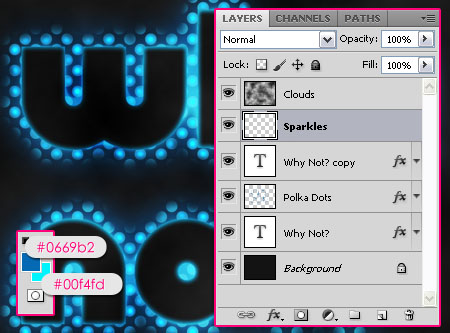
Create a new layer right below the Clouds layer, and call it Sparkles. Set the Foreground color to #0669b2 and the Background color to #00f4fd.
Start adding some sparkles around the text.

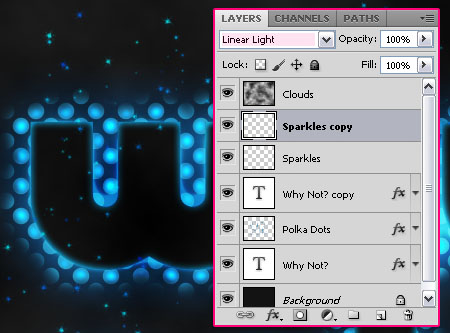
Duplicate the Sparkles layer, and change the copy’s Blend Mode to Linear Light.
Select the Sparkles layer once again, and go to Filter > Blur > Gaussian Blur. Change the Raduis value to 3.
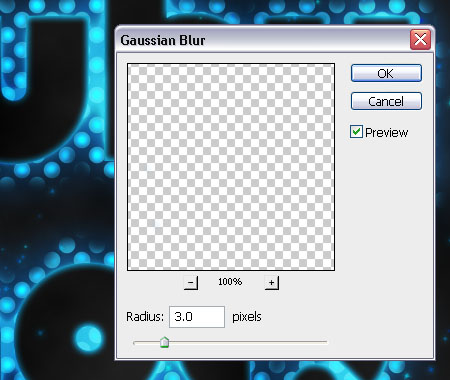
The blur will give the sparkles a nice glow.

And we’re done!
Did you enjoy this post? Please consider donating to help us cover our server costs.


thank for tutorial
You’re welcome.
Thanks for the comment.
hey mate, very nice tut, i really appreciate it.
here’s what i whipped up.
http://i53.tinypic.com/jqnyb9.jpg
Hello Kevin,
Amazing result!
I really like the colors you chose, and the result looks definitely awesome.
Just a simple note though. I noticed that the polkadots glow is emitting from the edges, not from the center, so I guess you didn’t change the Source to Center for the Inner Glow in Step 5. But other than that, great job indeed!
Glad you enjoyed the tutorial. Thanks a lot for the comment and the link.
Cheers 🙂
ahhhh, i do see that now, but i still enjoy it anyways.
thanks for the feedback mate 🙂
No problem at all, I still think your result is great as well, just thought I’d point that out.
Thanks once again 🙂
nice tutroial im on cs4 and it didn;t have the log conture so i made one
Hello Lachlan,
You can get the Contours you don’t have by following the steps shown in this image, but it’s good that you created the contour by yourself!
Thanks for the comment 🙂
aah i like it anyway…!!and now i am going to do it…!!feeling so happy…!! 😛
Awesome! Glad you will 🙂
Thanks for the comment.
Hi! I like the effect. My question is very simple because I new in this world of photoshop. How can add this text in a photo that the photo has not got black backgroung? Sorry but my english is not good. I am from Argentina
Hello Cecilia,
You need to replace the dark background created in the first step with the photo, but I’m not sure how that will work out, as the effect is based on a dark background. So if your photo is dark, it might look good, if not, then the glow might either disappear or be so shiny!
Hope this answers your question!
Thanks for the comment 🙂
tnx :X
You’re welcome!
contour Log ?!
I don’t have it :d !!!
how can i download it ?
Check this image please, hope it helps 🙂
Excellent tutorial
Really helpful to me.
Glad you found it helpful.
Thanks a lot for the comment 🙂
Hey amazing tut, but i have a problem, when i got to Setp 5 i right clicked on the text layer but there is no option for ” create a work path” please help me am new to photoshop.
Hello,
Thank you for the comment.
As for the “Create Work Path” option, is it grayed out or does it not exist at all? You might be clicking on the layer’s thumbnail (icon), but you need to click on the layer itself.
Hope this helps, but if the problem still exists, please feel free to add a reply.
Cheers!
Amazing and outstanding results. Instruction is really clear and helpful.
Thanks
Very glad you found it so!
Thanks a lot for the comment, I really appreciate it.
Hello sir,
I am doing the same as in the tut.. but on 5 step there is no ” create work path ” option available for me….actually it does not exist at all..what should i do now ?
please help me out of this … i also want to make a logo like the same..
Thanks…..
What Photoshop version are you using? Are you right clicking the text layer and not its thumbnail? I’m guessing you might be right clicking the thumbnail, so please try to right click the empty area to the right and see if you can get the option.
Hope this helps. Please feel free to attach a screenshot of the issue if the issue still exists.