
Bright Retro Text Effect
This tutorial will explain how to use layer Layer Style to create a nice bright retro text effect. Then, it will explain how to use a couple of brushes to add the stroke, some sparkles, and retro line decorations to the Background.
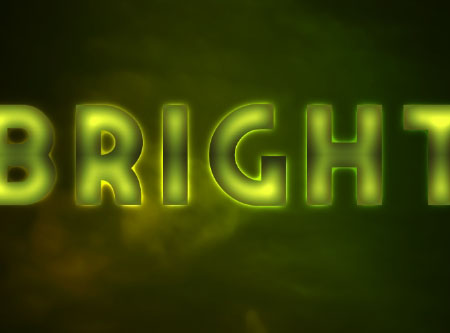
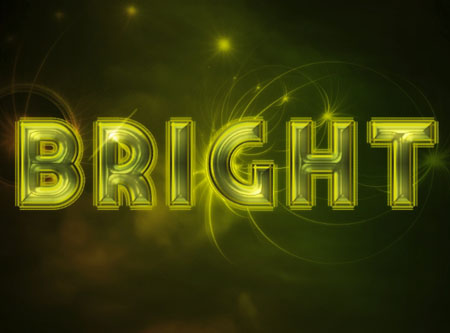
The Final Result

Tutorial Details
- Software Used : Photoshop
- Version : CS5 Extended
- Time : 0:30 – 0:45
Resources
- Marbold font.
- Retro Clouds : V. by ArtOfDecay-Stock.
- Sparklies Photoshop Brushes by redheadstock.
- decorative light effects by lindelokse.
- Retro Diagonals brushes pack.
Step 1
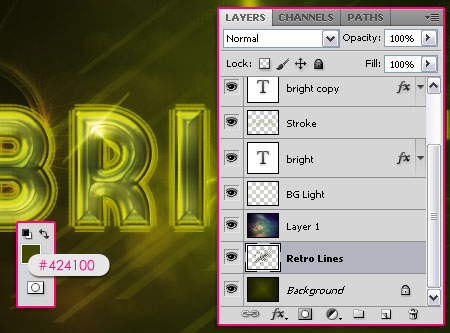
Create a new 1024 x 768 px document. Set the Foreground color to #424100, and the Background color to #161400, then, create a Diamond Gradient from the center of the document to one of the corners.
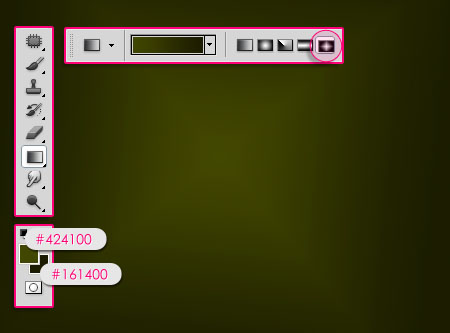
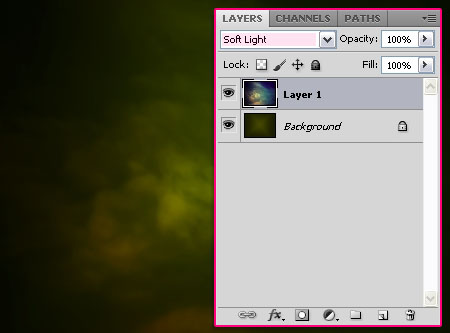
Open the Retro Clouds : V. image and place it on top of the Gradient Background. Resize the image to fit the document, and change its Blend Mode to Soft Light.
Step 2
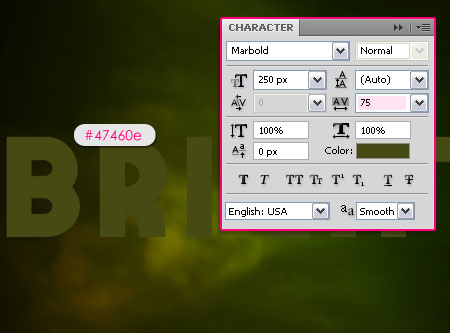
Create the text using the color #47460e. The font used is Marbold and the Size is 250 px. You need to set the Tracking value to something around 75 to avoid overlapping.
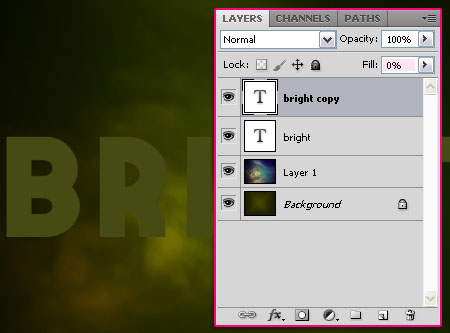
Duplicate the text layer and set the copy’s Fill value to 0.
Double click the original text layer to apply the following Layer Style:
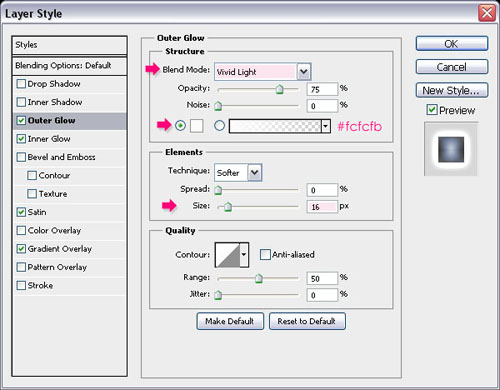
– Outer Glow
- Blend Mode : Vivid Light
- Color :
#fcfcfb - Size : 16
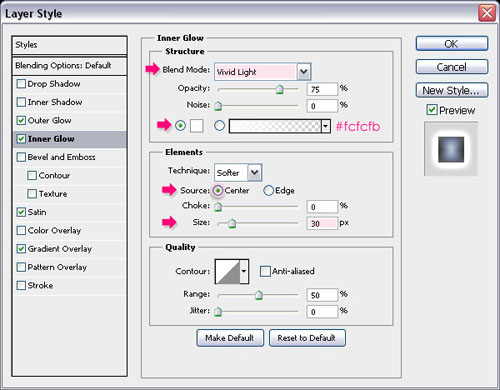
– Inner Glow
- Blend Mode : Vivid Light
- Color :
#fcfcfb - Source : Center
- Size : 30
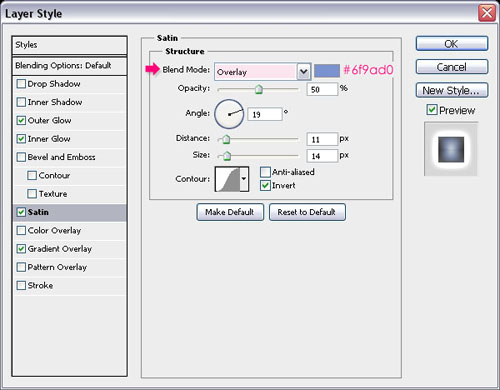
– Satin
- Blend Mode : Overlay
- Color :
#6f9ad0
– Gradient Overlay
- Blend Mode : Overlay
- Opacity : 45%
- Style : Reflected
- Scale : 85%
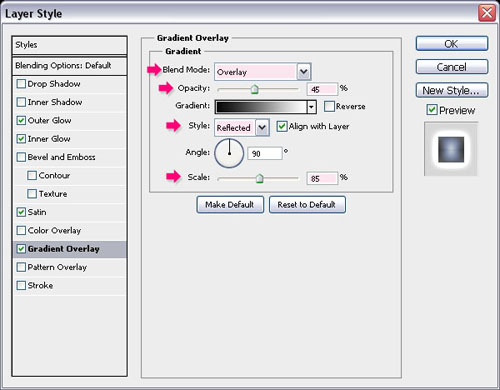
This will add nice glow to the original text layer.
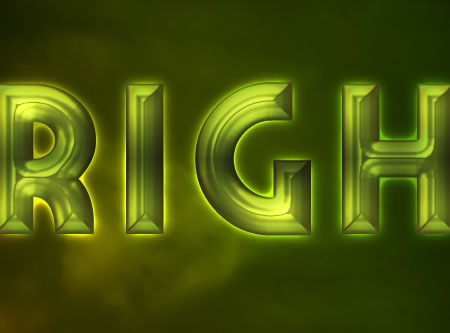
Step 3
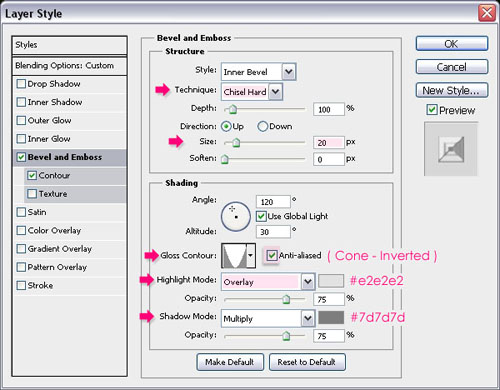
Double click the copy text layer to to apply the following Layer Style:
– Bevel and Emboss
- Technique : Chisel Hard
- Size : 20
- Gloss Contour : Cone – Inverted
- Check the Anti-aliased box
- Highlight Mode : Overlay
- Color :
#e2e2e2 - Shadow Mode – Color :
#7d7d7d
– Contour
- Contour : Guassian Inverse
- Check the Anti-aliased box.
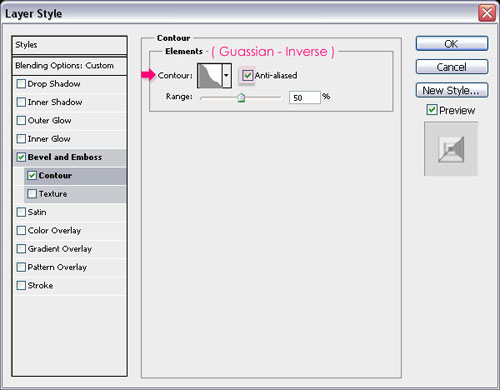
This will add the retro-like effect to the glow.
Step 4
Create a new 20 x 64 px document with a Transparent Background. Use a smooth round brush to create 3 Black dots with different sizes. Go to Image > Image Size and resize the document to 5 x 16 px.
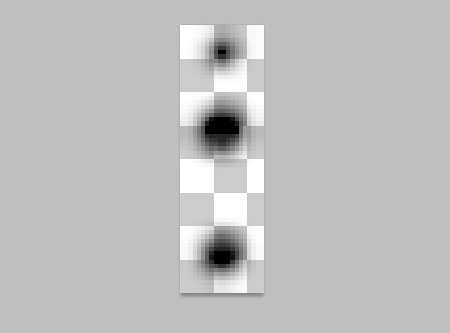
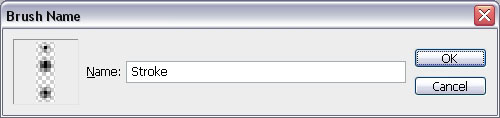
Go to Edit > Define Brush Preset and type in Stroke.
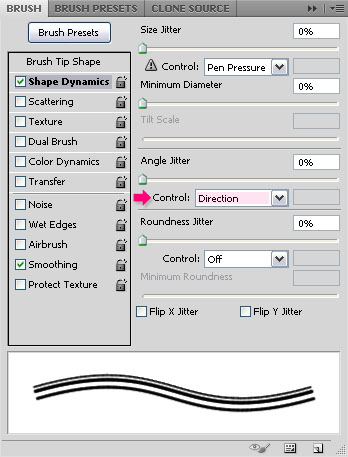
Back to the original document, open the Brush panel (Window > Brush). Under Shape Dynamics, choose Direction from the Control drop down menu under Angle Jitter. Also, make sure all the other values are set to 0.
Step 5
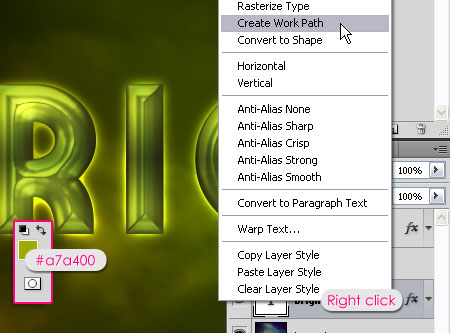
Create a new layer between the two text layers and call it Stroke. Set the Foreground color to #a7a400.
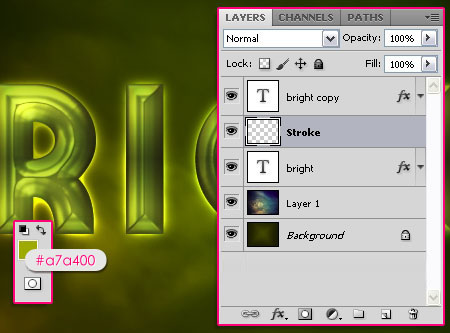
Right click one of the text layers, and choose Create Work Path.
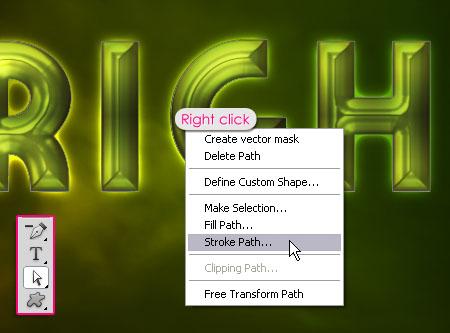
Pick the Direct Selection Tool, make sure that the Stroke layer is selected (active), then right click the path and choose Stroke Path.
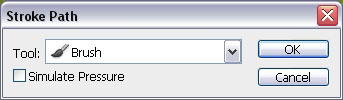
Choose Brush with the Simulate Pressure box un-checked.
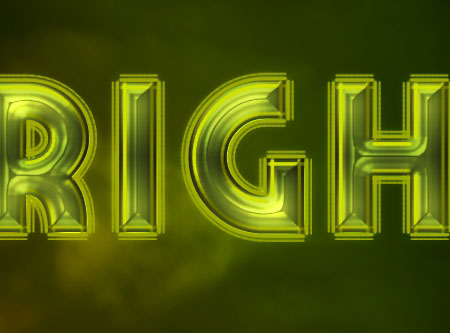
This will create a simple stroke.
Step 6
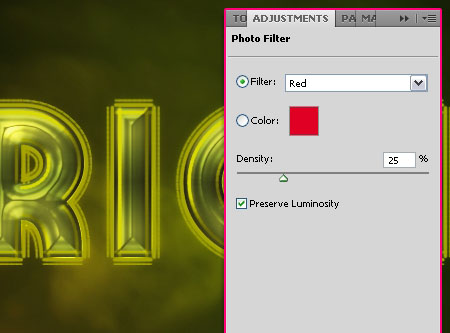
Click the Create new fill or adjustment layer icon down the Layers panel, and choose Photo Filter.
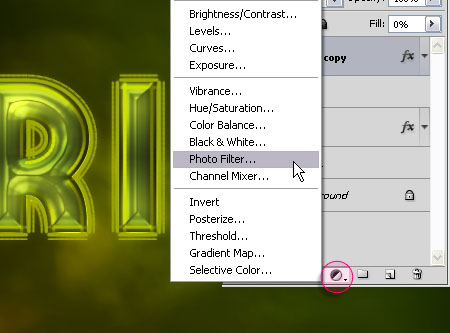
Choose the Red filter.
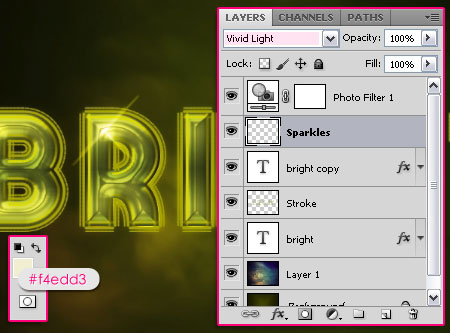
Create a new layer on top of the copy text layer and call it Sparkles, then change its Blend Mode to Vivid Light. Set the Foreground color to #f4edd3, and use the Sparklies Photoshop Brushes to add some sparkles. One or two are enough, but you can go ahead and add more if you want to.
Create another new layer right below the Original text layer and call it BG Light, then change its Blend Mode to Vivid Light and its Opacity to 70%.
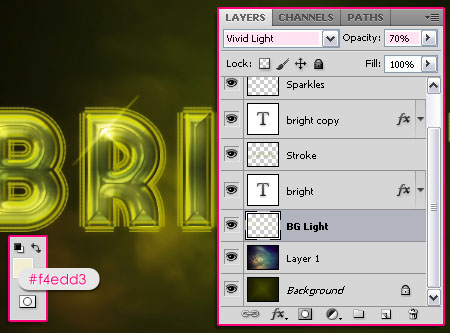
Use the decorative light effects brushes to add some nice glowing lights.
Finally, create a new layer below the Background image (Layer 1) and call it Retro Lines. Set the Foreground color to #424100, and use a brush from the Retro Diagonals set to add some lines to the Background. Keep in mind that you can resize the brushes to whatever size you like.
This is the final effect. But you can check the next step to see how to add some nice colors to this effect to make it look even more “Retro”.
Step 7
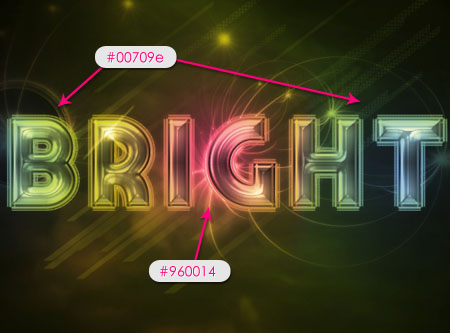
Create a new layer on top of the Sparkles layer and call it Colors. Change its Blend Mode to Hue.

Using a big soft round brush, add some color spots to the text. This technique adds a nice retro or vintage feel to the effect. The colors used here are #00709e and 960014, but you can go ahead and try other different colors as well.
If the colors look so bright, you can lower the Colors layer’s Opacity value. Here, it’s set to 70%.

And that’s pretty much it!
Hope you enjoyed this tutorial.
Did you enjoy this post? Please consider donating to help us cover our server costs.


Another great text effect, it looks so beautiful. Thank you for the tutorial!
Thank you so much, glad you liked it.
Cheers 🙂
Needs more detail in step 5.
” Pick the Direct Selection Tool, make sure that the “Stroke” layer is selected (active), then right click on the path and choose Stroke Path.”
The Direct Selection Tool changes the selected layer. so making the stroke layer active makes no sense, because when you click it changes and if you right click on the stroke layer nothing happens because there are no paths. is there another way to ad the brush stroke to a path?
Hello Bobby,
The Direct Selection Tool does not change the layer selected, but if the path is not showing, try going to View -> Show -> Target Path, this should make the path visible, so that you can stroke it.
Hope this helps.
Please add another comment if this does not work.
Very nice effect, thank you! This is my result:
http://i294.photobucket.com/albums/mm106/almavez/alma/tutorials/BrightRetroText.jpg
Cool! Awesome result indeed.
Cheers! 🙂
Can you provide a .PSD file?
I’m really sorry, but PSD files are not available for download.
If you have any questions please add them in a comment and I’ll try my best to answer them.
Regards.
I would ask but I very badly understand and write on English(((
I wanted.psd what to look at an error.
It is impossible to me after 5 steps ((
You can leave a comment in your language, and I’ll use Google translate to see what the problem is, and give you the answer.
Is the problem related to the workpath?
Ik wil je heel graag bedanken voor de mooie les . Ik heb ervan genoten
You’re welcome.
Dank u wel for the comment 🙂
Hi,
I followed the instruction till Step 5. While creating the work path,I tried to right click the option “create the work path” but it gives me an error message saying “Could not complete your request because the Type Layer uses a Faux Bold Style!” Do not understand what is it and why it is coming back. I tried with different fonts as well,just not sure what is wrong. Can you please help out with this?
You need to go to Window -> Character to open the Character panel, and un-click the Faux Bold icon if it’s clicked. Check this image please.
Hope this helps.
With step 3, my type is completely flat, there is hardly any outer glow and the bevel and emboss doesn’t seem to show. How do I fix this?!
Is this while the Layer Style dialog box is still open (the Preview box might not be checked), or the text doesn’t change even after you click OK and get out of the dialog box?
Are you using the same font and font size? This issue is usually due to a change in those values. If that’s the case, you need to change the Bevel and Emboss and Glow values accordingly.
Hope this helps. But if the problem still exists please feel free to add a reply.
how can i have that retro diagonals? Cz, if i click the link it will go to this site –> http://brushlovers.com/all-brushes thankyou and pls help 🙂
Seems like the file isn’t available there anymore, but you can download the same set here. Will change that in the Resources section as well.
Hope this helps 🙂
Wow This is very fantastic Photoshop effect tutorial
I learned too much from your site Awesome ………..?
Thanks
Sanarya
So glad to know that.
Thank you very much for your kind words.
This Text effect is awesome! Love it! ?
Happy you do 🙂
thanks for the comment.
Tried several times to download that diagonals brush set but wouldn’t work. I have CS4. Did say that it’s not compatible with my version. Am assuming that it’s CS5 and above? In the end, I made my own brush from the pic inside the download which came out ok. Other than that, loved it. 😀
That’s weird! It should work in CS4. Did you extract (unzip) the file then load the .abr file into Photoshop? It should work fine.
Glad you created your own set and finished the design anyway 🙂
Thank you very much for the comment.
help!!
i’m stuck at step #1.
what image do i place on the backgound?
The image is linked. You need to click the link, download the image, open it in Photoshop, then place it on top of the background in the document you’re working on.
Hope this helps.
Please feel free to leave a reply with any other queries you have.
my retro diagonal is broken…i downoaded, unzip, then the photoshop say ‘its not compatible with this version’ i use cs6..
I updated the link, please download the file from here, and make sure to load the file called “Retro Diagonals.abr” not the one called “._Retro Diagonals.abr”.
Hope this helps.
Thanks..Now it’s work!
Thanks again for your helps..
Awesome!
You’re welcome 🙂
Thanks
See Mine………..!!
Nice outcome indeed 🙂
Thank you for the comment and for sharing your work.
Here is mine…I enjoyed doing this ( your ) tut…I also did the slime and bloody text…I just dont know where to put my results 😉
That’s a nice bright version indeed!
Glad you enjoyed it, and thank you very much for sharing your work 🙂
You can share the other effect in its tutorial’s comments section 😉