Decorated Gold Metallic Text Effect
Posted by textuts | On 17 December, 2013 | In Inspired , Simple Photoshop Text Effect TutorialsThis is another festive holidays-inspired text effect tutorial, that explains how to use Photoshop’s Layer Styles, very basic brushes, and a nice bokeh texture to create decorated golden metallic text effect.
The Final Result
Tutorial Details
- Software Used : Photoshop
- Version : CS6 Extended
- Time : 0:45 – 1:15
Resources
- Junegull font.
- Carbon fibre pattern by Atle Mo.
- Leather 1 pattern by Atle Mo.
- gradient-shapes for Photoshop by ilnanny (Load the METALS.grd file).
- floral swirls brushes by szuia.
- Xmasstree-4 by TheOnlyOne76.
Step 1
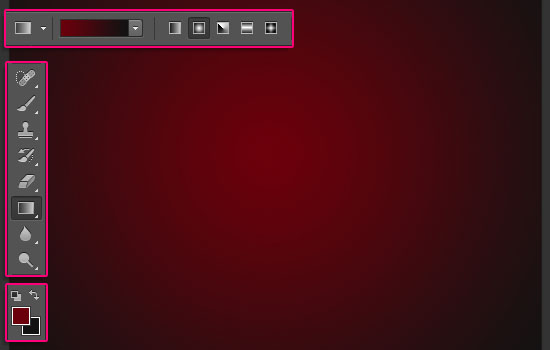
Create a new 1280 x 1024 px document. Set the Foreground color to #6a000c and the Background color to #111111. Pick the Gradient Tool, choose the Foreground to Background, Radial Gradient, in the Options bar. Then click and drag from the center of the document to one of the corners.

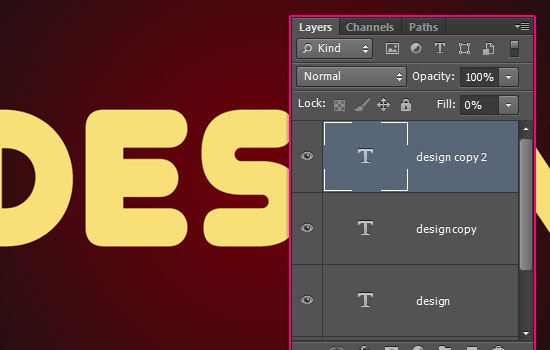
Create the text using the font Junegull. The color is #f9df78 and the font Size is 428 pt.
Duplicate the text layer twice, and change the second copy’s Fill value to 0.

Step 2
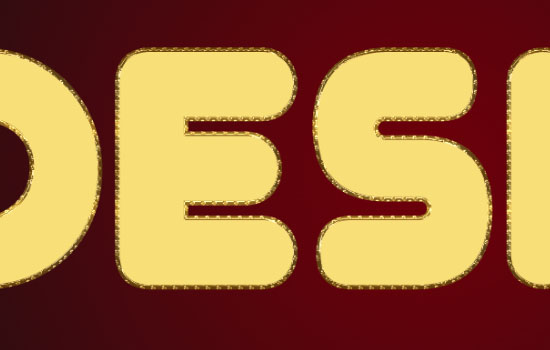
Double click the original text layer to apply the following Layer Style:
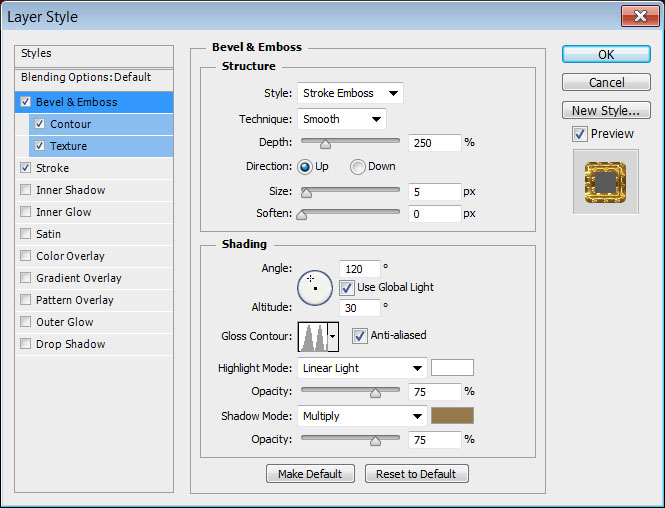
– Bevel and Emboss
- Style : Stroke Emboss
- Depth : 250
- Gloss Contour : Ring – Double
- Check the Anti-aliased box
- Highlight Mode : Linear Light
- Shadow Mode – Color :
#96794b
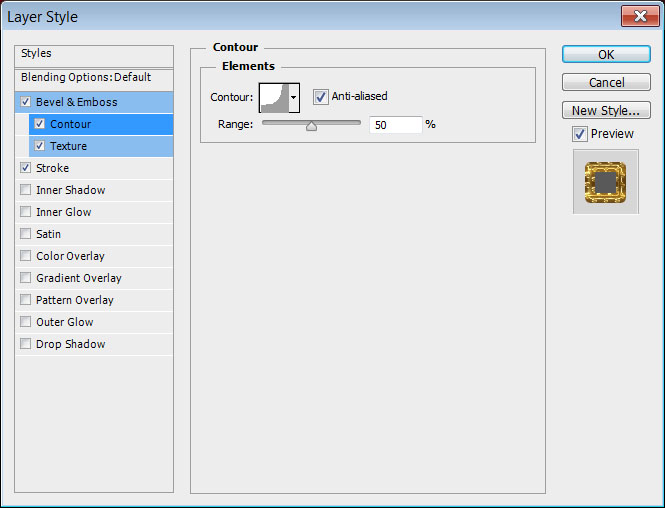
– Contour
- Contour : Cove – Deep
- Check the Anti-aliased box
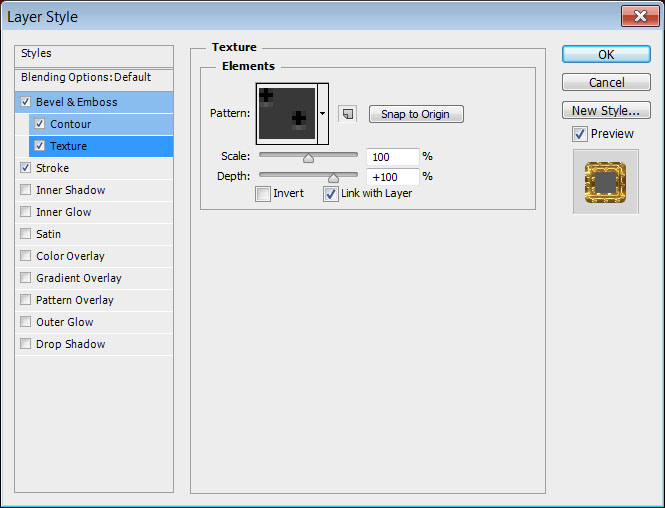
– Texture
- Pattern : Carbon fibre
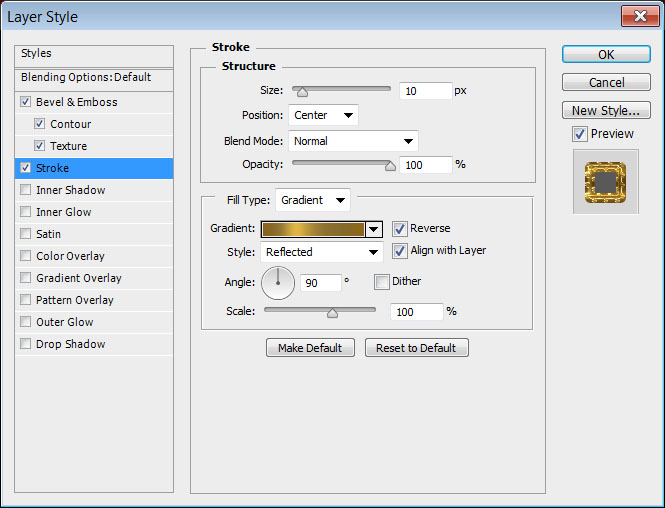
– Stroke
- Size : 10
- Position : Center
- Fill Type : Gradient – “Gold 24k – 20L”
- Style : Reflected
- Angle : 90
- Check the Reverse box
This will create the outer stroke of the text.

Step 3
Double click the first copy text layer to apply the following Layer Style:
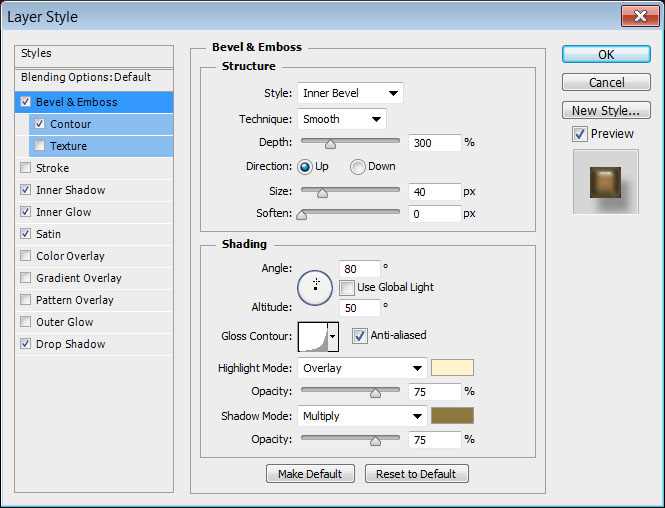
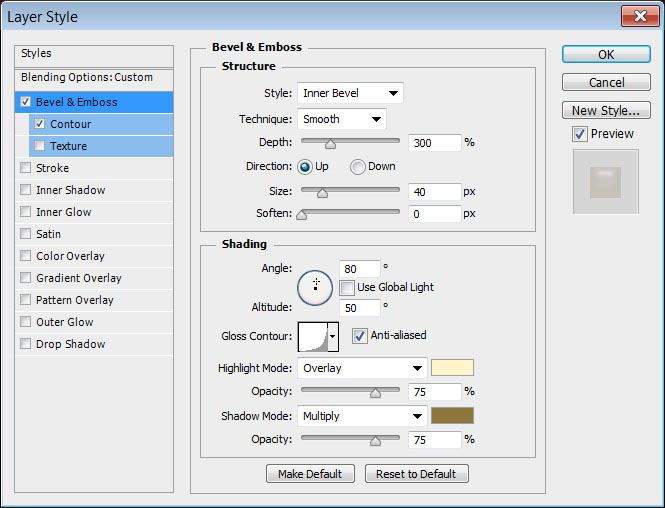
– Bevel and Emboss
- Depth : 300
- Size : 40
- Uncheck the Use Global Light box
- Angle : 80
- Altitude : 50
- Gloss Contour : Log
- Check the Anti-aliased box
- Highlight Mode : Overlay
- Color :
#fff5cc - Shadow Mode – Color :
#8c773d
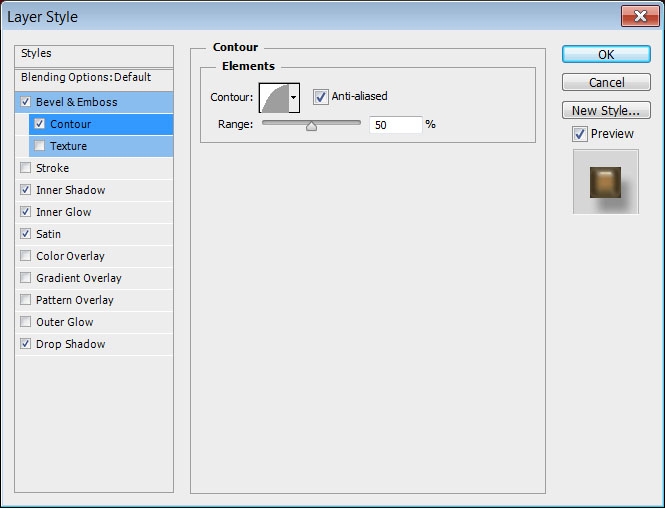
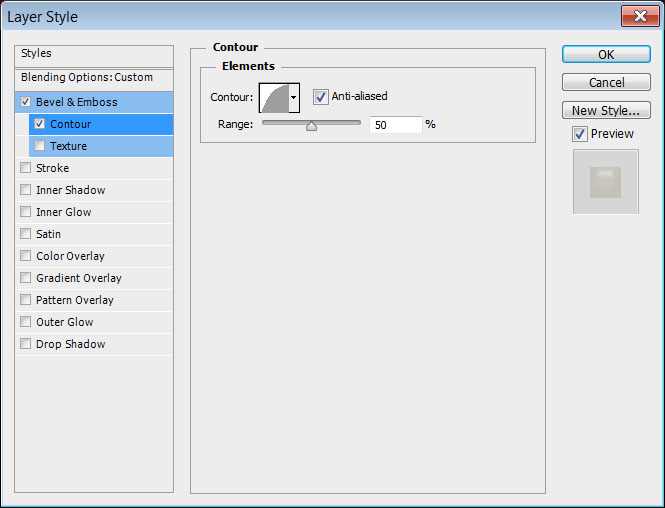
– Contour
- Contour : Half Round
- Check the Anti-aliased box.
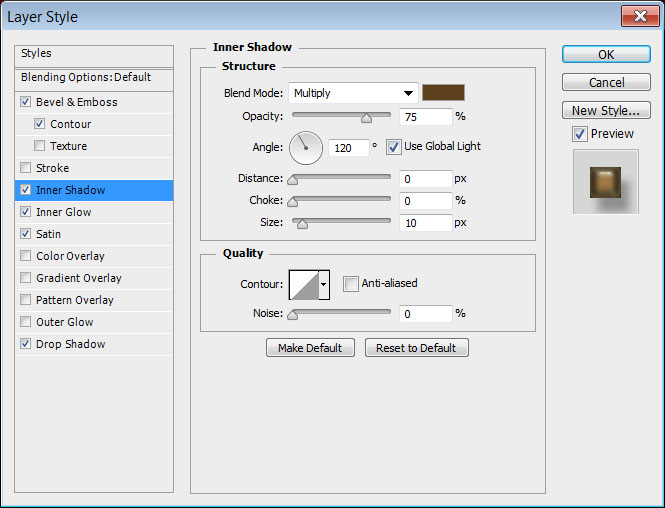
– Inner Shadow
- Color :
#5c401b - Distance : 0
- Size : 10
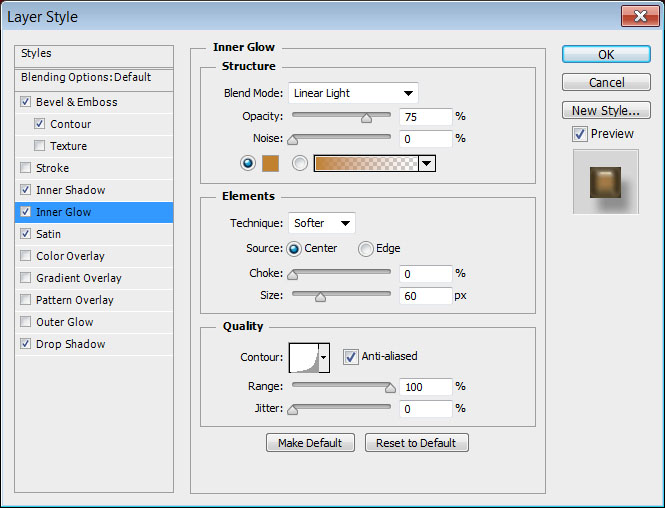
– Inner Glow
- Blend Mode : Linear Light
- Color :
#c1812e - Source : Center
- Size : 60
- Contour : Log
- Check the Anti-aliased box
- Range : 100
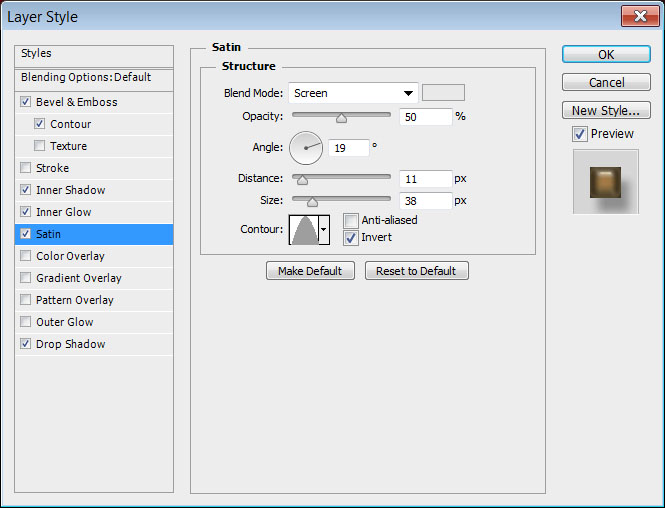
– Satin
- Blend Mode : Screen
- Color :
#e9e9e9 - Size : 38
- Contour : Cone
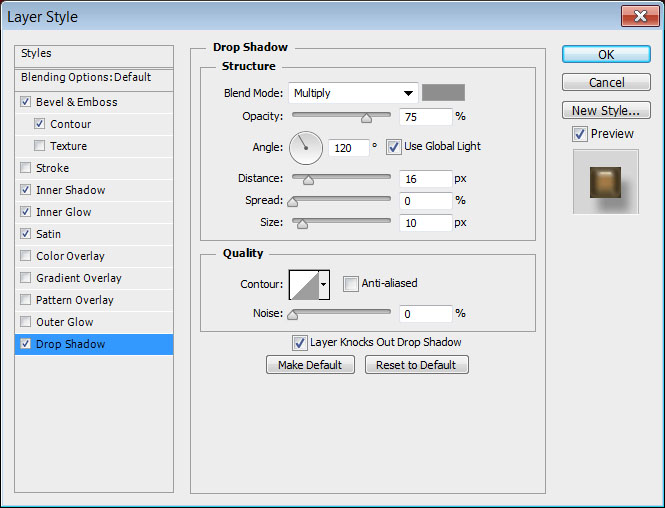
– Drop Shadow
- Color :
#8e8e8e - Distance : 16
- Size : 10
This will create the glossy metallic layer of the effect.


Step 4
Double click the second copy text layer to apply the following Layer Style:
– Bevel and Emboss
- Depth : 300
- Size : 40
- Uncheck the Use Global Light box
- Angle : 80
- Altitude : 50
- Gloss Contour : Log
- Check the Anti-aliased box
- Highlight Mode : Overlay
- Color :
#fff5cc - Shadow Mode – Color :
#8c773d
– Contour
- Contour : Half Round
- Check the Anti-aliased box.
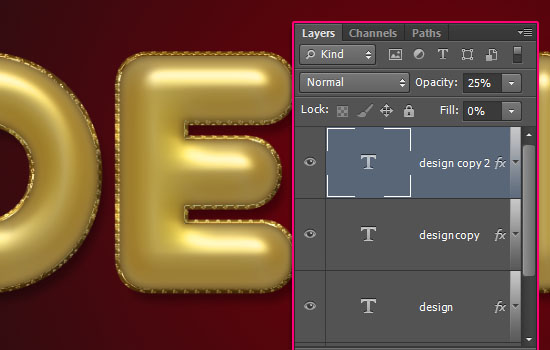
Change the second copy layer’s Opacity to 25%. This will add a subtle glossy layer that will intensify the highlights and shadows a little bit more.

Step 5
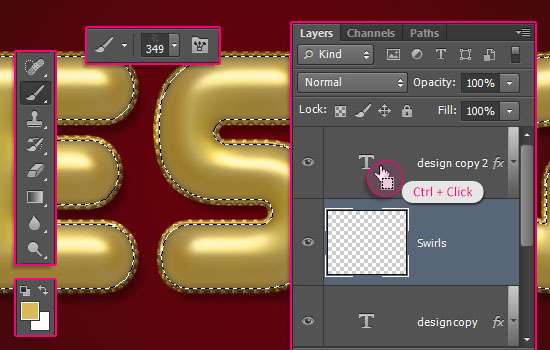
Ctrl/Cmd + click any text layer’s thumbnail to create a selection, create a new layer right below the second copy text layer and call it Swirls, set the Foreground color to #dbb858, pick the Brush Tool, and choose the 6a brush tip from the floral swirls brushes pack.

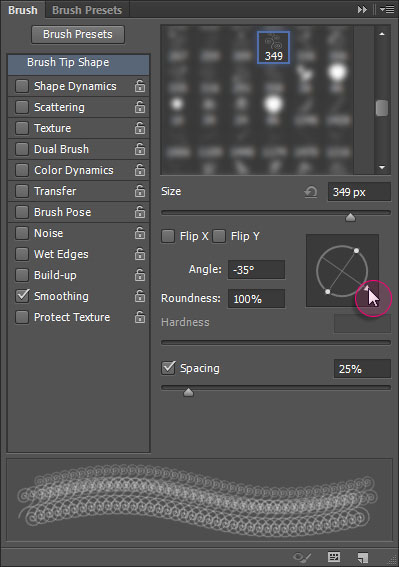
You can open the Brush panel (Window > Brush), and change the tip’s Angle while you’re using the brush next to create some variation.

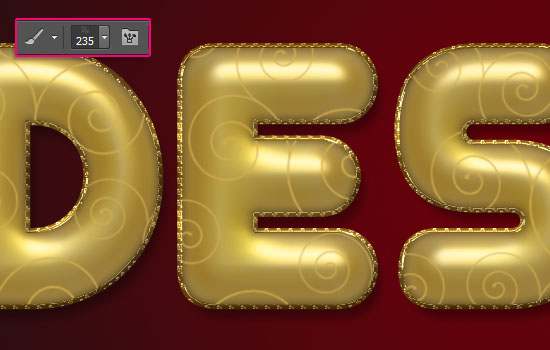
You can also change the tip’s Size as you like, then, start clicking to fill the selected area with the swirly decorations. Keep in mind that you can use the Eraser Tool to remove any unwanted parts, then refill them again, as well as using different brush tips from the pack.
Once you’re done, go to Select > Deselect to get rid of the selection.

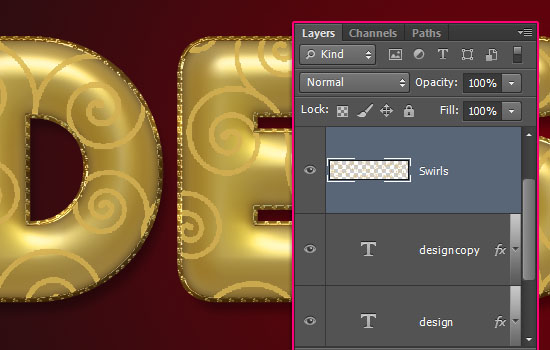
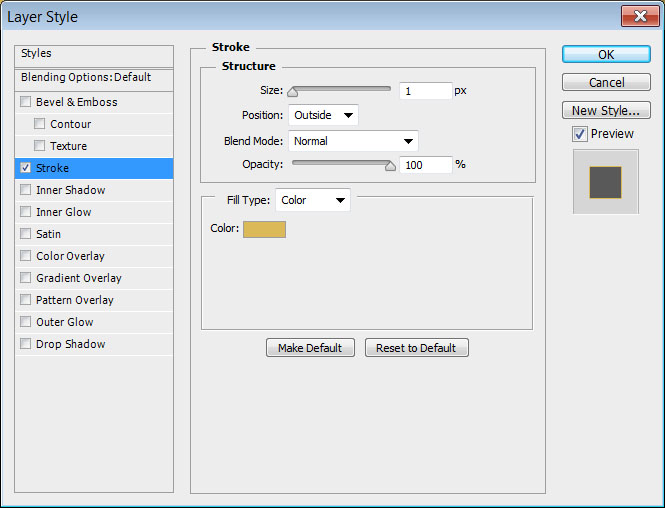
Double click the Swirls layer to apply a Stroke effect by changing the Size to 1 and the color to #dbb858.
This will thicken the swirls, and create some jagged edges, which will be great for creating the glitter-like appearance next.
To be able to style the stroke, we must rasterize it with the layer’s content
To do so, go to Layer > Rasterize > Layer Style if you are using CS6+ versions, or, Layer > Group (to put the Swirls layer in a group), then Layer > Merge Group to resterize the layer. Rename it to Swirls once again.

Step 6
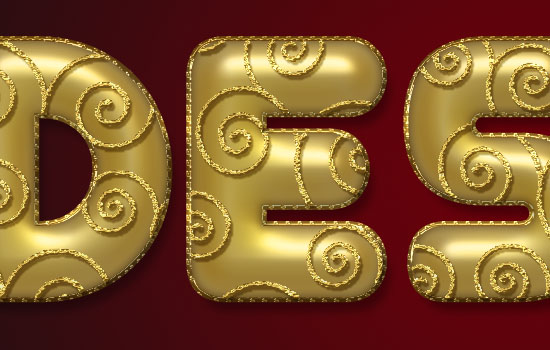
Double click the Swirls layer to apply the following Layer Style:
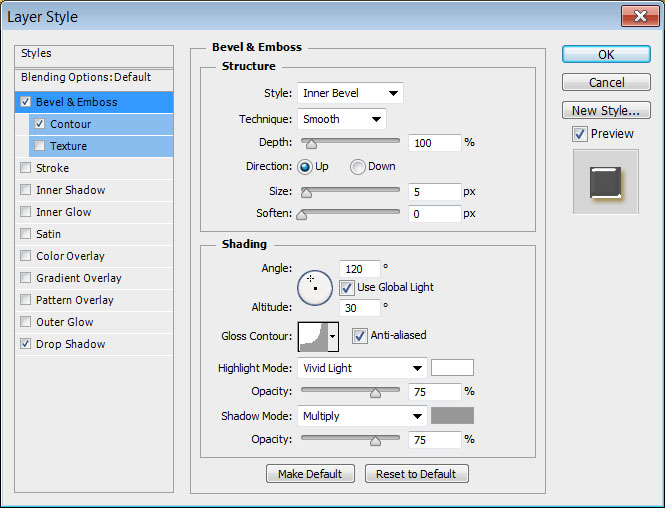
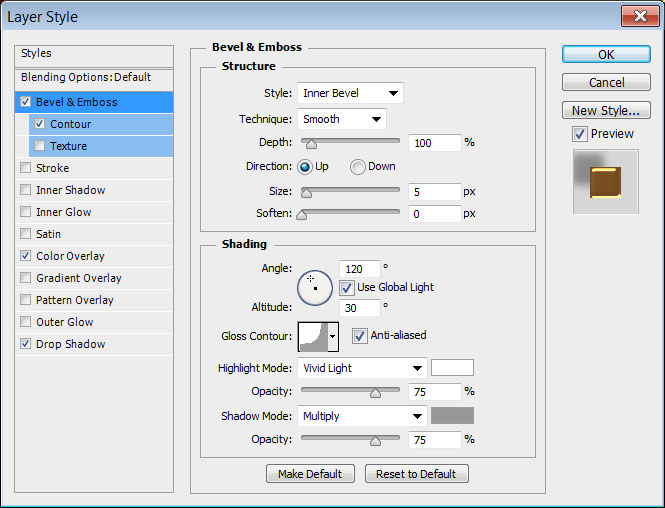
– Bevel and Emboss
- Gloss Contour : Ring – Double
- Check the Anti-aliased box
- Highlight Mode : Vivid Light
- Shadow Mode – Color :
#5d4700
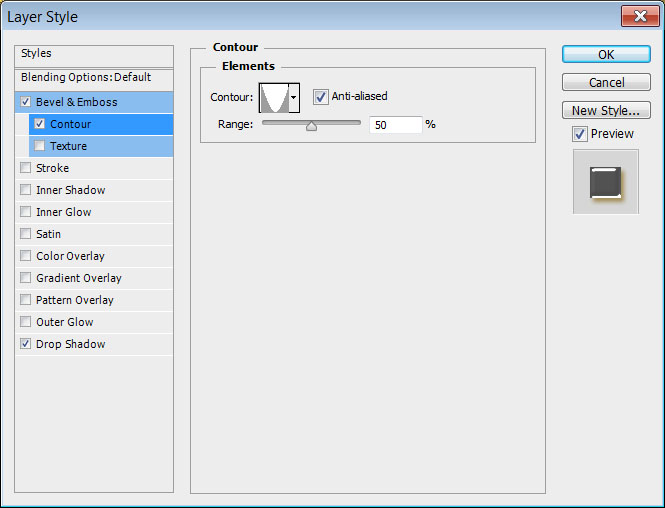
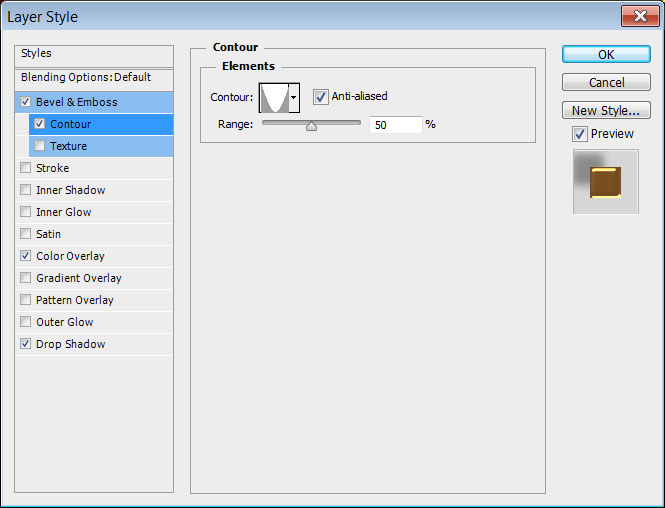
– Contour
- Check the Anti-aliased box.
- Range : 80%
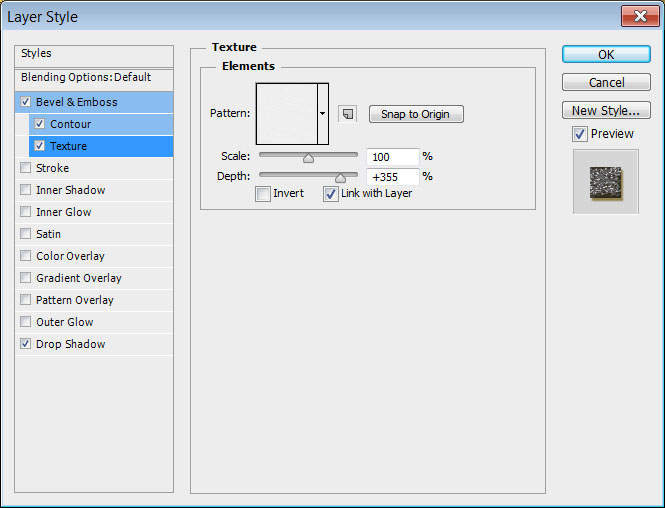
– Texture
- Pattern : Leather 1
- Depth : 355%
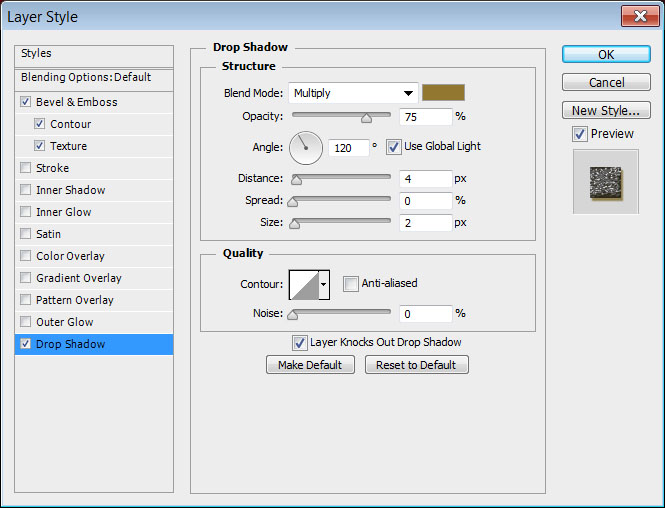
– Drop Shadow
- Color :
#91772f - Distance : 4
- Size : 2
This will style the glittering swirls.

Step 7
Create a new layer on top of the Swirls layer and call it Pearls.
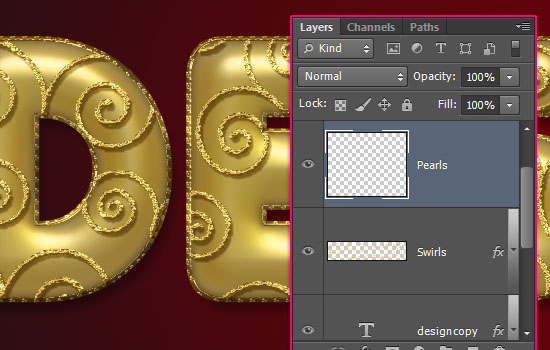

Double click the Pearls layer to apply the following Layer Style:
– Bevel and Emboss
- Gloss Contour : Cove – Deep
- Check the Anti-aliased box
- Highlight Mode : Vivid Light
- Shadow Mode – Color : #979797
– Contour
- Contour : Cove – Inverted
- Check the Anti-aliased box.
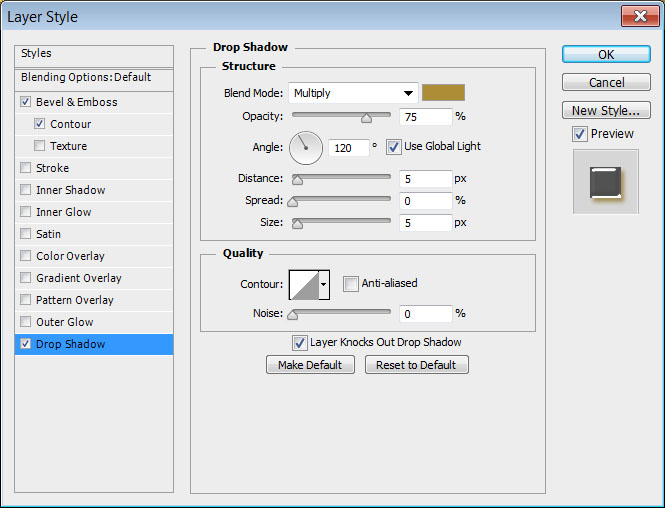
– Drop Shadow
- Color :
#ae8d37
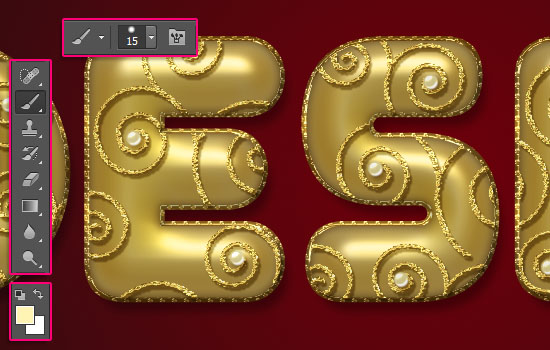
Pick the Brush Tool, choose a 15 px hard round brush tip, set the Foreground color to #fff4b4, and start dotting some pearls inside some of the swirls you created.

Note: In the next step, we are going to rasterize and merge the layers, which means they won’t be editable anymore, and you will not be able to access or modify their Layer styles either.
So if you want to keep a copy of the original layers, save a copy of the document you’re working on before you continue with the tutorial.
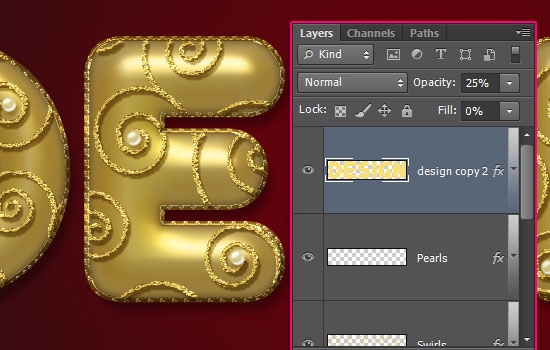
For each text layer you have, select it then go to Layer > Rasterize > Type.

Step 8
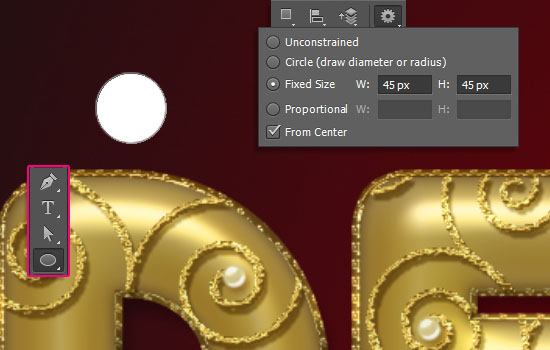
Pick the Ellipse Tool, choose the Shape option in the Options bar, and click the Geometry Options icon. Choose Fixed Size, and type in 45 for both the W and H values (Width and Height), then check the From Center box.
Click and drag slightly to create the first circle.

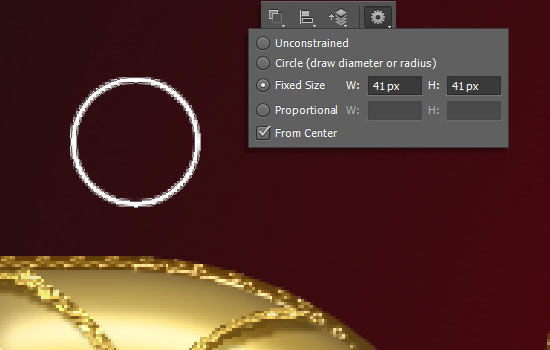
Change the Fixed Size values to 41, choose the Subtract Front Shape option, then click and drag to place the smaller circle inside the bigger one and release to subtract it.
Make sure to place the resulting shape layer right below the original text layer.

Double click the ring shape layer to apply the following Layer Style:
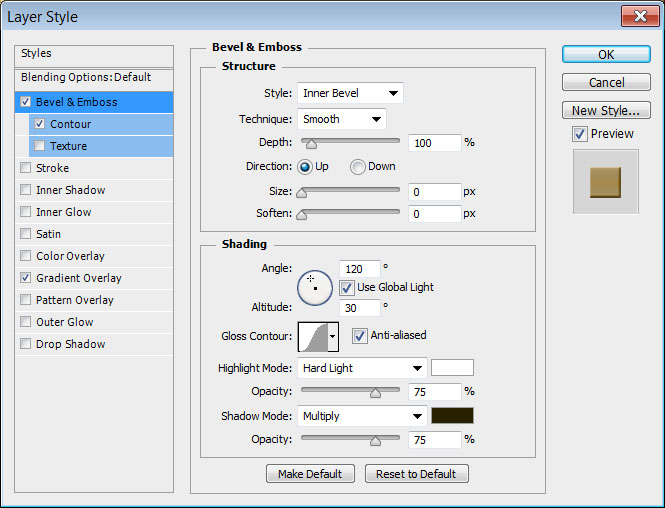
– Bevel and Emboss
- Gloss Contour : Gaussian
- Check the Anti-aliased box
- Highlight Mode : Hard Light
- Shadow Mode – Color :
#272100
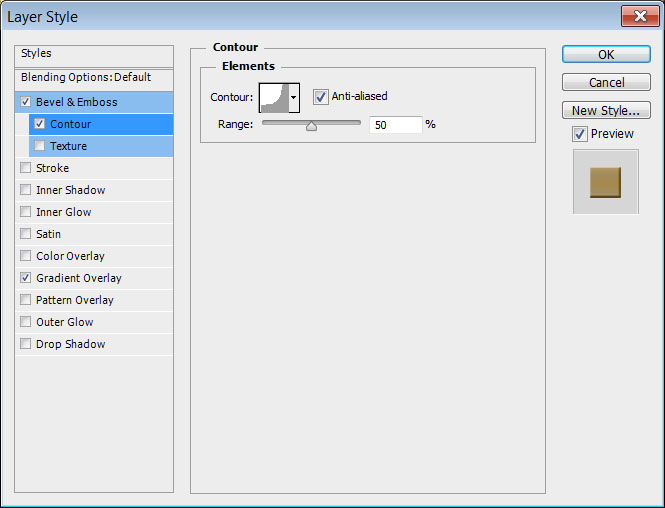
– Contour
- Contour : Cove – Deep
- Check the Anti-aliased box.
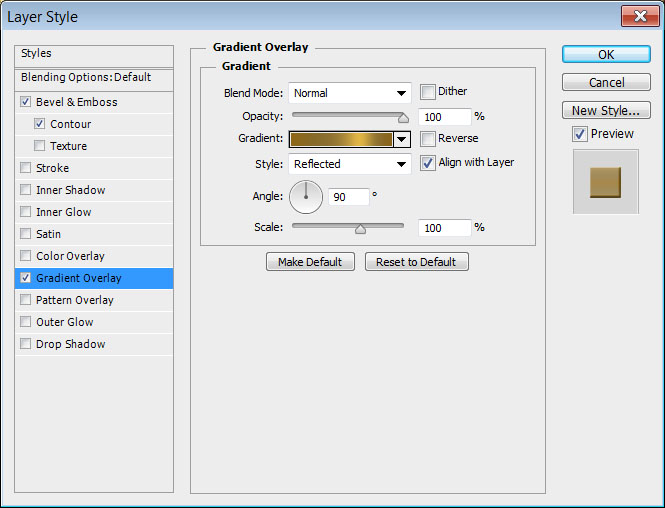
– Gradient Overlay
- Gradient : Gold 24k – 20L
- Style : Reflected
This will style the ring.


Duplicate the ring shape layer then move the copies to place them behind each letter.
(With the Move Tool selected, press and hold the Shift key, then press the Right Arrow Key a couple of times to move the rings. this will make sure to keep all the copies at the same horizontal level.)


Step 9
Select the rasterized original text layer, then go to Layer > Rasterize > Layer Style (or group it and merge the group if you’re using < CS6 versions). Then, Ctrl/Cmd + click its thumbnail to create a selection.
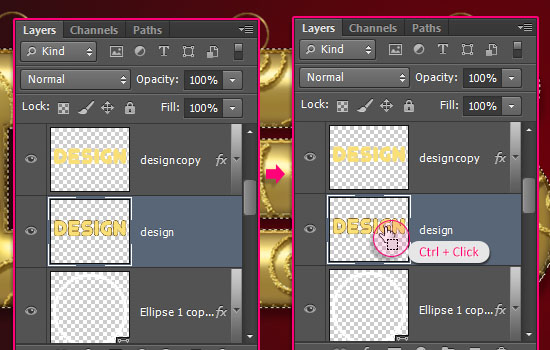

Select all the layers except for the ring and Background layers, then go to Layer > Merge Layers. You’ll notice that the Drop Shadow of the first copy text layer looks bright. That’s because when the layers are merged, the Blend Modes are ignored (for the transparent areas).
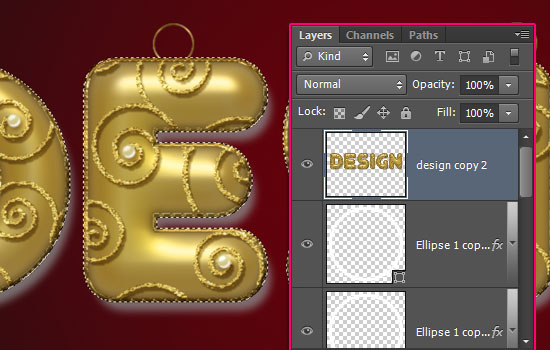

Since we don’t need the shadow outside the selection anyway, we’re going to remove it. So press the Ctrl/Cmd + J keys to duplicate the selected part in a new layer, and delete the layer that has the shadow.
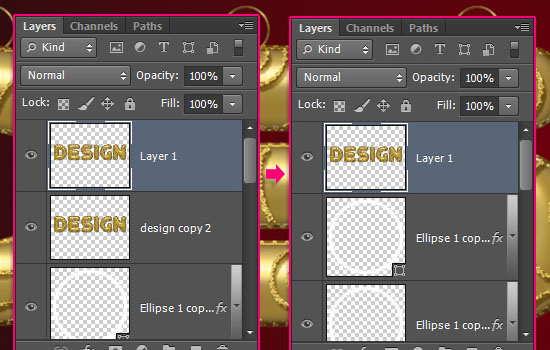

Now select all the layers except for the Background layer, and merge them once again (Layer > Merge Layers).
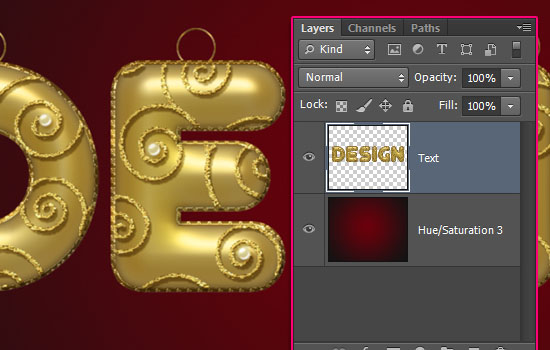

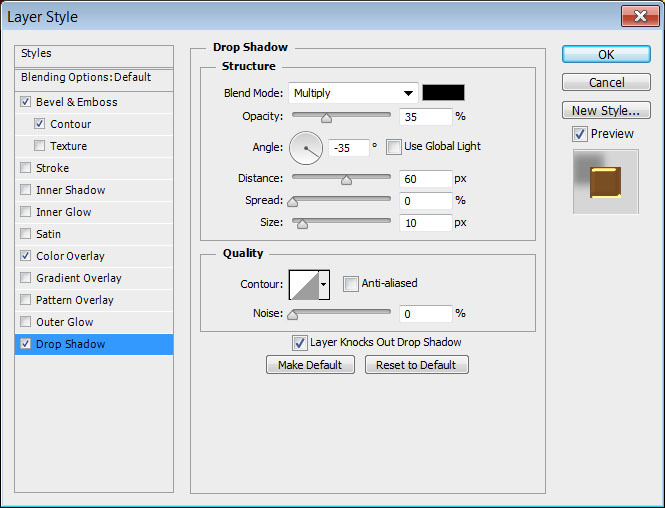
Double click the merged layer to apply a Drop Shadow effect:
- Opacity : 35%
- Uncheck the Use Global Light box
- Angle : -35
- Distance : 60
- Size : 10
This is what you should get:


Step 10
Pick the Rectangular Marquee Tool, and select the first letter. Then duplicate it in a new layer by pressing Ctrl/Cmd + J. Select the main text layer again, and repeat the process for all the letters you have.
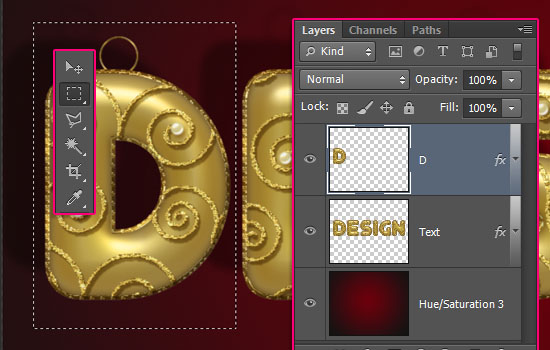

When you’re done, make the main text layer invisible by clicking the eye icon next to it.
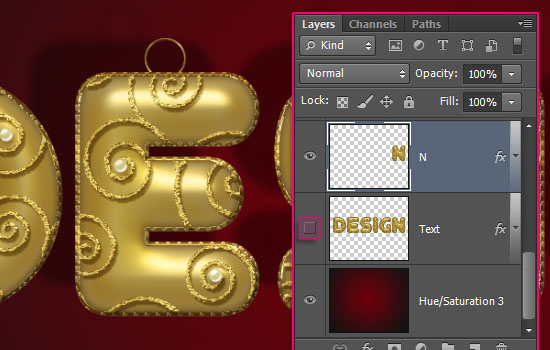

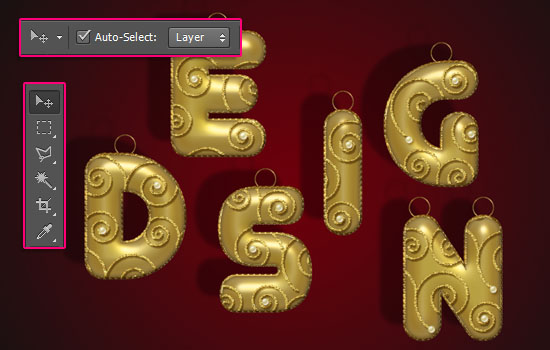
Pick the Move Tool, check the Auto-Select: box in the Options bar, and choose Layer. This will enable you to click and drag the letters and move them around as you like in the scene.
Don’t forget to un-check the Auto-Select: box when you’re done with the tutorial ; )

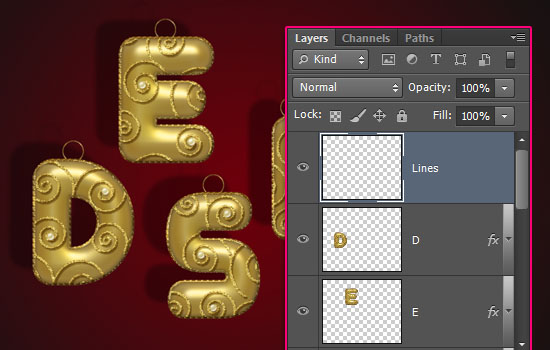
Create a new layer on top of all layers and call it Lines.

Step 11
Double click the Lines layer to apply the following Layer Style:
– Bevel and Emboss
- Gloss Contour : Cove – Deep
- Check the Anti-aliased box
- Highlight Mode : Vivid Light
- Shadow Mode – Color :
#979797
– Contour
- Contour : Cove – Inverted
- Check the Anti-aliased box.
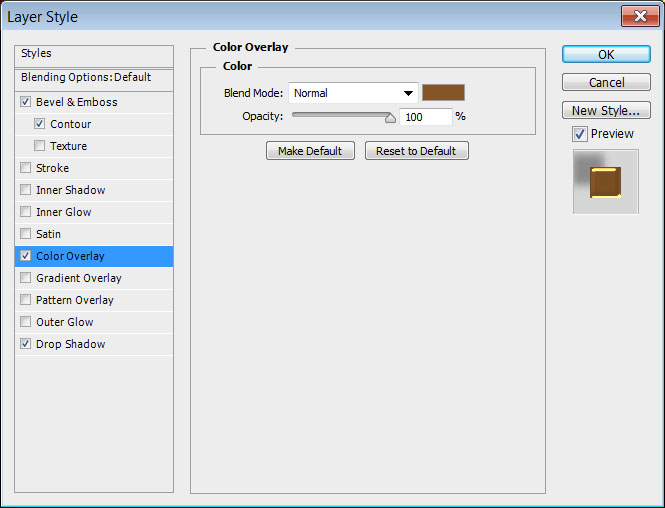
– Color Overlay
- Color :
#855526
This is the effect you can come back to to change the color of the strings if you like.
– Drop Shadow
- Opacity : 35%
- Uncheck the Use Global Light box
- Angle : -35
- Distance : 60
- Size : 10
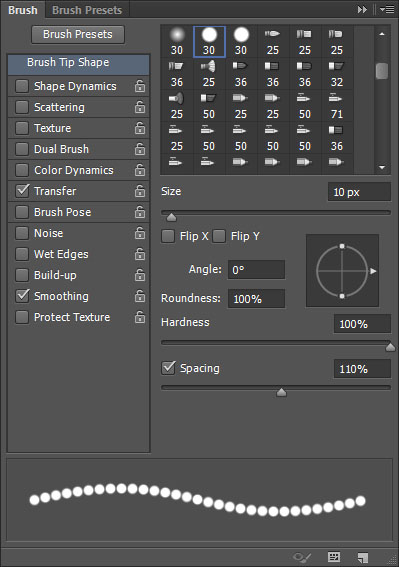
Pick the Brush Tool, choose a hard round 10 px brush, and in the Brush panel, set the Spacing value to 110%.

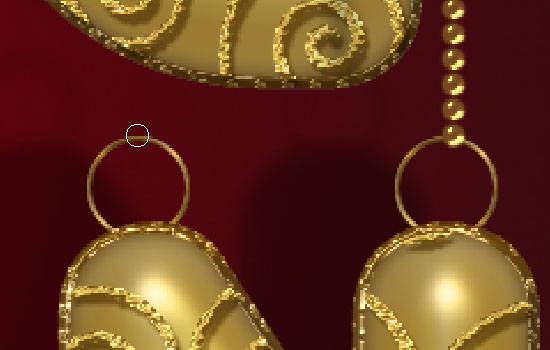
For each ring you have, click placing the brush tip closer to its top, then press and hold the Shift key, and drag the mouse upwards until you reach the edge of the document.
Make sure to release the Shift key before you click to create the next string, then press it again to drag upwards (otherwise, all the lines will be connected!).

You can create each letter’s strings in a separate layer if you like, as this will make moving the letters easier after creating the lines (in case you want to move them).


Step 12
That’s it for the text. This step is optional, and it explains how to add a nice bokeh texture to the Background.
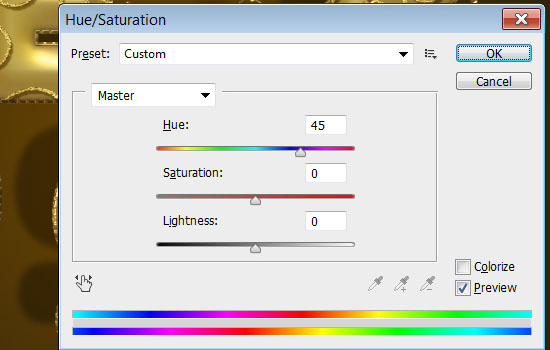
Select the Background layer, then go to Image > Adjustments > Hue/Saturation, and change the Hue value to 45.

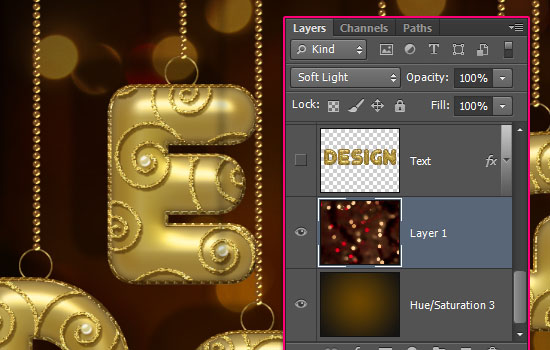
Place the Xmasstree-4 bokeh texture on top of the Background layer, change its layer’s Blend Mode to Multiply, then go to Edit > Transform > Rotate 90° CW. Move the texture around as you like.

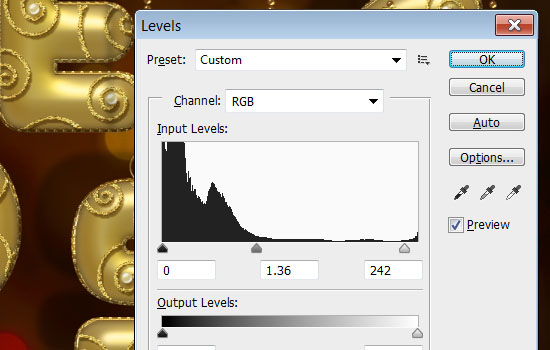
Finally, go to Image > Adjustments > Levels, change the Highlights value to 242, and the Gamma value to 1.36 to brighten up the texture a bit.

And you’re done!
Hope you enjoyed the tutorial and found the tips and tricks used helpful 🙂
Did you enjoy this post? Please consider donating to help us cover our server costs.









The link to Leather 1 Pattern links us to another texture (DeviantArt texture in any case, but not the one specified at the beginning of the tutorial). Could you offer us the correct link, or an alternative link? Thank you very much!!!!!!!!!!!! ;=)
The following link seems to be correct:
http://subtlepatterns.com/leather-1/
Sorry about that ❗ The link you added is correct – updated the one in the Resources section as well.
Thank you very much for pointing that out 🙂
This tut is very, very, VERYYYYYYYY nice (in any case!!). :=)
Thank you so very much Luca, really glad you like it 😀
Hi Rose – Another great tut for the collection – thanks for sharing. At the beginning after duplicating the text twice – the picture shows the Opacity set to 0% but the description says set the fill to 0%. I soon found out which was correct 🙂
The correct value to change is the Fill – Later in the tutorial the Opacity is set to 25% and the Fill to 0. Sorry about that as well 😉
Thank you for the comment 😀
Great idea for a text effect and the result, as always, is outstanding!
I always appreciate your amazing comments.
Thanks you very much!
beautiful effect Thank you sooo muts, gerda
Very glad you like it 🙂
Many thanks for the comment.
Merci !
http://nsm08.casimages.com/img/2013/12/20//mini_13122011255913680411833256.jpg
De rien!
Very nice outcome 🙂
Thanks for sharing it and for the comment.
Hi Rose,
Awesome tutorial, outcome. Followed it the last few days, was fun doing! I especially like the subtle tones you use in the layer effects, for shadows, highlites… Pearls are sweet! All in all very harmonious.
See what I did here: http://fc01.deviantart.net/fs71/i/2013/356/3/3/text_effect_for_xmas_by_redsterfish-d6yvkwc.jpg
Thanks again, guess it was quite some work writing this tutorial.
Jürgen
Amazing outcome!
Really glad that you liked all the details going on 😉
Thank you very much for the great comment 🙂
Ecco i miei auguri per tutti e in modo particolare all’autore di questo favoloso tutorial. Grazie
Nice outcome:) Very glad you liked the tutorial.
Grazie for sharing your work and for the very kind words 🙂
Thank you for this tutorial fully explained and I adapted to the season.
Here is my creation:
http://cartes-mireilled.eklablog.com/bonne-annee-en-or-a105540408
I wish you a happy holiday season.
That’s cool! Loving all the stars on there 😉
Thank you very much for the kind comment and for sharing your work.
Happy Holiday Season to you too 😀
nice tutorial 😀 umm..can u make it video like youtube or something?
Thank you!
We do not create video tutorials for now, but we’re definitely considering that sometime soon 😉
Thanks once again 🙂
Please help me same for the image size is 12 inch x 6 inch, and resolution 600 dpi…..
If you mean that you want to created the effects for these dimensions, then you’ll have to scale all the Layer Styles up so that they work for the values you have. But the problem is that the brushes are not big enough for it 🙁
So you can look up other similar bigger ones, or work with vector swirls instead.
Hope this helps 🙂
where can i get the log contour ?
Please check this link to see how to get it.
Hope this helps.
Thank you soooo much – I had been to this link and read it but obviously not properly – I missed out a step – but now it’s worked perfectly
No problem at all, glad the issue was solved 🙂
Thanks again for the comment 😉