
Futuristic Text Effect
In this tutorial, we are going to create a glowing glossy futuristic looking text effect. Many Layer Styles will be applied to achieve this text effect, along with a nice brush trick to create the feathery fluffy stroke.
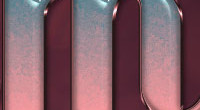
The Final Result

Tutorial Details
- Software Used : Photoshop
- Version : CS5 Extended
- Time : 0:45 – 1:15
Resources
- Arista 2.0 font.
Step 1
Create a new 1024 x 768 px document. Set the Foreground color to #264c55, and the Background color to #322d2d. Create a Radial Gradient by dragging from the center of the document to one of the corners.
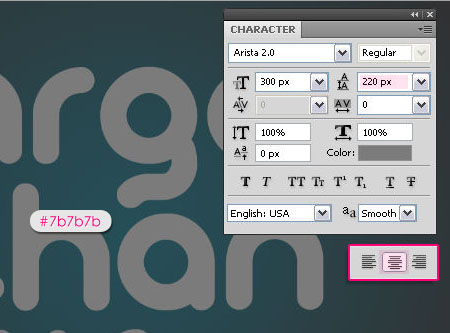
Create the text using the color #7b7b7b. The font used is Arista 2.0, and the Size is 300 px.
If needed, center-align your text, then open the Character panel (Window > Character), and set the Leading value to something around 220 px, so that the vertical space between the words isn’t so big.
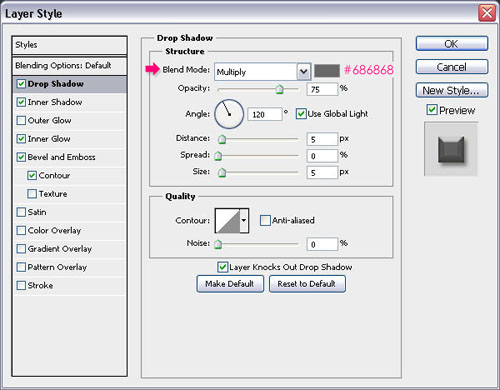
Duplicate the text layer, then double clickthe original one to apply the following Layer Style:
– Drop Shadow
- Color :
#686868
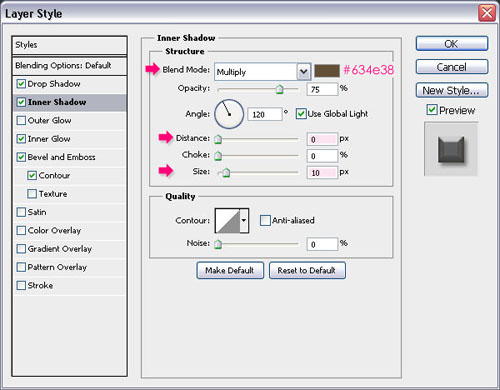
– Inner Shadow
- Color :
#634e38 - Distance : 0
- Size :
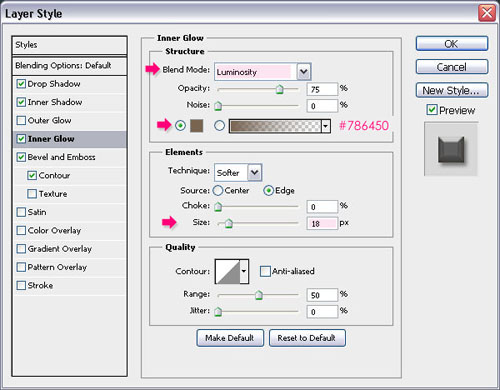
– Inner Glow
- Blend Mode : Luminosity
- Color :
#786450 - Size : 18
– Bevel and Emboss
- Technique : Chisel Hard
- Depth : 250
- Size : 16
- Uncheck the Use Global Light box
- Angle : 90
- Altitude : 30
- Gloss Contour : Shallow Slope Valley
- Check the Anti-aliased box
- Shadow Mode – Color :
#7b7b7b
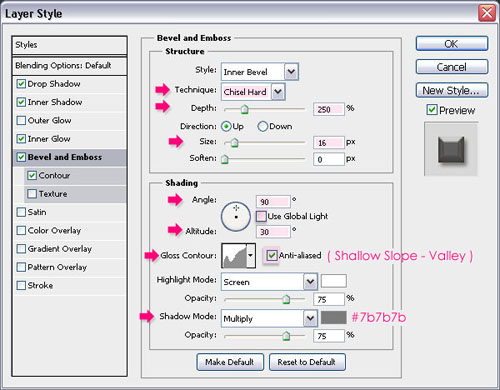
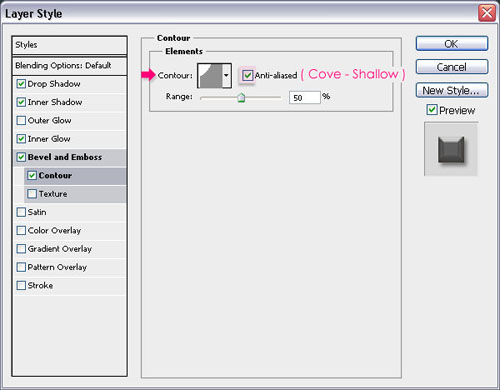
– Contour
- Contour : Cove Shallow
- Check the Anti-aliased box.
Step 2
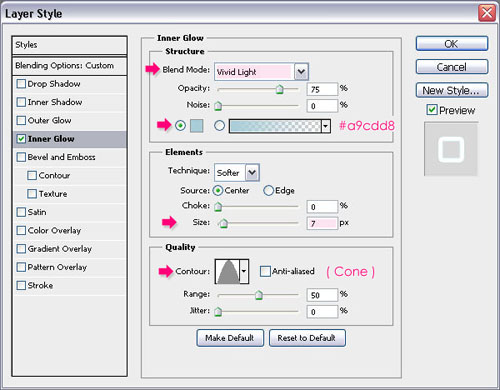
Back to the duplicated text layer, change its Fill value to 0.
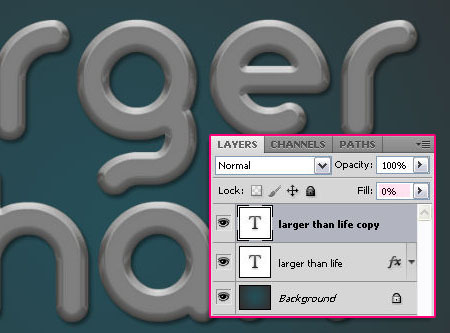
Then double click it to apply an Inner Glow effect:
- Blend Mode : Vivid Light
- Color :
#a9cdd8 - Size : 7
- Contour : Cone
This is what you should get:

Step 3
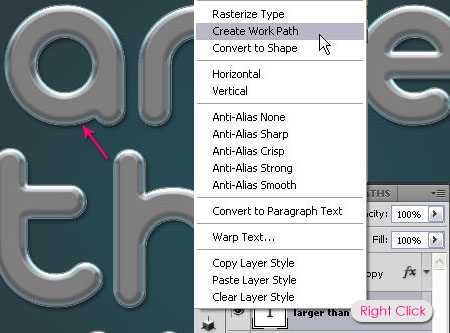
Right click one of the text layers and choose Create Work Path.
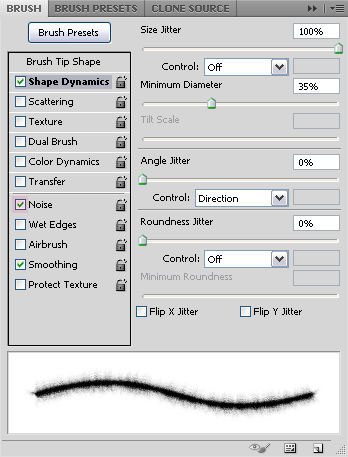
Select the Brush Tool, then, in the Brush panel (Window > Brush), choose the Star 42 pixels brush tip, and change its Settings as below:
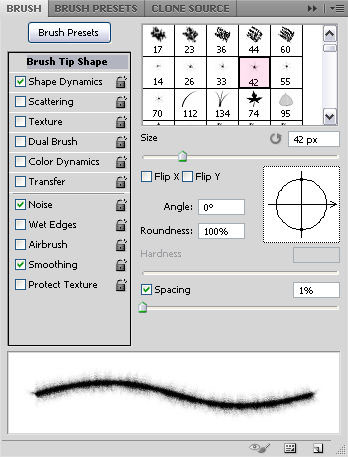
Shape Dynamics
Step 4
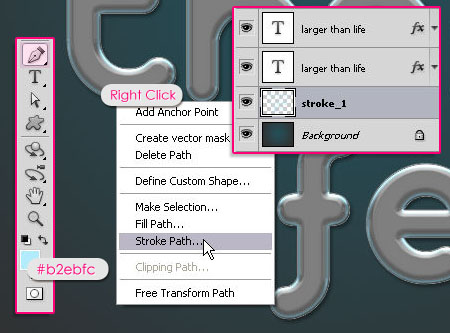
Create a new layer under both text layers and call it stroke_1. Set the Foreground color to #b2ebfc, and pick the Pen Tool. Right click the path you’ve just created and choose Stroke Path.
Choose Brush from the Tool drop down menu, and make sure the Simulate Pressure box is un-checked.
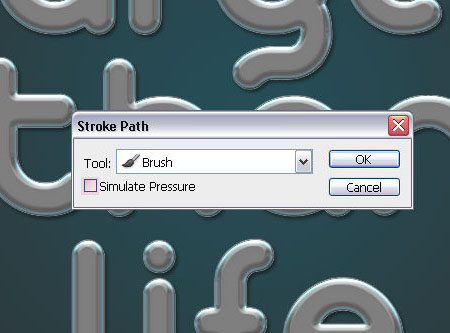
Hit the Enter/Resturn key to get rid of the path. You should get a stroke similar to this.

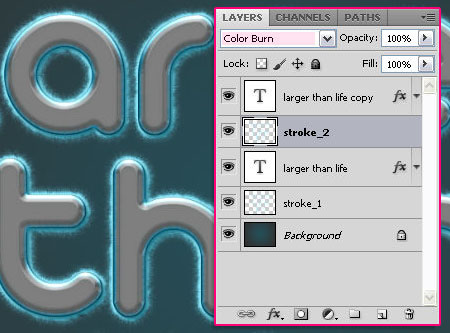
Duplicate the stroke_1 layer, rename the copy to stroke_2, then drag it between the original and copy text layers, then change its Blend Mode to Color Burn.
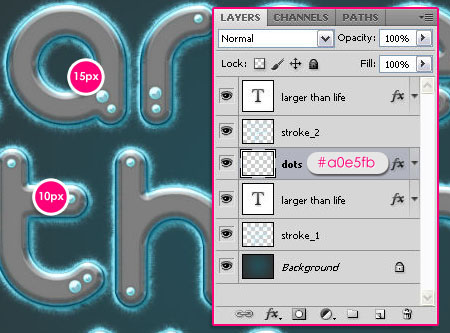
Step 5
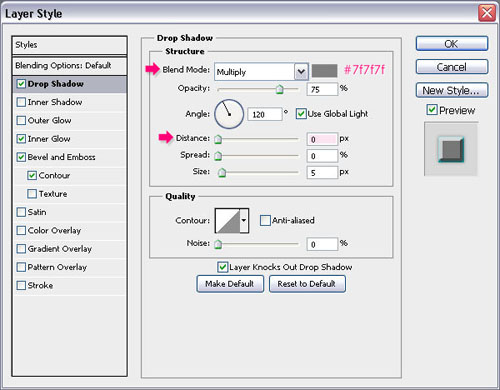
Create a new layer under the stroke_2 layer and call it dots. Double click it to apply the following Layer Style:
– Drop Shadow
- Color :
#7f7f7f - Distance : 0
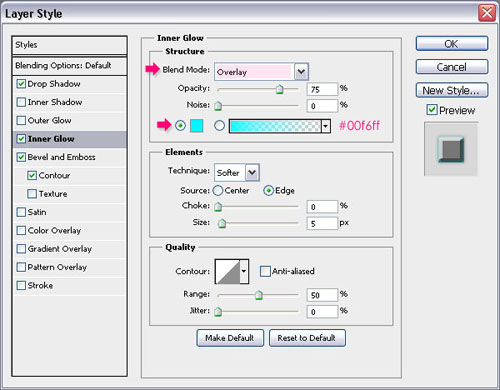
– Inner Glow
- Blend Mode : Overlay
- Color :
#00f6ff
– Bevel and Emboss
- Gloss Contour : Notched Slope Rounded
- Shadow Mode – Color :
#767676
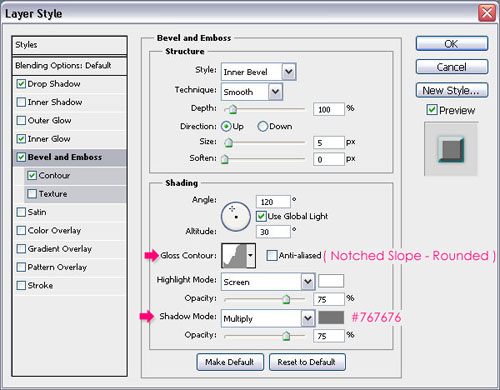
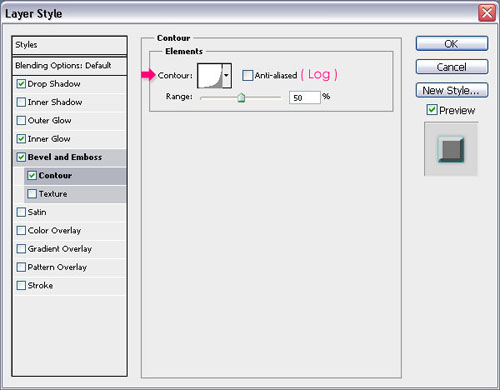
– Contour
- Contour : Log
Set the Foreground color to #a0e5fb, then pick a hard round brush and start adding dots (on the dots layer). The sizes of the brush used here are 10 and 15 px.
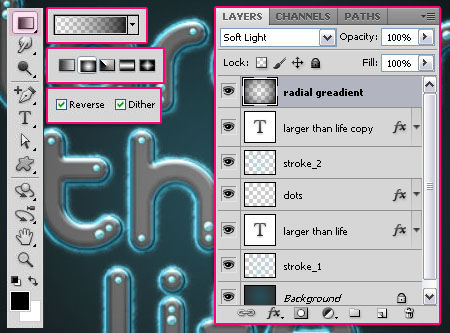
Step 6
Finally, create a new layer on top of all layers, call it radial gradient, and change its Blend Mode to Soft Light. Use the Gradiant Tool to crate a Radial Gradient like you did in Step 1, except this time the gradient should be set to Foreground to Transparent using a Black Foreground color. Don’t forget to check the Reverse box to get the right gradient.
And we’re done!
Did you enjoy this post? Please consider donating to help us cover our server costs.


What a nice creation. Especially the fine hairs around the letters with the colour, very good. Thanks!
Thanks a lot!
very awesome. i love seeing the changes step by step. thank you.
You’re welcome. Thanks for the comment!
Muito show, valeu ter compartilhado, postarei em meu blog o que fiz aqui informando seu site, show.
Paz.
Thanks for the support!