
Glossy Encapsulated Text Effect
This tutorial explains a simple way to create a glossy encapsulated text effect, using Layer Styles to create the glossy plastic like effect, and simple Filters to create the texture.
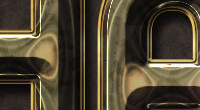
The Final Result

Tutorial Details
- Software Used : Photoshop
- Version : CS5 Extended
- Time : 0:30 – 0:45
Resources
- Chumbly BRK font.
- Texture 24 by WanderingSoul-Stox.
- Sparklies Photoshop Brushes by redheadstock.
Step 1
Create a new 1000 x 1500 px document. Set the Foreground color to #e57100, and the Background color to #8a0205, then, create a Radial Gradient from the center of the document to one of the corners.
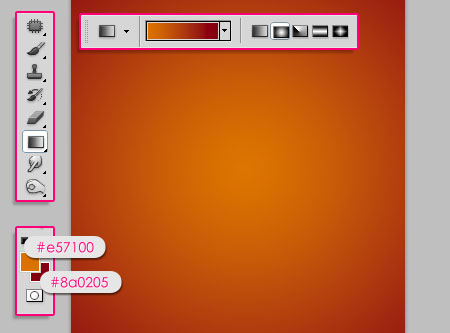
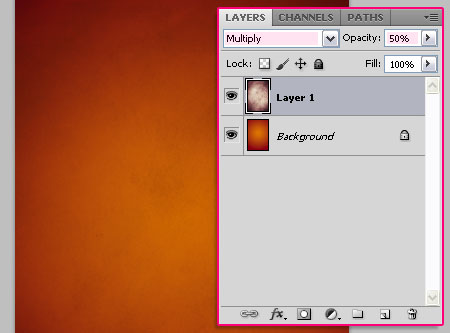
Open the Texture 24 image, rotate it if necessary (Image > Image Rotation > 90° CW), then place it on top of the Gradient Background. Change its Blend Mode to Multiply, and its Opacity to 50%.
Step 2
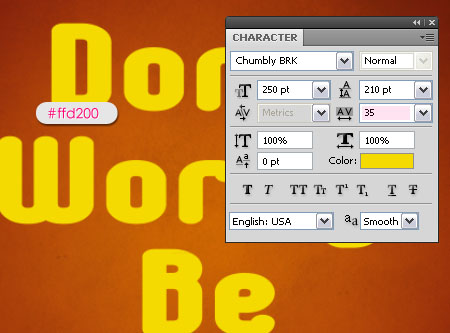
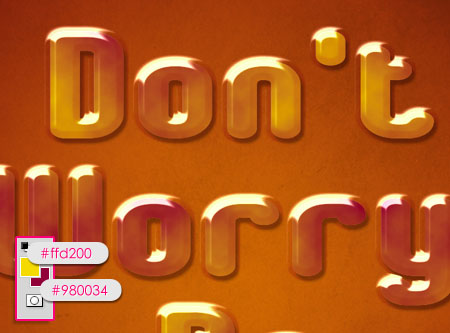
Create the text using the color #ffd200. The font used is Chumbly BRK , and the Size is 250 pt. You might as well need to modify the Leading and Tracking values in the Character panel (Window > Character).
Duplicate the text layer, and change the copy’s Fill value to 0.
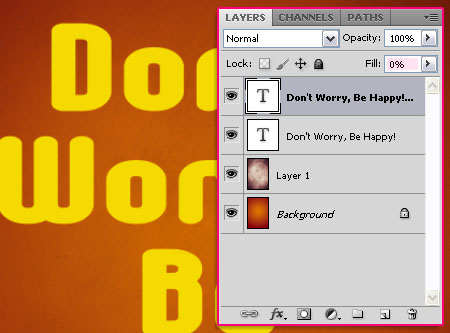
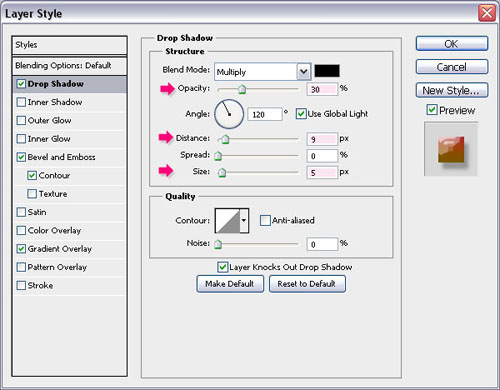
Double click the original text layer to apply the following Layer Style:
– Drop Shadow
- Opacity : 30%
- Distance : 9
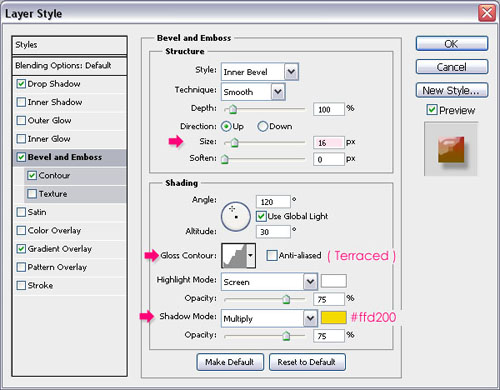
– Bevel and Emboss
- Size : 16
- Gloss Contour : Terraced
- Shadow Mode – Color :
#ffd200
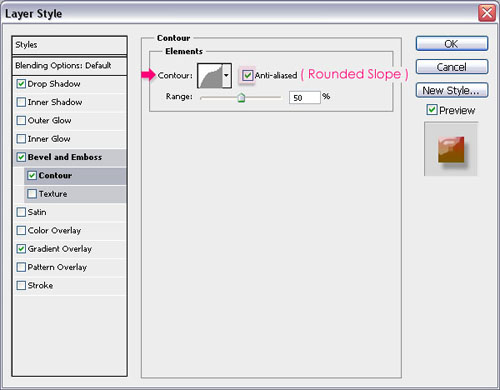
– Contour
- Contour : Rounded Slope
- Check the Anti-aliased box.
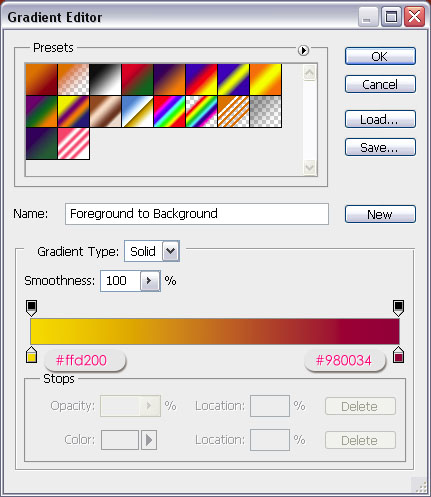
– Gradient Overlay
- Blend Mode : Color
- Click the Gradient box to create the gradient
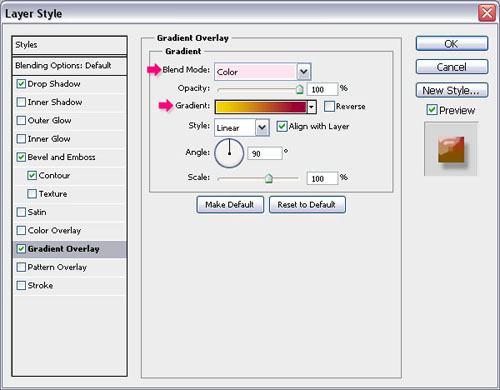
The Gradient has only two colors, #ffd200 and #980034.
Click OK. The text should look a bit glossy and shiny.

Step 3
Now, double click the copy text layer and apply the following Layer Style:
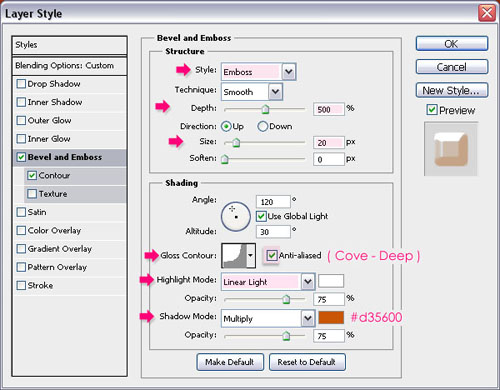
– Bevel and Emboss
- Style : Emboss
- Depth : 500
- Size : 20
- Gloss Contour : Cove – Deep
- Check the Anti-aliased box
- Highlight Mode : Linear Light
- Shadow Mode – Color :
#d35600
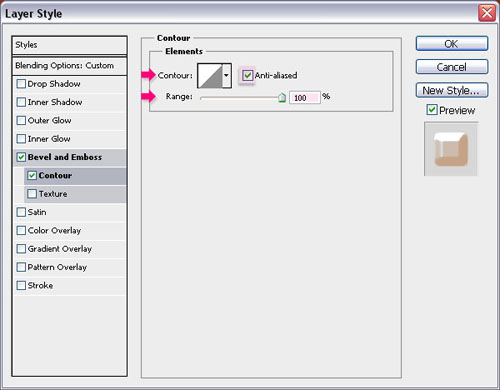
– Contour
- Check the Anti-aliased box.
- Range : 100%
The text should look super glossy and bright!

Step 4
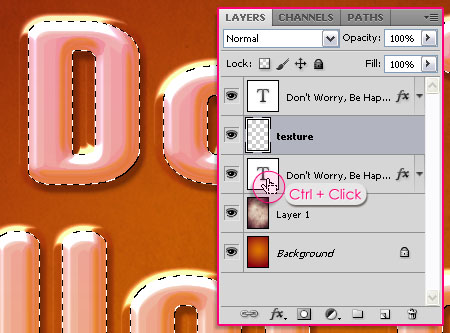
Create a new layer between the two text layers and call it texture. Ctrl/Cmd + click any of the text layers’ thumbnails to create a selection.
Set the Foreground color to #ffd200 and the Background color to #980034. Go to Filter > Render > Clouds. Press Ctrl/Cmd + D to get rid of the selection.
Go to Filter > Texture > Patchwork and type in the values below:
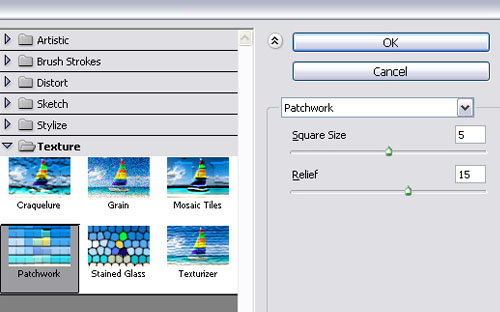
You should get a result similar to this:

Change the texture layer’s Blend Mode to Overlay.

Step 5
Create a new layer on top of all layers, call it Round Brush, and change its Blend Mode to Overlay. Set the Foreground color to #f4edd3 and pick the Brush Tool.
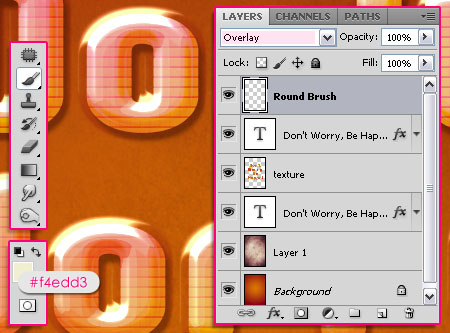
Choose a soft round brush, and set its Size to something around 40 px. Start adding soft dots where there are bright or shiny areas. Don’t add too many dots, and try to spread them all over the text.

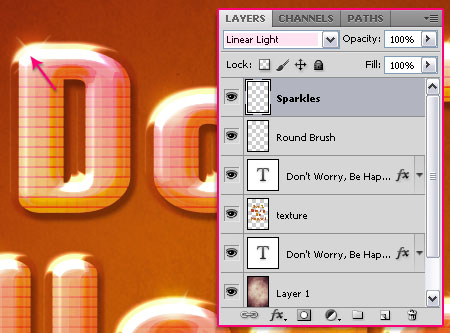
Create another layer on top of all layers, call it Sparkles, and change its Blend Mode to Linear Light. Choose any of the sparkles you like from the Sparklies Photoshop Brushes pack, resize it and/or rotate it, and start adding sparkles over the brush dots you’ve created. You can change the Size and Angle values in the Brush panel (Window > Brush) while you’re adding the sparkles, so that they don’t all look the same.
That’s it!
Did you enjoy this post? Please consider donating to help us cover our server costs.


thank you for such a nice tutorial 🙂
here’s my final result
http://i54.tinypic.com/xp6mvq.jpg
Great! I see you’ve got lots of sparkles there 😉
Amazing outcome though, I really like it.
Thanks for posting links to your outcome, and for the comments as well 🙂
very nice ! thank for this tutorial !
You’re welcome 🙂
Thanks for the comment.
Nice tut Thanks
You’re welcome 🙂
Thanks for the comment.
Wooow great
Thanks my friend, you are my bro
Glad you liked it.
Thanks for the comment.
(I’m a girl though :))
Awesome Glossy Effects.
Thanks a lot 🙂
Even a beginner Photoshopper such as myself could follow along. Thank you young lady!
You’re welcome, thanks a lot for the comment 🙂
Thanks.
You’re welcome 🙂
it looks great! Thank you for this tutorial 🙂
Thanks a lot for the comment 🙂
Wow, thanks a lot for sharing!!!
I´m kinda n00b in PS, your tutorial is very easy to follow and well explained. It helped a lot!!!
Kind Regards & Best Wishes for you!!!
So happy you liked the tutorial and found it useful.
Thank you so much for your kind words.
Best wishes for you as well 🙂