
Glowing Text Effect
This tutorial will show you how to create a nice glowing text effect, using Photoshop brushes and simple Layer Layer Style.
The Final Result

Tutorial Details
- Software Used : Photoshop
- Version : CS5 Extended
- Time : 0:30 – 0:45
Resources
- Elegant font.
Step 1
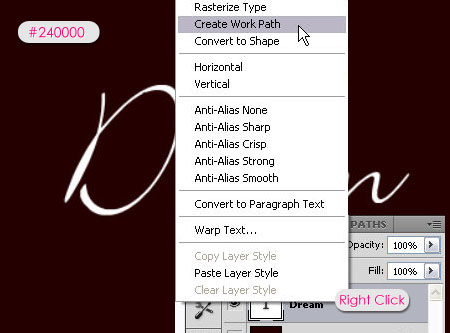
Create a new 1024 x 768 px document, and fill the Background with the color #240000. Create the text using in White. The font used is Elegant, and the Size is 250 px.
Right click the text layer and choose Create Work Path.
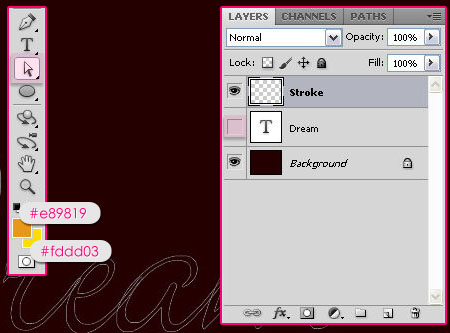
Create a new layer and call it Stroke, then make the text layer invisible by clicking the eye icon next to it. Set the Foreground color to #e89819 and the Background color to #fddd03.
Step 2
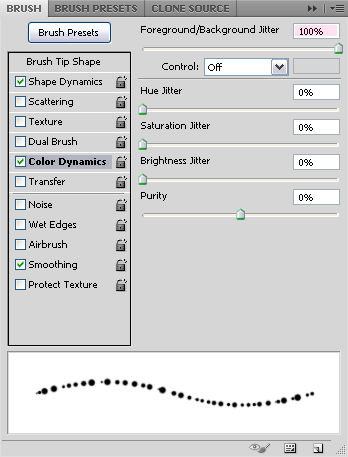
Open the Brush panel (Window > Brush), choose a hard round brush tip, and modify its Settings as below:
Brush Tip Shape
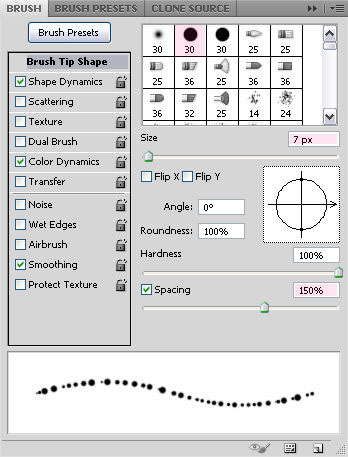
Shape Dynamics
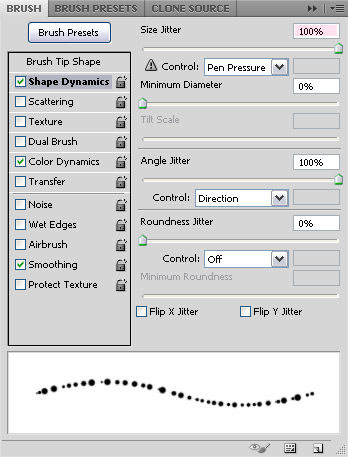
Color Dynamics
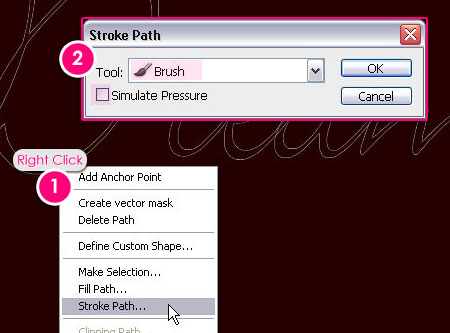
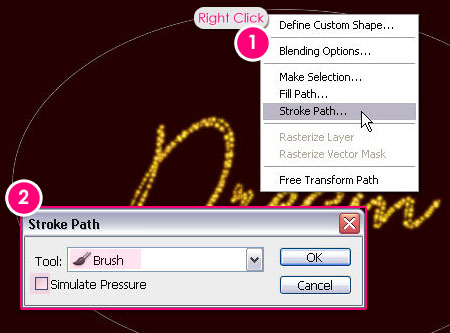
Now go back to the work path, pick the Direct Selection Tool, right click the path, and click Stroke Path. Choose Brush from the Tool drop down menu, and make sure that the Simulate Pressure box is un-checked.
Hit Enter/Return to get rid of the path, this is how the stroke should look like.

Step 3
Duplicate the Stroke layer, then change its Blend Mode to Pin Light.
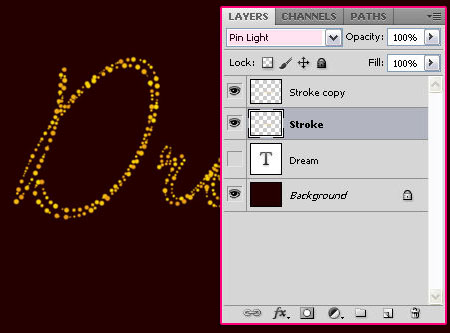
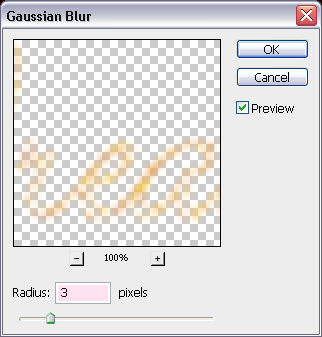
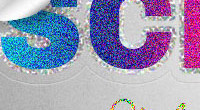
Make sure that the original Stroke layer is still selected, and go to Filter > Blur > Gaussian Blur. Change the Radius value to 3.
You should get a result similar to this:

Step 4
Double click the Stroke copy layer to apply the following Layer Style:
– Outer Glow
- Color :
#9f9f28 - Size : 6
- Contour : Valley High
- Range : 100
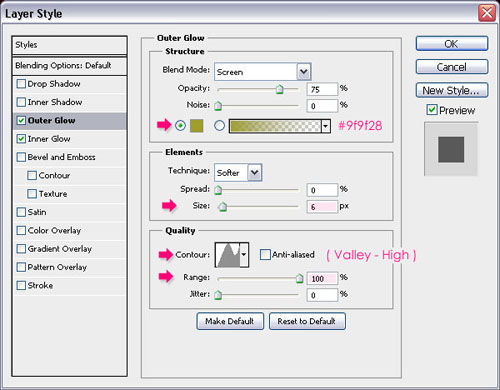
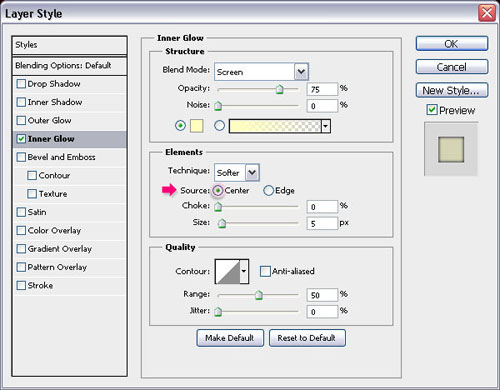
– Inner Glow
- Source : Center
- Size : 4
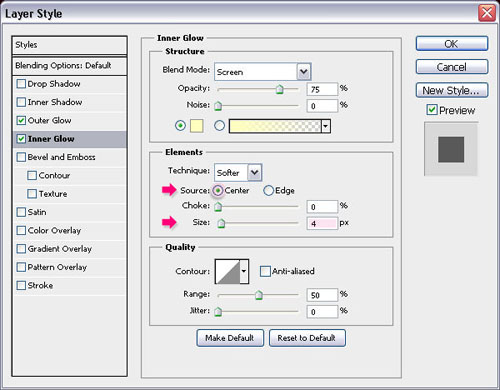
The Layer Style applied should make your text glow.

Step 5
It’s time to create the Background now. So let’s start with the brush used:
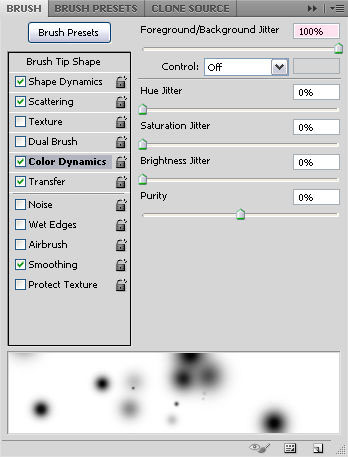
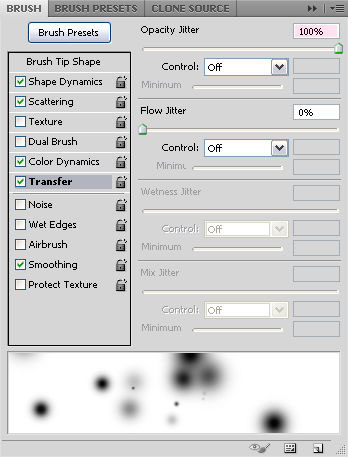
Choose a big soft round brush, and modiy its Settings as below:
Brush Tip Shape
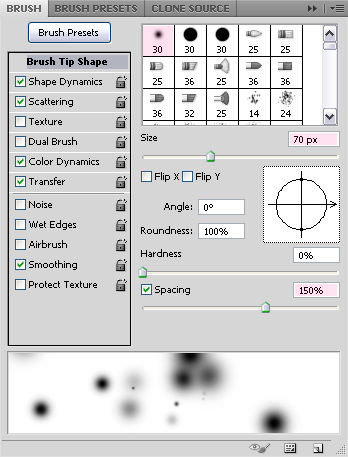
Shape Dynamics
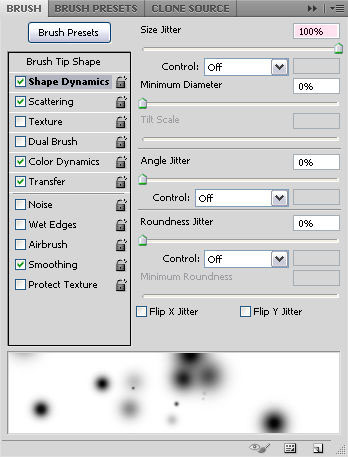
Scattering
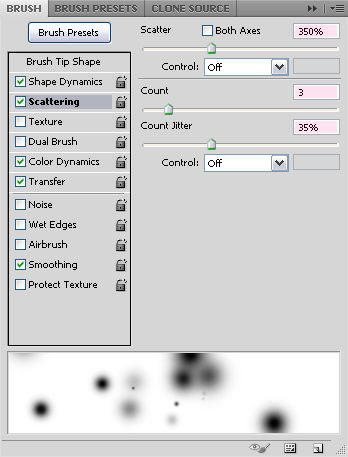
Color Dynamics
Transfer
Step 6
Create a new layer under both Stroke layers, and rename it to BG. The Foreground and Background colors should be the same as in Step 1. Pick the Ellipse Tool, and click the Paths icon in the options bar, this will enable you to draw a path instead of a filled shape.
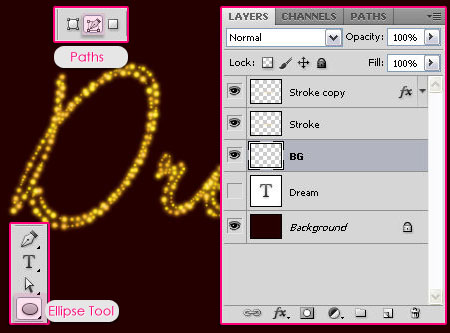
Draw an ellipse around the text. Leave enough distance between the path and the text to avoid overlapping.

Right click the path, click Stroke Path, choose Brush and make sure that the Simulate Pressure box is un-checked.
Hit Enter/Return to get rid of the path.

Double click on the BG layer to add a simple Inner Glow, and just change the Source to Center.
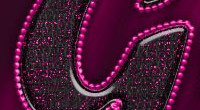
You can use the brush to add more sparkles if you think some areas are still empty. And this is the final result.
Did you enjoy this post? Please consider donating to help us cover our server costs.


Nice tutorial…^^ Thanks…
You’re welcome.
Muito show o tutorial, de fácil compreensão e excelente utilização.
Obrigado por compartilhar conosco.
Paz pra ti.
Glad you enjoyed it!
Thanks a lot.
This is a wonderful text effect and useful for many other applications.
The technique can definitely be applied in many different ways.
Thanks for the comment 🙂
Wow~ Thank you ^^
You’re welcome! Thanks for the comment.
good job
Thanks.
eesta estupenda 🙂
Muchas Gracias 🙂
Awesome tutorial! Very easy to follow and nicely made. Well done.
Happy you liked it 🙂
Thanks a lot for the comment.
Woow eu adorei seus tutoriais, por várias vezes estive procurando por tutoriais ao mínimo de textura em letras mas em sites brasileiro não encontrei, fico muito feliz em ter encontrado este site perfeito Obrigada 🙂
That means a lot! Really glad you’re enjoying the tutorials 😀
Muito obrigada for the awesome comment 🙂