
Inflated Satin Text Effect
This tutorial will show you how to use Layer Styles for three text layers, and a modified simple brush, to create a shiny inflated satin text effect.
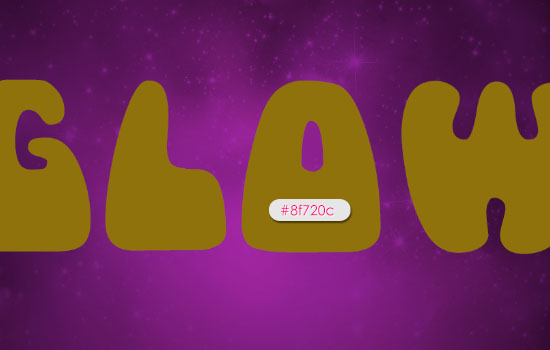
The Final Result

Tutorial Details
- Software Used : Photoshop
- Version : CS6 Extended
- Time : 0:30 – 0:45
Resources
- Mama font.
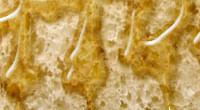
- Texture 94 3000X3000 by FrostBo.
- Small Crosses pattern.
- Metallic Pattern.
- Diagonal Noise pattern.
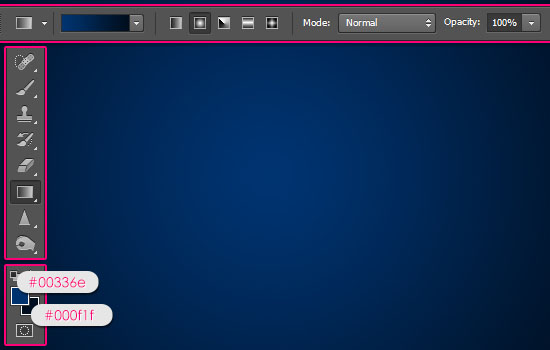
Step 1
Create a 1152 x 864 px document, set the Foreground color to #00336e and the Background color to #000f1f. Pick the Gradient Tool, click the Radial Gradient icon in the Options bar, then click and drag from the center of the document to one of the corners.
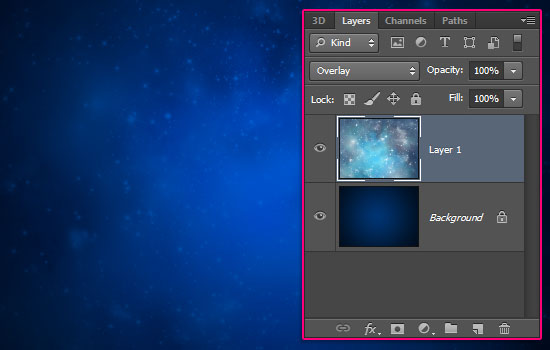
Place the Texture 94 3000X3000 image on top of the Background layer, resize it so that it fits within the document, then change its layer’s Blend Mode to Overlay.
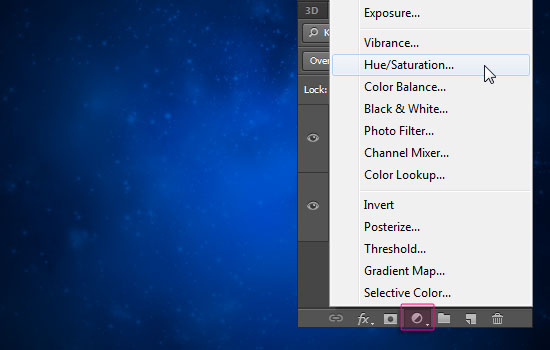
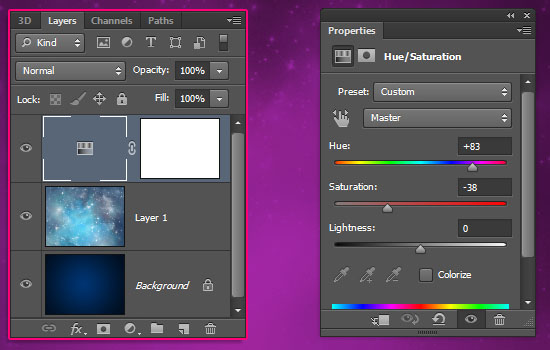
Click the Create new fill or adjustment layer icon down the Layers panel, then choose Hue/Saturation.
Change the Hue value to 83 and the Saturation value to -38.
Step 2
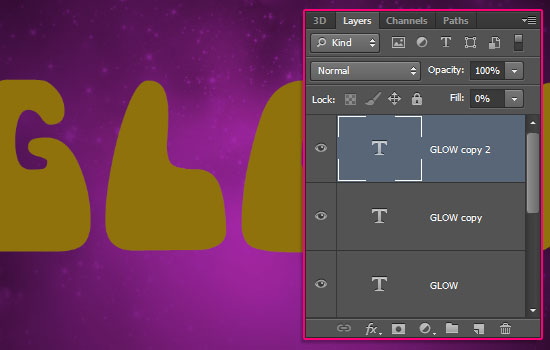
Create the text in the color #8f720c using the font Mama. The font Size should be something around 320 pt.
Duplicate the text layer twice, so that you have 3 text layers. Change the last one’s (second copy) Fill value to 0.
Step 3
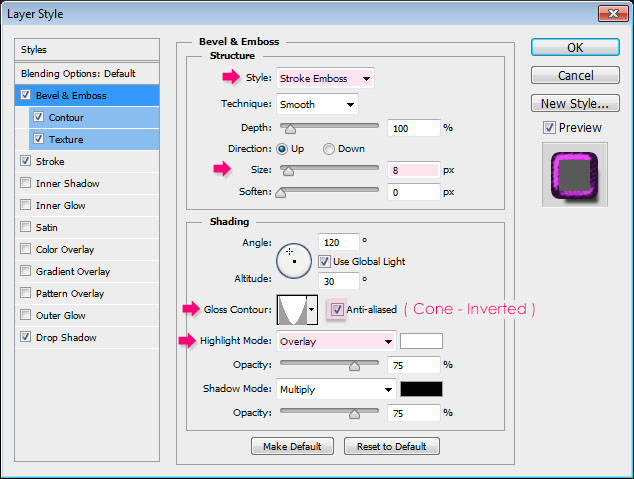
Double click the original text layer to apply the following Layer Style:
– Bevel and Emboss
- Style : Stroke Emboss
- Size : 8
- Gloss Contour : Cone – Inverted
- Check the Anti-aliased box
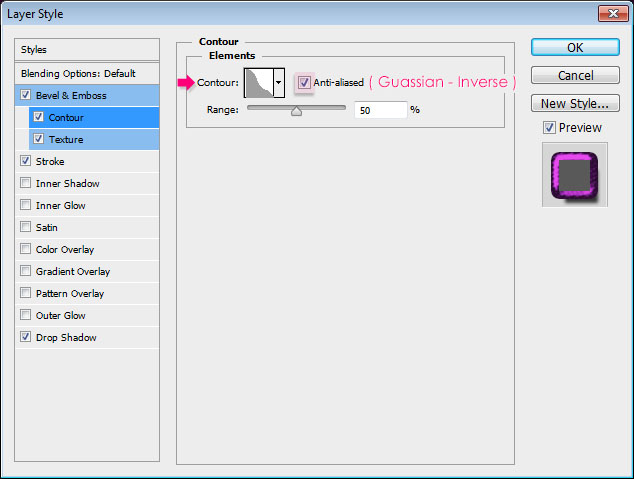
– Contour
- Contour : Guassian – Inverse
- Check the Anti-aliased box.
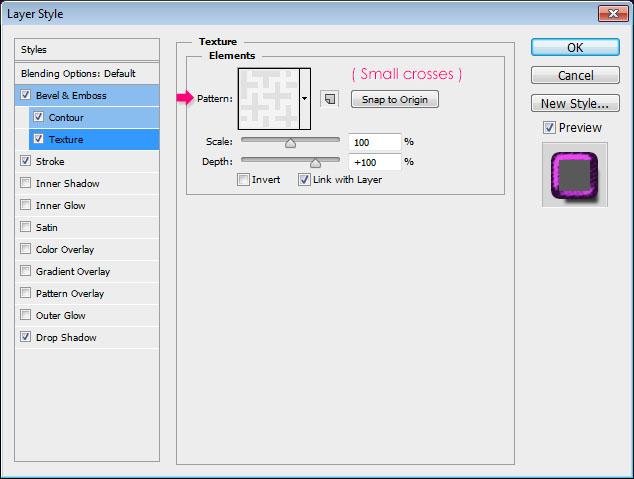
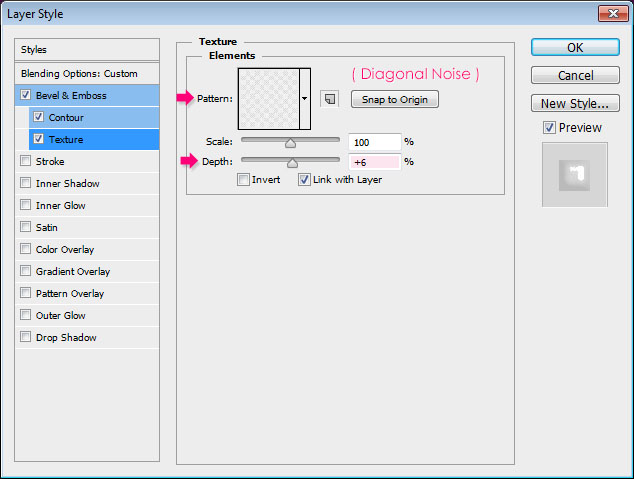
– Texture
- Pattern : Small Crosses
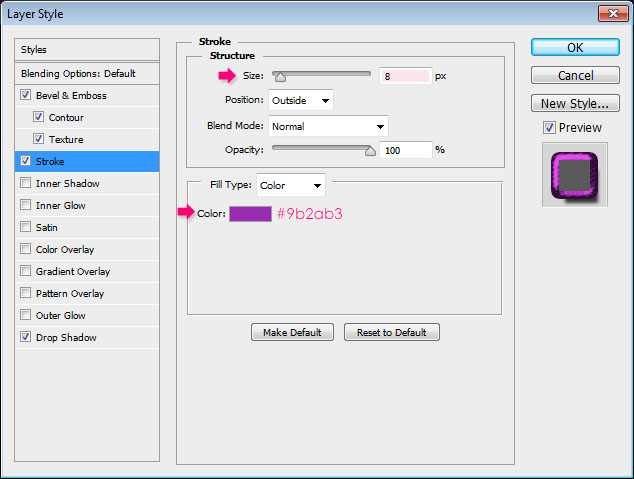
– Stroke
- Size : 8
- Color :
#9b2ab3
– Drop Shadow
- Distance : 13
- Spread : 23
- Size : 16
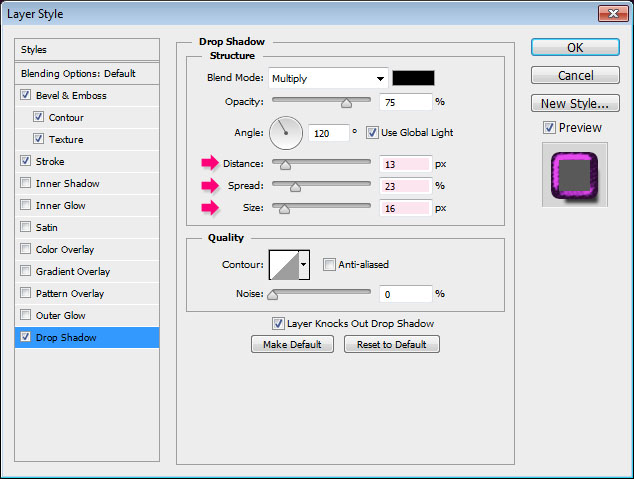
This will create the text’s stroke.

Step 4
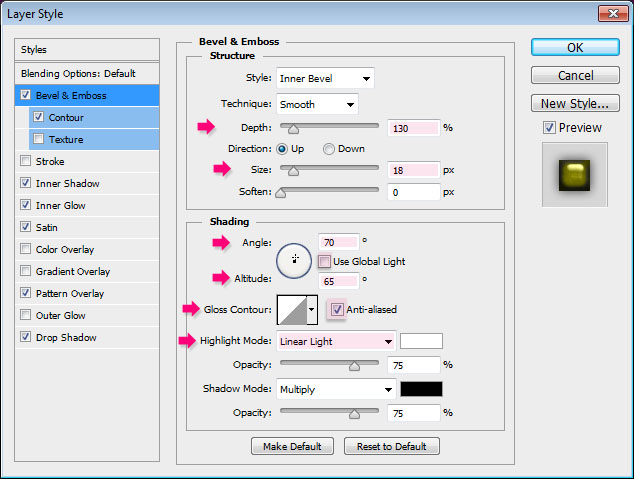
Double click the first copy text layer (the one in the middle) to apply the following Layer Style:
– Bevel and Emboss
- Depth : 130
- Size : 18
- Uncheck the Use Global Light box
- Angle : 70
- Altitude : 65
- Check the Anti-aliased box
- Highlight Mode : Linear Light
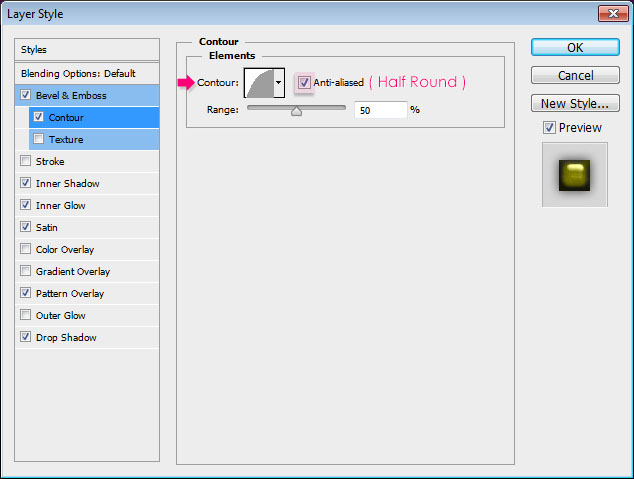
– Contour
- Contour : Half Round
- Check the Anti-aliased box.
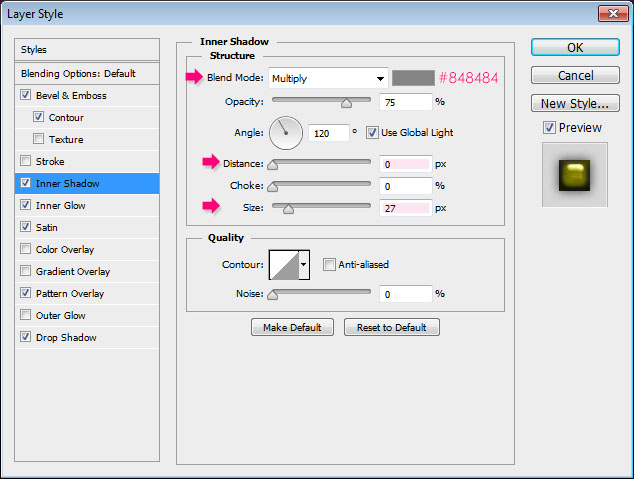
– Inner Shadow
- Color :
#84848 - Distance : 0
- Size : 27
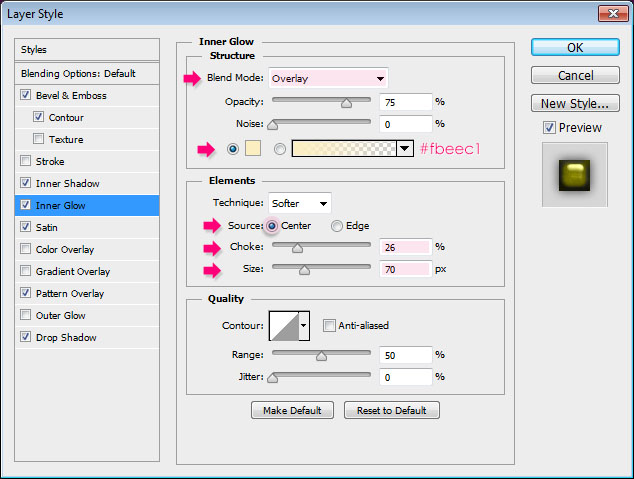
– Inner Glow
- Blend Mode : Overlay
- Color :
#fbeec1 - Source : Center
- Choke : 26
- Size : 70
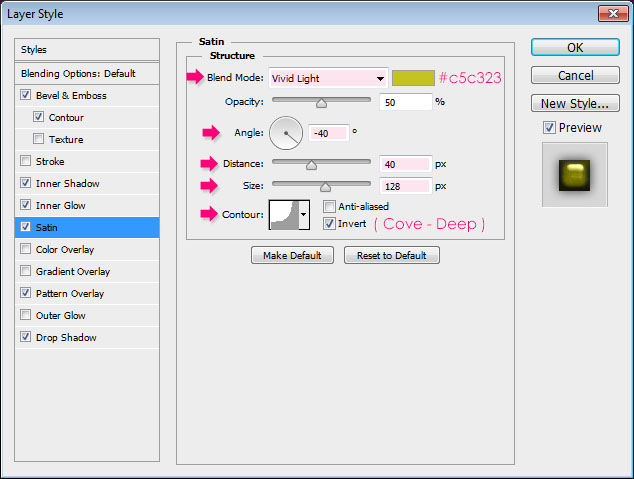
– Satin
- Blend Mode : Vivid Light
- Color :
#c5c323 - Angle : -40
- Distance : 40
- Size : 128
- Contour : Cove – Deep
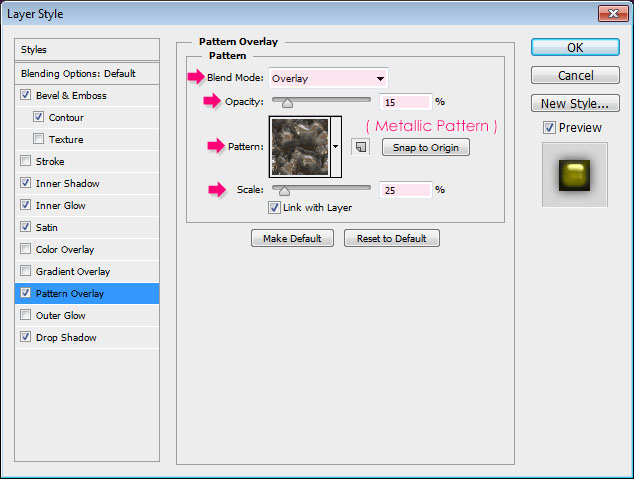
– Pattern Overlay
- Blend Mode : Overlay
- Opacity : 15%
- Pattern : Metallic Pattern
- Scale : 25%
– Drop Shadow
- Distance : 0
- Size : 16
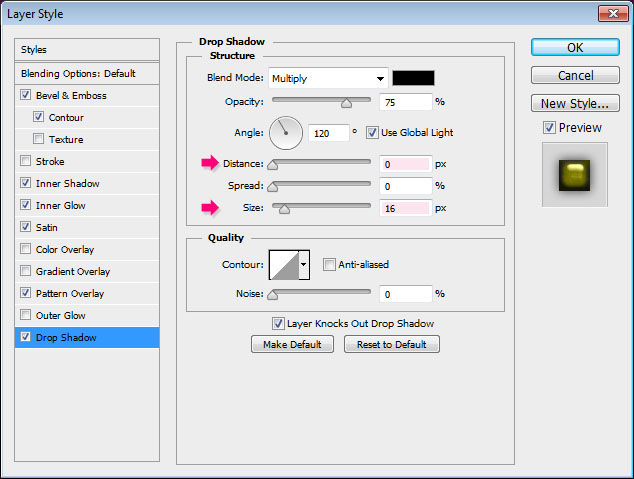
This will create the inner glowing part of the text.

Step 5
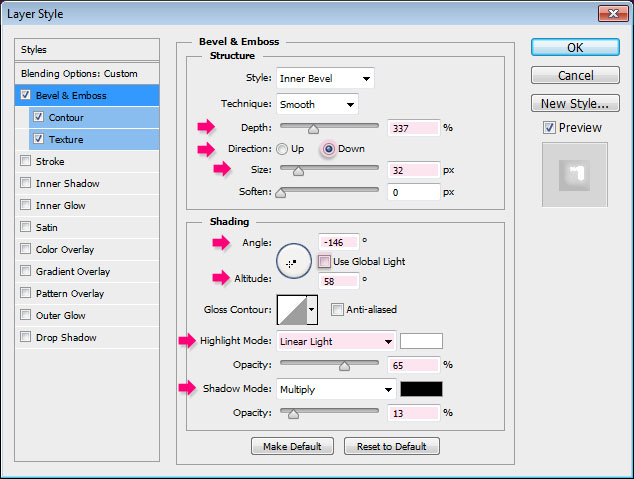
Double click the second copy text layer (the one at the top) to apply the following Layer Style:
– Bevel and Emboss
- Depth : 337
- Direction : Down
- Size : 32
- Uncheck the Use Global Light box
- Angle : -146
- Altitude : 58
- Highlight Mode : Linear Light
- Opacity : 65%
- Shadow Mode – Opacity : 13%
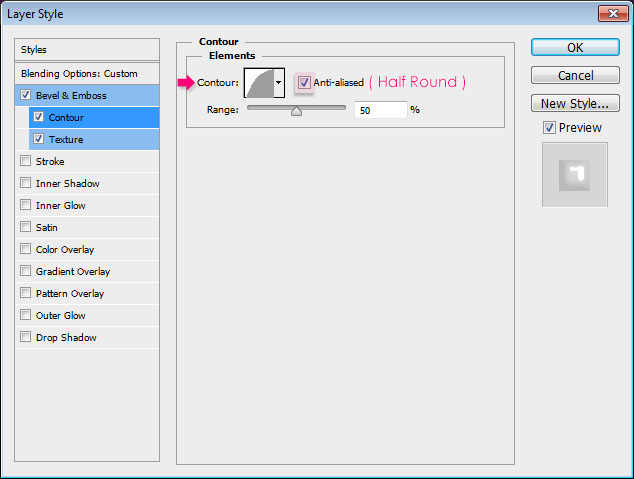
– Contour
- Contour : Half Round
- Check the Anti-aliased box.
– Texture
- Pattern : Diagonal Noise
- Depth : 6%
This completes the main text effect.

Step 6
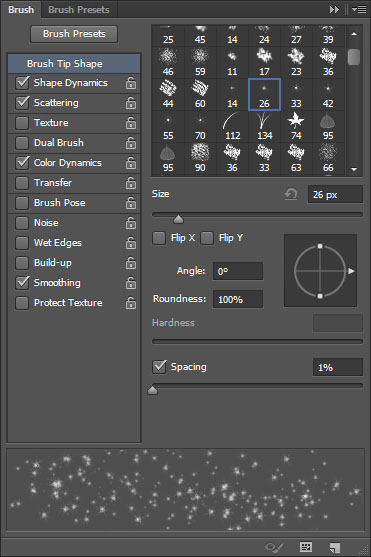
Pick the Brush Tool and open the Brush panel (Window > Brush). Choose the Star 26 pixels brush tip then modify its Settings as shown below:
Brush Tip Shape
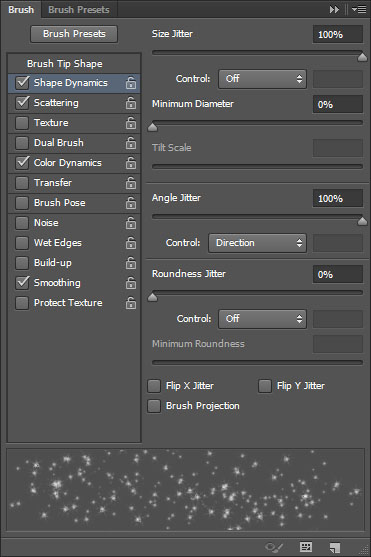
Shape Dynamics
Scattering

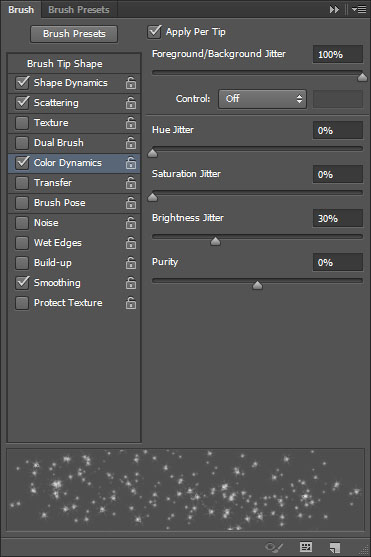
Color Dynamics
Step 7
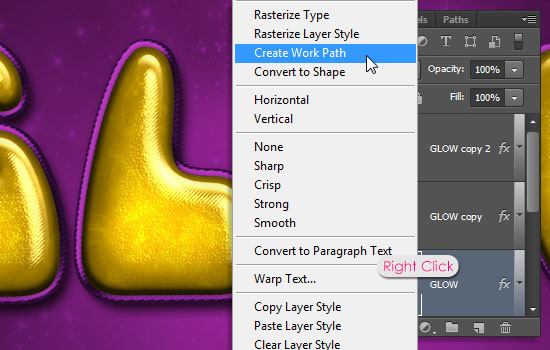
Right click any of the text layers then choose Create Work Path.
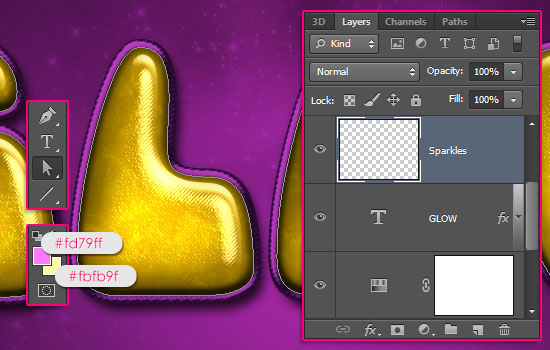
Create a new layer on top of the original text layer and call it Sparkles. Set the Foreground color to #fd79ff and the Background color to #fbfb9f. Then pick the Direct Selection Tool.
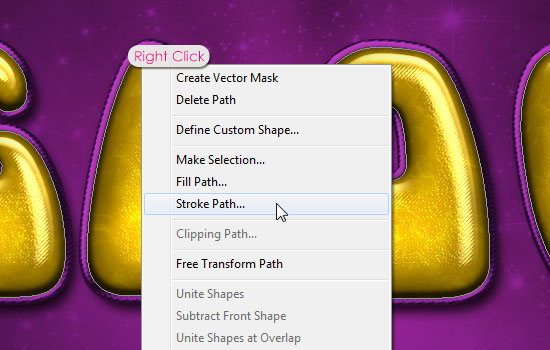
Right click the work path and choose Stroke Path.
Choose Brush from the Tool drop down menu and click OK.
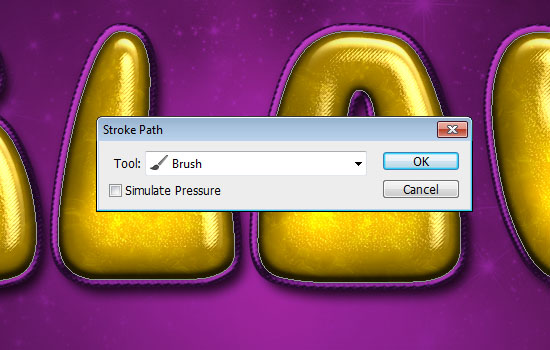
This will stroke the path with the modified brush. Hit Enter/Return to get rid of the path.

Duplicate the Sparkles layer and change the copy’s Blend Mode to Linear Light.
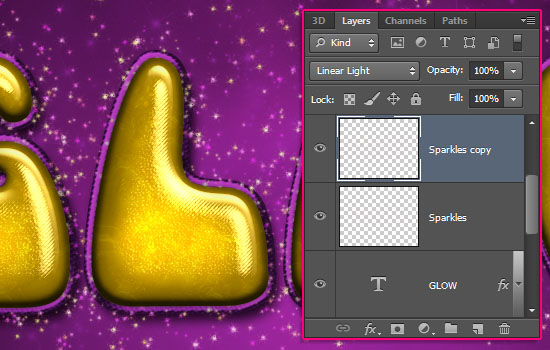
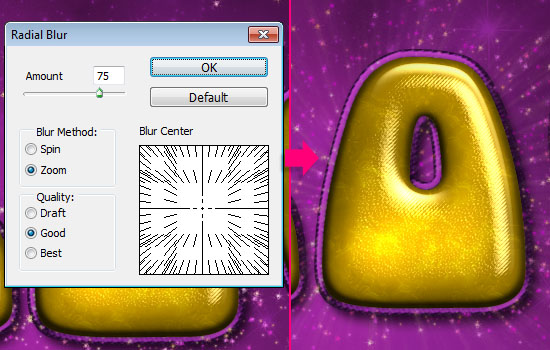
Finally, select the original Sparkles layer, then go to Filter > Blur > Radial Blur. Change the Amount to 75 and choose Zoom under the Blur Method. This will add a firework-like effect to the sparkles.
And you’re done! Hope you enjoyed the tutorial.
Did you enjoy this post? Please consider donating to help us cover our server costs.


I really like the coloring! Nicely done.
Many thanks ^_^