
Smudged Watercolor Text Effect
This tutorial explains how to modify the settings of a simple brush and a smudge brush to create a smudged watercolor text effect easily.
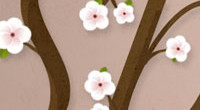
The Final Result:

Tutorial Details
- Software Used : Photoshop
- Version : CS6 Extended
- Time : 0:30 – 0:45
Resources
- Y2K Neophyte
- Crumpled white paper texture by melemel.
Step 1
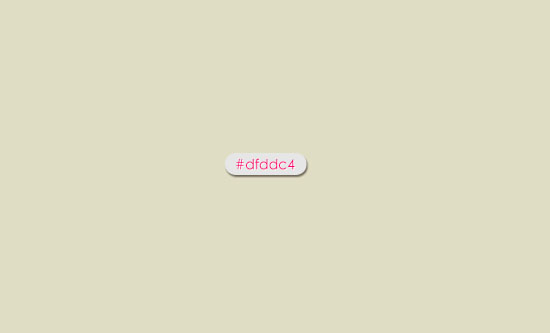
Create a new 1152 x 864 px document and fill it with the color #dfddc4.
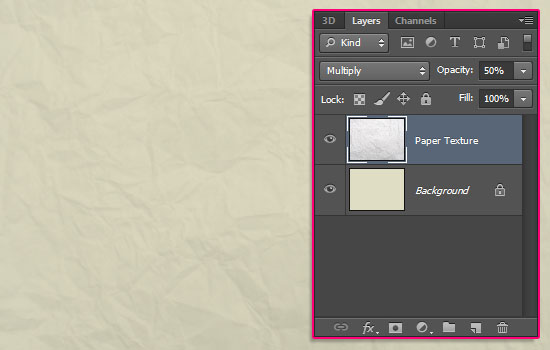
Place the Crumpled white paper texture on top of the Background layer, then change its layer’s Blend Mode to Multiply and its Opacity to 50%.
Step 2
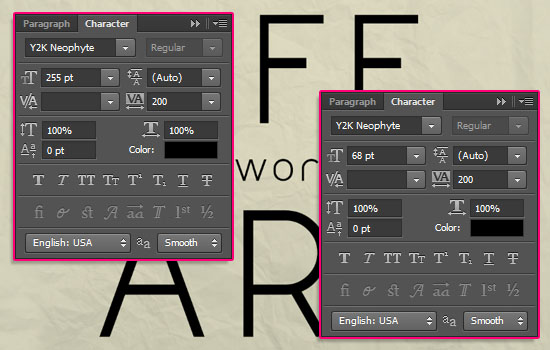
Create the text in Black. You can use All Caps if you like as well. The font used is Y2K Neophyte. If you have more than one word, and/or different font sizes, create each of them in a separate layer. Also, set the Tracking value to 200 to avoid overlapping of the smudged watercolor later on.
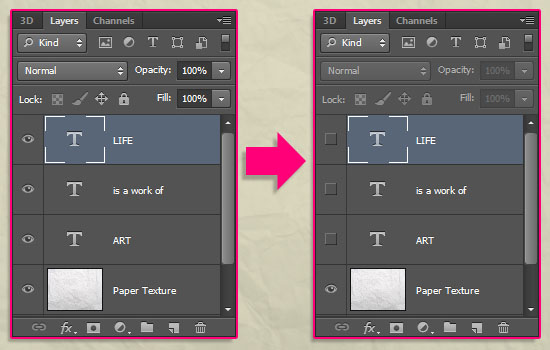
Make all the text layers invisible by clicking the eye icons next to them.
Step 2
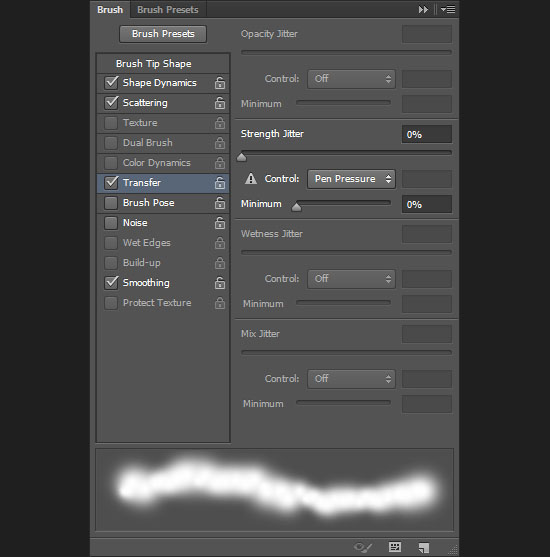
Open the Brush panel (Window -> Brush), choose the Rough Round Bristle brush, and modify its Settings as below:
Brush Tip Shape
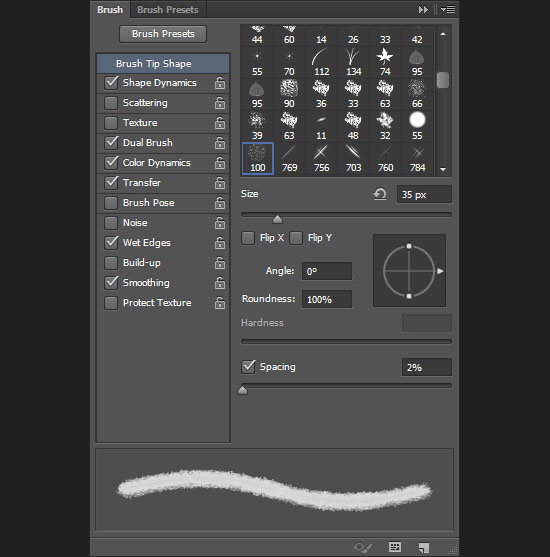
Shape Dynamics
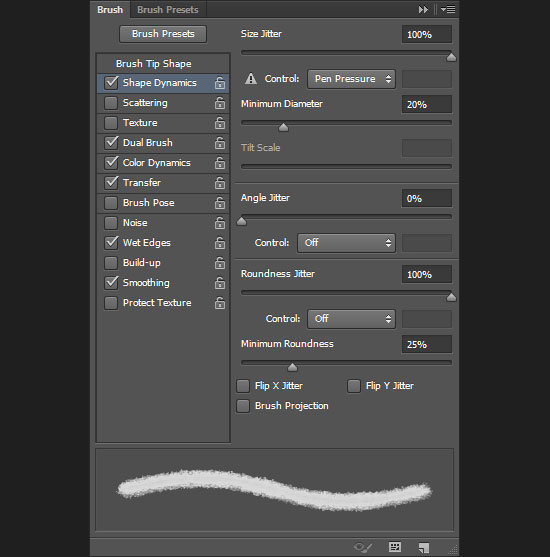
Dual Brush

Color Dynamics
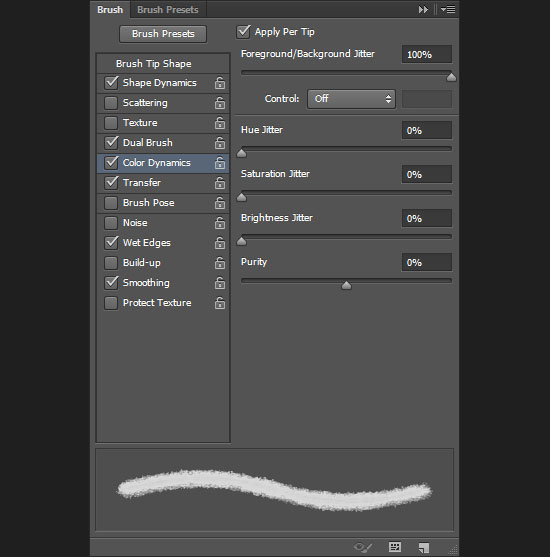
Transfer
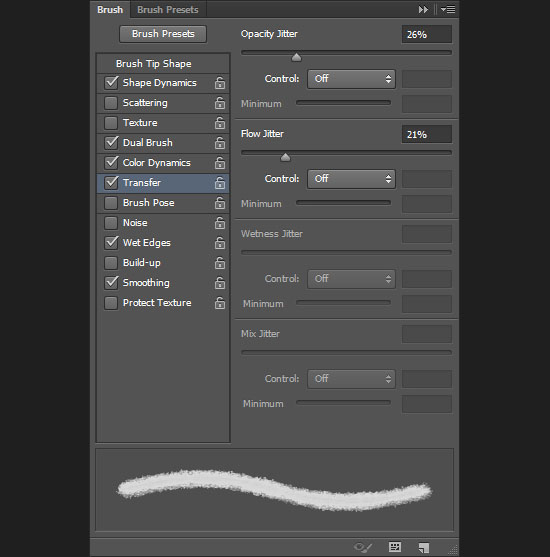
And check the Wet Edges and Smoothing boxes too. This will create the basic watercolor brush. The Size Jitter and Dual Brush values add randomness to the brush shape, while the Color Dynamics and Transfer values add color and opacity variations so that the brush has a more realistic effect.
Step 4
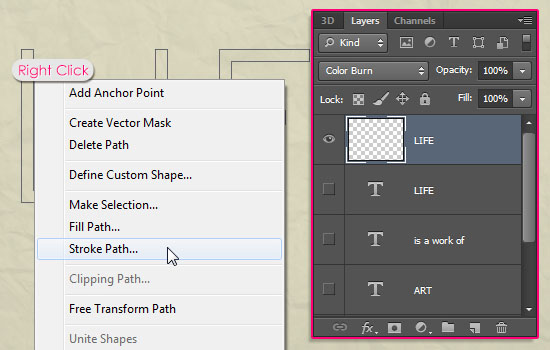
Right click the first text layer and choose Create Work Path. Set the Foreground color to #a6a6a6 and the Background color to #424242, and pick the Direct Selection Tool.
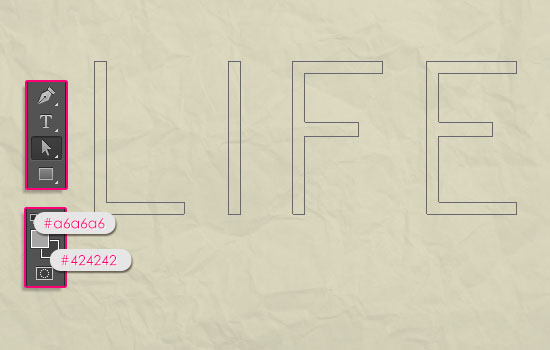
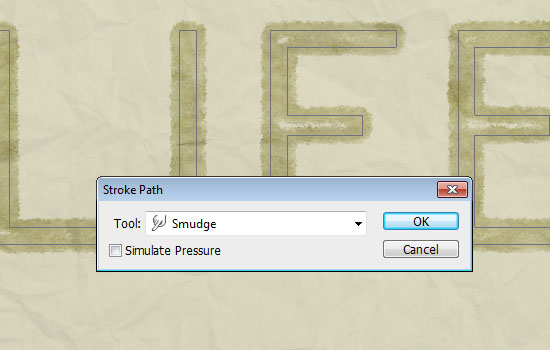
Create a new layer on top of all layers, rename it to whatever text you’re working with, and change its Blend Mode to Color Burn. Then, right click the path and choose Stroke Path.
Choose Brush from the Tool drop down menu and un-check the Simulate Pressure box.
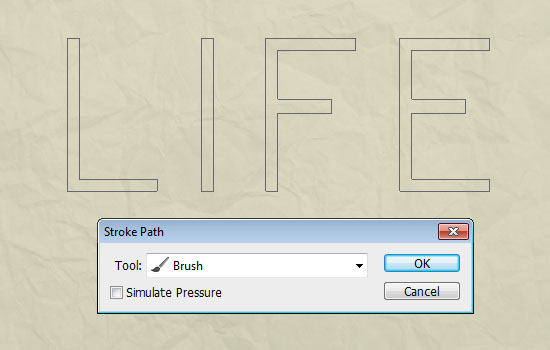
This will stroke the path with the watercolor brush.
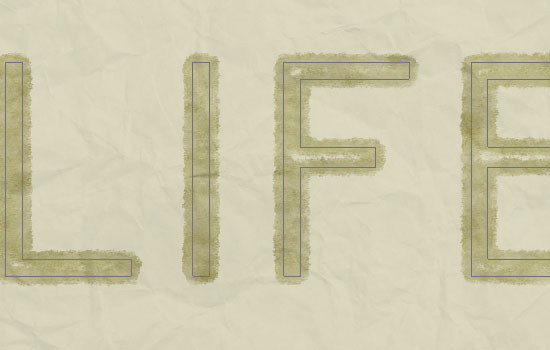
Step 5
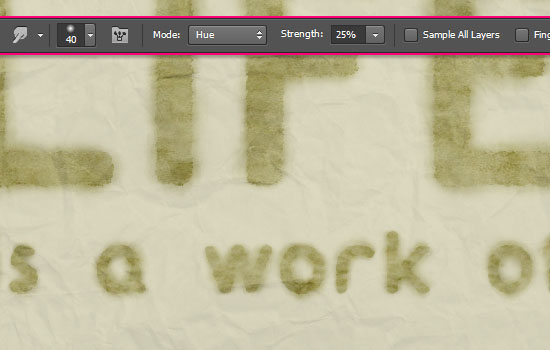
Pick the Smudge Tool with a 70 px soft round brush. In the Options bar, change the Mode to Hue and the Strength to 25%.
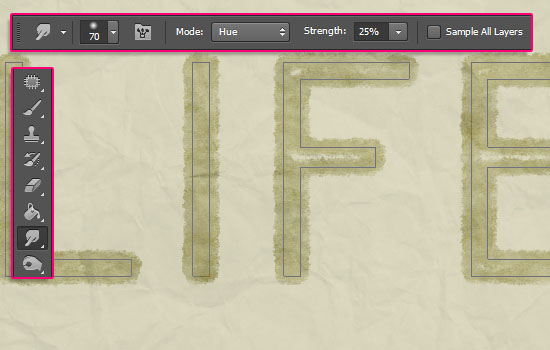
Open the Brush panel once again and modify the smudge brush Settings as shown below:
Brush Tip Shape
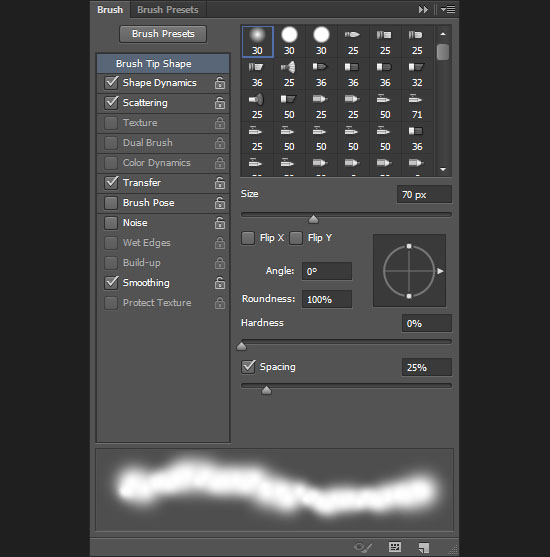
Shape Dynamics
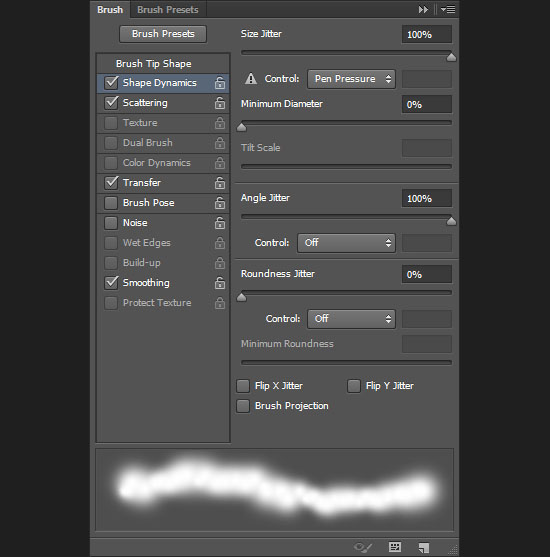
Scattering
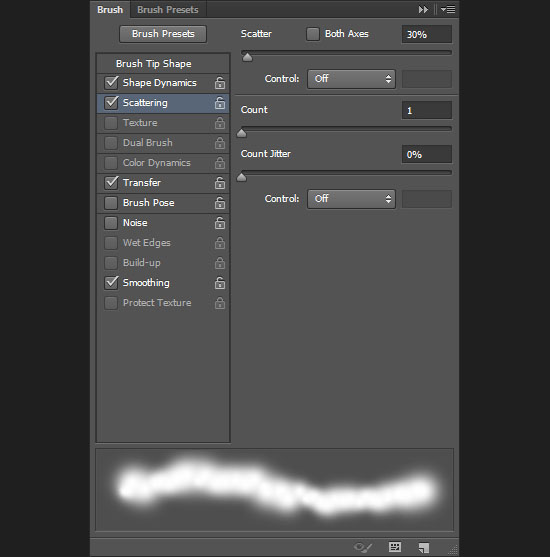
Transfer
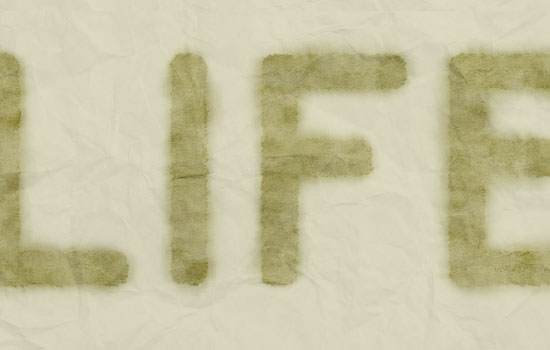
Right click the Path once again and choose Stroke Path. This time, choose Smudge from the Tool drop down menu, and make sure that the Simulate Pressure box is still un-checked.
This will smudge the watercolor stroke. Hit Enter/Return to get rid of the path.
Step 6
Create a new layer for the next line of text, and don’t forget to change its Blend Mode to Color Burn.

If you are using a smaller text size, you’ll need smaller brush sizes as well. In this case, the watercolor brush Size is set to 15 px.
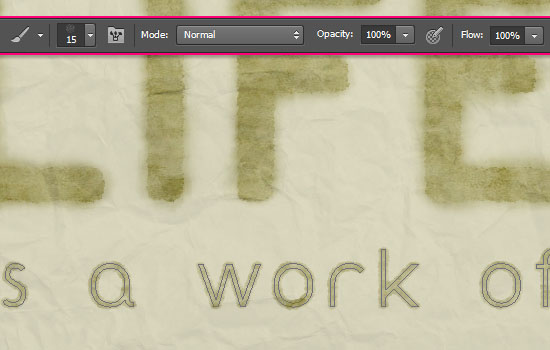
The smudge brush Size is set to 40 px. You can experiment with different sizes until you like the result.
Step 7
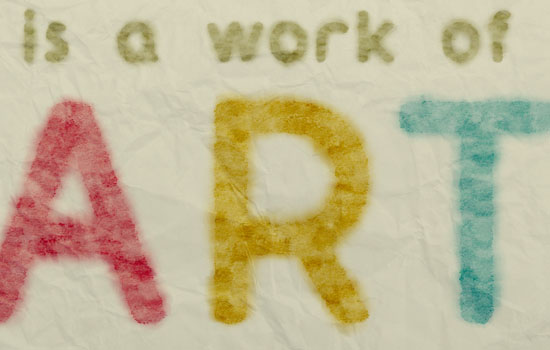
You can as well stroke each letter with a different color. To do so, you’ll need to select that letter first, by clicking and dragging around it using the Direct Selection Tool.

Then, choose two shades of the color you want to use, a light one for the Foreground color, and a dark one for the Background color. The ones used here are #e890b9 and #7b1b3b.
On a new layer, stroke the selected path with the watercolor and smudge brushes just like you did previously.
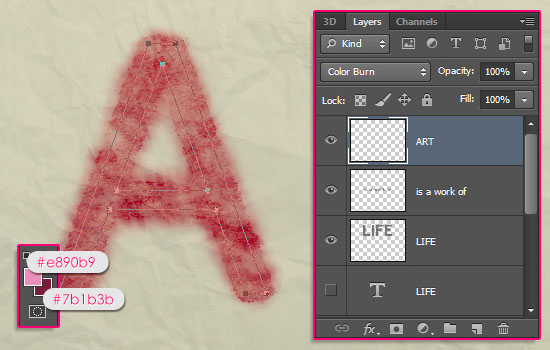
Once you’re done, and before you hit Enter/Return to get rid of the path, select the next letter, two new colors, and repeat the same steps.
Your watercolor text is now finished!
Did you enjoy this post? Please consider donating to help us cover our server costs.


Beautiful result, very realistic watercolor effect!
Glad you like it.
Thanks a lot for the comment.
Thank you for another fantastic tutorial.
I learn a lot of Photoshop by following your tutorials. things I find useful in other contexts.
The technique is what matters for sure.
Glad you find the tutorials useful.
Thank you so much for the comment and for the support 🙂
niiiice
thanks you 🙂
Thanks for the comment 🙂
well nice one bro 🙂
but i have problem 🙂 when i make the new layer and try to make the stroke path O.o what should i do!?
What exactly goes wrong? Is the Stroke Path option grayed out?
(I’m a girl 🙂 )
I love it very much
Thanks
Glad you do!
Thank you for the comment.
great result 🙂
Thank you 🙂
Thank You.
You’re welcome 🙂
Thanks for the comment.
I did step by step but i have something different than the result here , The letters of the word still empty not solid not full of colors like yours , please help me .
This might be because you are using a different font or a bigger font size. So you either need to increase the brush size, or fill in the empty spaces manually. Just make sure not to increase the brush size so much that the letters overlap.
Hope this helps.
Please feel free to leave any other queries you have.
Haven’t tried this out yet but it looks so cool! The result is great and I *never* would have figured something like this out on my own. Thank you for writing it!
That’s very kind of you to say! Glad you like it.
Thanks a lot for the comment.
Forgive me for the previous comment, please remove it written in Russian. You are a master with a capital letter. Thank you for such wonderful lessons! I am your fan.
No problem ^_^
That really means a lot!
Thank you very much for the amazing comment and for the support 🙂
I want so badly for this to work, but I’ve been through the steps ten times now and I just can’t get it to. Using Photoshop CC.
Not sure what happened to my previous comment. Alas…. I keep coming back here because it seems so simple straightforward but I keep failing to get the same result you do.
Can you please upload a screenshot of the issue? Which Step are you not able to follow?
Are you using the same font and font size? If so, can you please check if you document’s Resolution (Image > Image Size) ise set to 72? If not, you might need to create a new document with that Resolution value and try again.
Hope this helps. Please feel free to leave a reply with any further details.
Amazing work!
Really glad to know that you’re enjoying the tutorials.
Thank you very much for the sweet comment and for sharing your work ^_^
Do you have any video of that?I’d want to finnd out more details.