
Simple Printable Pennant Banner Design and Text Effect
Pennant banners are one of those simple things that you can personalize and have fun with to create a nice decoration for almost any occasion.
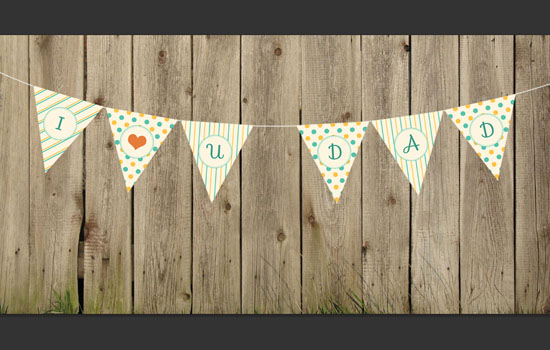
This tutorial will show you how to create a simple printable pennant design, then, it will show you how to use it to make a lovely pennant banner mini mock-up.
So whether you want to print the pennants or incorporate them into a design, you’ll end up with a nice result that you can use in many different ways. Let’s get started!
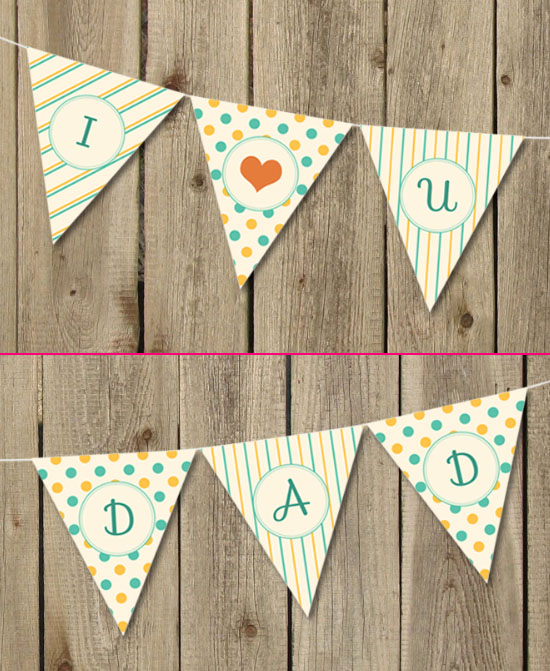
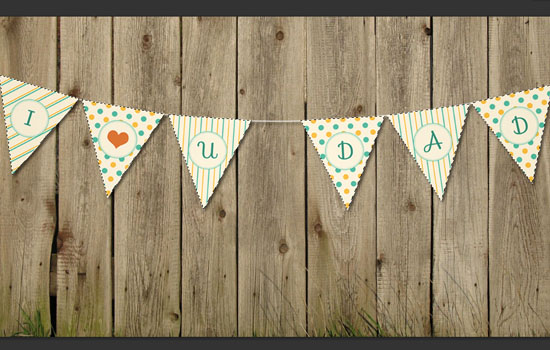
The Final Result

Tutorial Details
- Software Used : Photoshop
- Version : CC
- Time : 0:30 – 1:30
Resources
- Sofia font.
- Free Digital Paper Pack #1.
- WoodPlanksFences0031 (Medium – 1600×1186).
- PaperCrumpled0002 (Medium – 1600×1200).
(Open each image file in Photoshop, then go to Edit > Define Pattern, so that you can use the images later in the tutorial).
Step 1
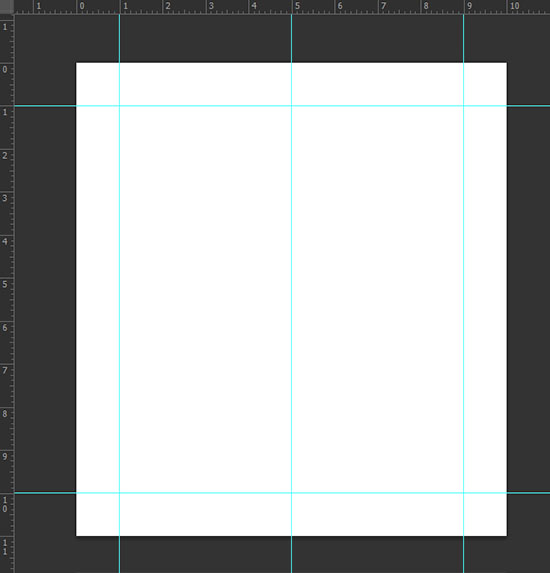
Create a new 10″ x 11″ document, set the Resolution to 300, and the Color Mode to CMYK Color.
Show the Rulers by going to View > Rulers (Ctrl/Cmd + R), then go to View > Snap To > Guides.
Right click any of the rulers and choose Inches.
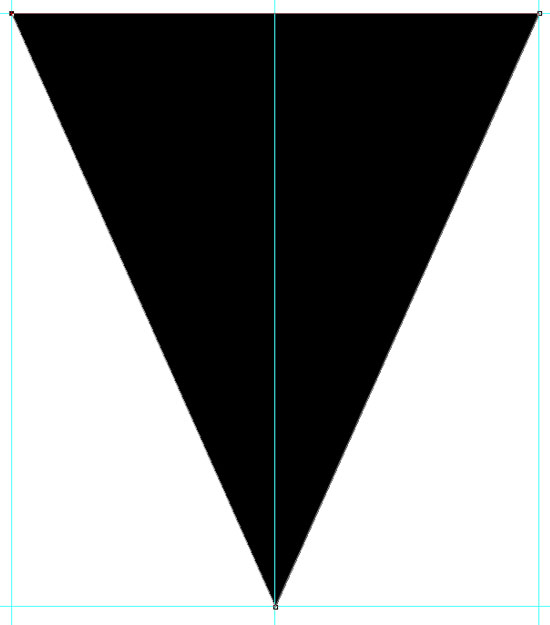
Click the Horizontal Ruler to drag a horizontal guide and place it an inch away from the top. Drag another one and place it an inch away from the bottom. Then, drag two more guides from the Vertical Ruler and place one an inch away from the left side and the other an inch away from the right side. Finally, drag one more vertical guide and place it in the center of the document.
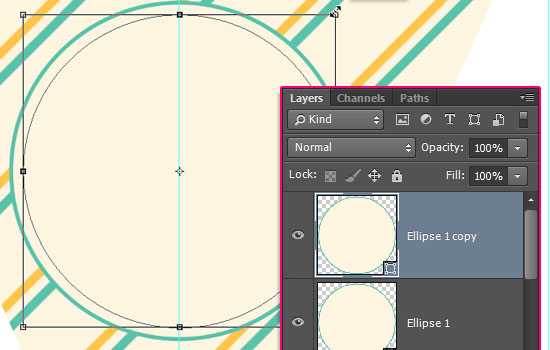
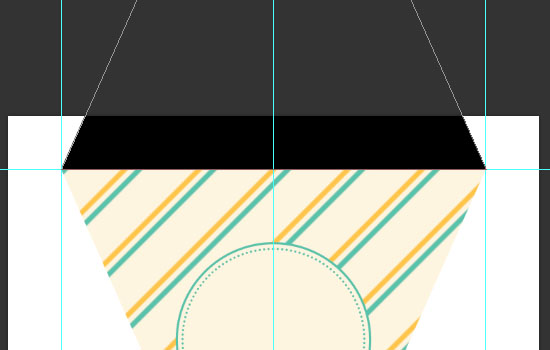
Pick the Polygon Tool, and in the Options bar, set the Sides to 3. Then click, press and hold the Shift key, and drag to create a simple upside down triangle in the middle of the document.
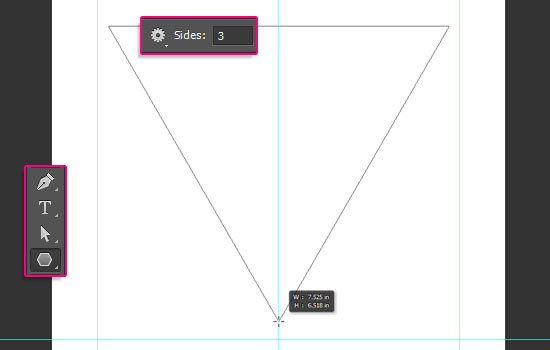
Pick the Direct Selection Tool, then click and drag to select the upper anchor points.
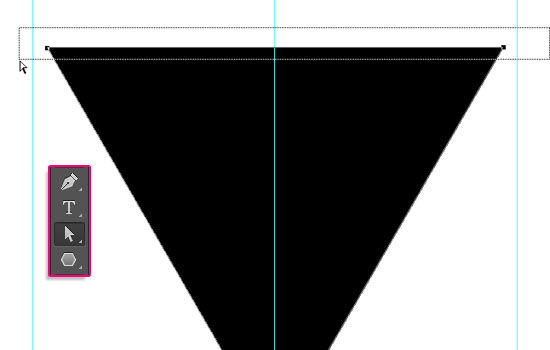
Drag the selected points until they snap to the top guide. Then click and drag each point separately until it snaps to its upper guide corner.
Drag the triangle’s head to the bottom guide, making sure it is centered. So it should be placed where the bottom guide intersects with the one in the center of the document.
Step 2
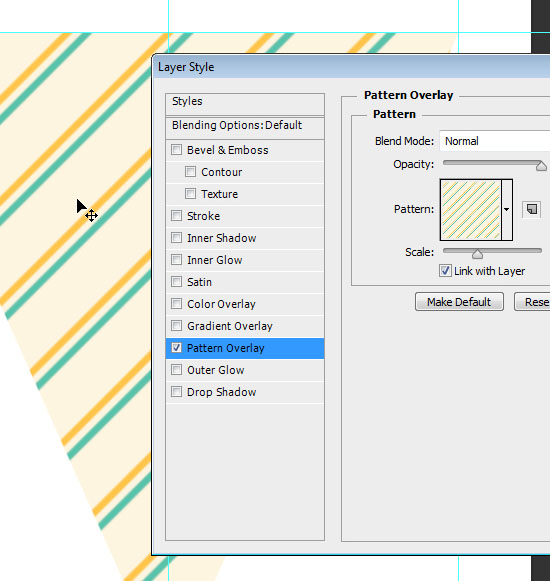
Double click the triangle shape’s layer to apply the pattern you like under the Pattern Overlay tab.
Feel free to use any pattern or texture you like. The patterns used here are from the Free Digital Paper Pack #1, which are all tileable.
Once you apply the pattern, you might want to tweak the settings a little bit. The Scale value, for example, is set to 70% here.
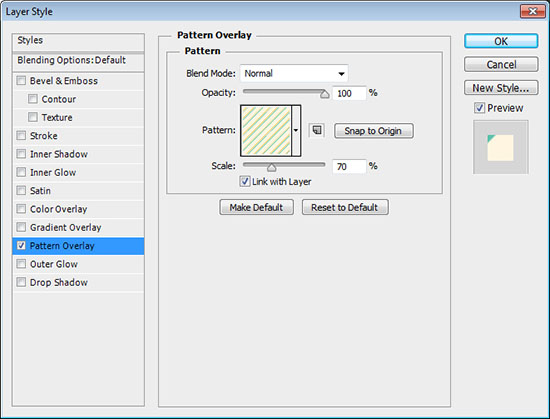
You can also click and drag the pattern to move it around. If you’re not using patterns, you can simply place the image you like on top of the triangle shape’s layer, and create a Clipping Mask instead.
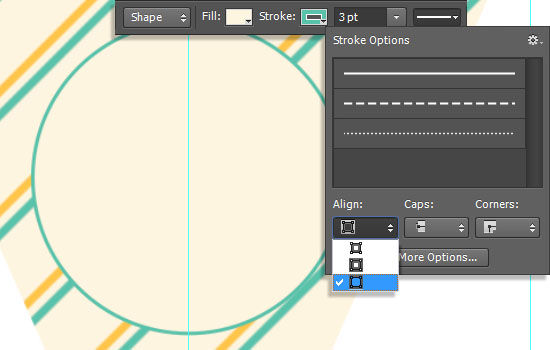
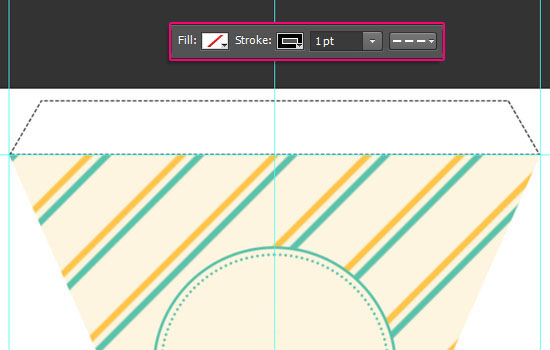
Pick the Ellipse Tool, click the Geometry Settings icon in the Options bar, and check the From Center box.
Place the cursor on top of the center guide, press and hold the Shift key, then click and drag to create a circle near the top of the triangle. Choose a size you like for the circle, and keep in mind that you can change it any time you need to later.

In the Options bar, change the circle’s Fill color to #fef5e0, the Stroke color to #59c2aa, the Stroke Size to 3, and the Align to Outside.
If you’re using a different pattern or texture, feel free to use any other color values that suit your design.
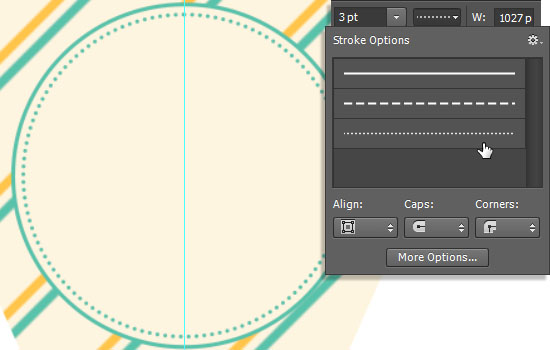
Duplicate the circle shape’s layer, then go to Edit > Transform Path > Scale. Press and hold the Shift and the Alt/Option keys, then drag the copy circle inwards. This is how you can scale any of the circles while keeping it centered. Once you like the size of the copy circle, hit Enter/Return.
Choose the dotted preset from the Stroke Options box, and change the Align to Center. You can play around with the values to get a variety of other results as well.
Step 3
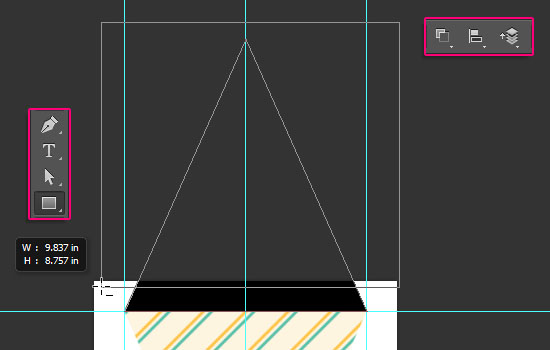
Duplicate the triangle shape’s layer.
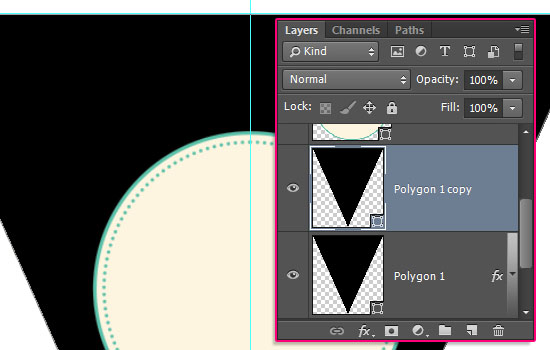
Go to Edit > Free Transform, then set the Reference point location in the Options bar to top-center.
Go to Edit > Transform > Flip Vertical to flip the triangle upside down. Hit Enter/Return to accept the changes.
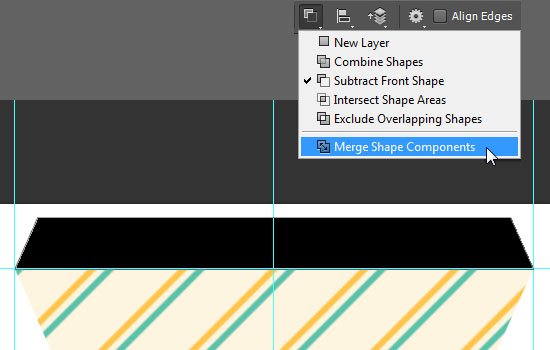
Pick the Rectangle Tool, and choose the Subtract Front Shape option in the Options bar. Click and drag to create a rectangle that covers the upper part of the copy triangle, leaving only a small part of its base.
Click the Path operations icon then click Merge Shape Components at the bottom.
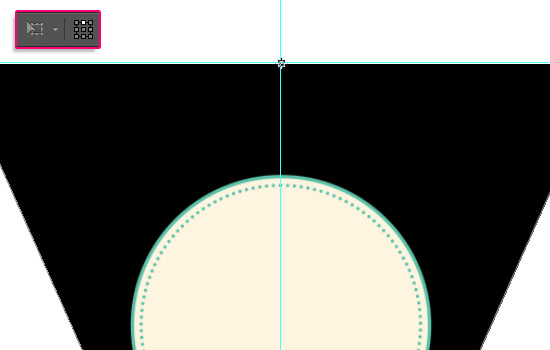
Use the Direct Selection Tool (A) to select the two upper anchor points of the shape you have, then go to Edit > Transform Points > Scale, press and hold the Shift and Alt/Option keys, then drag the sides inwards a tiny bit. Hit Enter/Return when done.
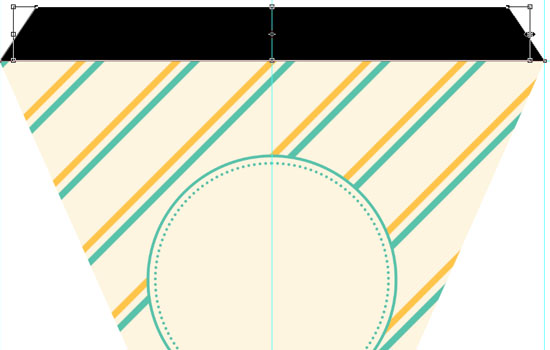
Change the shape’s Fill to None, the Stroke Size to 1, and choose the dashed line preset with the Align set to Inside.
This will create a tiny part at the top of the pennant that you can fold and glue to its back after placing the string inside it. This way, you won’t have to punch any holes in the pennants.
Step 4
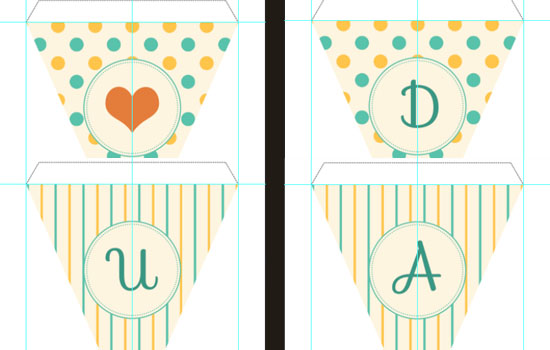
What you’ll need to do now, is add the letter, or shape, inside the pennant you have. The font used here is Sofia, the Size is 150 pt and the color is #399782.
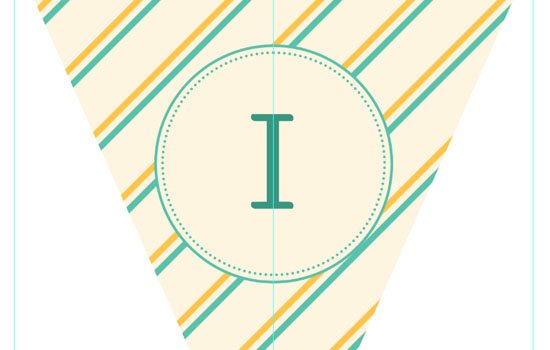
Group all the pennant layers, then duplicate that group to create a new copy for each letter or shape you want to add. Have fun with the patterns, colors, and fonts used. Just let your creative side take over!
This is the end of the printable design part. Next, we’re going to incorporate the pennants into a simple design.
Step 5
Open the WoodPlanksFences0031 texture, and use the Crop Tool to get the part of the background that you want to work with. You can also skip this for now and crop the design once you finish it.
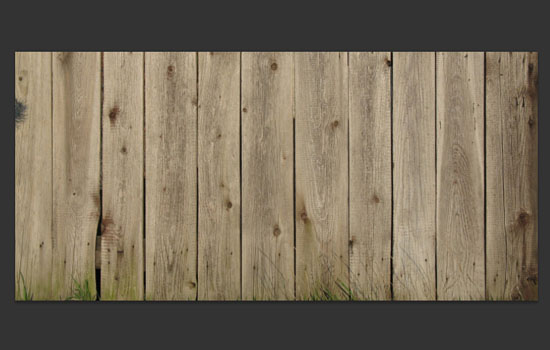
Go to Image > Adjustments > Levels, and change the Highlights value to 245.

Pick the Pen Tool, choose the Path option in the Options bar, then click and drag out of the left side of the document, and click and drag out of the right side to create a curve. You can use the Direct Selection Tool (A) to modify the points if needed.
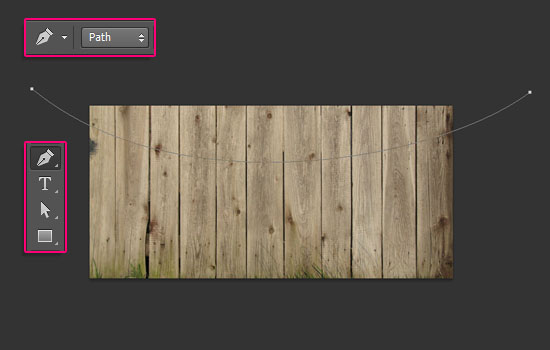
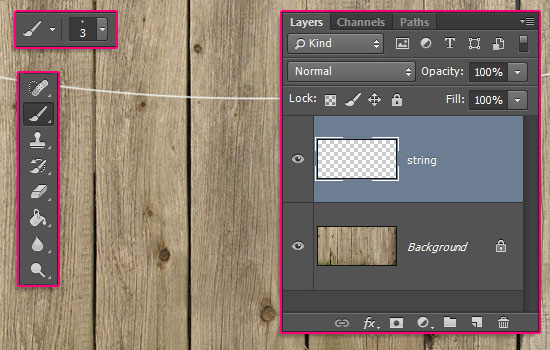
Pick the Brush Tool, choose a hard round 3 px brush tip, and set the Foreground color to #f0f0ee. Create a new layer on top of the Background layer, call it string, then pick the Direct Selection Tool (A).
Right click the path and choose Stroke Path, then choose Brush from the Tool drop down menu and click OK. Hit Enter/Return to get rid of the work path.
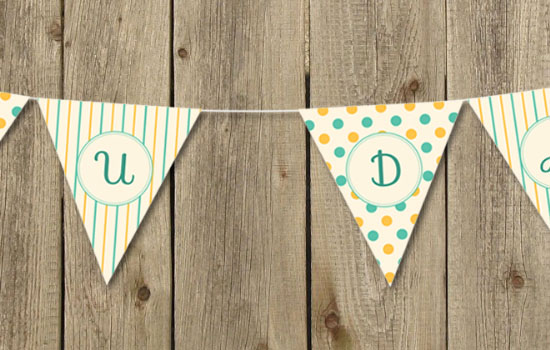
Next, you’ll need to place the pennant triangles along the string.
To do this, select all the letter/shape groups you have in the original printable file, then go to Layer > Duplicate Layers, and duplicate them into the document you’re working with.
After that, select each group and go to Layer > Merge Group (Ctrl/Cmd + E).
Select all merged layers, then go to Edit > Free Transform (Ctrl/Cmd + T). Scale the letters down to a size you like, then hit Enter/Return to accept.
After that, select each layer individually, press Ctrl/Cmd + T, then rotate the pennant triangle selected and move it around to place it along the string. Remember to hit Enter/Return when done.
Step 6
Double click the first pennant layer to apply the following Layer Style:
– Inner Glow
- Opacity : 100%
- Size : 0
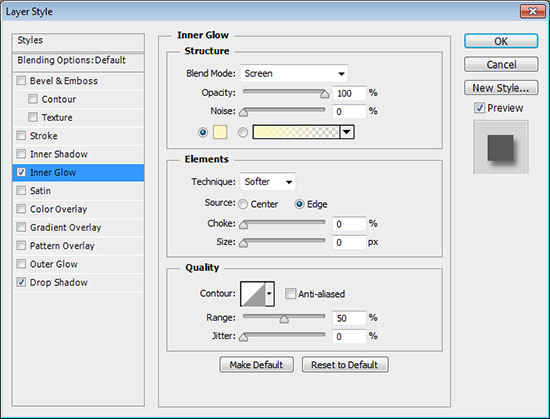
– Drop Shadow
- Opacity : 50%
- Distance : 7
- Size : 7
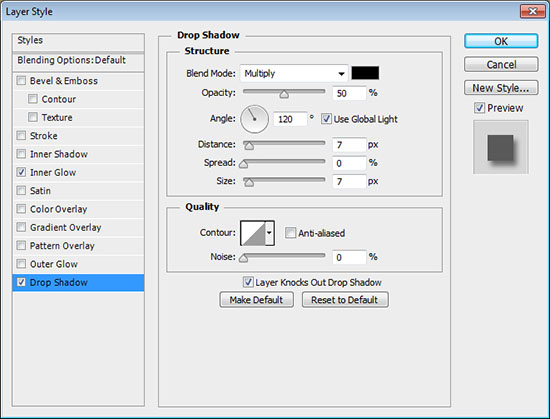
This will add a simple shadow and define the edges a little bit.

Right click the styled layer, choose Copy Layer Style, then select all the remaining pennant layers, right click any of them, and choose Paste Layer Style.
Apply the same previous Drop Shadow effect to the string layer.
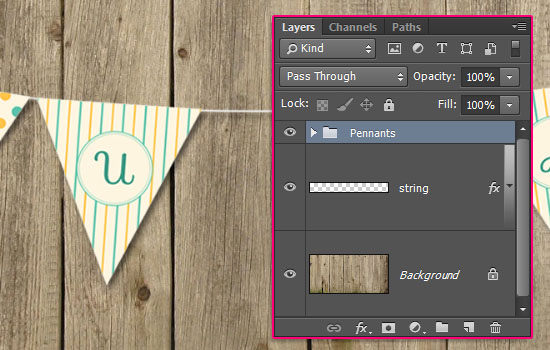
Group the pennant layers and call the group Pennants.
Step 7
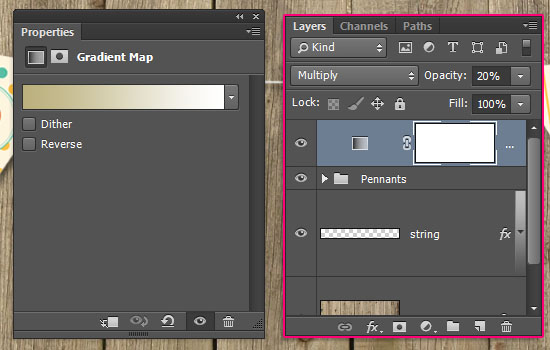
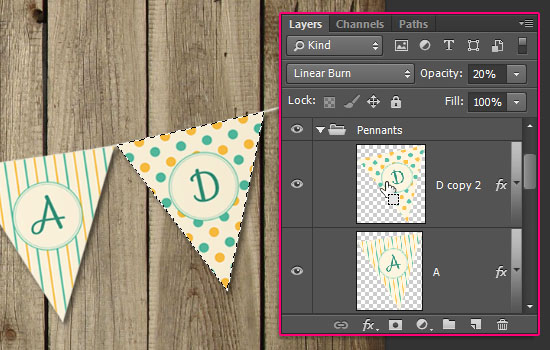
Click the Create new fill or adjustment layer icon down the Layers panel and choose Gradient Map.
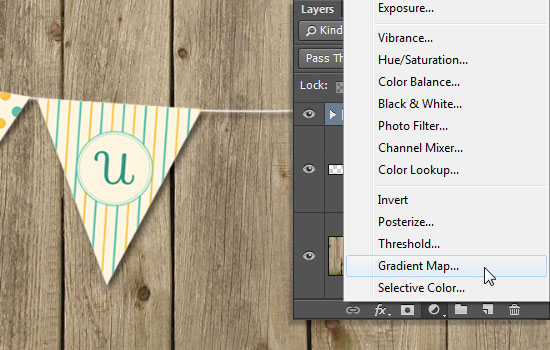
Use the colors #bbb07d to the left and #ffffff to the right to create the gradient, then change the adjustment layer’s Blend Mode to Multiply and its Opacity to 20%.
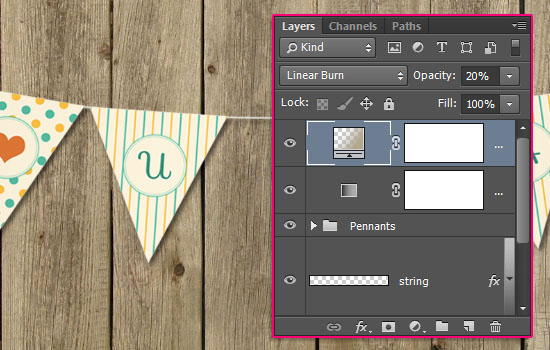
Click the Create new fill or adjustment layer icon once again and choose Gradient. Use a Transparent to Fill Color gradient using the colors #a7a297 to the left and #b3a78c to the right, change the Style to Radial, and the Scale to 300.
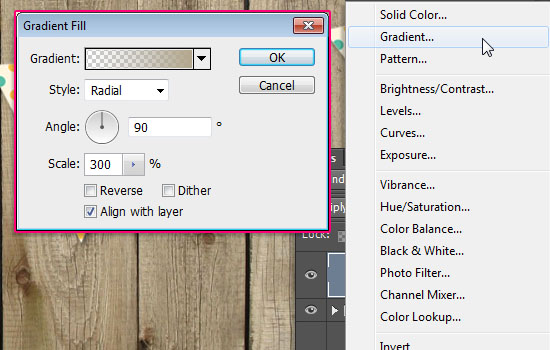
Change the Gradient layer’s Blend Mode to Linear Burn and its Opacity to 20%.
Step 8
Ctrl/Cmd + click a pennant layer’s thumbnail to create a selection.
Press and hold the Shift key, then Ctrl/Cmd + click another pennant layer’s thumbnail to add it to the original selection.

Repeat that to add the rest of the pennants to the selection.
Create a new group inside the Pennants group and call it Texture Overlay. Then click the Add vector mask icon down the Layers panel to create a selection-based mask.
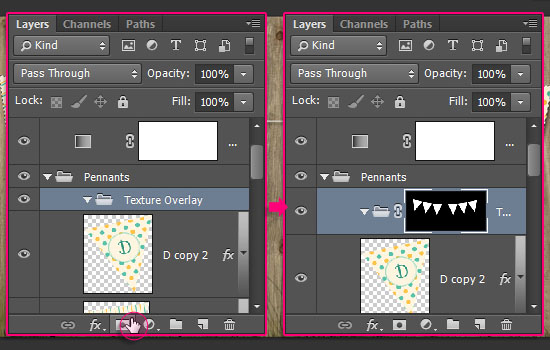
Place the PaperCrumpled0002 image inside the Texture Overlay group, scale it as needed to cover the letters, then change its layer’s Blend Mode to Lighten, and its Opacity to 50%.
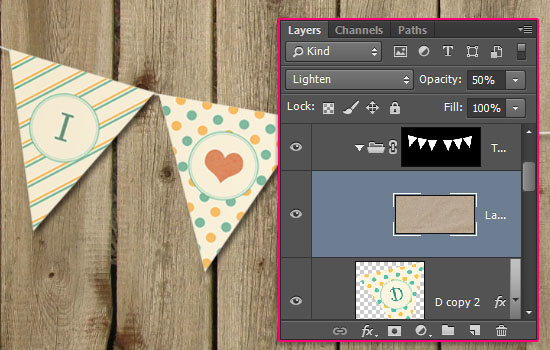
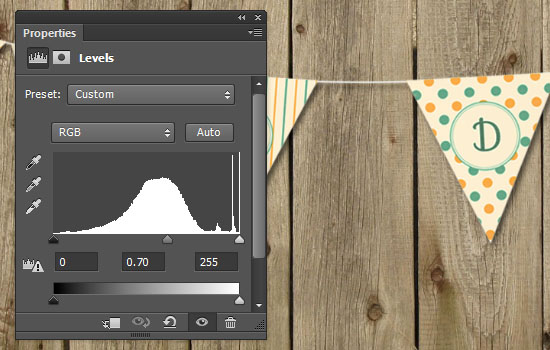
Click the Create new fill or adjustment layer icon and choose Levels.
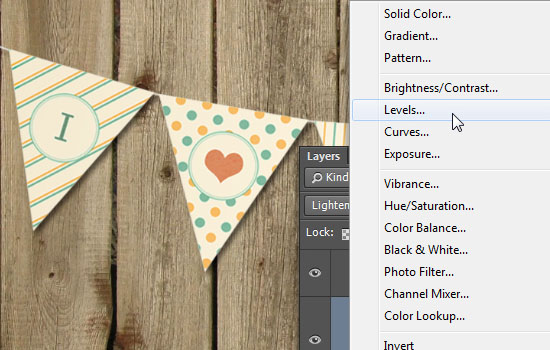
Change the Gamma value to 0.70. This will add a nice subtle texture to the pennants.
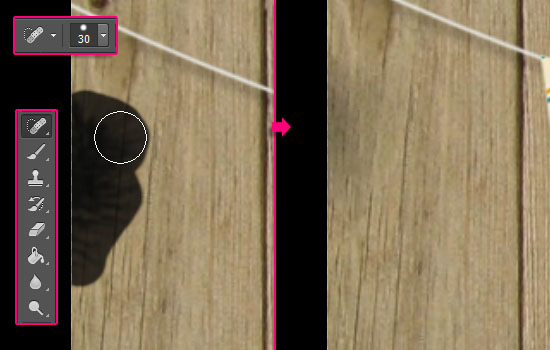
This is optional, but if needed, select the Background layer, pick the Spot Healing Brush Tool, and choose a 30 px hard round brush to get rid of any unwanted parts.
And you’re done!
Hope you enjoyed creating your pennant banner, and found the tutorial’s tips helpful 🙂
Did you enjoy this post? Please consider donating to help us cover our server costs.


Sorry, I did not understand what size you need to specify to create the first document.What do you mean 10 “x 11”?Maybe I do not understand that.
That is the size measured in Inches, which you can choose from the unit drop down menus next to the Width and Height fields in the New (File > New) dialogue box.
Hope this helps 🙂
Thanks!
You’re welcome 🙂
.