
Simple Zipper Text Effect – Part 2
This is Part 2 of this tutorial. In Part 1 we created the zipper brush, stroked the main text, and styled the zipper.
In this part, we’re going to continue styling the other parts, then add the slider (and pull tab) and style them as well.
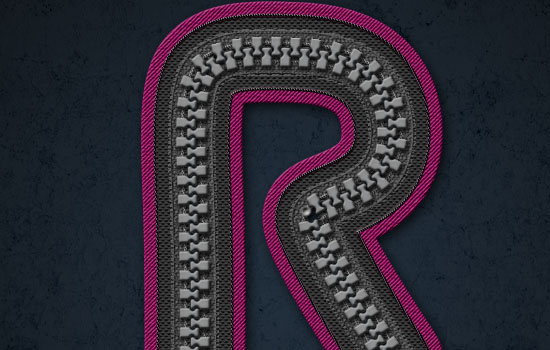
The Final Result

Tutorial Details
- Software Used : Photoshop
- Version : CS6 Extended
- Time : 0:45 – 1:45
Resources
- Rocky wall pattern by Projecteightyfive.
- Small Crosses pattern by Ian Dmitry.
- Diamonds Are Forever pattern by Tom Neal.
- Carbon fibre pattern by Atle Mo.
- Diagonal Noise pattern by Christopher Burton.
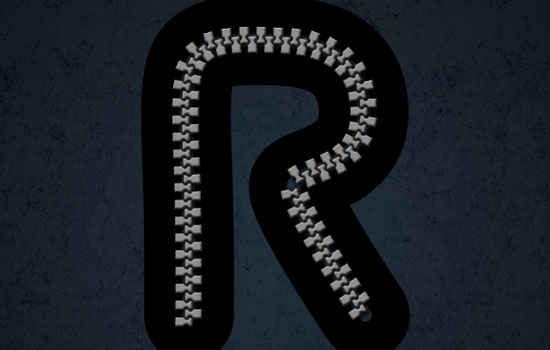
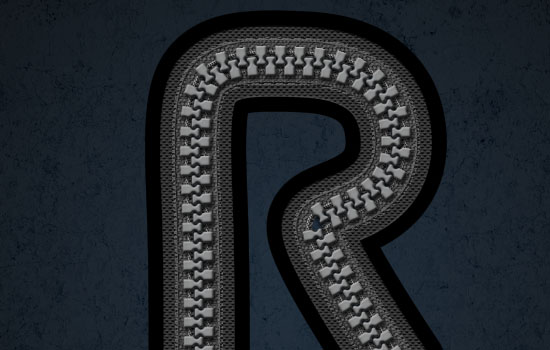
Final result of Part 1
Next, we’ll be applying Layer Styles to the different stroke layers from top to bottom, starting with the layer “20”.
Step 8
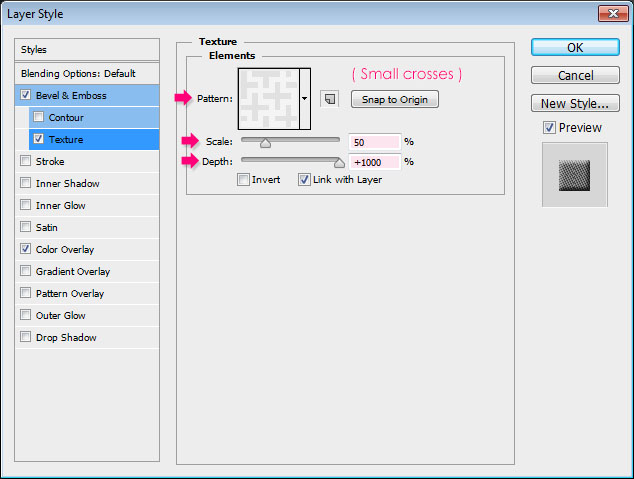
Double click the 20 layer to apply the following Layer Style:
– Bevel and Emboss
Just use the default values.

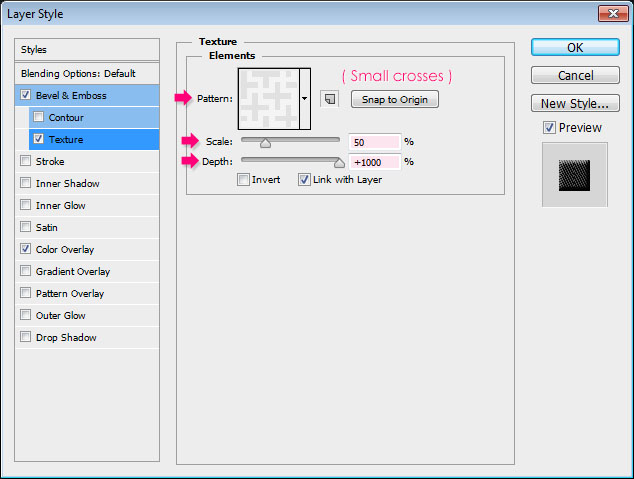
– Texture
- Pattern : Small crosses
- Scale : 50%
- Depth : 1000%
– Color Overlay
- Color :
#696969
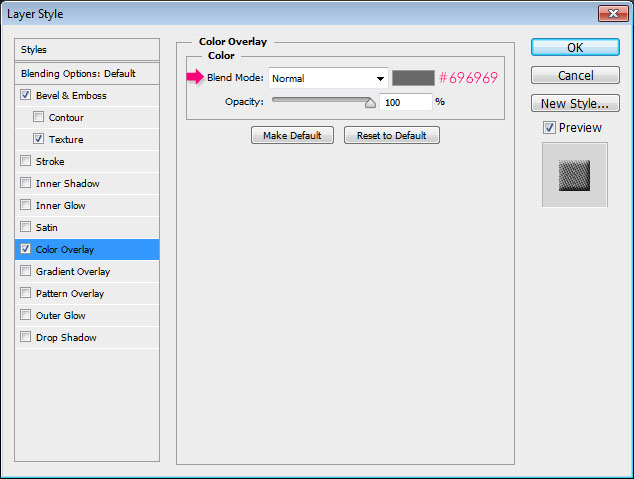
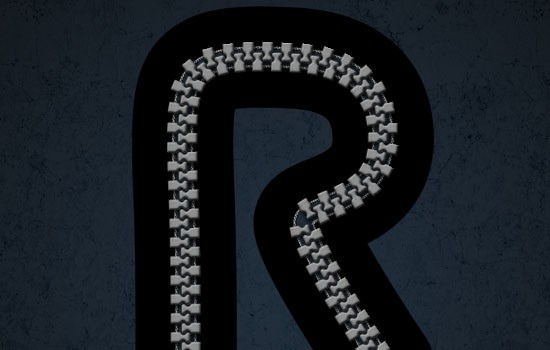
This will style the thin line in the center.
Step 9
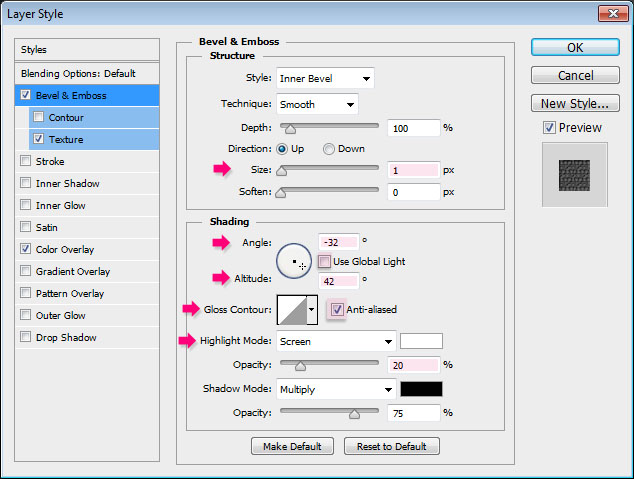
Double click the 40 copy layer to apply the following Layer Style:
– Bevel and Emboss
- Size : 1
- Uncheck the Use Global Light box
- Angle : -32
- Altitude : 42
- Check the Anti-aliased box
- Highlight Mode – Opacity : 20%
– Texture
- Pattern : Diamonds Are Forever
- Depth : 1000%

– Color Overlay
- Color :
#494949
This will style the “Tape”.
Step 10
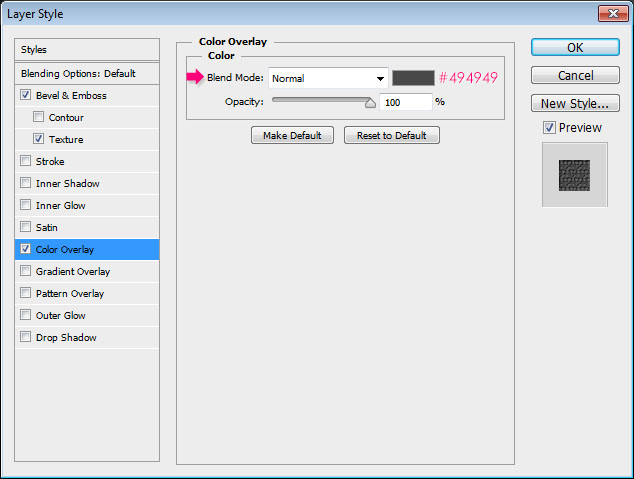
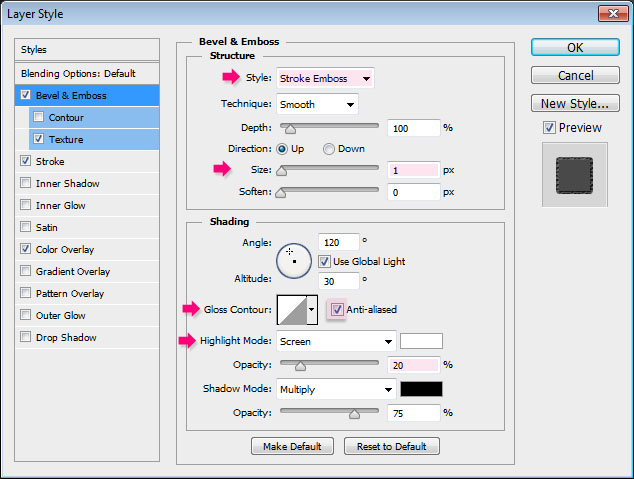
Double click the 40 layer to apply the following Layer Style:
– Bevel and Emboss
- Style : Stroke Emboss
- Size : 1
- Check the Anti-aliased box
- Highlight Mode Opacity : 20%
You’ll see the effect of this step when we apply the Stroke effect next.
– Texture
- Pattern : Diamonds Are Forever
- Depth : 1000%

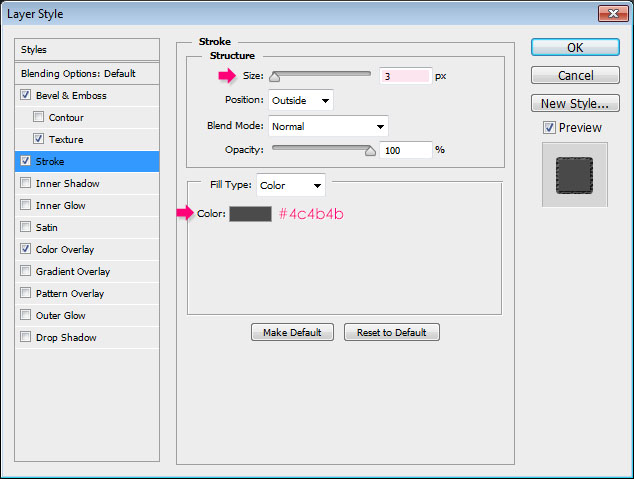
– Stroke
- Size : 3
- Color :
#4c4b4b
– Color Overlay
- Color :
#494949
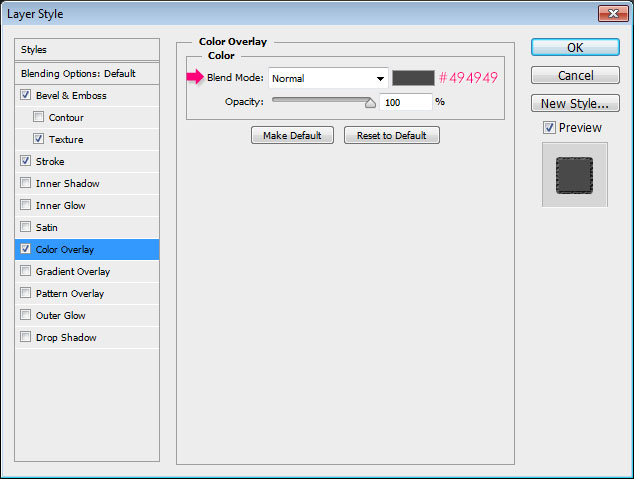
This will add an outer stroke to the Tape.
Step 11
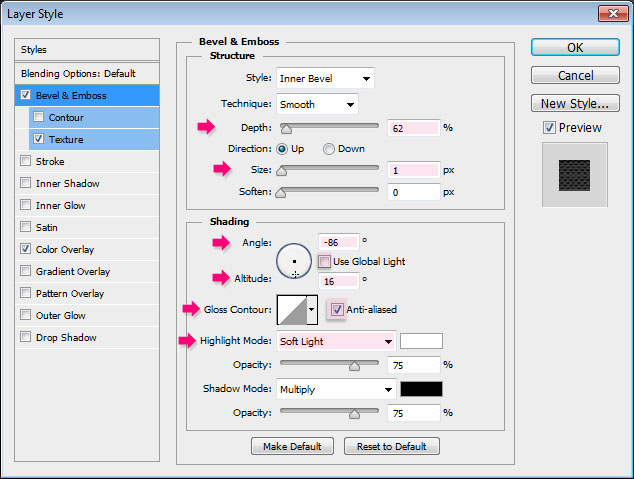
Double click the 70 layer to apply the following Layer Style:
– Bevel and Emboss
- Depth : 62
- Size : 1
- Uncheck the Use Global Light box
- Angle : -86
- Altitude : 16
- Check the Anti-aliased box
- Highlight Mode : Soft Light
– Texture
- Pattern : Carbon Fiber
- Scale : 50%
- Depth : 1000%

– Color Overlay
- Color :
#303030

This will style the layer around the Tape.
Step 12
Double click the 75 layer to apply the following Layer Style:
– Bevel and Emboss
Just use the default values.

– Texture
- Pattern : Small crosses
- Scale : 50%
- Depth : 1000%
– Color Overlay
- Color :
#0c0c0c
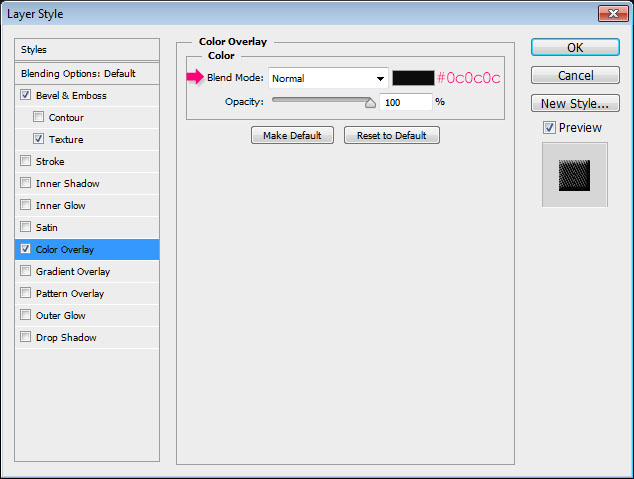
This will style the outer part of the previous layer.
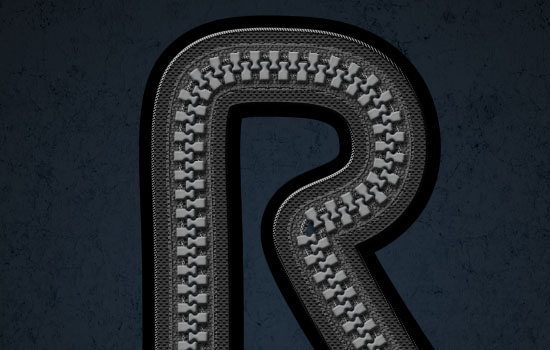
Ctrl/Cmd + click the 70 layer’s thumbnail to create a selection.
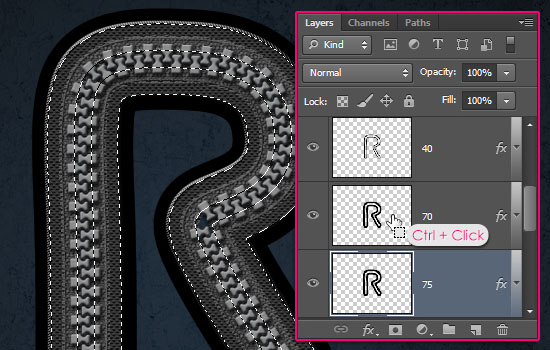
Make sure that the 75 layer is the selected layer, then press the Delete key on the keyboard to delete the selected part. Go to Select > Deselect (Ctrl/Cmd + D) to get rid of the selection. This will keep only the outer part of the stroke.
Step 13
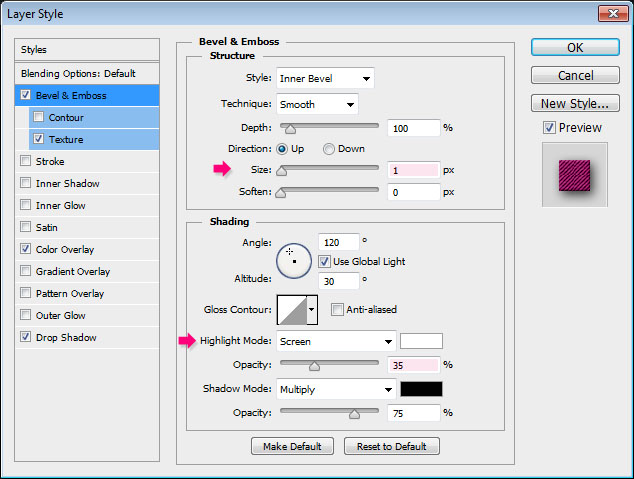
Double click the 100 layer to apply the following Layer Style:
– Bevel and Emboss
- Size : 1
- Highlight Mode – Opacity : 35%
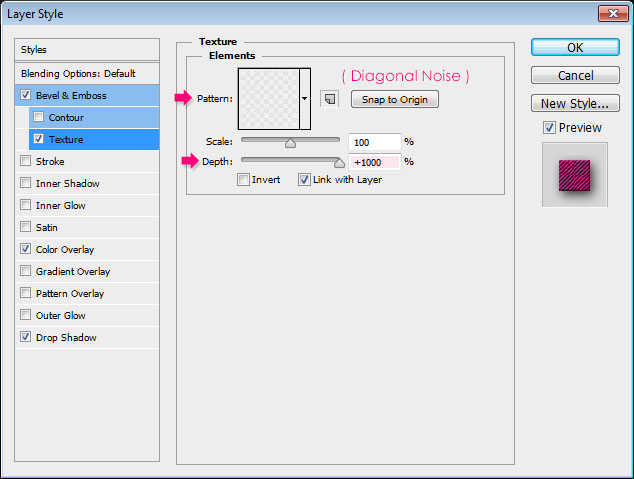
– Texture
- Pattern : Diagonal Noise
- Depth : 1000%
– Color Overlay
- Color : This is the fun part where you can try different colors and choose your favorite. Here, the color used is
#940057
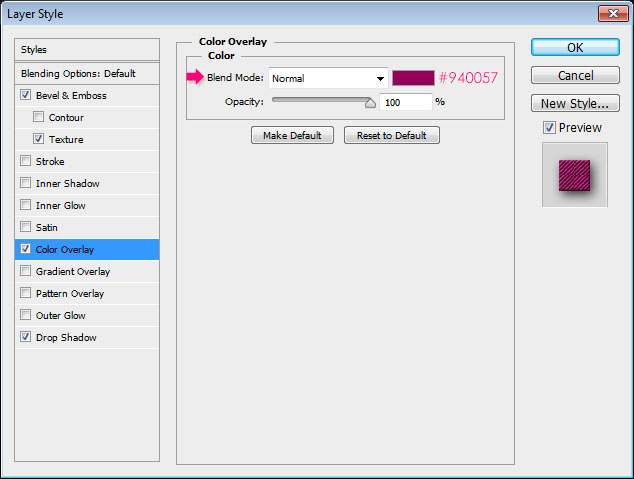
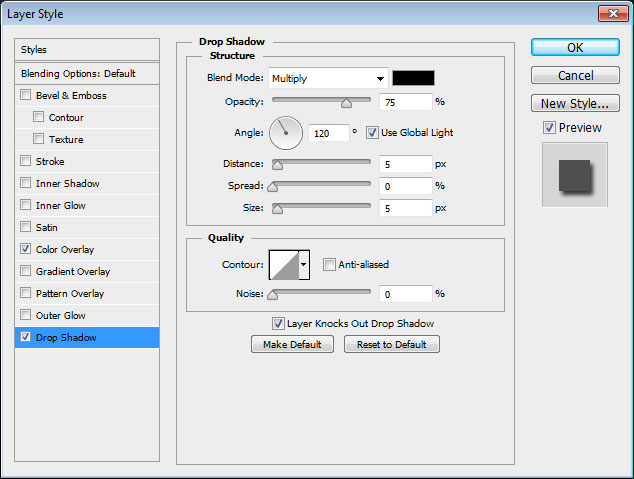
– Drop Shadow
- Size : 13
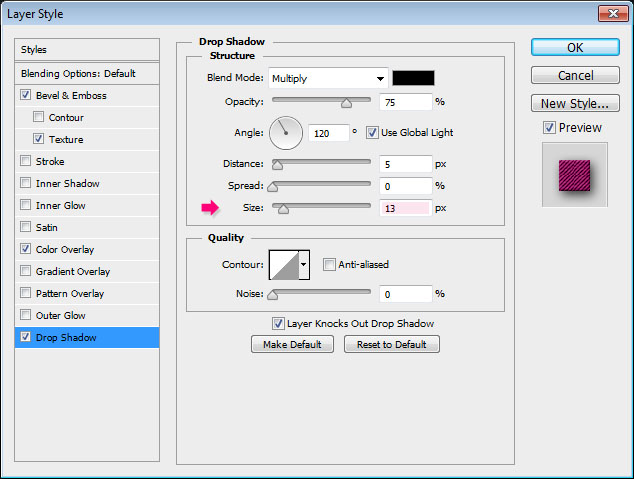
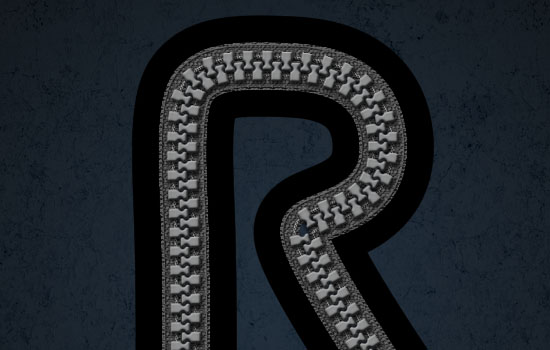
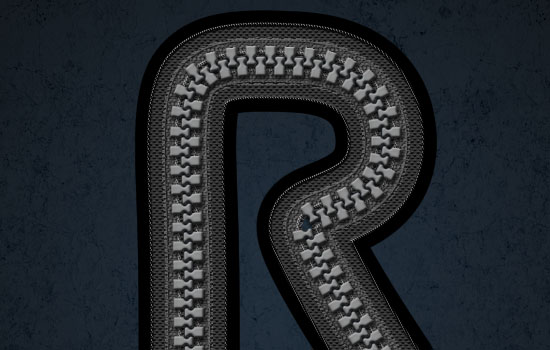
And the text is all styled now!
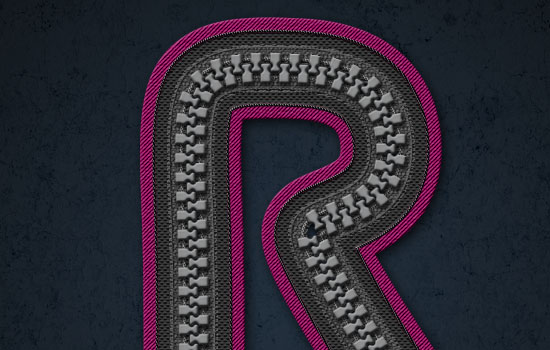
Step 14
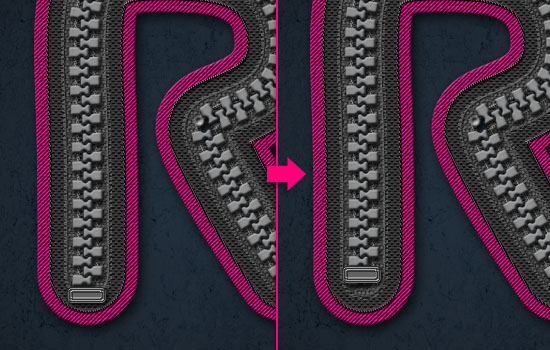
As mentioned in the first part, the zipper pieces might overlap. So we tried to fix that, but you might still end up with some empty areas.
You can delete more parts and re add them, but we’re going for an easier option here, which is adding a rivet.
So create a new layer on top of all layers, call it Rivet, then set the Foreground color to #838383, pick a hard round brush, choose a size that covers the area, here it is 10 px, then click to add the rivet.
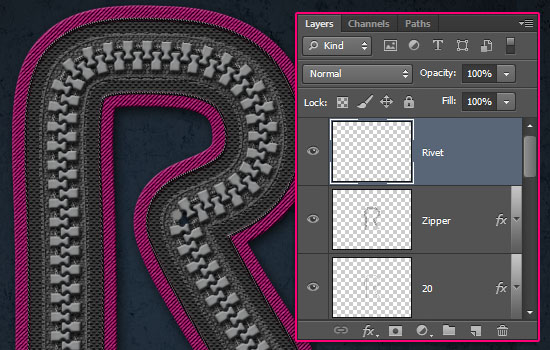
Double click the Rivet layer to apply the following Layer Style:
– Bevel and Emboss
- Technique : Chisel Hard
- Depth : 50
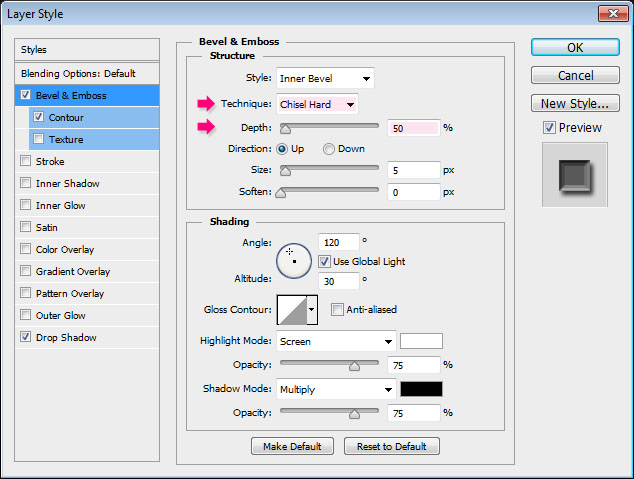
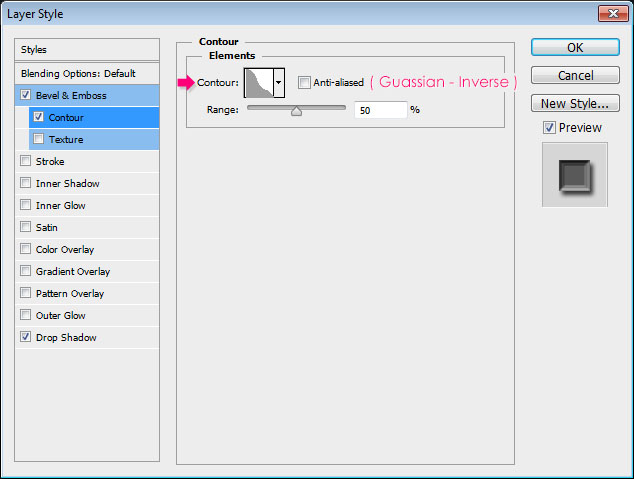
– Contour
- Contour : Guassian – Inverse
– Drop Shadow
Use the default values.

This will style the rivet.
Step 15
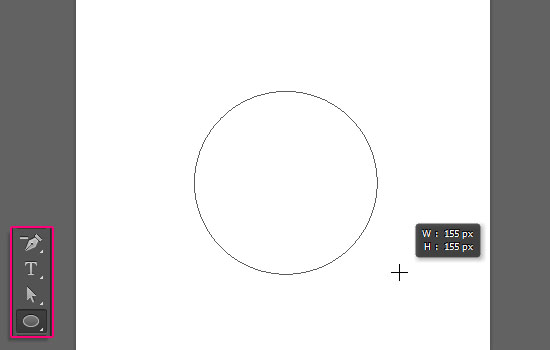
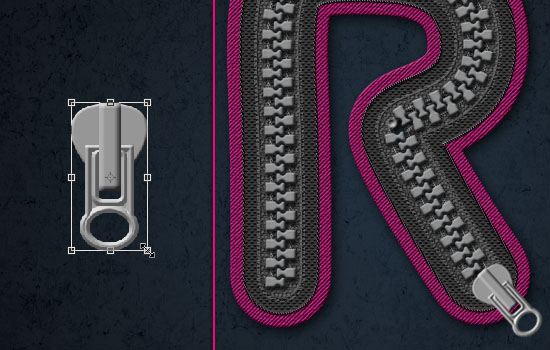
Next, we’re going to create the slider.
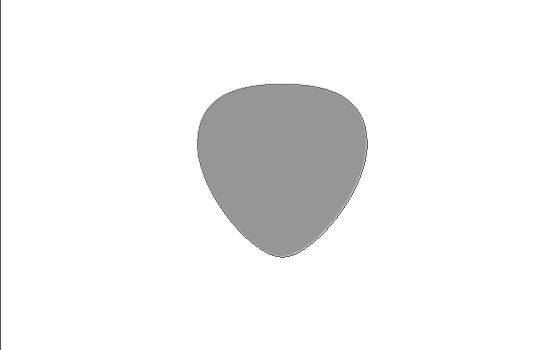
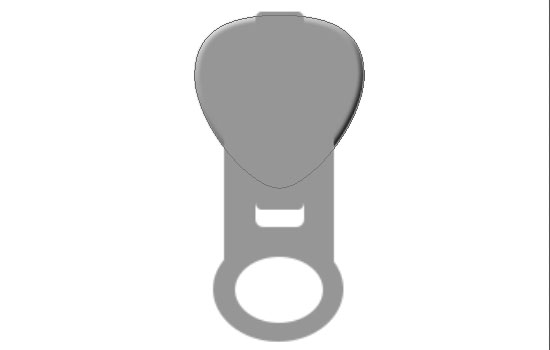
Create a new 350 x 350 px document, set the Foreground color to #969696, pick the Ellipse Tool, then click and drag to create a 150 x 150 px circle (press and hold the Shift key while dragging to achieve a perfect circle).
Use the Direct Selection Tool to select the anchor point at the bottom of the circle, then go to Edit > Transform > Scale. Press and hold the Alt/Option key, then click and drag one side of the transform box inwards to narrow that part down.
Hit Enter/Return when done, and move the point downwards.
Then select the two points on the sides of the circle and move them upwards.

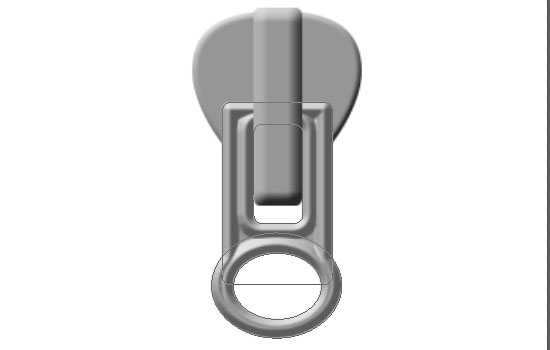
Continue modifying the shape until you get a slider body shape that you like. (Something close to a guitar pick’s shape ^_^).
Pick the Rounded Rectangle Tool, make sure that the Radius value is set to 5 in the Options bar, then draw a rectangle as shown below.
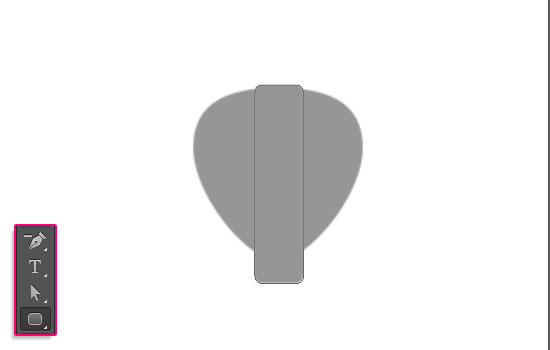
Draw yet another bigger rectangle on top of the lower third of the slider.
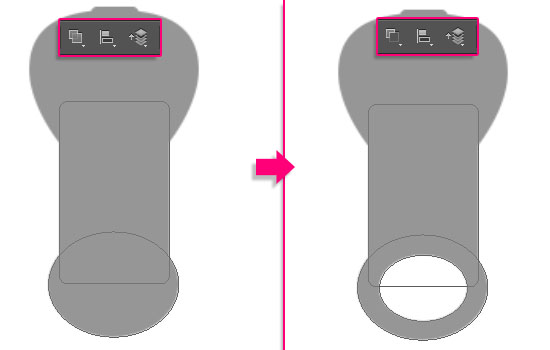
Then, pick the Ellipse Tool again, and choose the Combine Shape option (icon) in the Options bar. Create an ellipse at the end of the big rectangle.
With the Ellipse Tool still active, choose the Subtract Front Shape option, and create a smaller ellipse inside of the existing one to remove the inner part.
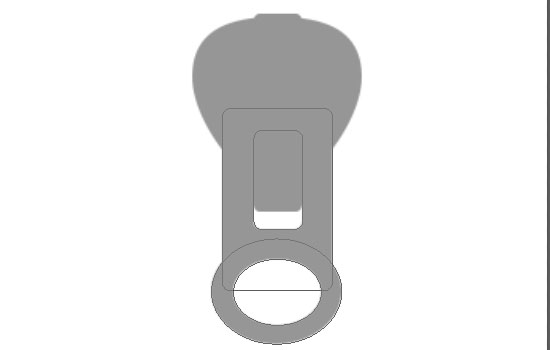
Finally, pick the Rounded Rectangle Tool, keep the Subtract Front Shape option, then draw a rectangle inside the big one to remove the inner part as well.
You can use the Direct Selection Tool to move the points around if needed.
Next, we’ll apply Layer Styles to the different shapes from bottom to top.
Step 16
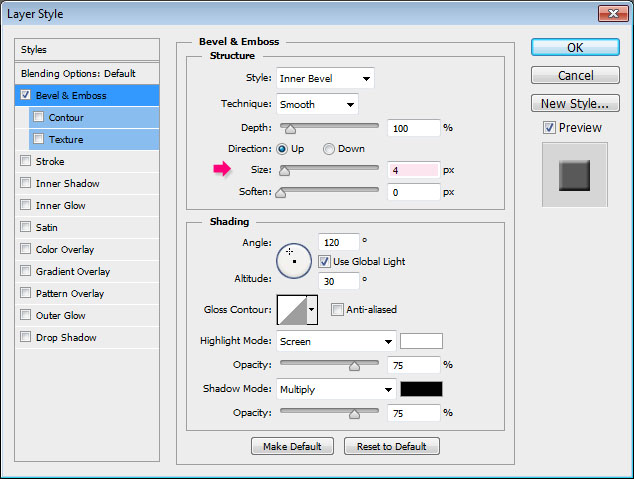
Double click the main slider body layer to apply a Bevel and Emboss effect, by changing the Size to 4.
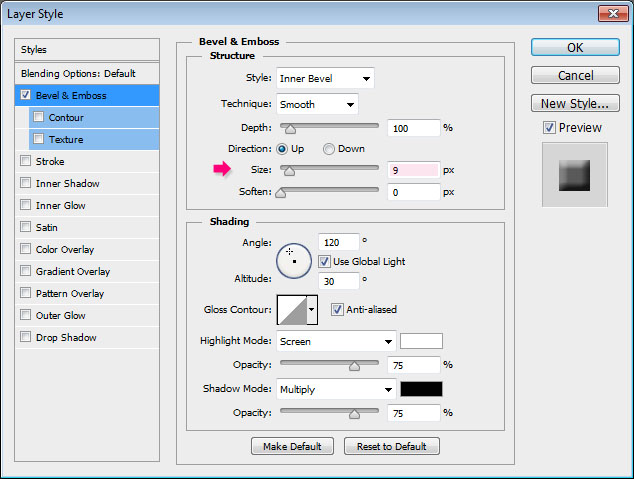
Double click the small rectangle layer to apply a Bevel and Emboss effect, by changing the Size to 9.
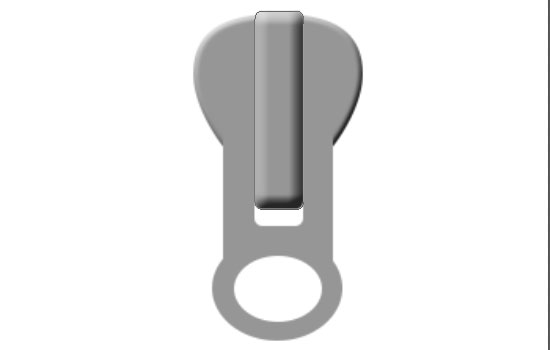
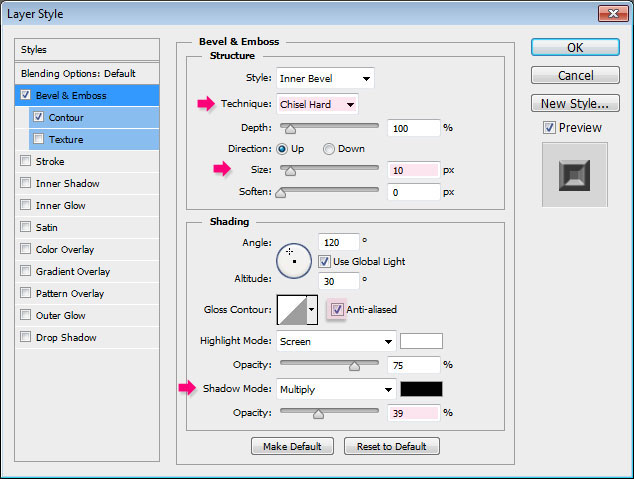
Double click the last shape (tab) layer to apply the following Layer Style:
– Bevel and Emboss
- Technique : Chisel Hard
- Size : 10
- Check the Anti-aliased box
- Shadow Mode – Opacity : 39%
– Contour
- Contour : Cone
- Check the Anti-aliased box.
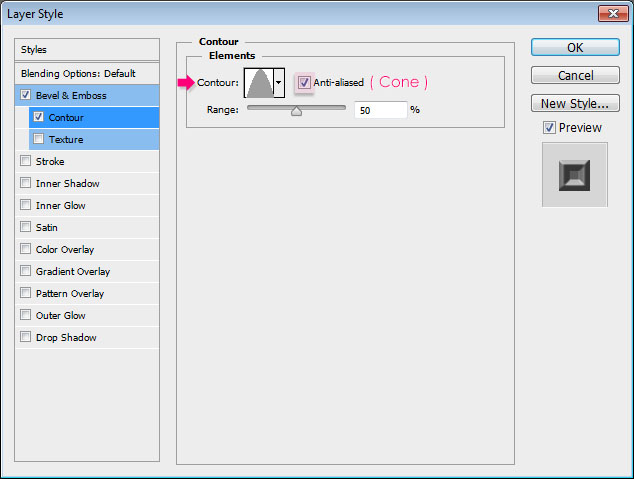
That’s it for the styling for now.
Step 17
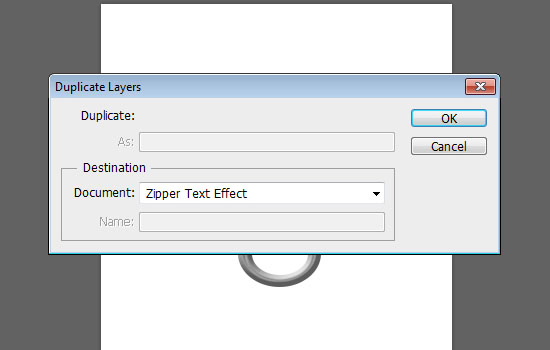
Select all the shape layers you have, then go to Layer > Duplicate Layers, and choose the name of your original document from the Document drop down menu (under Destination).
Save this document, then close it and go back to the original one.
Make sure that the duplicated layers are on top of all other layers. Then select each shape layer separately and go to Layer > Rasterize > Layer Style.
* Note: This only works for CS6. If you are using older versions, you’ll need to group each layer, then go to Layer > Merge Group.
What this does, is it makes the Layer Style a part of the layer itself.
Once all shape layers are resterized, select all of them, then go to Edit > Free Transform.
Resize, rotate, and position the slider at the end of your text. Don’t forget to hit Enter/Return when done.
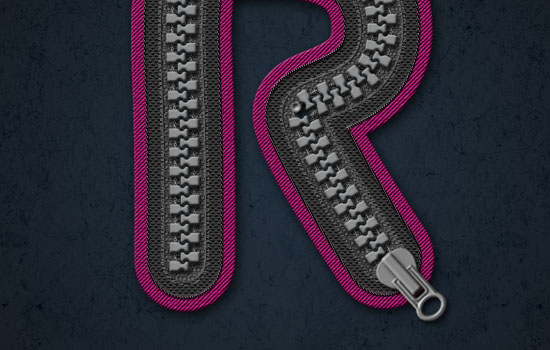
Apply the following Layer Style to all shape layers:
– Color Overlay
- Blend Mode : Multiply
- Color :
#e1e1e1

– Drop Shadow
Use the default values.
That should be it for the slider.
Step 18
The last thing we’ll add is the bottom stop. So use the Rounded Rectangle Tool to create a small rectangle over the zipper’s start point (the color is #626262).
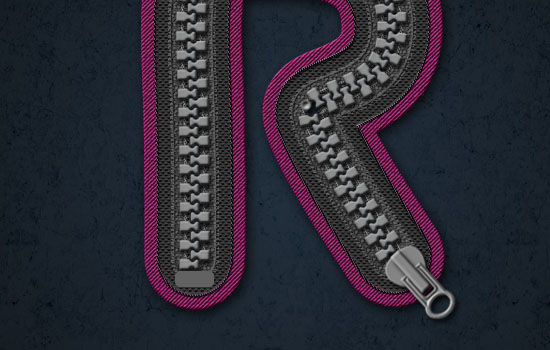
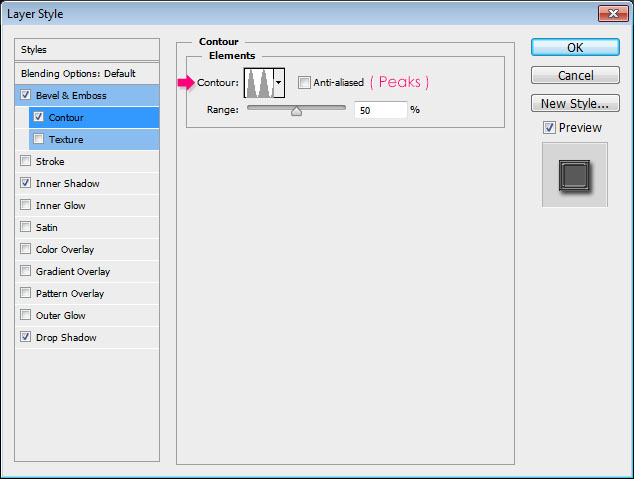
Double click the layer to apply the following Layer Style:
– Bevel and Emboss
- Technique : Chisel Hard
- Depth : 150
- Highlight Mode : Vivid Light
- Color :
#dadada - Shadow Mode – Opacity : 50%

– Contour
- Contour : Peaks
– Inner Shadow
- Distance : 0
- Size : 3
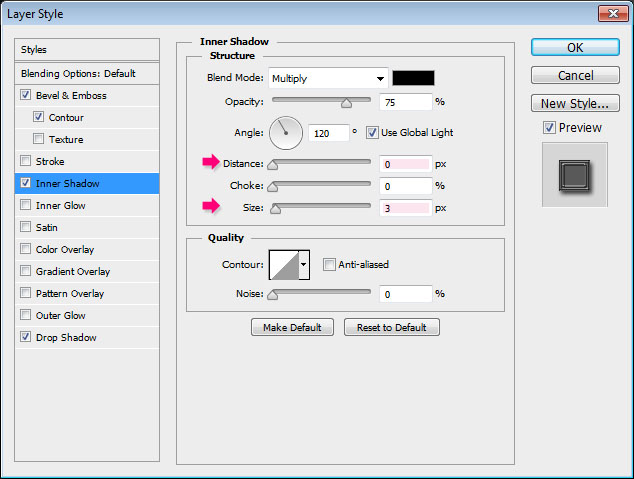
– Drop Shadow
- Distance : 3

Then, you can move the rectangle to place it as you like.
And we’re done!
Hope you enjoyed the tutorial and found it helpful.
Did you enjoy this post? Please consider donating to help us cover our server costs.


Just super. Great lesson. I am every day, more and more admire you. You are a wonderful person. Thanks for the lessons.
That means a lot! I really am very thankful for your absolutely kind words.
This just totally made my day 🙂
Thank you so very much once again.
Regards.
Great tuto ! I took a lot of pleasure to make that.
Thank you very much ! See you soon with a new lesson i hope
(sorry for my bad english)
…My work:
[img]http://nsm08.casimages.com/img/2013/04/03//mini_13040307243813680411044640.jpg[/img]
http://www.casimages.com/img.php?i=13040307243813680411044640.jpg
Amazing outcome indeed!
Glad you had fun working on it 🙂
Thank you very much for the link, the kind words, and the support.
It looks great and what I feel is that this tutorial for the advanced learner and probably for the same reason, I am still struggling to get the shape as described and depicted here.
It is a bit advanced because of the zipper part.
Can you please add more details? Like, what Step you got stuck at and weren’t able to achieve the same result?
Usually, the issues are size or value-related. So maybe something in the settings?
Please feel free to add a reply with those details, and if you can add a screenshot of the problem that’d be great as well.
Regards.
thanx
Very well done!
Thanks for sharing your work 🙂
thank you for the tutorials
You’re welcome!
Thanks for the comment 🙂
Thanks very much for your tutorial. Fantastic! I love it!
Thanks for sharing.