
Stuffed Wool Text Effect
Using textures with layer styles is a great way of achieving some cool effects. This tutorial will show you how to use a wool texture, a couple of layer styles, and some brushes, to create a cozy, stuffed wool – inspired text effect.
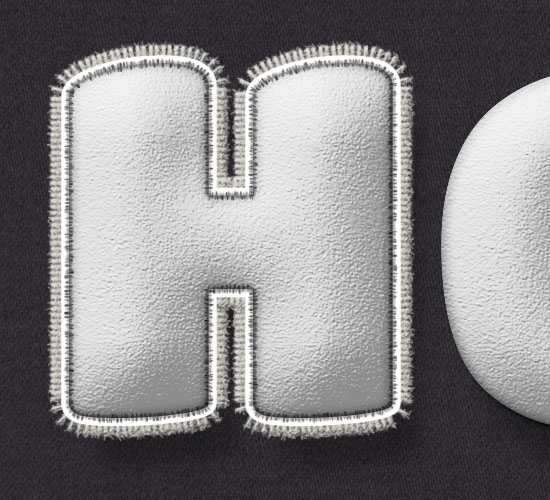
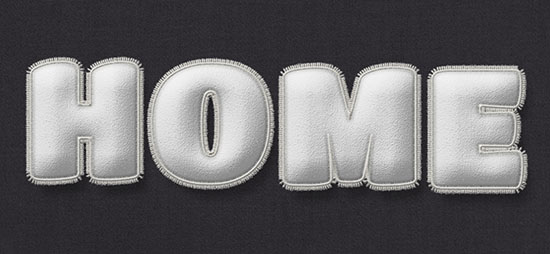
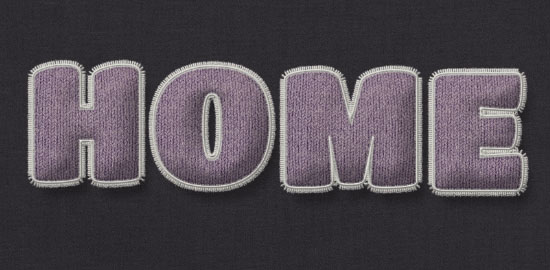
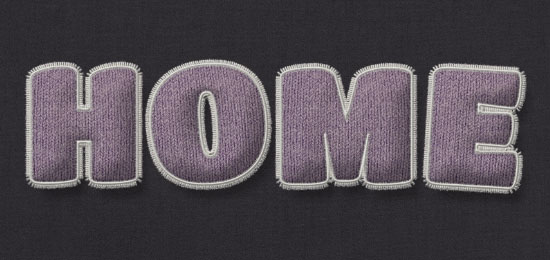
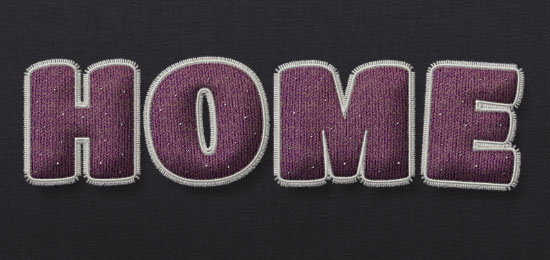
The Final Result

Tutorial Details
- Software Used : Photoshop
- Version : CC 2014
- Time : 1:30 – 2:45
Resources
- Titan One Regular font.
- Brushes Set.
- FabricPlain0048 Image 2 – Medium – 1600×1166.
- Cork pattern by Atle Mo.
- Diagonal Noise pattern by Christopher Burton.
- Rough Cloth pattern by Bartosz Kaszubowski.
- Polonez Pattern pattern by Radoslaw Rzepecki.
- Wool Texture by Texturewave (You can use any texture and size you like. In this tutorial, I used the first texture – Small size).
- Free Pack 6000 photoshop gradients by Supertuts007 (Load the CHROMES.grd file).
Step 1
Create a new 1750 x 855 ps docuemnt. Go to File > Place Embedded, and open the FabricPlain0048 image. Resize it as needed, then hit the Enter/Return key to accept the changes.
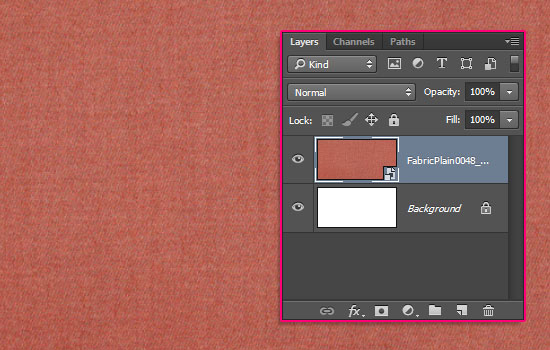
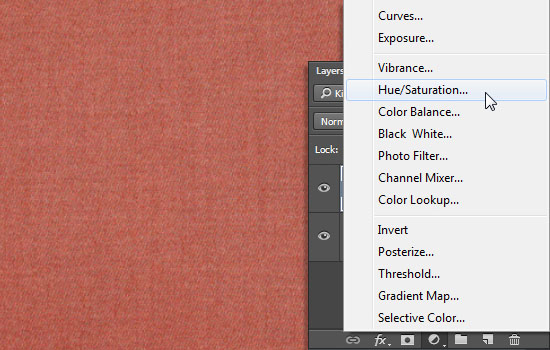
Click the Create new fill or adjustment layer icon at the bottom of the Layers panel and choose Hue/Saturation.
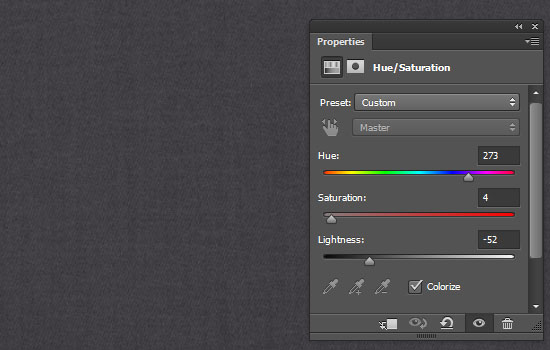
Check the Colorize box, change the Hue to 273, the Saturation to 4, and the Lightness to -52.
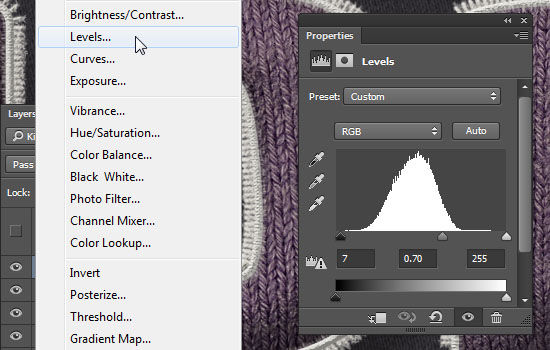
Click the Create new fill or adjustment layer icon again and choose Levels.
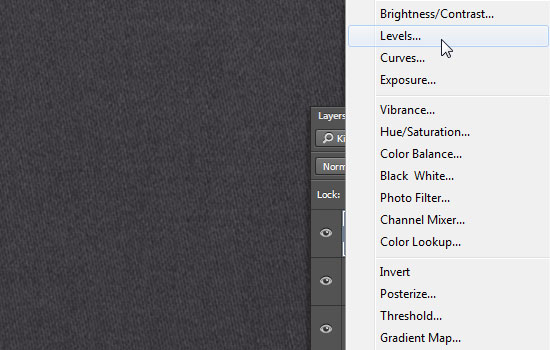
Change the Gamma value to 0.80.

Step 2
Create the text in All Caps, each letter in a separate layer, using the font Titan One Regular, the Size 500 pt, and whatever light color you want as we’ll be adjusting the color later on after adding the texture.

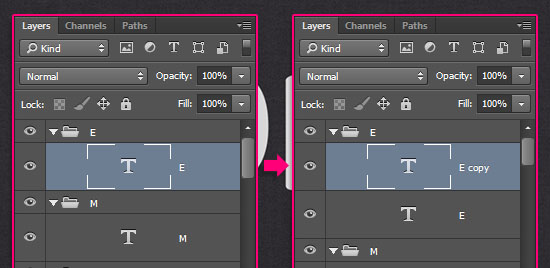
Place each letter’s layer in a group that has that letter’s name (by selecting the layer then going to Layer > Group Layers), then duplicate each text layer in its group.
Double click the first letter’s original text layer to apply a Drop Shadow effect using the following values:
- Color :
#3c3c3c - Opacity : 35%
- Distance : 55
- Size : 27
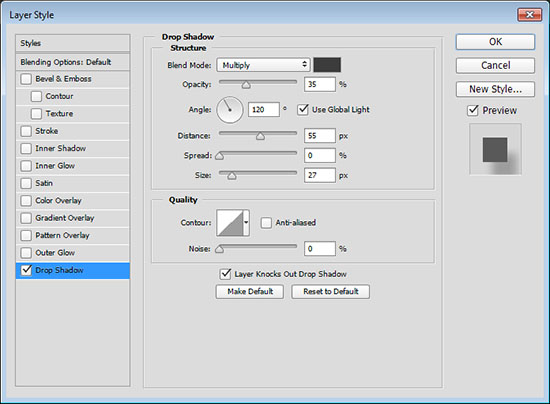
This will apply a simple drop shadow effect.
Right click the styled layer, choose Copy Layer Style, then select all the other original text layers for the other letters you have (Ctrl/Cmd + click each one), right click any of them, and choose Paste Layer Style.
This is how you’ll be applying the layer styles for the rest of the tutorial as well, since we’re working with each letter individually.

Step 3
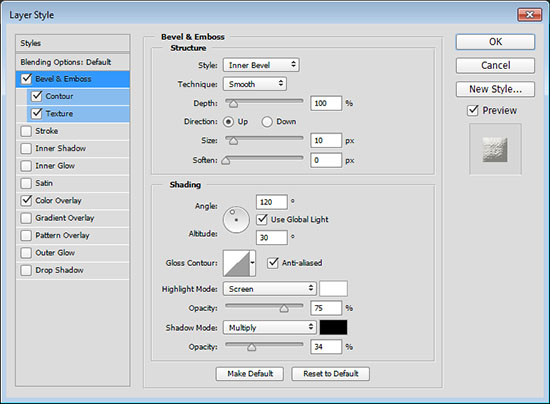
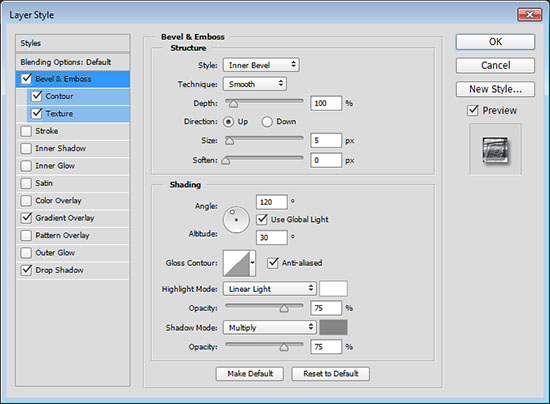
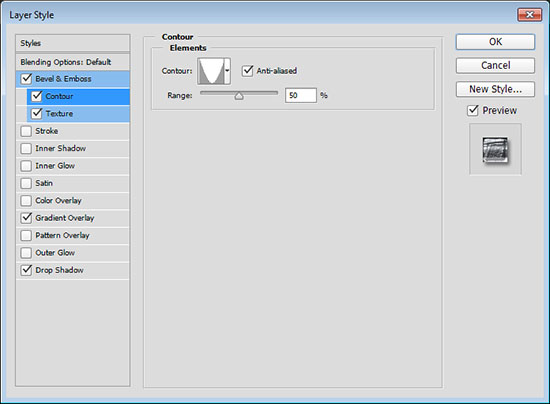
Double click the copy text layer of the first letter to apply the following layer style:
– Bevel and Emboss
- Size : 80
- Check the Anti-aliased box
- Shadow Mode – Opacity : 35%
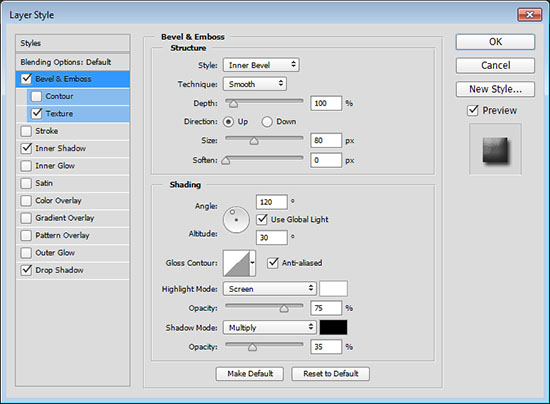
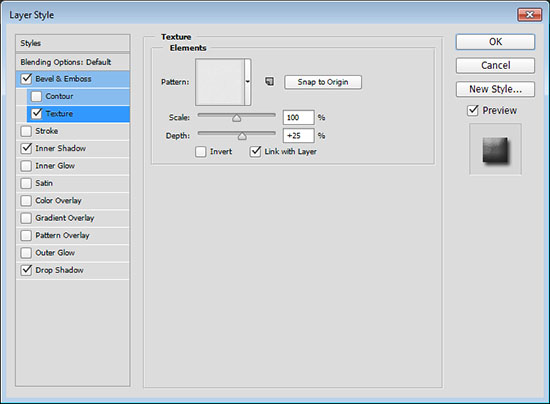
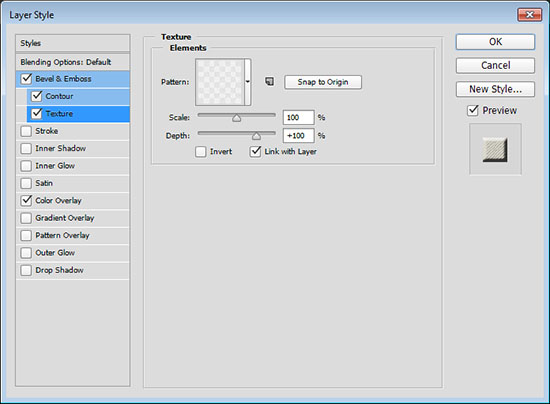
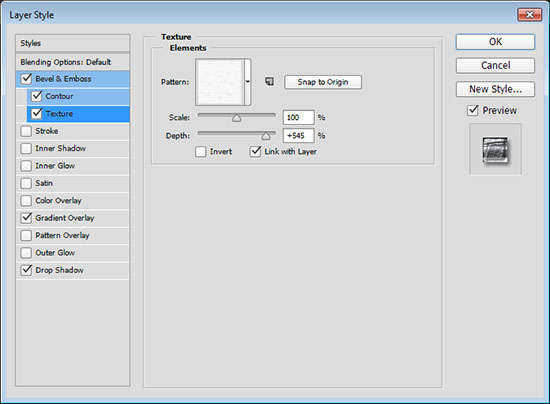
– Texture
- Pattern : Cork
- Depth : 25%
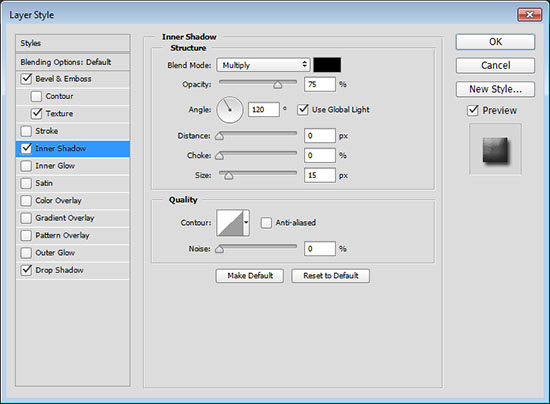
– Inner Shadow
- Distance : 0
- Size : 15
– Drop Shadow
Use the default values.
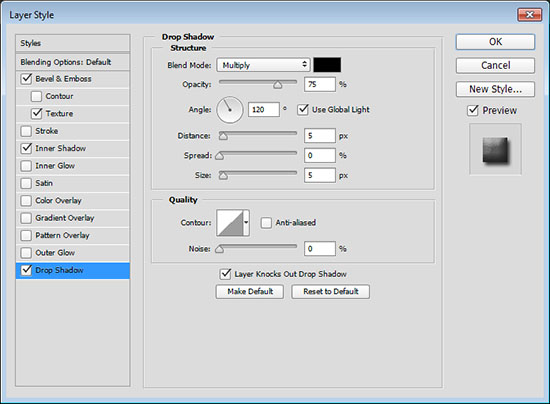
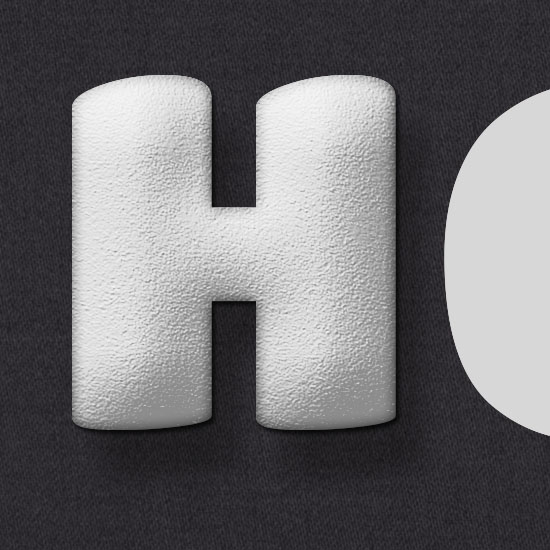
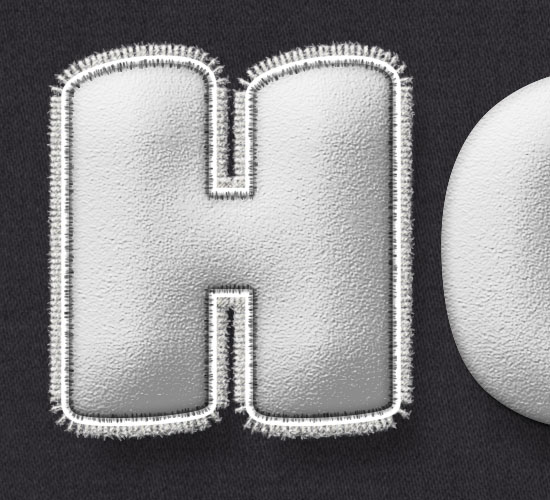
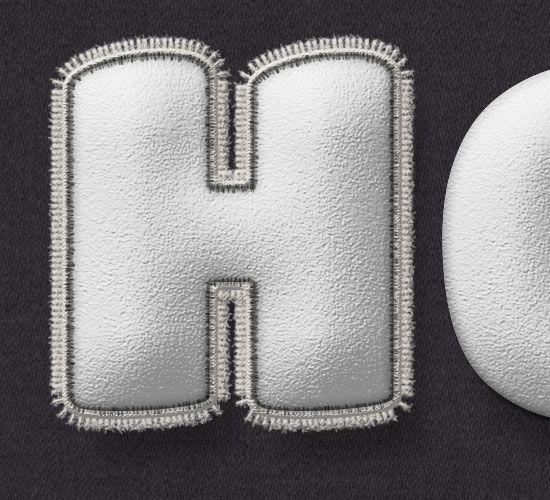
This will style the main part of the text that gives the 3D stuffed look.
Copy and paste the layer style for the rest of the copy text layers.

Step 4
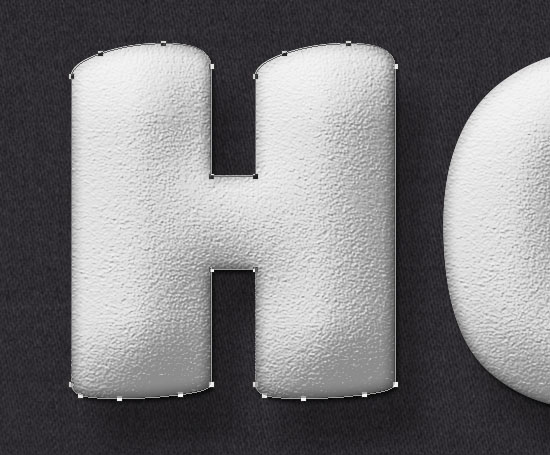
Right click the first letter’s original text layer and choose Create Work Path.
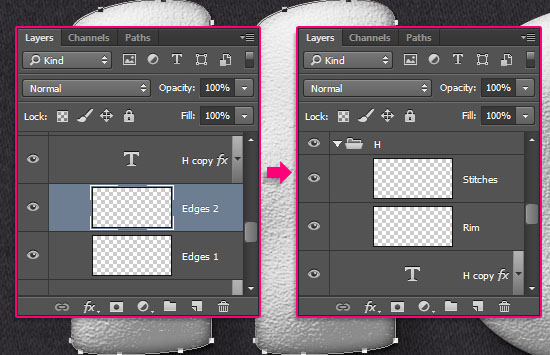
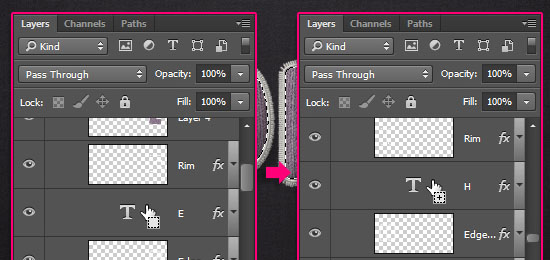
Create two new layers on top of the original text layer, call the first one Edges 1 and the second Edges 2.
Then, create two more new layers on top of the copy text layer, call the first one Rim and the second Stitches.
You’ll need to create those layers for each other letter you have.
Step 5
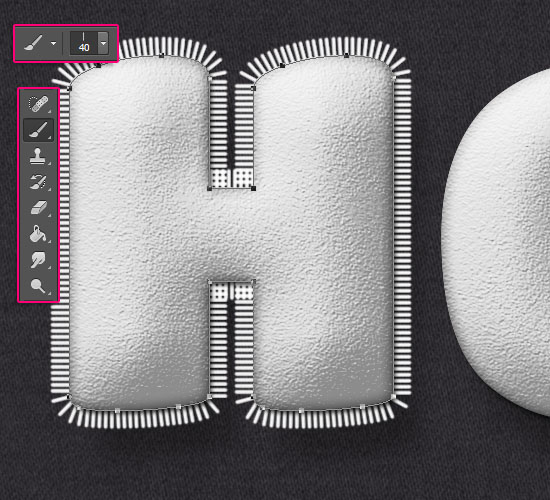
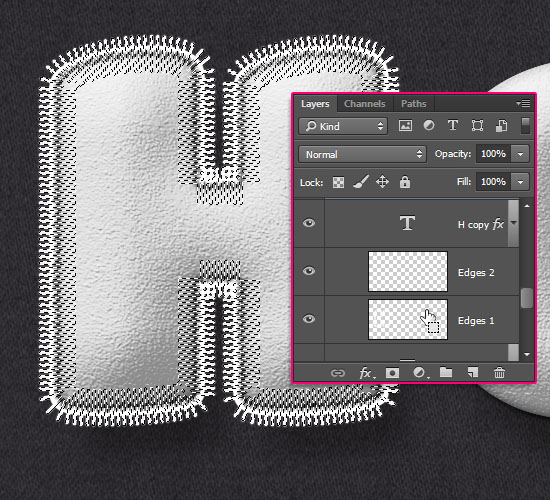
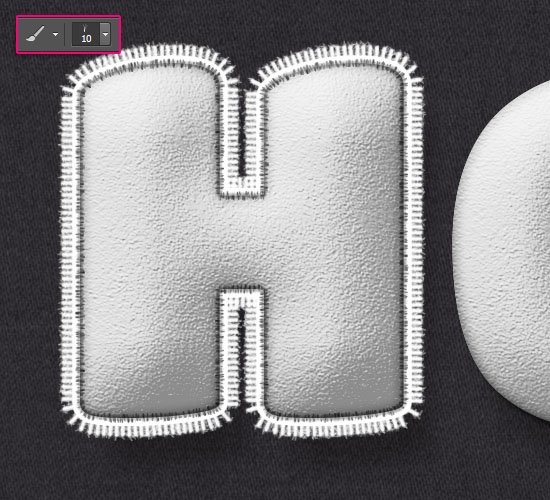
Pick the Brush Tool, and choose the Stroke 1 brush tip. Select the Edges 1 layer, then hit the Enter/Return key once to stroke the path with the brush.
Another way to stroke the path is by selecting the Direct Selection Tool, right clicking the work path, and choosing Stroke Path. Then, you’ll need to choose Brush from the Tool drop down menu, un-check the Simulate Pressure box, and click OK.
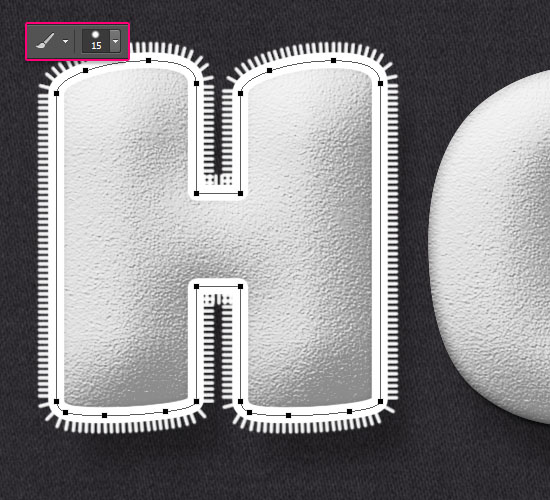
Select the Rim layer, choose the Rim brush tip, and stroke the path again.
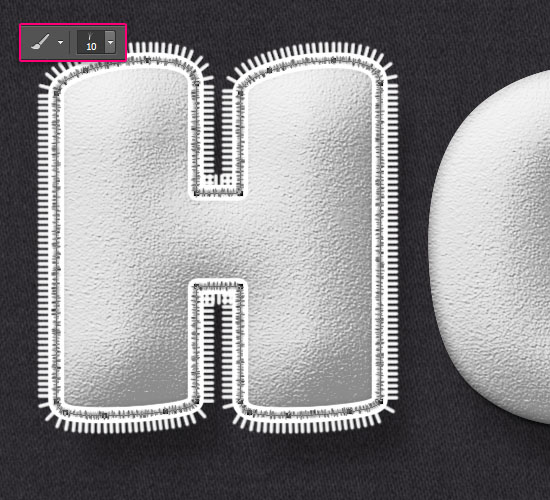
Select the Stitches layer, pick the Stitches brush tip, and stroke the path once more.
Pick the Direct Selection Tool and hit the Enter/Return key to get rid of the work path.
Step 6
Ctrl/Cmd + click a text layer’s thumbnail to create a selection.
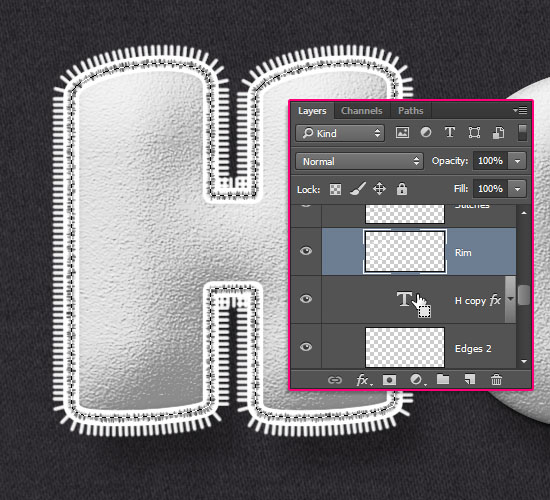
Select the Rim layer and hit the Delete button to remove the inner part of the rim’s stroke. Then go to Select > Deselect (Ctrl/Cmd + D) to get rid of the selection.
Ctrl/Cmd + click the Edges 1 layer’s thumbnail to create a selection.
Open the Paths panel (Window > Paths), then press and hold the Alt/Option key, and click the Make work path from selection icon at the bottom of the panel.
Enter the value 2 for the Tolerance and click OK.
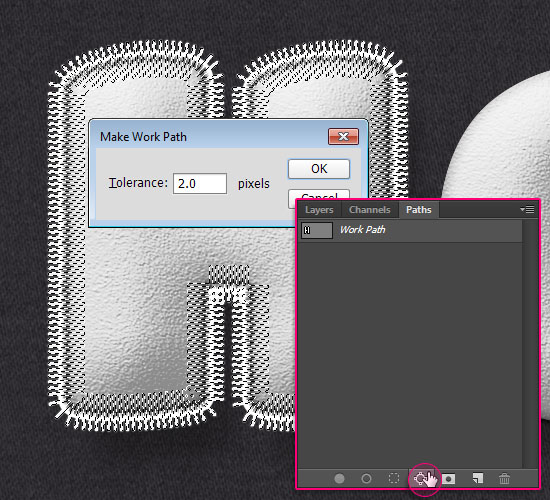
This will convert the selection into a work path. Select the Edges 2 layer.
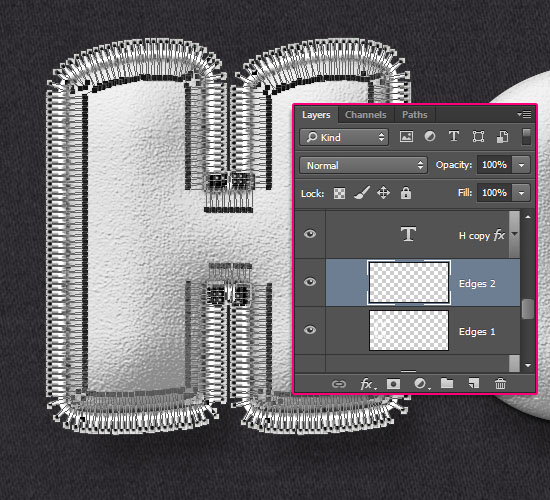
Stroke the work path with the Stroke 2 brush tip and clear the work path just like you did before.
Repeat the same steps for the rest of the letters.
Step 7
Double click the Edges 1 layer to apply the following layer style:
– Bevel and Emboss
- Just check the Anti-aliased box.

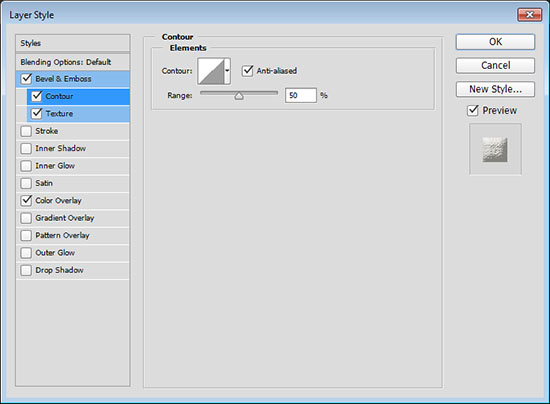
– Contour
- Check the Anti-aliased box.

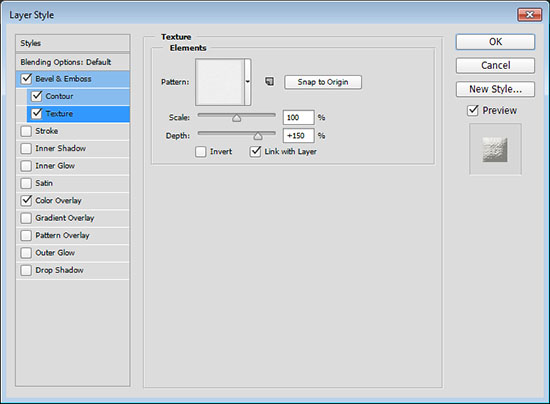
– Texture
- Pattern : Diagonal Noise
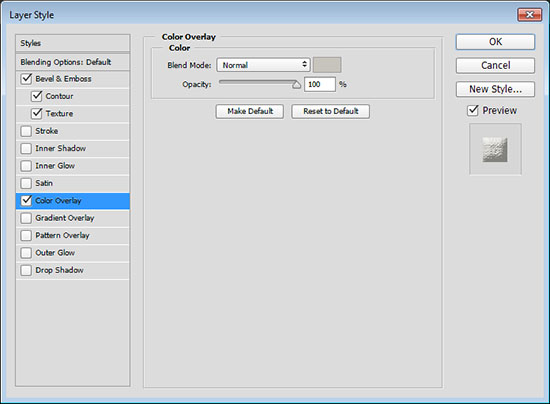
– Color Overlay
- Color :
#cfccc0

This will style the first part of the outer edge.
Step 8
Double click the Edges 2 layer to apply a Color Overlay effect using the color #e4e1dc.

This will color the small hairs around the edges.
Step 9
Double click the Rim layer to apply the following layer style:
– Bevel and Emboss
- Size : 10
- Check the Anti-aliased box
- Shadow Mode – Opacity : 34%
– Contour
- Check the Anti-aliased box.
– Texture
- Pattern : Rough Cloth
- Depth : 150%
– Color Overlay
- Color :
#c6c4bd
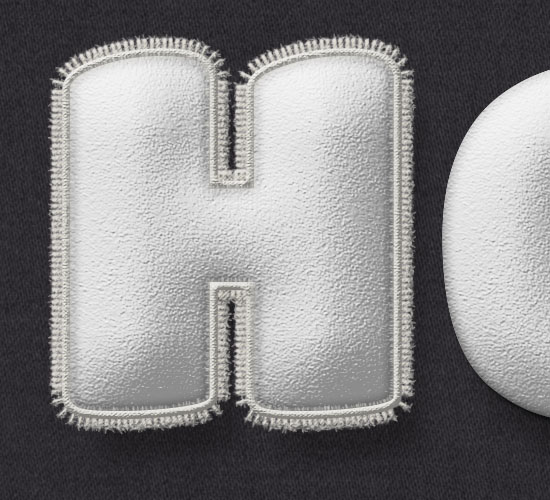
This will style the rim.
Copy and paste the Edges 2 layer style to apply it to the Stitches layer.
Copy and paste the layer styles you have for the rest of the other letters’ layers.
Step 10
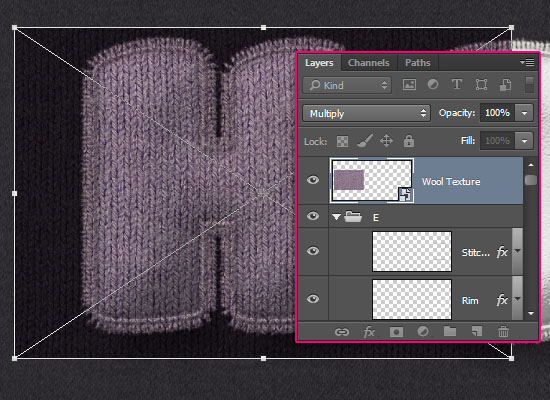
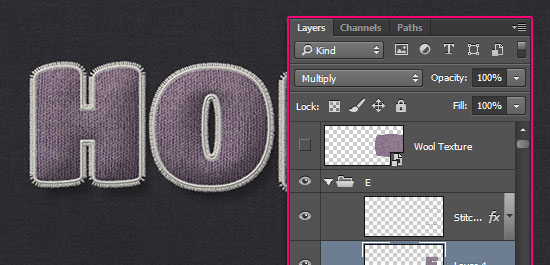
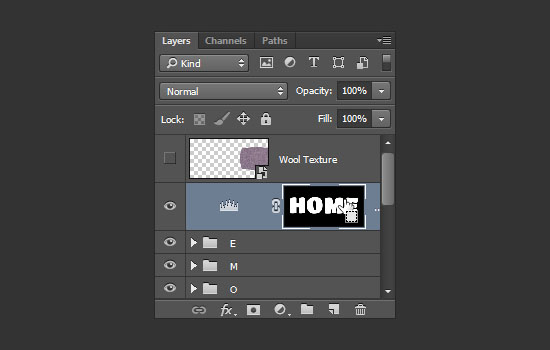
Go to File > Place Embedded to place the Wool Texture‘s image on top of all layers. Resize the texture depending on how big or small you want the details to be, hit the Enter/Return key to accept the changes, then rename the layer to Wool Texture, and change its Blend Mode to Multiply.
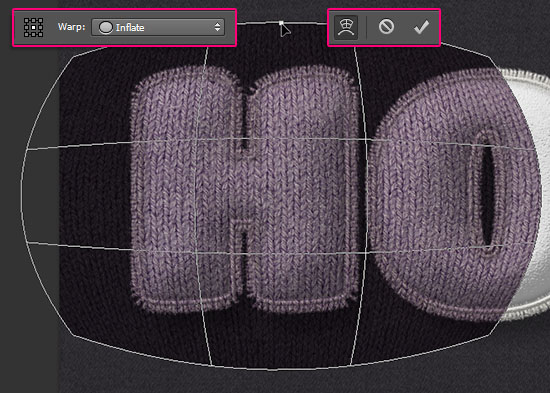
Place the texture on top of the first letter you have so that the letter is in the center of the texture.
Go to Edit > Transform > Warp, and choose the Inflate option from the Warp drop down menu in the Options bar. You can control the strength of the effect using the handle at the top. This will help give the texture a more 3D, inflated look. Hit the Enter/Return key to accept the changes.
The cool thing about having the texture placed in a smart object is that you can re-adjust the Warp effect any time if you like.
Ctrl/Cmd + click the first letter’s original text layer to create a selection.
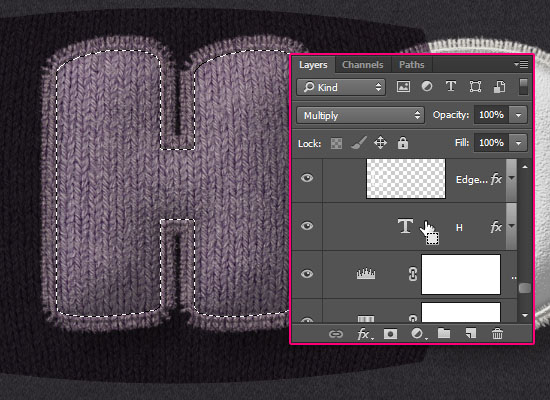
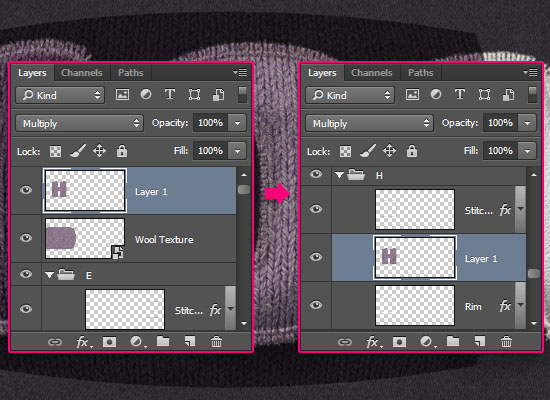
With the Wool Texture layer selected, press Ctrl/Cmd + J to duplicate the selection in a separate layer. Drag the duplicated layer on top of the Rim layer.
Then, use the Move Tool to move the Wool Texture so that the second letter is in its center this time, and repeat the same steps for each remaining letter.
Once each letter has its copy of the texture, make the Wool Texture layer invisible by clicking th eye icon next to it.
Step 11
Select all the copy text layers and change the text color to #f4f4f1.
Next, you can select each letter’s group, then go to Edit > Free Transform, and rotate, resize, or move the letter as you like. Don’t forget to hit the Enter/Return key when done to accept the changes.
Ctrl/Cmd + click any of the letters’ text layer’s thumbnail to create a selection, then press and hold the Ctrl/Cmd + Shift keys, and click the rest of the text layers’ thumbnails to create a selection for all of them together.
Click the Create new fill or adjustment layer icon and choose Levels. The selection will be masked so that it is the only part affected by the Levels layer. Change the Highlights value to 7, and the Gamma to 0.70.
Ctrl/Cmd + click the Levels layer’s mask thumbnail to re-create the selection.
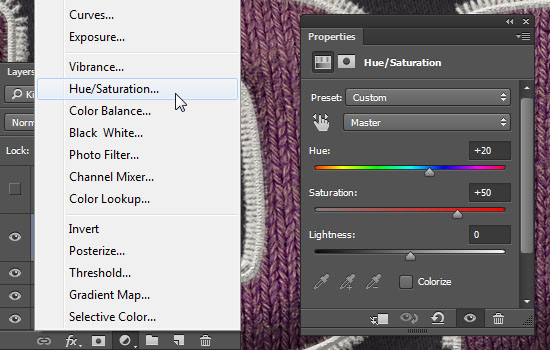
Click the Create new fill or adjustment layer icon and choose Hue/Saturation. Change the Hue to 20 and the Saturation to 50. You can try other values to get other colors if you want as well.
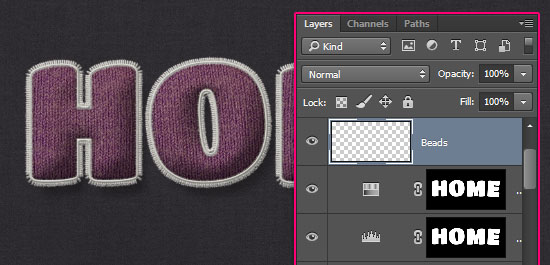
Step 12
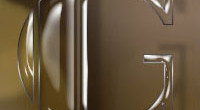
Create a new layer on top of all layers and call it Beads. Then, double click it to apply the following layer style:
– Bevel and Emboss
- Check the Anti-aliased box
- Highlight Mode : Linear Light
- Shadow Mode – Color :
#858585
– Contour
- Contour : Cone – Inverted
- Check the Anti-aliased box.
– Texture
- Pattern : Polonez Pattern
- Depth : 545%
– Gradient Overlay
- Use the Stainless Steel 30pot gradient fill.
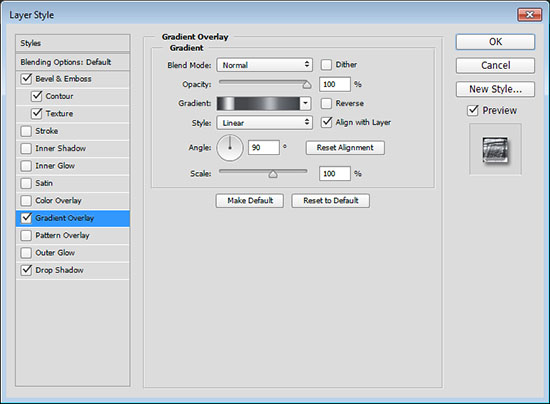
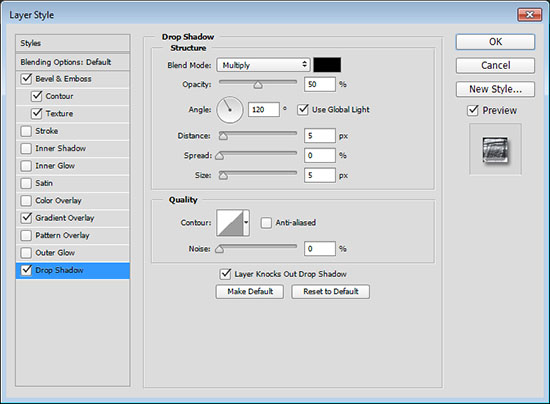
– Drop Shadow
- Opacity : 50%
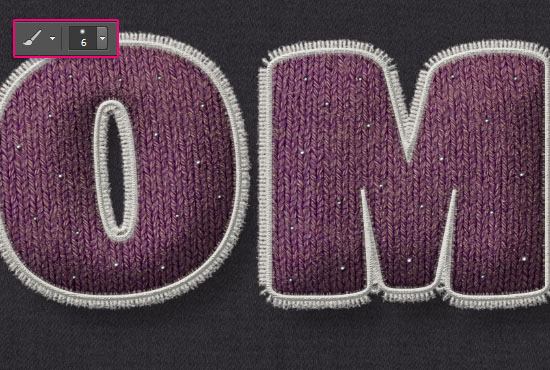
Pick a 6 px hard round brush tip, and start clicking to scatter some beads all over the text.
Step 13
Double click the FabricPlain0048 layer to apply a Gradient Overlay effect using the following values:
– Gradient Overlay
- Blend Mode : Multiply
- Opacity : 20%
- Angle : 95
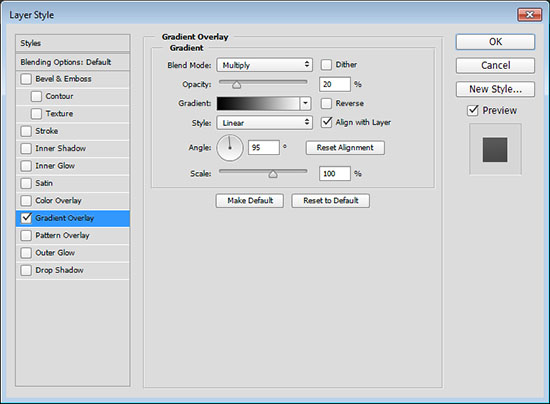
This will basically apply a gradient with an Angle that matches the light direction based on the styled letters.
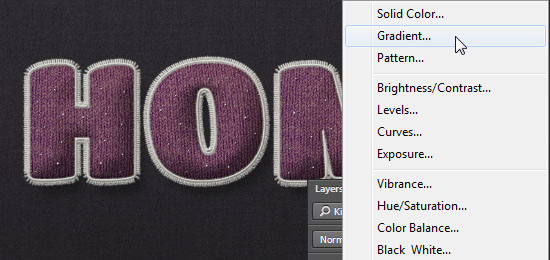
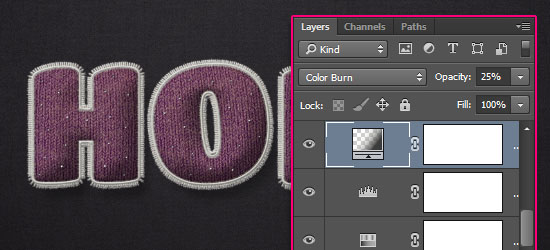
Click the Create new fill or adjustment layer icon and choose Gradient.
Create a Transparent to Color gradient using the colors #f7f6f1 to the left and #3c3c3c to the right. Change the Style to Radial and the Scale to 500.
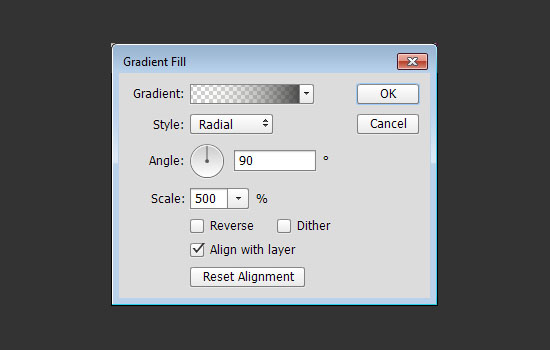
Place the Gradient layer below the letters’ groups, then change its Blend Mode to Color Burn and its Opacity to 25%.
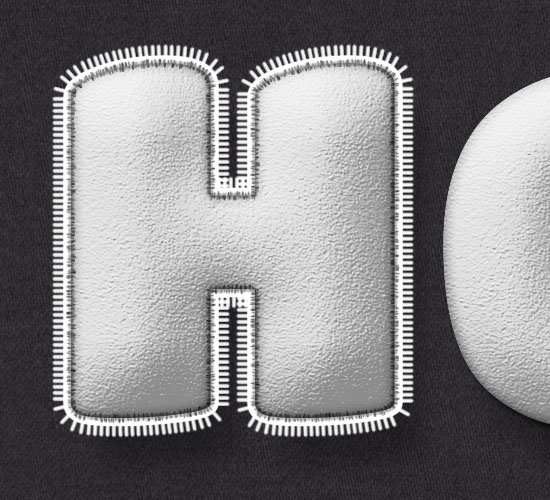
And there you have your cozy, squishy text!
Hope you enjoyed the tutorial and found it helpful 🙂
Did you enjoy this post? Please consider donating to help us cover our server costs.


?????????
Hello , thanks for your tutorial !
That’s different and cool indeed!
Thanks a lot for sharing your work 🙂
Thanks for great tut!
That’s really cute!
Thanks a lot for the comment and for sharing your work 🙂
thank you Rose?it looks good
That looks nice!
Thanks a lot for sharing your work and for the comment 🙂
Assolutamente fantastico! grazie
Wonderful outcome – really well done!
Grazie for sharing your work and for the comment 🙂
hallo and welcome
my question is that how “CORK” pattern is load in texture Step no 3 . what is procedure.I cannot do this step.