
Super Glossy Text Effect
This tutorial will explain how to create an awesome super glossy text effect, using a couple of Layer Layer Style to achieve the glossy look, and some brushes for the bright squares and shiny sparkles.
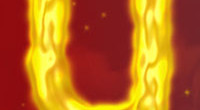
The Final Result

Tutorial Details
- Software Used : Photoshop
- Version : CS5 Extended
- Time : 0:30 – 0:45
Resources
- Alfredo Heavy font.
- Sparklies Photoshop Brushes by redheadstock.
- Square Photoshop Brush.
Step 1
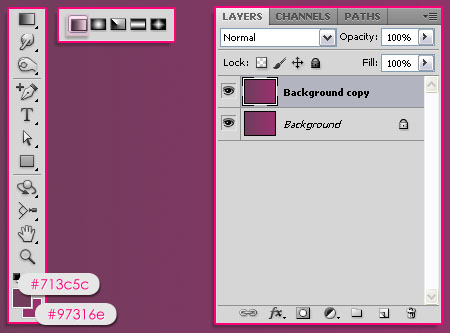
Create a new 1600 x 1200 px document. Create a Linear Gradient from left to right, with the Foreground color set to #713c5c and the Background color to #97316e. Then, duplicate the Background layer.
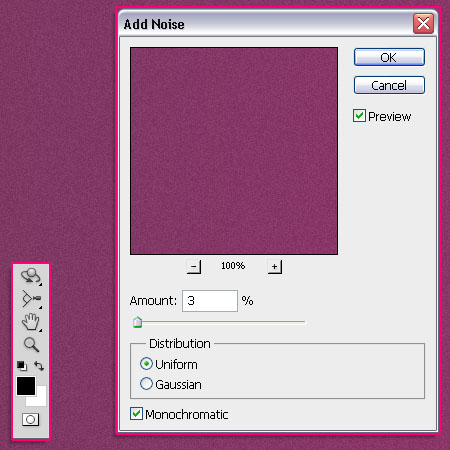
Set the Foreground and Background colors back to Black and White, then go to Filter > Noise > Add Noise. Set the Amount to 3, the Distribution to Uniform, and check the Monochromatic box.
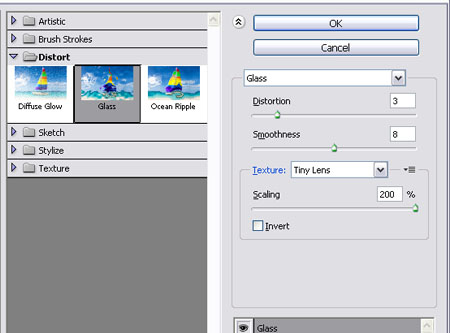
Go to Filter > Distort > Glass, set the Distortion to 3, the Smoothness to 8, the Texture to Tiny Lens, and the Scaling to 200%.
The background should have a simple nice texture now.

Step 2
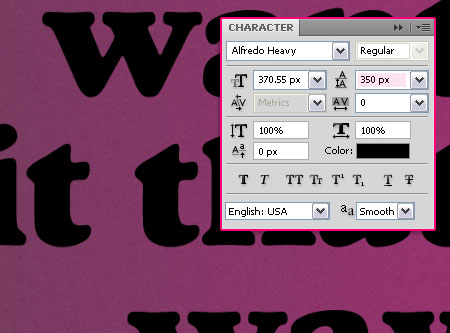
Create the text using the color Black. The font used is Alfredo Heavy, and the Size is 370 px. The effect looks better on very bold fonts. Also, you can change the Leading value to adjust the line spacing if necessary.
Double click the text layer to apply the following Layer Style:
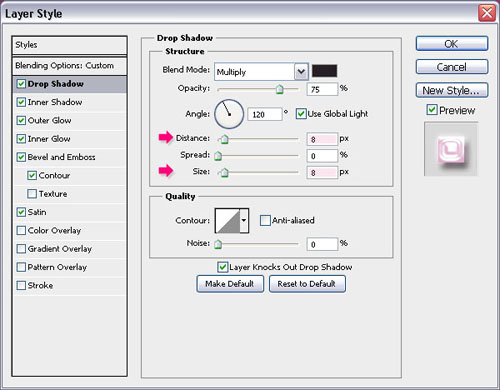
– Drop Shadow
- Distance : 8
- Size : 8
– Inner Shadow
- Blend Mode : Linear Dodge (Add)
- Color :
#c577a4 - Distance : 8
- Size : 20

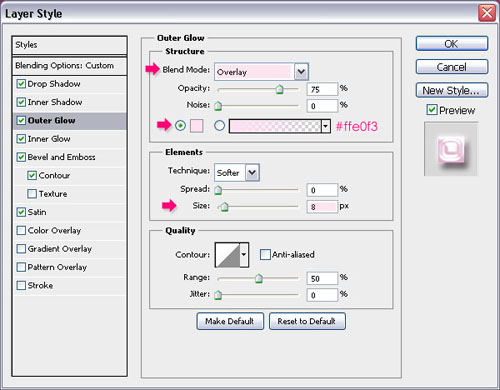
– Outer Glow
- Blend Mode : Overlay
- Color :
#ffe0f3 - Size : 8
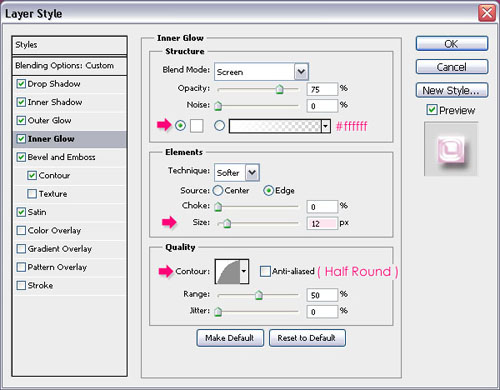
– Inner Glow
- Color :
#ffffff - Size : 12
- Contour : Half Round
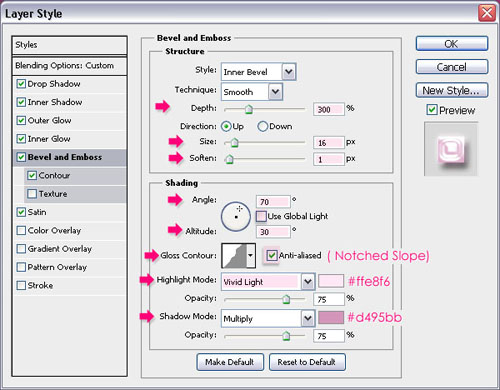
– Bevel and Emboss
- Depth : 300
- Size : 16
- Soften : 1
- Uncheck the Use Global Light box
- Angle : 70
- Altitude : 30
- Gloss Contour : Notched Slope
- Check the Anti-aliased box
- Highlight Mode : Vivid Light
- Color :
#ffe8f6 - Shadow Mode – Color :
#d495bb
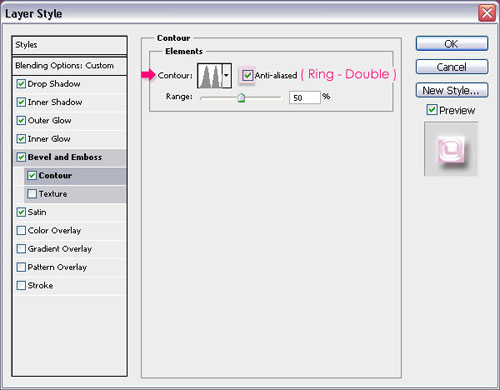
– Contour
- Contour : Ring – Double
- Check the Anti-aliased box.
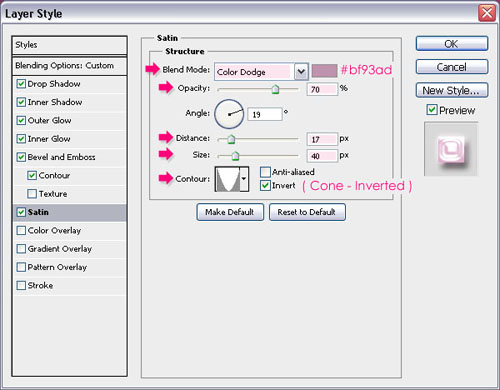
– Satin
- Blend Mode : Color Dodge
- Color :
#bf93ad - Opacity : 70%
- Distance : 17
- Size : 40
- Contour : Cone – Inverted
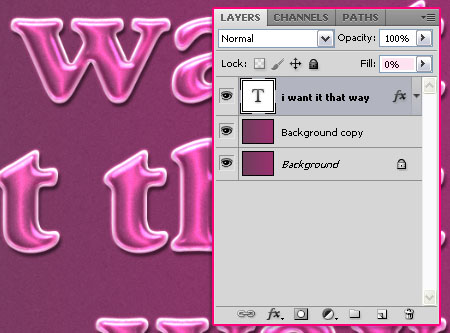
When you hit OK, change the text layer’s Fill value to 0 so that the text becomes transparent.
Step 3
Ctrl/Cmd + click the text layer’s thumbnail to create a selection.
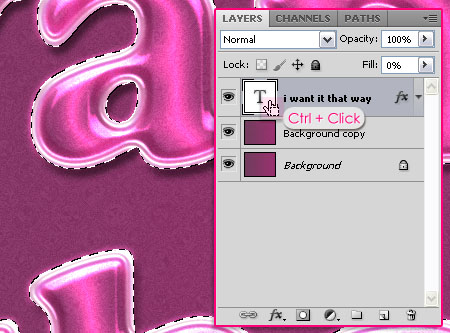
This is optional, if you like the noise that appears beneath the text, leave it as it is, but if you want the text to stay clear then select the Background copy layer and hit Delete.
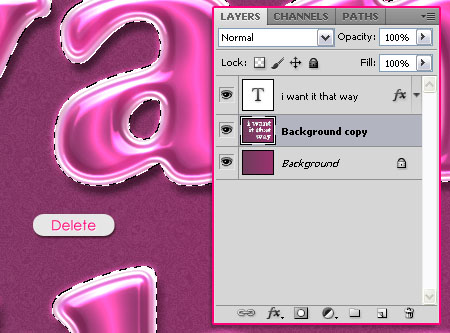
Create a new layer on top of the Background layers and call it squares. Set the Foreground color to #ffa8cf.
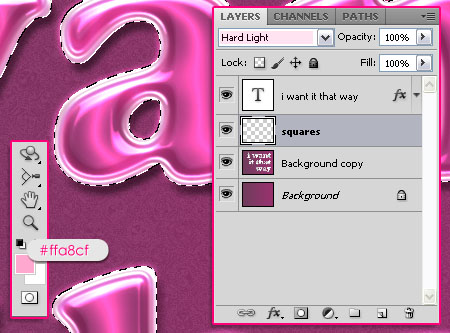
Step 4
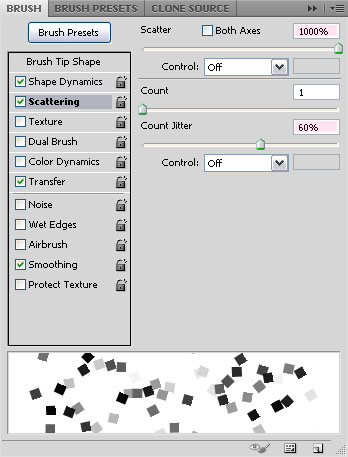
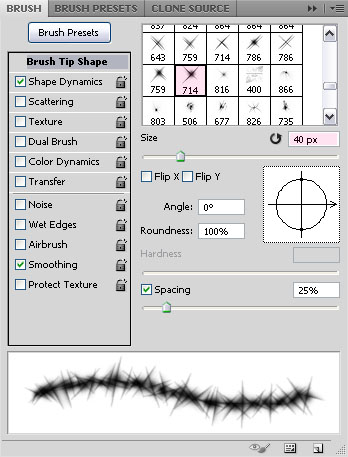
Load the Squares Photoshop Brush, and open the Brush panel (Window > Brush) to change the Settings as below:
The Spacing is set to 50%. If you want more squares to appear when you use the brush decrease the Spacing value, and if you want less squares, then increase the Spacing value.
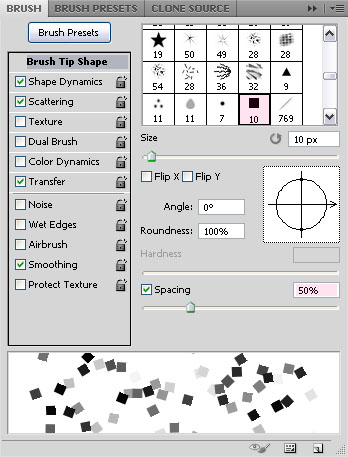
Shape Dynamics

Scattering
Transfer

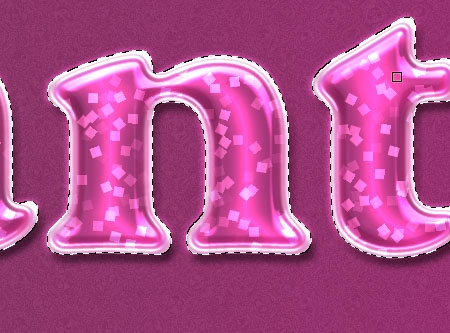
Start painting the squares inside the selection. Don’t paint over the same area more than once, as this will make the squares overlap and look very bright, but if you like that then go for it!
You can undo, redo, and repeat this until you’re satisfied with the final result.
Step 5
Set the Foreground color to White, and load the Sparklies Photoshop Brushes. You can choose the sparkle you like, but here, the brush single7 one is used.
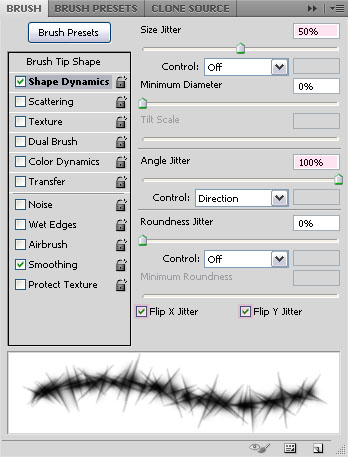
In the Brush panel, change the Size to something around 40 px.
In order for the Size to change with each click, change the Size Jitter under the Shape Dynamics tab to 50%.
Also, to change the angle of the sparkles, set the Angle Jitter to 100%. You can also check the Flip X Jitter and Flip Y Jitter boxes as well.
Create a new layer on top of all layers and call it sparkles. Start clicking over some bright edges to add sparkles. Click once only, don’t click and drag.
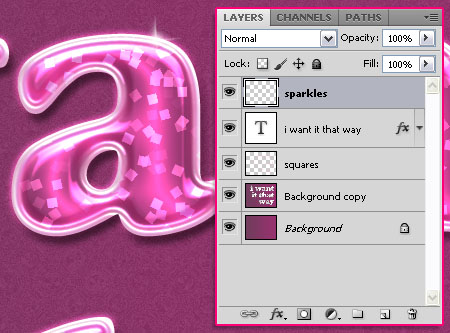
Change the sparkles layer’s Blend Mode to Overlay, then duplicate it to make the sparkles look brighter.

And you’ll get an awesome super glossy “party” text effect!
Hope you enjoyed the tutorial.
Did you enjoy this post? Please consider donating to help us cover our server costs.


very very beautiful
very very lovly tutorial.
Thank you very much!
Glad you liked it.
many ta’s for sharing : )
You’re welcome!
Thanks for the comment.
Thanks..^^
Thanks for the comment.
Great tut, thanks for sharing 🙂
You’re welcome.
Thanks for the comment.
Really liked this text effect!! Enjoyed working with the tutorial. As always the directions are very easy to understand. Toda
So glad you did!
Thanks for the comment 🙂
Great tut, thanks so much!
You’re welcome.
Glad you liked it.
it is so amazing work, thanks
Thanks a lot for the comment 🙂
The color of my text doesnt change….only the border changed…the color is still black, what am i doing wrong ?
Forget it, i made it.
No problem, glad you did 🙂
i can’t seem to do it… The color of the text didn’t change into the glossy pink color… please help
Did you make sure to change the Fill value to 0 at the end of Step 2?
If so, at what step do you start getting a different result than the one in the image?
i really really love it!
it is very presentable
Really glad you liked it 🙂
Thank you very much for the comment.
I don’t have Notched Slope. Where cant i find it?
You just need to load the Contours, please check this image to see how to do so.
Hope this helps.
thanks! I finally made it and I really like it.
Awesome! Glad to know you did 🙂
Thanks for the comment.
yes, its really helpful to create logo also. thanks.
Glad you found it helpful.
Thanks a lot for the comment.
I have try several times but fail 🙁
Can I have psd file of this tut??? Please!!!!!!
PSD files are not available for free download… Really sorry about that!
At what step do things start to not work properly? Please feel free to leave the issues you’re facing in a reply and we’ll make sure to help you solve the problem.
Regards.