
Burnt Text Effect
In this tutorial, we are going to create a simple burnt on wood text effect, using simple layer styles for the text, and some filters and nice brushes for the Background.
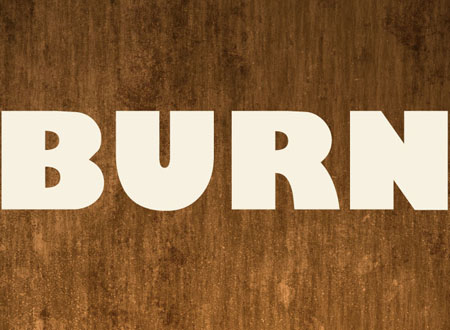
The Final Result

Tutorial Details
- Software Used : Photoshop
- Version : CS3
- Time : 0:20 – 0:30
Resources
- Trumania EEN font.
- Grunge Brushes by Aramisdream.
- grunge.28 Brushes by ShadyMedusa-stock.
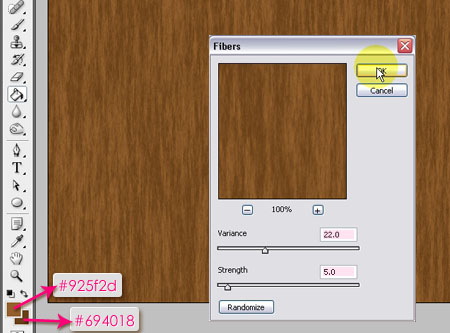
Step 1
Create a new 1024 x 768 px document. Set the Foreground color to #925f2d, and the Background color to #694018. Fill the Background with the Foreground color, then go to Filter > Render > Fibers. Change the Variance to 22, and the Strength to 0.5.
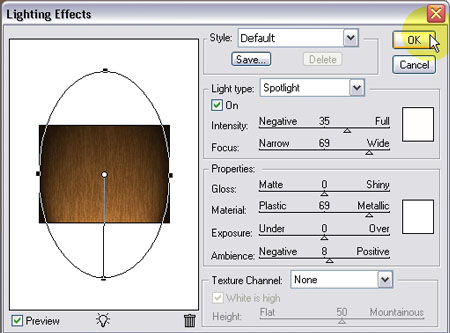
Step 2
Go to Filter > Render > Lighting Effects, and create the effect below:
Step 3
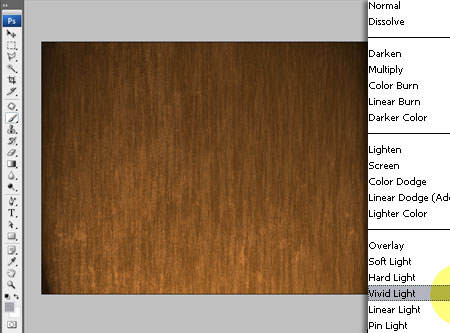
Create a new layer, call it grunge – bottom, and from the first Brushes set (Grunge Brushes), choose the brush highlighted below. Using the color #a5a4ac, place the brush the way you like on one of the corners of the Background.
Change the grunge – bottom layer’s Blend Mode to Vivid Light.
From the same Brushes set, choose the brush below, and change the color to #c2bdad. Create a new layer and call it grunge – top. Place the brush at the top of the layer.
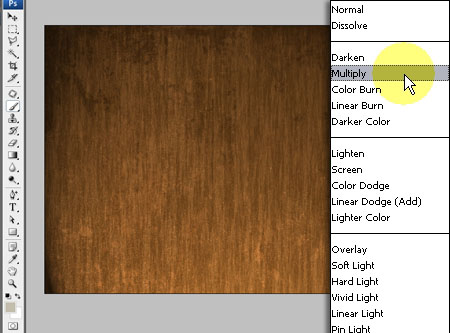
Change the grunge – top layer’s Blend Mode to Multiply.
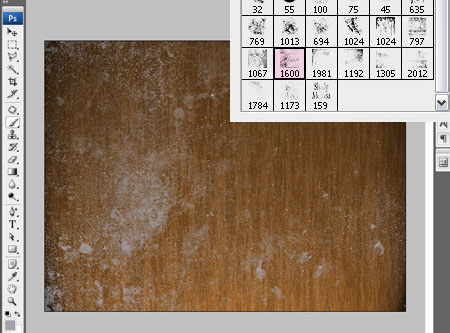
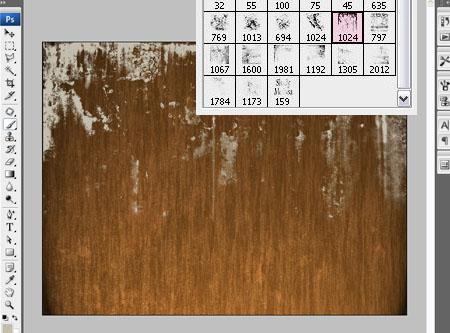
– Finally, using the second Brushes set (grunge.28 Brushes), create a new layer and call it grunge – BG, and use the brushes highlighted below to scatter some texture over the Background.
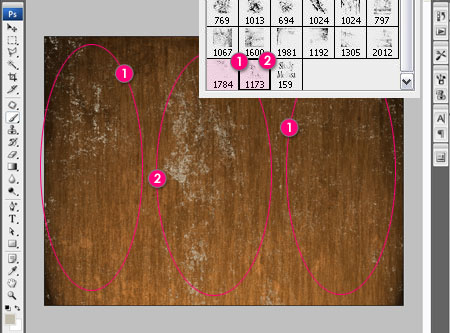
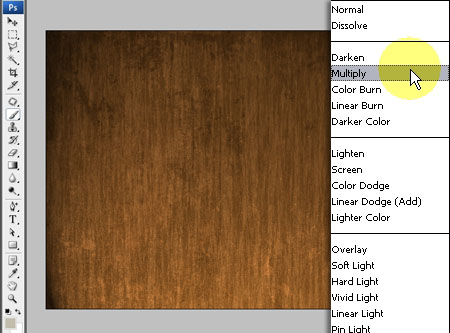
Change the grunge _ BG layer’s Blend Mode to Multiply as well.
Step 4
Create the text using the font Trumania EEN, the color #f6f1e0, and the Size 206 px.
Step 5
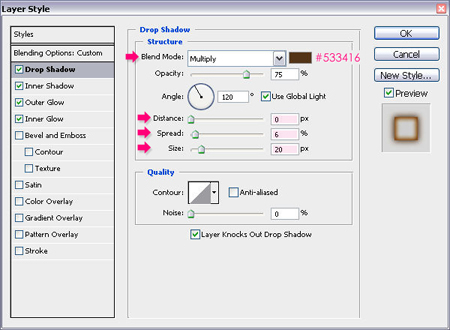
Double click the text layer to apply the following Layer Style:
– Drop Shadow
- Color :
#533416 - Distance : 0
- Spread : 6
- Size : 20
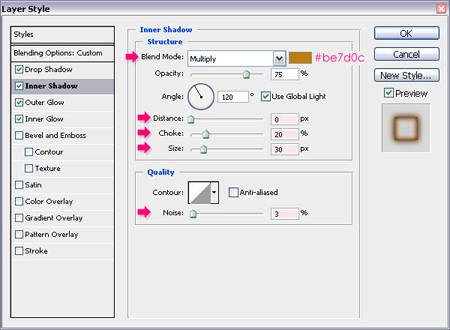
– Inner Shadow
- Color :
#be7d0c - Distance : 0
- Choke : 20
- Size : 30
- Noise : 3
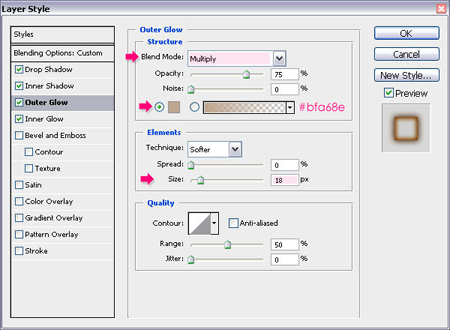
– Outer Glow
- Blend Mode : Multiply
- Color :
#bfa68e - Size : 18
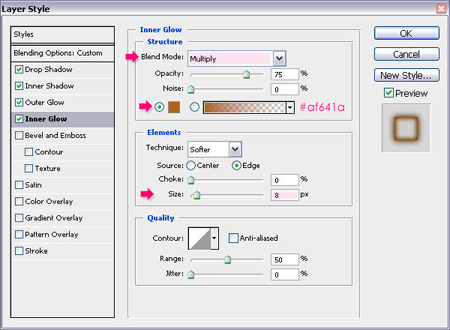
– Inner Glow
- Blend Mode : Multiply
- Color :
#af641a - Size : 8
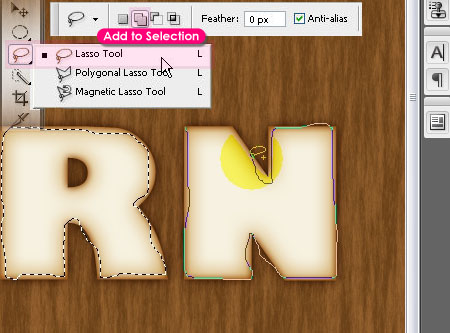
Step 6
Pick the Lasso Tool, and start creating some jagged edges around the letters. Choose the Add to Selection option to create the selection for all the letters at the same time.
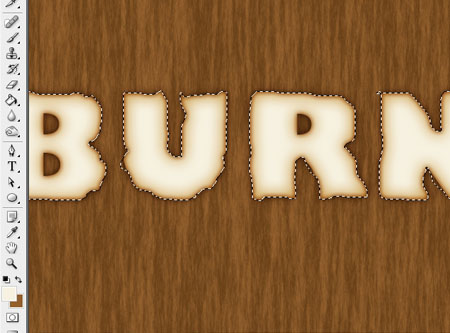
Step 7
Once you’re done, duplicate the text layer, then right click the copy, and choose on Rasterize Type.
Then, go to Select > Inverse to invert the selection, and hit Delete to remove the outer edge.
Finally, change the Layer’s Blend Mode to Soft Light, and its Fill value to 85%.
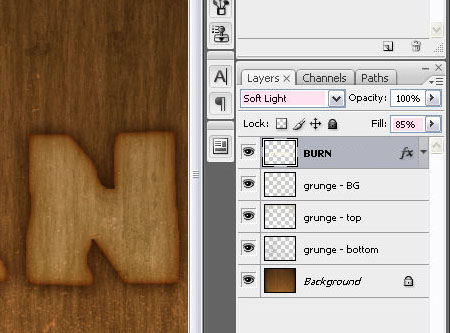
And this is the final result again.
Did you enjoy this post? Please consider donating to help us cover our server costs.


Muito bom o tutorial, parabéns.
Colocarei em meu site um que fiz seguindo as instruções.
Paz.
Thanks!
Desculpe-me, não informei o site, agora está correto.
Paz.
good one too
Thanks.
to Bad that This Will Not Work on a Mac.
Why not?
It’ll work on mac. Worked for me. I have a different question though.
Say I want to take a black square. Use the type tool over it with the letter “e”. And then remove the e in both layers. I hope that makes sense.
I suppose a better way of phrasing this would be that after I delete the “e”, the black square shows the “e” shape, but it goes straight to my background layer and I see white (Or even transparent).
Hello Shawn,
There are a couple of ways to do that, but I guess this is the easiest way:
– First, you need to create the black square on a new layer, using the “Rectangular Marquee Tool” to draw the square selection, then, fill the selection with the black color.
– Create the “e” letter on a separate text layer on top of the black square layer.
– Press the Ctrl key, and while still pressing, click on the “e” text layer’s thumbnail (icon). This will create a selection (shaped like the “e” letter).
– Click on the black square layer so that it is the active layer, and hit “Delete”.
– Make the text layer invisible (by clicking the “eye” icon next to it to remove it).
– Finally, press Ctrl+D (or go to Select -> Deselect) to get rid of the selection.
Hope this helps!
Ah! I completely forgot about the ability to select the layer like that. Is there a similar way to do this in AI as well by chance?
Also thank you for the help. That was extremely helpful!
You’re welcome!
As for AI, I don’t really know how that can be done, sorry!
Thanks for the comment.
Cheers!
good one too….
Thank you!
How would you alter for Large Format texts?
You’ll need to use bigger values for the layer effects. Or, you can simply scale them up after you use the values in the tutorial.
If this is not what you mean, please feel free to add a reply with more details.