
Crumpled Paper Textured 3D Text Effect In Photoshop CS5 – Part 1
This tutorial will explain how to create a 3D text in Photoshop CS5 step by step, and will guide you through the many details involved in creating the final result.
Many concepts, tips and tricks will be covered throughout the tutorial, such as Repoussé, texturing, bump maps, camera tools, lighting, and rendering basics.
This part (Part 1) will explain how to create the 3D scene, and will stop at rendering. The next part (Part 2), will explain the remaining steps needed to get the final result.
Let’s get started!
The Final Result

Tutorial Details
- Software Used : Photoshop
- Version : CS5 Extended
- Time : 2:30 – 3:30
Resources
- Arista 2.0 font.
- Paper Texture by ~Spiteful-Pie-Stock.
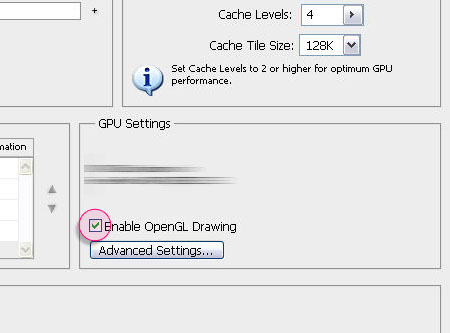
Enabling OpenGL
The Repoussé will not work unless OpenGL is enabled. So go to Edit > Preferences > Performance, and make sure Enable OpenGL Drawing (under GPU Settings) is checked.
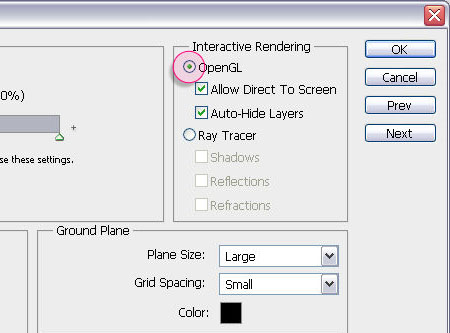
Also, go to Edit > Preferences > 3D, and make sure OpenGL (under Interactive Rendering) is enabled.
Step 1
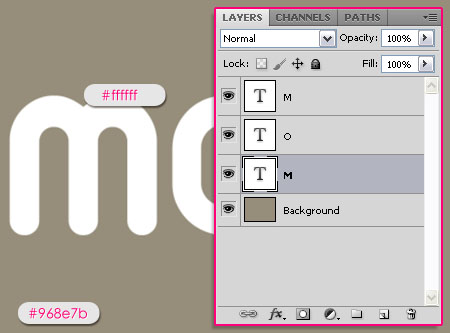
Create a new 1024 x 768 px document. Fill the Background with the color #968e7b, this is a temporary color that will be changed in part 2, but it will help us better recognize some details for now.
Create the text with a White color. The font used here is Arista 2.0. The Size 450 px, but it doesn’t matter as you can scale the text up and down when you create the 3D objects later on.
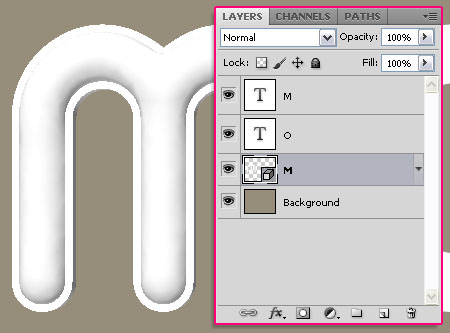
Create the letters in separate layers if you want to move each letter alone in the 3D scene.
Select the first letter’s layer and go to 3D > Repoussé > Text Layer.
A dialog box will appear telling you that this will rasterize the type layer, and you will no longer be able to modify your text. So if you are sure you don’t need to modify your text, click yes and continue.

In the Repoussé dialog box, choose the Inflate shape preset. Under Extrude, change the Depth to 0.05, and under Inflate, change the Strength to 0.02. Finally, under Bevel, choose Front and Back from the Sides drop down menu, and change the Width to 5. This will create the outer edges of the text.
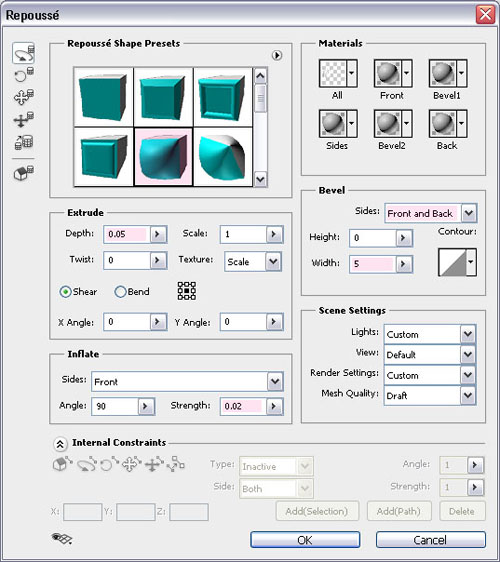
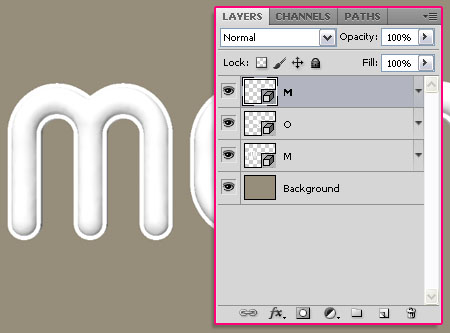
Hit OK. Notice how the layer’s thumbnail (icon) changes when the text becomes a 3D object.
Repeat the same steps for the rest of the letters.
Step 2
Until now, each layer is in a separate scene, which means that the objects are not in the same scene and do not affect each other. So we need to merge the 3D layers in order to put all objects in one scene.
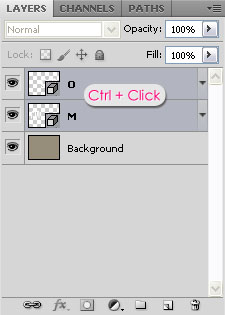
To do that, click on the first layer, then press the Ctrl key, and click on the layer below it.
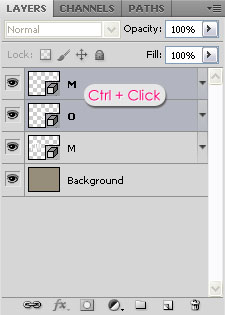
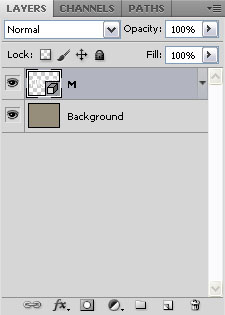
Once both layers are selected, go to 3D > Merge 3D Layers. This will combine the two layers in one 3D layer.
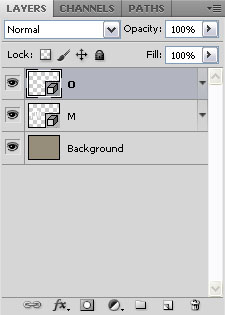
Select the merged layer, and do the same thing with the layer below it (Ctrl + Click), and merge both layers again.
Repeat the steps until only one layer is left (all the layers are merged into one 3D layer).
Step 3
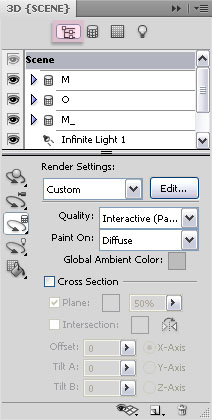
Open the 3D panel (Window > 3D). Make sure to set the display to Scene (the highlighted icon in the image below), as this will show you all the elements of the 3D scene.
Notice that the merged 3D objects have now become meshes put together in the same 3D scene. You can select and modify each mesh alone by clicking its name.
*Note: The lists are collapsed in the image to show you that the 3D objects are in the same scene now, but your lists will most probably be expanded. If not, click on the little arrow next to each mesh name on the left to expand its materials list.
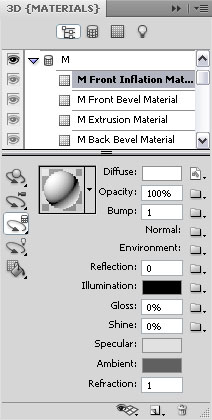
Under each mesh, there is a list of the materials that are used to texture it. Click on M Front Inflation Material to start creating the texturing materials.
Step 4
First of all, we want to make sure that the are no existing textures for the Diffuse, because if there are any, you will not be able to change the Diffuse color. So click the icon next to the Diffuse color box, and choose Remove Texture.
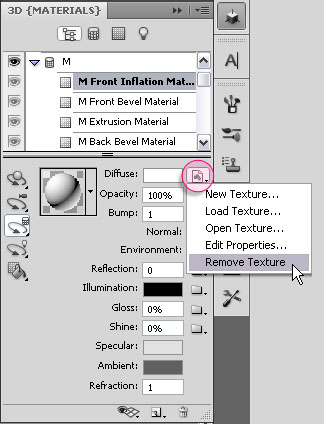
Notice that the icon became a folder icon when no texture is assigned. Click on the Diffuse color box and set the color to #b53232.
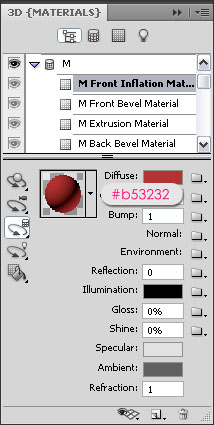
The color alone does not give any details, so we will be using a Bump Map to create the crumpled paper material.
“A Bump Map is a grayscale image in which lighter values create raised surface areas and darker values create flatter surface areas.” This is done without altering the mesh, it just gives an illusion of the details.
So we need to get the grayscale image first.
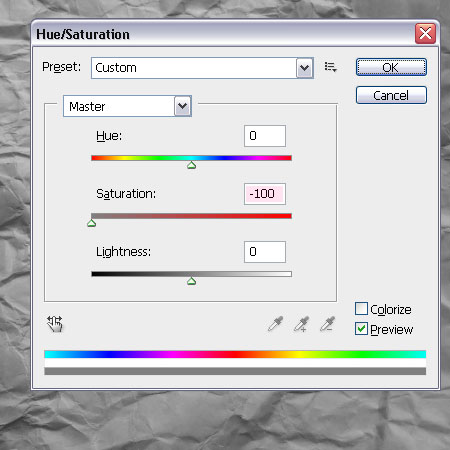
Open the Paper Texture image in Photoshop, and go to Image > Adjustments > Hue/Saturation. Change the Saturation to -100. This will convert the image to a grayscale image. Save the grayscale image under a different name. For example, add ‘bump’ at the end of the image’s name, just to make sure you choose the right image when loading the texture in the next step.
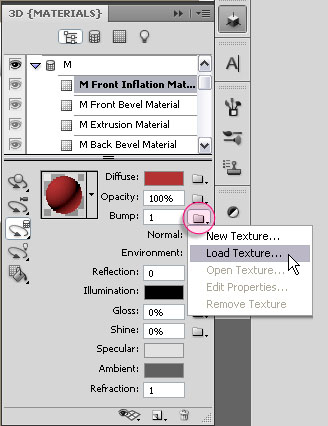
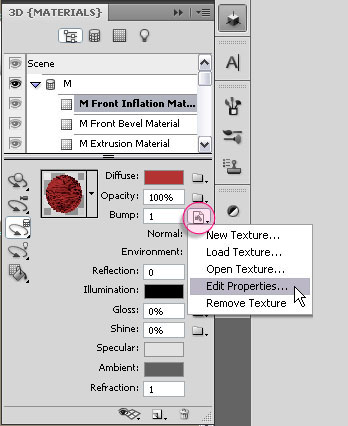
Go back to the original document, and click on the folder icon next to Bump, then choose Load Texture, and load the grayscale image you’ve just saved in the previous step.
When you load the texture, go ahead and click on the same icon again, but this time choose Edit Properties. This will enable you to modify the scaling and positioning values.
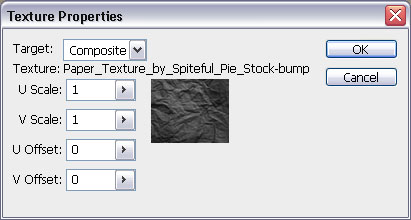
In the Texture Properties dialog box, set the values as below, then hit OK.
Once you’re done with the map, change the Bump value to whatever value you like. A higher value gives more (stronger) details. Here, the value is set to 5.
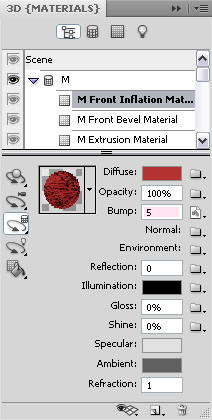
-Notice how the texture is becoming more detailed. The image might seem to have low resolution, but that’s fine for now.

Step 5
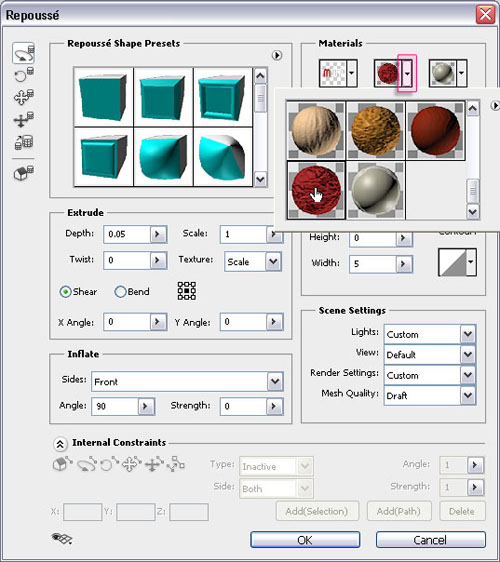
As we will be using the same material, we will save it so that we won’t need to recreate it for each letter.
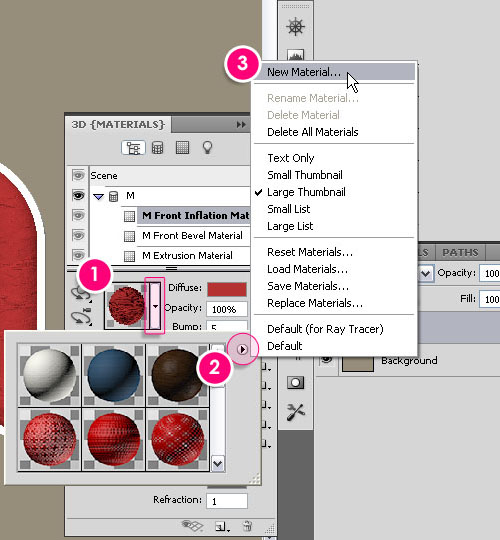
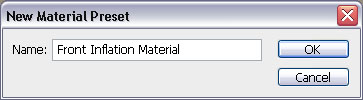
To do that, click the arrow next to the material preview to display the preset pop-up panel. Then click the pop-up menu icon (the little arrow at the top right corner of the pop-up panel), and choose New Material.
Name the Material.
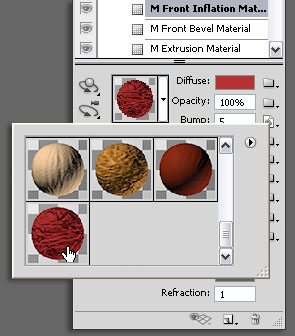
Now, if you scroll down the materials pop-up panel, you’ll find the new material there. Just simply click its icon to apply it to any surface or object.
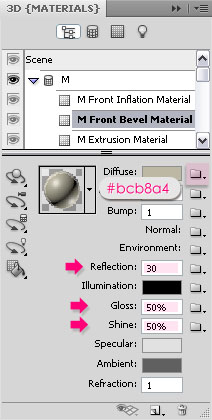
Select the M Front Bevel Material. Remove the texture, and change the color to #bcb8a4. Also, change the Reflection, Gloss and Shine values as below. Those values will create a reflective glossy material.
Save this material as well, as we’re going to need it in the following step.

Step 6
This is a simple trick that will save us some time. Instead of applying the same material over and over again to each side, just select the mesh, and click the Edit in Repoussé icon down the 3D panel. this will open the Repoussé dialog box, where you can modify the 3D object settings.

Under the Materials section, set the All material to the glossy one, this will apply it to all sides of the mesh.
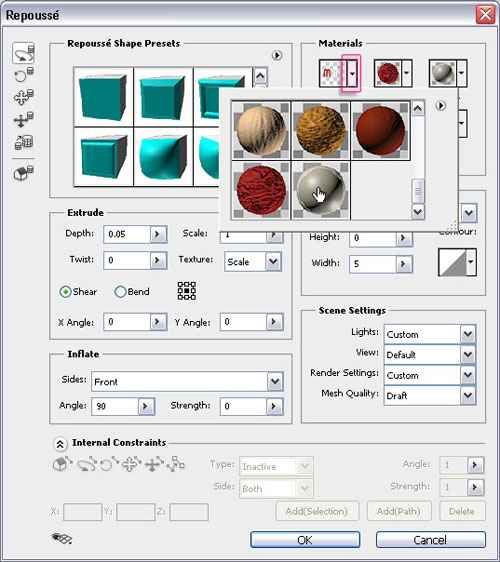
Then, change the Front material to the crumpled one, and hit OK.
Repeat the same steps for all letters.

Step 7
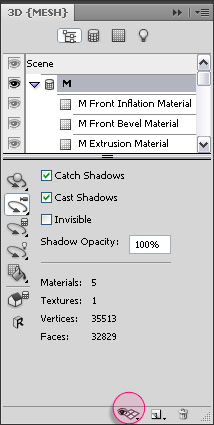
Now it’s time to position the meshes. You might need the Grid for this. So click the Toggle Overlays icon at the bottom of the 3D panel, and click or un-click what you want in your scene.
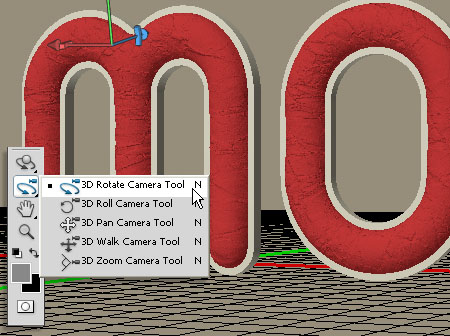
Use the Camera Tools to change the camera view without changing the 3D meshes’ position. Here are some useful tips to help you use the Camera Tools.
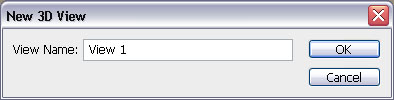
Keep in mind that you can save any camera view and get back to it any time later. To do that, make sure that a Camera Tool is selected, then, click the Save icon in the Options Bar.

Type in the name of the view and hit OK.
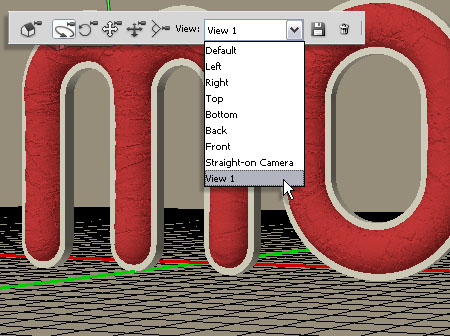
Now, you can choose that view form the View drop down menu in the Options Bar.
Step 8
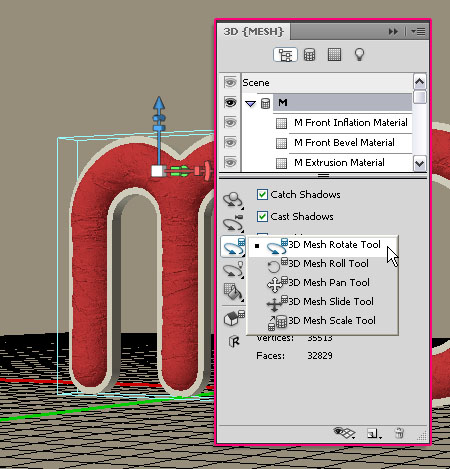
To move a mesh, or re-position it, you need to use one of the Mesh Tools in the 3D panel.
(Read more about the 3D Axis tools).
You can save the position of a mesh just like a camera view from the Mesh Options Bar.
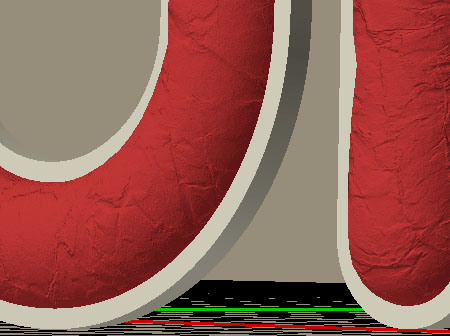
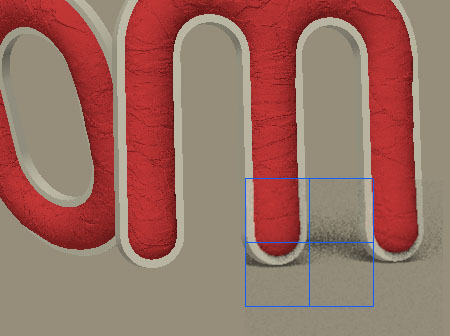
Zoom in and rotate the camera view to make sure nothing is floating above the ground (unless you want it to!).
Finish positioning the meshes, and choose your final camera view, as after this step we will be ready to render the scene.

Step 9
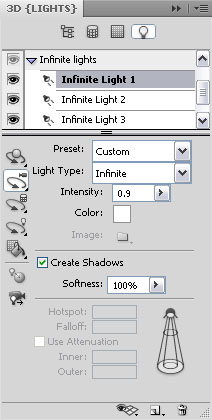
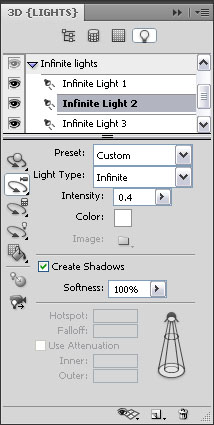
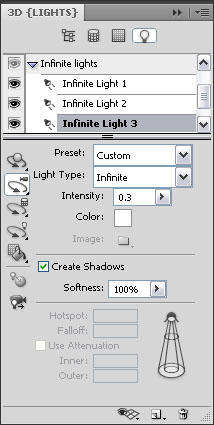
Under the Lights tab in the 3D panel, make sure that the lights settings are as below:
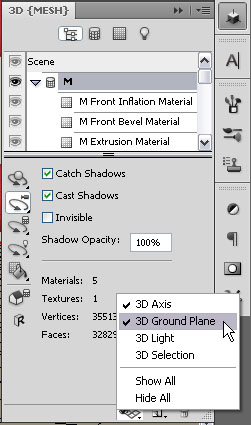
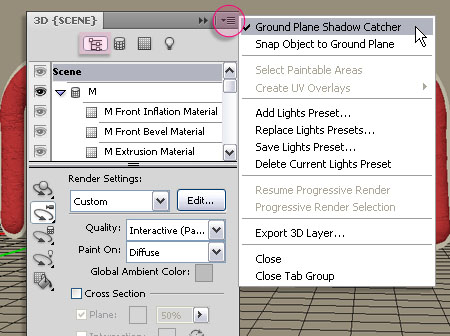
Finally, we want to make the Grid catch the shadow so that we won’t need to create a plane. So click the small arrow at the top right corner of the 3D panel, and click Ground Plane Shadow Catcher.
Step 10
Before starting the final Ray Trace rendering, you can create a selection around any area you’d like to test.
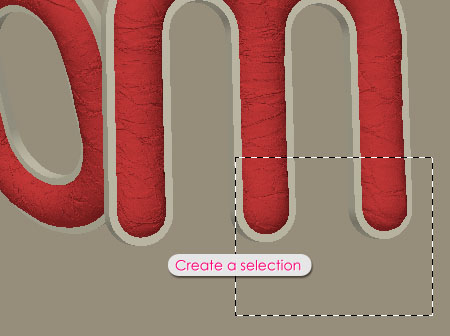
Then go to 3D > Progressive Render Selection. This will render the selected area only. Click anywhere in your Photoshop document to stop the rendering.
If you’re sure that everything is good, go ahead and click Scene at the top of the 3D panel, then choose Ray Traced Final from the Quality drop down menu.
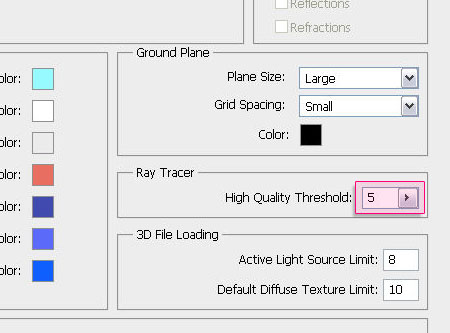
The rendering might take a couple of hours. You can control the High Quality Threshold at which the rendering stops by going to Edit > Preferences > 3D under the Ray Tracer box.
You can as well stop the rendering any time you’re satisfied with the result. You don’t need a perfectly rendered image, as we will be doing some editing in the next part of the tutorial.
The Final Result for Part 1:

( * Part 2 * )
Did you enjoy this post? Please consider donating to help us cover our server costs.


Nice work!..Thanks..^^
Thanks Moai 🙂
In step 7 when I am supposed to “Toggle Overlays icon”, it is grayed out. Seems I have everything selected like you do in the pics. Any ideas?
Hello Brewha,
If you made sure that the Mesh name is selected, try selecting a tool, such as a camera, object or mesh tool.
Dose this work?
Hey nice tutorial but I’m stuck in Step 10.
I am unable to find “Quality Drop Down Menu” and “Ray Traced Final” after clicking “Scene”.Anyone can tell me where in Photoshop CS5 Extended I can find these options.
Can anyone please help me as soon as possible. I really want to complete this tutorial. I’ll be very thankful to you.
And thank you Mr.Author for this tutorial.
Hello Shazil,
You need to click the “Scene” that appears in the last image in Step 9 (Click the word “Scene” at the top, right above “M”), then you’ll be able to find the “Quality” drop down menu. You can see it is set to “Interactive” in the last image in Step 9, change it to “Ray Traced Final” from there.
Does that work for you?
(I’m Ms. Author by the way 🙂 )
cool
Thanks!
Thanks for the amazing tutorial! Just tried it out, it works perfectly 🙂
That’s great to know!
Thanks a lot for leaving a comment 🙂
Hi, I have no Repoussé CS6 -> Text Layer 🙁
There is no Repoussé in CS6, the 3D environment is a bit different in there. The option for creating the 3D text is called “New 3D Extrusion from Selected Layer”.
Hope this helps.
Hi! Thanks you for the tutorial! I’ve got a problem on the step 9-10, i succeed to make shadows between letters (if one of the lettters is above another, a small shadow we be cast on it), but I don’t understand why, i don’t have any shadow on the floor, and this is really annoying! Can you help me?
Thanks a lot.
Did you make sure to click the “Ground Plane Shadow Catcher”? If so, your text might be floating above the ground plane. In Step 7, you can show the “3D Ground Plane”, so check whether or not the text is touching the ground. Also, make sure that the “Cast Shadows” and “Catch Shadows” boxes are checked, and that the “Create Shadows” boxes for the infinite lights in Step 9 are checked too.
Hope this helps. If the problem still exists, please feel free to add a reply.
Thanks for the comment 🙂
Thanks for the answer!
“Ground Plane Shadow Catcher”?, “Cast Shadows” and “Catch Shadows”, “Create Shadows” are all checked.
I have a lot of letters, and did the test with some letters, above, under, and stuck to the ground, nothing works.
Any other idea? Thank you for helping me!. I’ve been using a portable version of Photoshop for 3 years, but i didn’t have any problem so far :/
Thank you again.
I don’t know if this will be usefull, but each time i check “Ground Plane Shadow Catcher”, i’ve this message: “In adobe photoshop CS5, shadows on the ground plane shadow catcher will only be visible for Ray traced render quality settings”. Don’t know what that means…
This message means that the shadows won’t be visible in the “Interactive” rendering mode, but they will in the “Ray Traced Final” rendering, so it has nothing to do with the problem. But I want to ask though if you do get shadows when you use the “Ray Traced Final” or not. Can you try that please?
If no shadows appear, I assume there might be something wrong with the lights, like pointing upwards, or maybe the Shadow Opacity (shown in Step 7) is not set to 100%. Please check those things out as well and feel free to leave another reply if things still don’t work out.
Regards 🙂
this is really nice tutorial I like your work I want to subscribe you for learning all tutorial.Is it free to learn or their is payment for subscription?
It’s absolutely free!
All the Subscribe and Follow buttons are at the top of the page (the website’s header). Please feel free to click the ones you want 🙂
Many thanks for the kind words 🙂