
Folded Text Effect
There are a couple of nice “folded” text effect tutorials out there, but this tutorial uses a slightly different approach to achieve the concept. We’ll be creating a folded text, and a simple pattern to make it look like it’s cut out from a notebook. The letter “O” will be used to illustrate the concept, as it needs a little bit extra work.
The Final Result

Tutorial Details
- Software Used : Photoshop
- Version : CS5 Extended
- Time : 1:30 – 2:45
Resources
- Paper Texture by akinna-stock.
- Grungy paper texture v.5 by bashcorpo.
Step 1
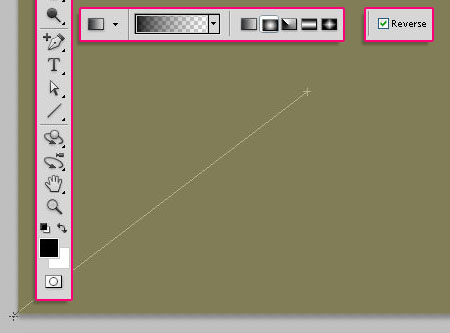
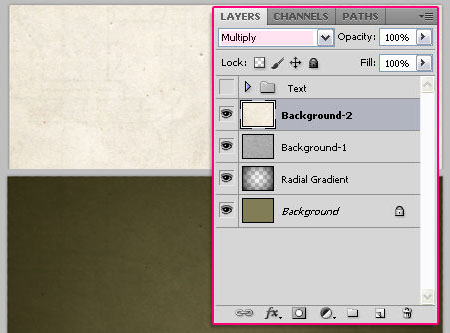
Create a new 1024 x 768 px document. Fill the Background with the color #817d57, then, set the Foreground and Background colors back to Black and White. Create a new layer and call it Radial Gradient. Choose the Foreground to Transparent gradient fill, click the Radial Gradient icon, and check the Reverse box in the Options bar.
Starting from the center of the background, drag the gradient to one of the corners.
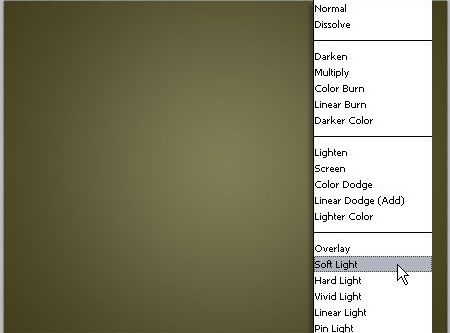
Change the Radial Gradient layer’s Blend Mode to Soft Light.
Step 2
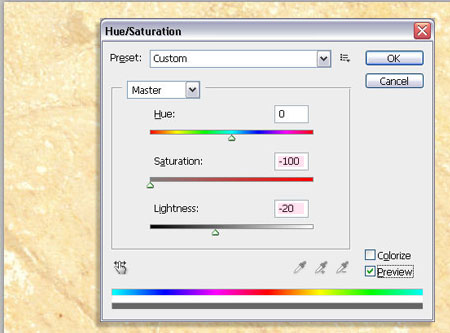
Place the Paper Texture on top of the Background layer, and rename its layer to Background-1.
Go to Image > Adjustments > Hue/Saturation, change the Saturation to -100, and the Lightness to -20.
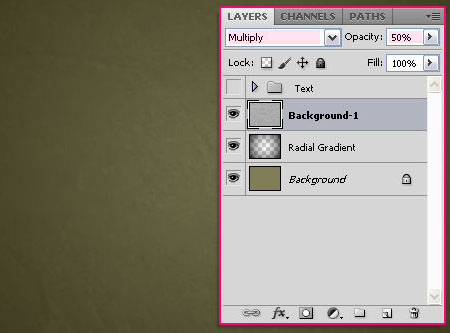
Change the Background-1 layer’s Blend Mode to Multiply, and the Opacity to 50%.
Place the Grungy paper texture on top of all layers, rename its layer to Background-2, and change its Blend Mode to Multiply.
Step 3
Create a new 300 x 300px document, and fill the background with the color #f7f4fb.
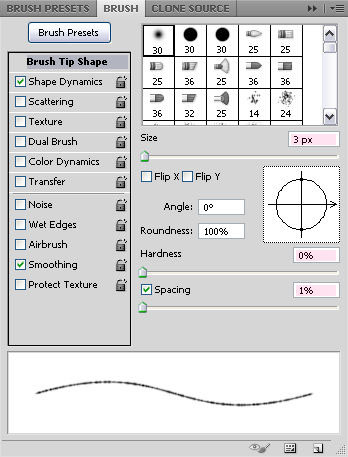
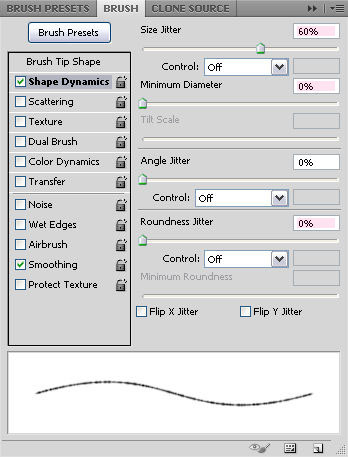
Set the Foreground color to #d0d5de. Choose a soft round brush, and in the Brush panel (Window > Brush), modify its Settings as below:
– Brush Tip Shape
– Shape Dynamics
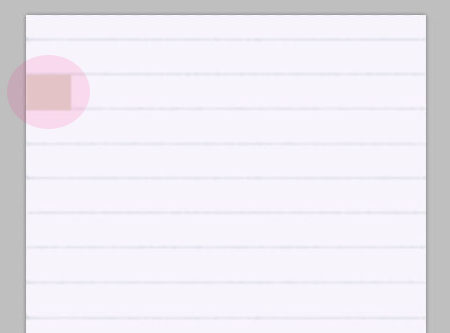
Start creating horizontal lines by clicking and dragging. Pressing and holding the Shift key while doing so will help you get straight lines, but remember to release it each time before clicking to create a new line, then press and hold it again, and so on.
A simple and quick trick to keep the same vertical distance between the lines is to create a square or rectangle shape, and move it downwards after drawing each line to draw the one below it.
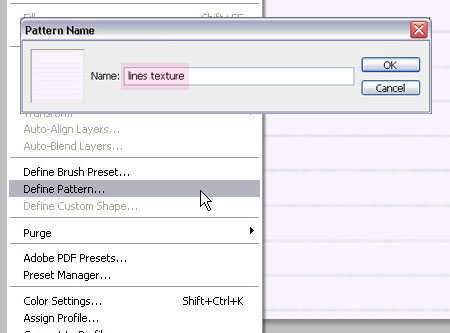
Once you’re done drawing the lines, go to Edit > Define Pattern, and type in a name for the pattern.
Step 4
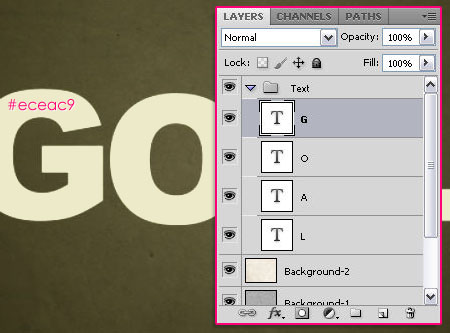
Back to the original document, create the text, each letter on a separate layer, using the font Arial Black, the Size 286 pt, and the color #eceac9.
Then, group the letters and call the group Text. This group will be used to keep the original letters’ layers, so the layers inside it won’t be used, except to duplicate them and make copies.
So for each letter in that group, duplicate it, then place the copy in a separate new group that has the letter’s name, then make the original letters’ group invisible by clicking the eye icon next to it. This will help keep things organized.
Step 5
Select the first letter’s layer (after you duplicate it and put it in its own group) – this will be referred to as the original layer, then go to Edit > Transform > Rotate, and rotate it as you like, then hit Enter/Return to accept the changes.
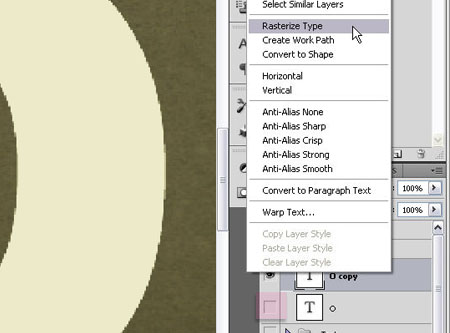
Duplicate the letter’s layer once again, and make the original layer invisible. Right click the duplicated layer and choose Rasterize Type.
Step 6
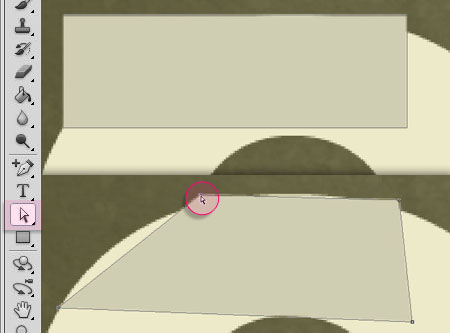
Using the Rectangle Tool, draw a rectangle on top of the letter. Then, use the Direct Selection Tool to select the Rectangle corners and move them to create an edge that extends from one point of the letter to another.
Step 7
Select the rasterized letter’s layer, and use the Polygonal Lasso Tool to select the parts outside the fold’s edge, and hit the Delete key to get rid of them.
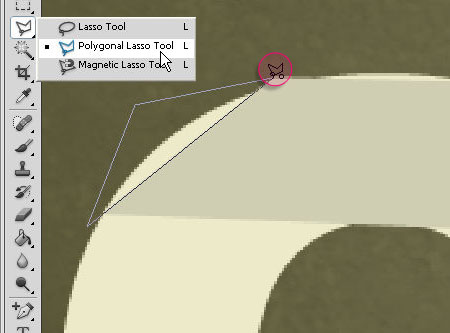
Also, for letters like the O letter, you’ll need to delete the area where the fold closes the letter as well. So just make sure that the fold looks right where it is placed, and delete any extra parts around it.
Step 8
Double click the rasterized letter’s layer, and apply a Drop Shadow effect using the color #7b7b7b.
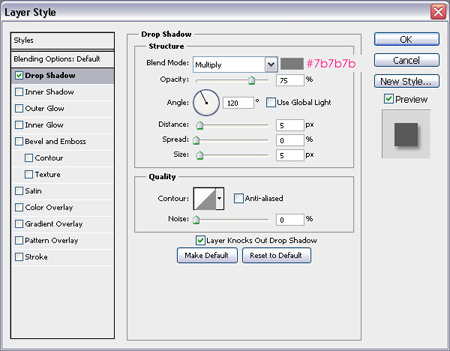
Double click the fold’s layer to apply the following Layer Style:
– Drop Shadow
- Color :
#7b7b7b - Size : 8
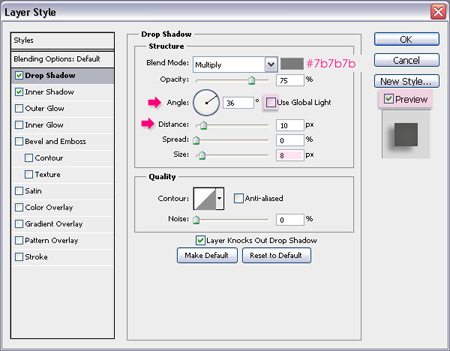
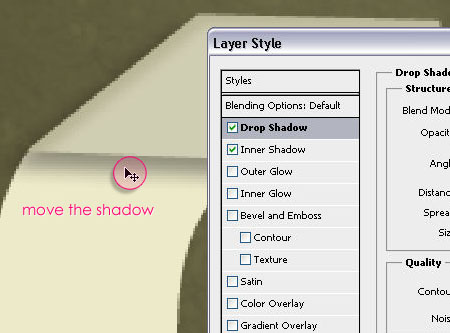
Un-check the Use Global Light box, so that you can change the Angle and Distance values by moving the shadow on the layer directly. To be able to do this you must make sure the Preview box is checked.
So just click and drag the shadow to place it where the fold should cast one.
– Inner Shadow
- Color :
#dbdacd - Size : 18
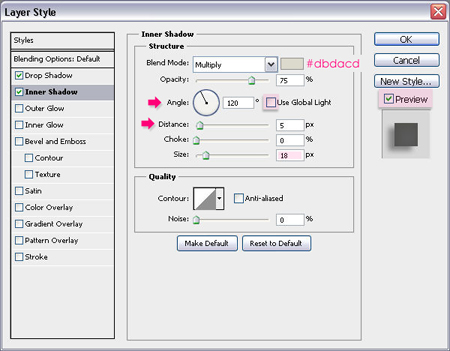
Move the shadow under the fold.
Step 9
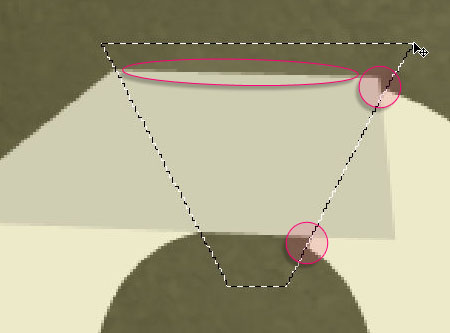
Create a new layer between the letter layer and the fold layer, call it Lines – letter. Use the Elliptical Marquee Tool to create a selection around the letter.
Pick the Paint Bucket Tool, choose the Pattern Fill in the Options bar, then choose the lines pattern to fill the circle, and change the pattern fill layer’s Blend Mode to Luminosity.
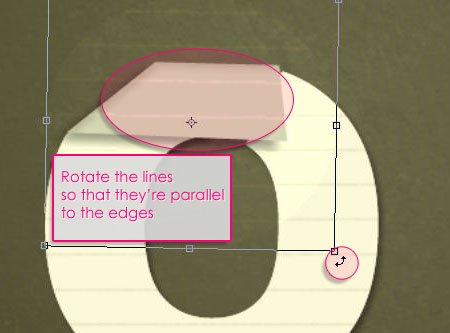
The reason for creating a selection that’s bigger that the letter instead of selecting the letter itself, is that those extra parts will make rotating the pattern without getting any empty parts possible. So go to Edit > Transform > Rotate to rotate the lines in the same angle of the letter, then hit Enter/Return when done.

Step 10
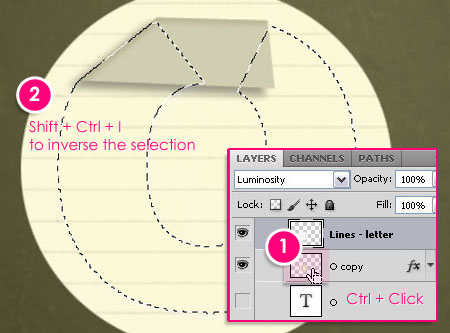
Ctrl/Cmd + click the letter layer’s thumbnail to create a selection.
Go to Select > Inverse, then hit Delete to get rid of the extra parts.
Step 11
Create a new layer on top of the fold layer, rename it to Lines – fold. Again, create a selection and fill it with the pattern.
Change the Lines – fold layer’s Blend Mode to Divide, and rotate the pattern.
Ctrl/Cmd + click the fold shape layer’s thumbnail to create a selection, invert it, and delete the extra parts.
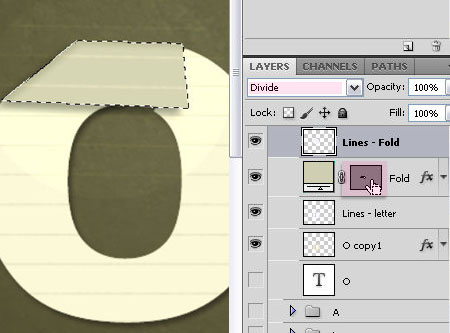
This is what you’ll get.

Step 12
Repeat those same steps to create the rest of the letters.
Once you’re done, you’ll need to press and hold the Shift key, then Ctrl/Cmd + click every letter and fold layers’ thumbnails to create a selection of the final text you have.
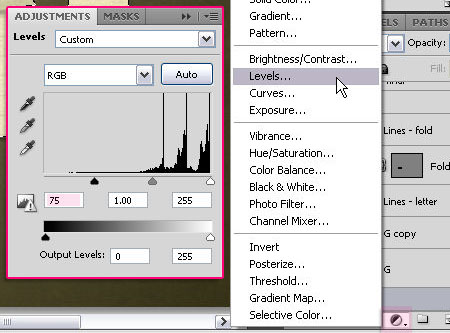
Click the New Adjustment Layer button at the bottom of the Layers panel, choose Levels, make sure to place the adjustment layer on top of all layers, then change the Shadows value to 75. This will darken up the final result.
Finally, move the Background-2 layer right below the Levels adjustment layer.
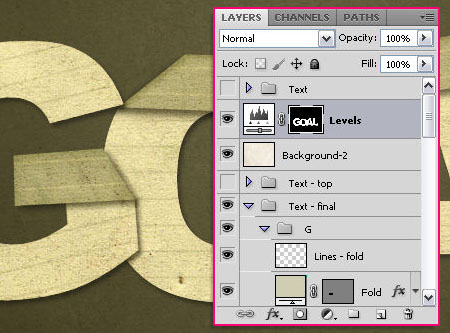
And there you have it!
Did you enjoy this post? Please consider donating to help us cover our server costs.


The final result is great. But I must say it was hard to follow all the steps with ease.
Thanks for the tutorial, I learned a lot!
Thank you so much for your comment. I’m always looking for feedback, so you can contact me if you have any suggestions, please, in order to make the steps easier to follow next time.
Best Regards.
Thanks so much! I used this technique along a few corners instead of letters in making a banner and it came out great!
Hello Lindsey,
It’s always great to know that the concept is being used in many different ways, glad this was the case for you.
Thanks a lot for the comment 🙂
Hello! I Just wanted to say keep up the excellent job! I will be coming back to your blog for more soon.
Thank you so much for the support, it means a lot.
Beautiful work,
thanks for sharing.
Glad you like it 🙂
Thanks a lot for the comment.
how to “using the Polygonal Lasso Tool select those parts and delete them.” in step 7 ?
You’ll need to click once, release, then drag to add each of the points that surround the parts you want to delete. Once the part is selected, you can then hit the Delete key to get rid of them.
Hope this helps. Please feel free to leave any other questions you have 🙂
Tanks for your tutorial.
But dou dont explain about in two photo … please tell me how creat these !
http://uupload.ir/files/dc8r_fold_te_8.jpg
http://uupload.ir/files/3v0_fold_te_13.jpg
Thanks a lot
Hi
Thanks for your tutorial
Please more Explain these item in phohts :
http://www.mediafire.com/convkey/9910/g1ov74yt3nlhchjzg.jpg?size_id=4
http://www.mediafire.com/convkey/390f/b40yxatqf11hf6rzg.jpg?size_id=4
Thanks a lot
For the first image, you need to press and hold the Ctrl/Cmd key, then click the shape layer’s thumbnail shown to create a selection, and release all.
After you create the selection, go to Select > Inverse. Then, hit the Delete key in order to delete the lines outside the fold. Once you’re done, go to Select > Deselect.
As for the second one, press and hold the Shift key, so that you can add to the selection, then press and hold the Ctrl/Cmd key as well, and click each letter and fold layer’s thumbnail to create a selection of all of them.
Then, create the adjustment layer as shown, and use the same values.
Hope this helps.
If there are any other questions please feel free to leave them.
Thank you for the comment 🙂
It’s very useful , thanks
Glad to know that!
You’re very welcome 🙂
This tutorial is hard to follow for beginners because it’s mostly a textual guidance without preview. I don’t know where to set is Paper Texture and Paper Texture and how to Foreground to Transparent gradient fill. This is not recommended tutorial. You should update this tutorial.