
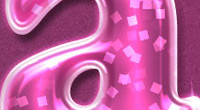
Simple Fireflies Text Effect
In this tutorial, we will be using one of the Photoshop CS5 new painting brushes to create a firefly-like text, and then apply some glow to make it shine!
The Final Result

Tutorial Details
- Software Used : Photoshop
- Version : CS5 Extended
- Time : 0:30 – 0:45
Resources
- HarryPotter7 font.
- cleanzor_texture_270 by ~cleanzor.
- Sparkles Brush.
Step 1
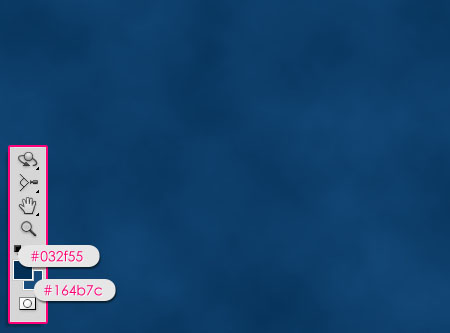
Create a new 1024 x 768 px document. Set the Foreground color to #032f55 and the Background color to #164b7c, then go to Filter > Render > Clouds.
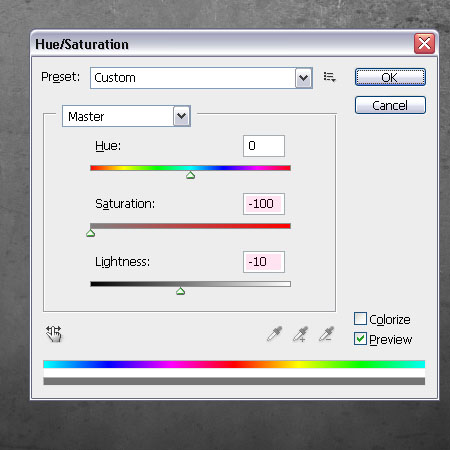
Open the cleanzor_texture_270 image and place it on top of the Background layer. Then, go to Image > Adjustments > Hue/Saturation, change the Saturation to -100, and the Lightness to -10.
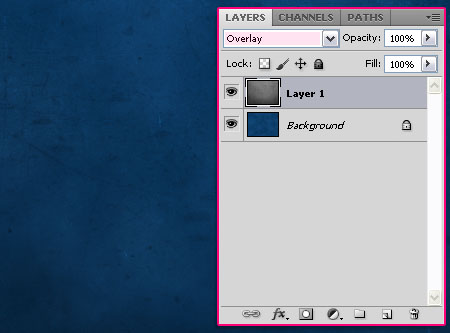
Change the image layer’s Blend Mode to Overlay.
Step 2
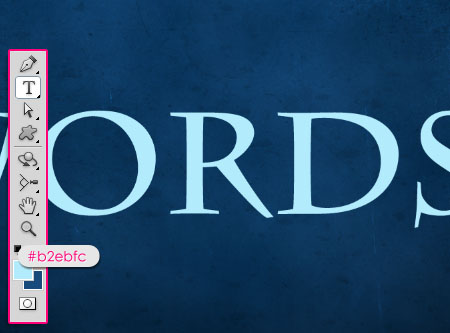
Set the Foreground color to #b2ebfc, and create your text using the Foreground color. The font used is HarryPotter7, and the Size is 215 px.
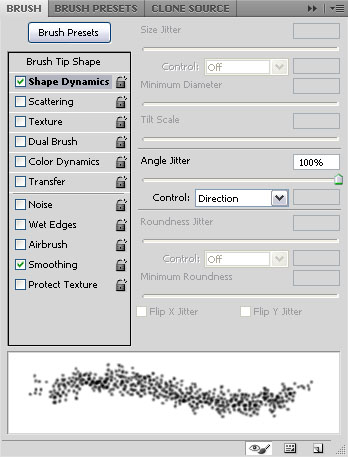
Open your Brush panel (Window > Brush), and choose the Flat Angle Low Bristle Count brush tip, then modify its Settings as below:
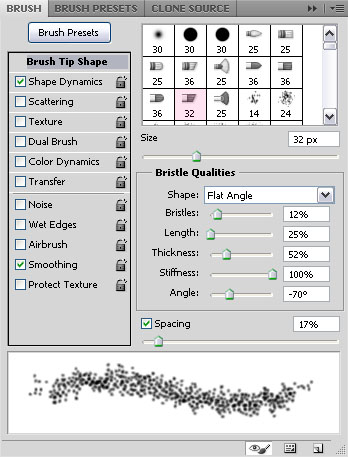
Shape Dynamics
Step 3
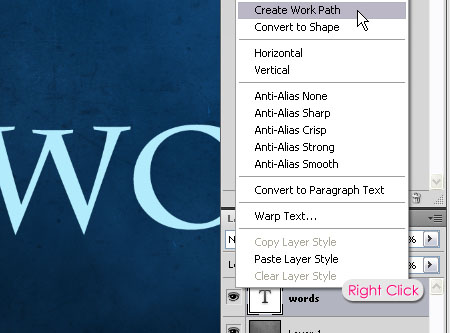
Right click the text layer, and choose Create Work Path.
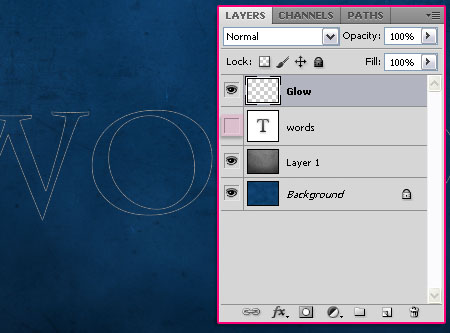
Create a new layer on top of all layers and name it Glow, then remove the eye icon next to the text layer to make it invisible.
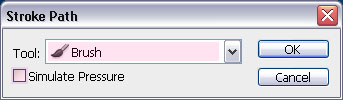
Pick the Direct Selection Tool and right click the path, then choose Stroke Path.
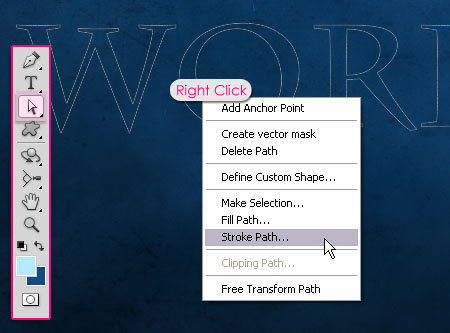
Choose Brush from the Tool drop down menu, and un-check the Simulate Pressure box.
Hit Enter/Return to get rid of the path.

Step 4
Double click the Glow layer to apply an Outr Glow effect.
– Outer Glow
- Blend Mode : Vivid Light
- Color :
#00f6ff - Size : 18
- Contour : Half Round
- Range : 100
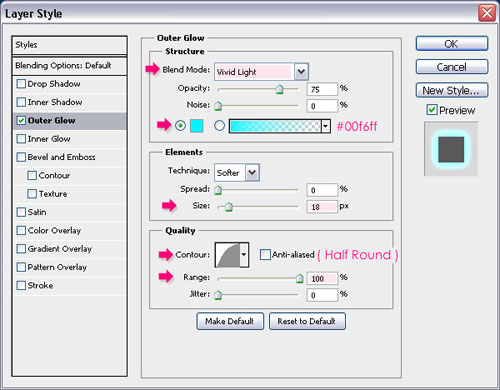
The text should have a nice glow now!
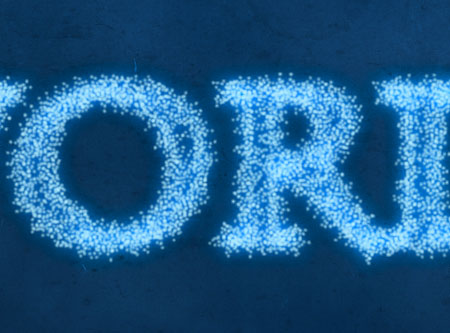
Finally, you can use the Sparkles Brush to add some nice sparkling shapes to the final result. Just load the brush, and use it on the Glow layer, or on a new layer with the same Outer Glow effect.
Did you enjoy this post? Please consider donating to help us cover our server costs.


Thank you..^^
You’re welcome 🙂
I don’t have “Create Work Path” at step 3! Please help!
Is the text layer active (selected) when you right click it? Is the option “Create Work Path” grayed out or does it not exist at all?
It doesn’t exist at all. I’ve done everything exactly as you did, i’ve searched everywhere on photoshop for that option, but can’t find it anywhere. Is there a solution?
Can you find it under Layer -> Type? What version of Photoshop are you using by the way?
At which brush preset do we find Flat Angle Low Bristle Count? 😛
I found another one that I used, but I would like to know which one you used?
Hello TennkoZt,
If you take a look at the second image in Step 2, you can see the brush, it’s in the default set, along with the other PS CS5 new painting brushes.It is the one with the size 32.
Hope this helps!
Thank you for this very nice tutorial!! I’ve had fun and it inspired me to create a wallpaper. Link: http://tv-etc.deviantart.com/art/Wallpaper-White-Collar-S3-206581280
This is awesome! Very well done.
Glad you liked the tutorial.
Thank you for the comment 🙂
That was fun to make. Thank you!
Glad you had fun doing it!
Thanks for the comment.
Thank You.But i am using CS3,I get something from YOU.
Hello Thar,
The brush is available only in Photoshop CS5. Sorry for that!
Thanks for the comment.
my brush is not like the image, he was at a lower intensity, quqse can not see, what should I do??
Hello Jeffson,
Are you using the CS5 new paint brushes?
The final result might be affected by the size of the text as well, so is the size of your text the same as in the tutorial?
If so, then at what step exactly do you start getting different results?
is exactly like the tutorial, the file size, font size, but the brush is not like in the tutorial, see how it looks.
http://imageshack.us/photo/my-images/692/semttulo1zjp.jpg/
If I use another brush with soft tip that is similar to, but the result is not the same.
I’ve been trying to figure out what the problem might be, but couldn’t come up with anything, as the values seem to be all correct.
Can you please for now try to load and use this brush, and tell me if it works or not?(I saved the brush with the settings, so no need to modify anything).
FirefliesBrush.
You might as well reset your brushes and try to modify the values once again.
Sorry for the inconvenience!
Hello friend, here’s a link to the video I made. I’m sorry to be bothering you. If possible, send me the file of the project has ended, if you can of course.
Once again, sorry for the inconvenience.
http://www.mediafire.com/?03fz7h3wyec64pd
Hello Jeffson,
I checked the video, and I don’t think anything was wrong! I have no problem sending you the source file, but it won’t solve the problem, as the brush layer is rasterized and cannot be modified.
Really sorry I couldn’t help for now, but I’ll still try to find out what might be causing this problem, and will add another reply if I figure out what the solution is.
Best regards.
Could you send me the file (*. psd) is already finished, so I just have to change the name?
Well, that’s the point I was trying to clarify, the PSD file won’t actually solve the problem, because the brush layer is rasterized, it cannot be modified like text layers.
Very easy to follow your tuts 🙂
I did a bunch of the text effect that you have on your site.
Thank you
That’s great!
Glad you find the tutorials useful.
Thank you so much for the comment.
i really enjoyed this tutorial im only 11 and i soon want to make my own tutorials based on ones like this!
Aww, thank you 🙂
Hopefully you’ll be creating awesome ones very soon, don’t forget to leave some links so that I can check them out 😉
Cheers!
hi textus
i use cs5 but the brush is not like in step 2 it is 32 but its different….please help me i really like this text effect
Hello Danial,
Can you please explain what’s exactly different so that I can help?
Regards.
Which font did you use for the words ‘more than’ and ‘can say’?
Great tutorial!
The font is Kravitz Thermal.
Glad you liked the tutorial.
Thanks for the comment.
You just need to duplicate it there, by going to Layer > Duplicate Layer, and choosing the Destination Document you want to duplicate the image’s layer to.
Hope this helps.
Thanks for the comment 🙂