
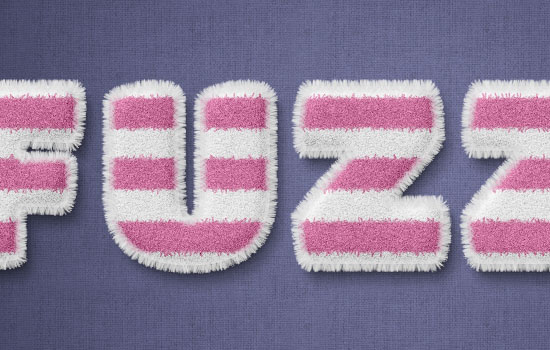
Striped Fuzzy Text Effect
If you’re a fan of the fuzzy/fluffy stuff, you’ll like this text effect. It is a really simple one, created using Photoshop’s Layer Styles, brushes, and Filters. You can use any color you like for the stripes, and even create them in different sizes. The techniques are pretty easy, but they give a nice, almost realistic, result.
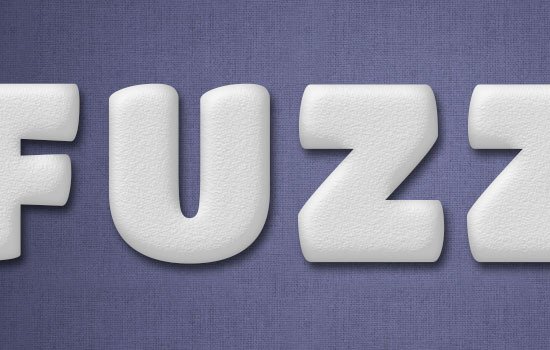
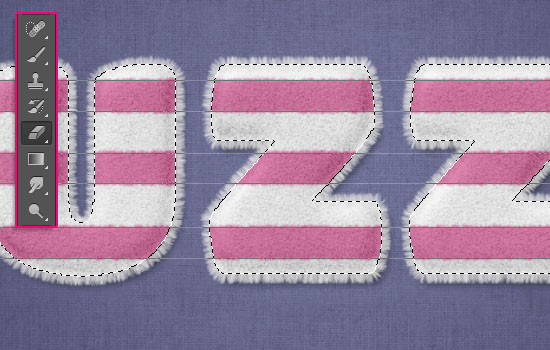
The Final Result

Tutorial Details
- Software Used : Photoshop
- Version : CS6 Extended
- Time : 0:30 – 0:45
Resources
- Titan One font.
- Potato Sack by klikekyle.
- White Texture pattern by Dmitry.
Step 1
Create a new 1000 x 460 px document. Set the Foreground color to #9193c3 and the Background color to #525578. Pick the Gradient Tool, choose the Foreground to Background gradient fill, and click the Radial Gradient icon.
Then, click and drag from the center of the document to one of the corners to create the background gradient.
Place the Potato Sack texture on top of the Background layer, and change its layer’s Blend Mode to Multiply. Then, resize it as move it until you like how it looks.
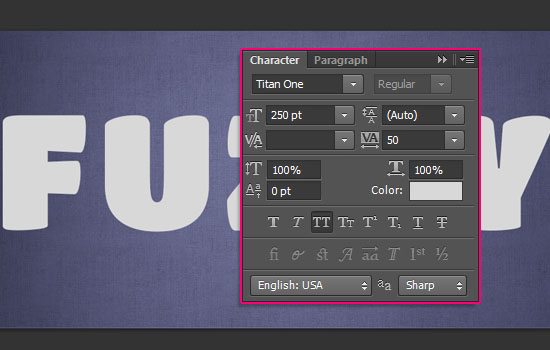
Create the text in All Caps using the font Titan One. The color is #d8d8d8, the Size is 250 pt, and the Tracking value is 50.
Step 2
Double click the text layer to apply the following Layer Style:
– Bevel and Emboss
- Size : 27
- Check the Anti-aliased box
- Shadow Mode – Color :
#d8d8d8

– Contour
- Contour : Half Round
- Check the Anti-aliased box.
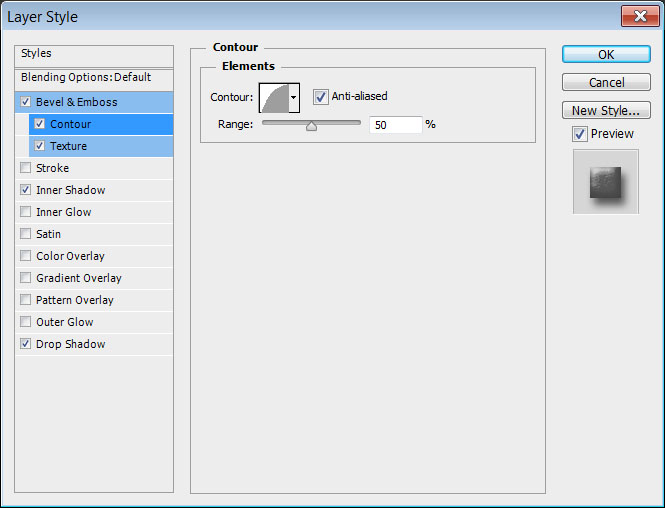
– Texture
- Pattern : White Texture
- Depth : 50%

– Inner Shadow
- Color :
#b5b5b5 - Distance : 0
- Size : 10
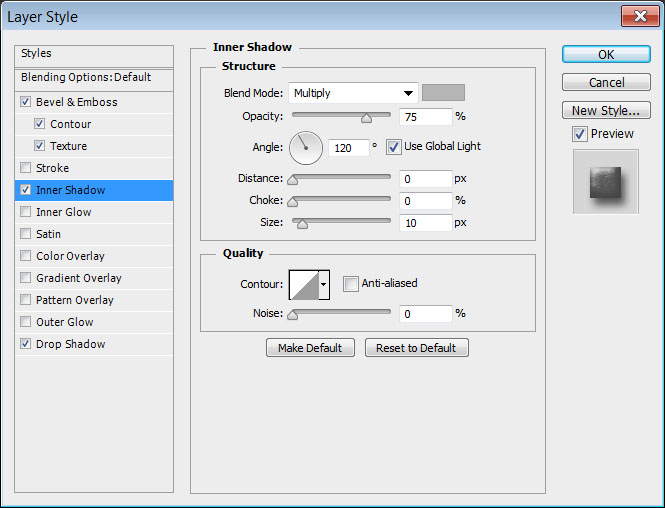
– Drop Shadow
- Opacity : 60%
- Distance : 8
- Size : 9
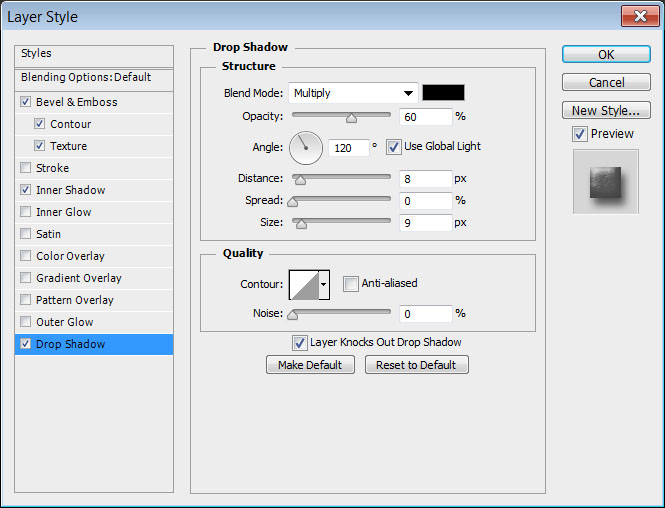
This will create the main text material, and give it a 3D look.
Step 3
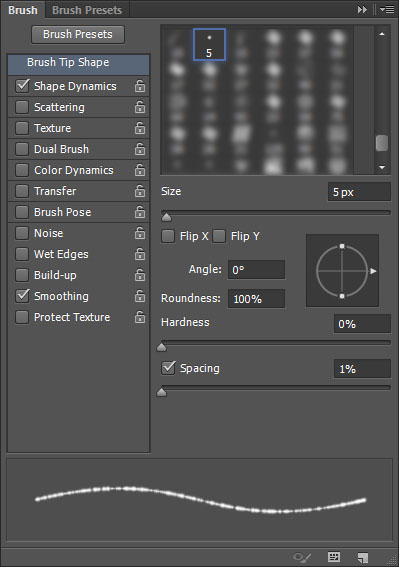
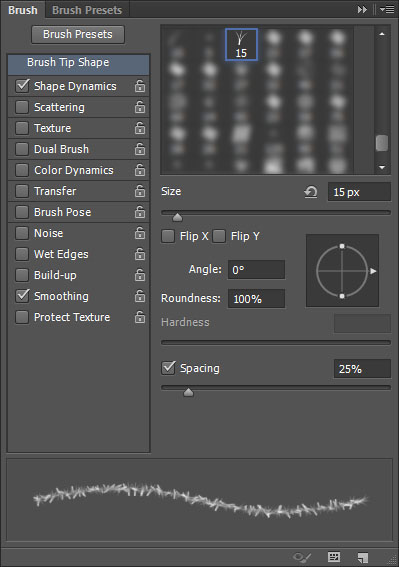
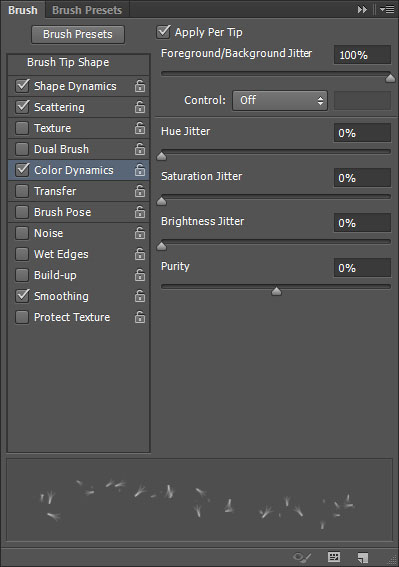
Pick the Brush Tool, and open the Brush panel (Window > Brush). Choose the Dune Grass tip, and change its Settings as below:
Brush Tip Shape
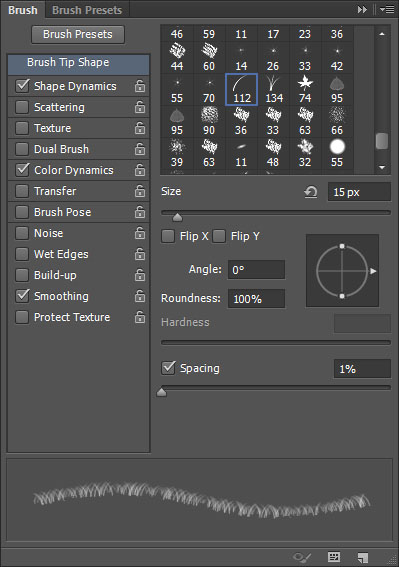
Shape Dynamics

Color Dynamics
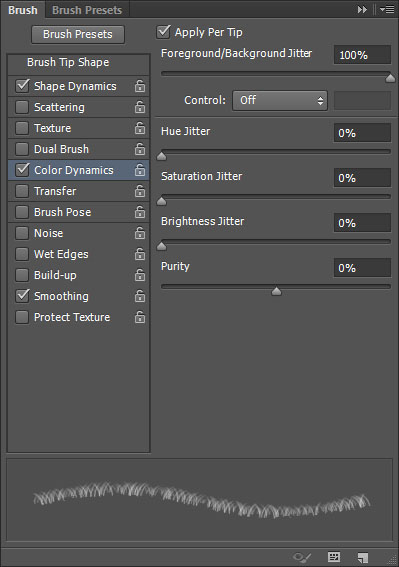
Step 4
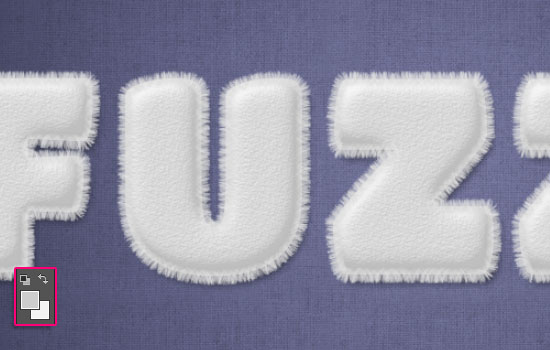
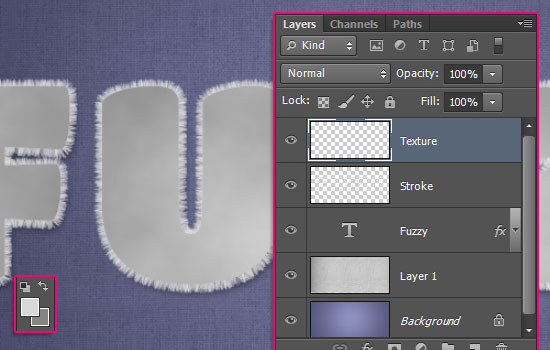
Right click the text layer and choose Create Work Path. Then, create a new layer on top of all layers and call it Stroke. Make sure that the Brush Tool is still selected.
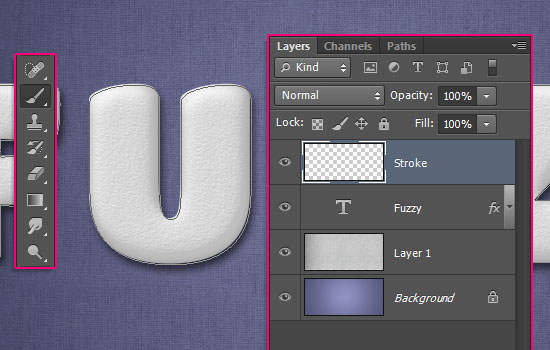
Set the Foreground color to #cdcdcd and the Background color to #f3f3f3. then, hit the Enter/Return key a couple of times (5 – 7) to stroke the path with the modified brush tip. When you like how the stroke looks, pick the Direct Selection Tool (A), and hit Enter/Return one more time to get rid of the path.
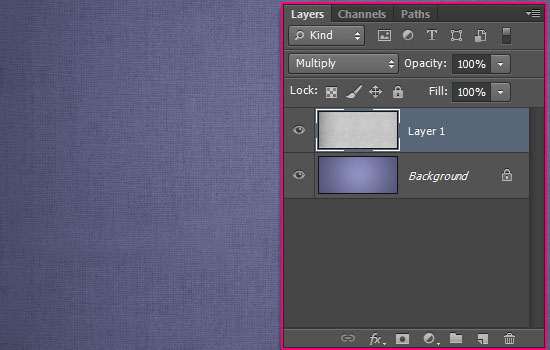
Ctrl/Cmd + click the text layer’s thumbnail to create a selection.
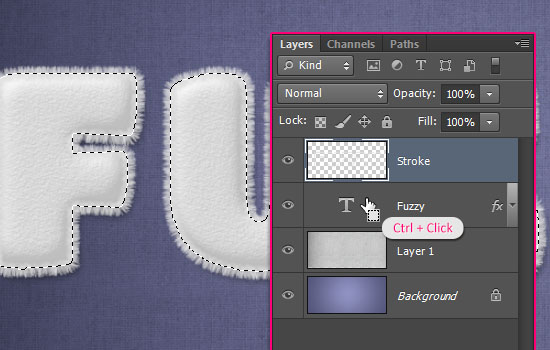
Create a new layer on top of all layers and call it Texture. Change the Foreground color to #d8d8d8 and the Background color to #858585, then go to Filter > Render > Clouds. Go to Select > Deselect (Ctrl/Cmd + D) to get rid of the selection.
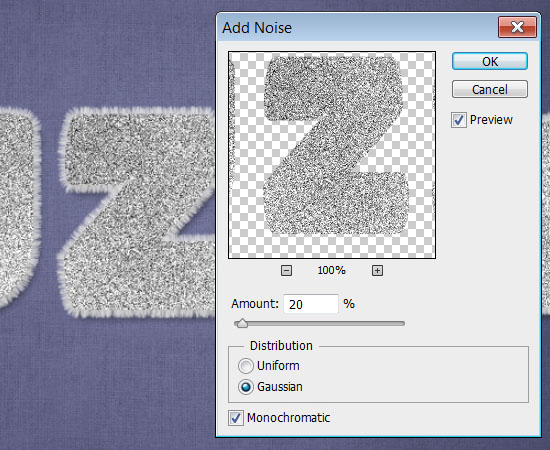
Go to Filter > Noise > Add Noise. Change the Amount to 20, the Distribution to Gaussian, and check the Monochromatic box.
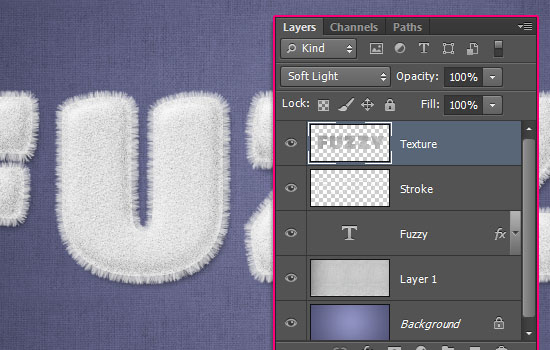
Change the Texture layer’s Blend Mode to Soft Light. This will help with the fuzzy appearance of the text.
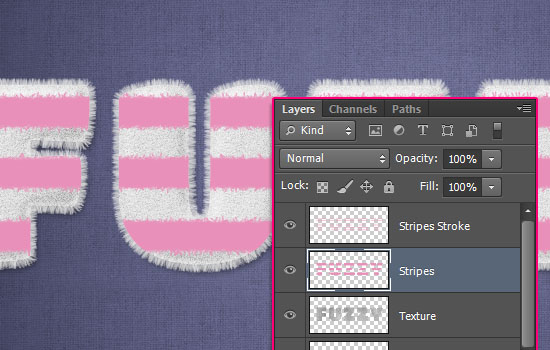
Step 5
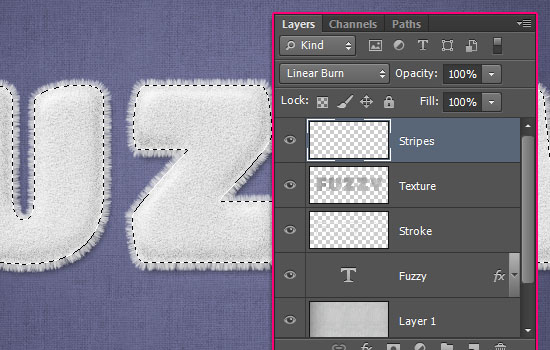
Create a selection once again, then create a new layer on top of all layers, call it Stripes, and change its Blend Mode to Linear Burn. This will help you choose the right color as you will see the result along with the Blend Mode.
Set the Foreground color to whatever color you want the stripes to be (here it is #e890b9), just make sure not to pick very dark colors, as the Linear Burn Blend Mode will darken them anyway.
Then, pick a hard round brush, and change its size to a size you like as well, depending on how thick or thin you want the stripes to be.
After that, press and hold the Shift key, click outside the left side of the text where you want to add the stripe, then drag to the right side to create a straight line, and release all.
Repeat this step to create all the stripes you want to create. You can use different brush sizes to add some variations.
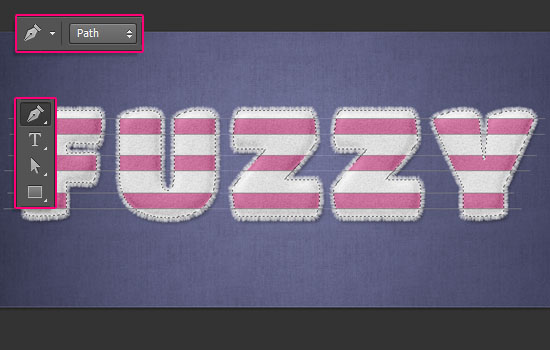
Pick the Pen Tool and choose the Path option in the Options bar. You’ll then need to create a straight line at the top and bottom of each stripe you created.
To do so, click once to the left of the stripe, press and hold the Shift key, and click again to the right side and release all.
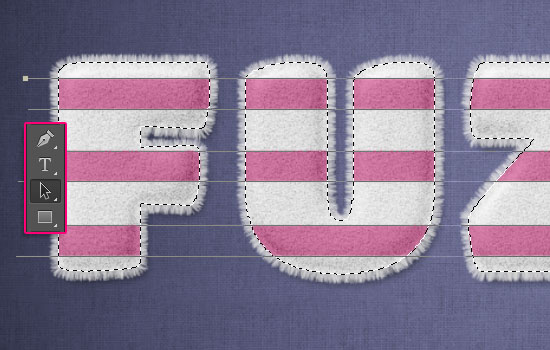
Don’t worry if the line is not placed exactly on top of the stripe’s edge, as we’ll move the lines next. But make sure after you create each line, to press and hold the Ctrl/Cmd key, and click away from the line to separate it from the next one.
Once you’re done, you an pick the Path Selection Tool, click any line you want to move, and use the Arrow Keys to move it as you like. When all the lines are placed correctly, click outside them so that no line stays selected.
Step 6
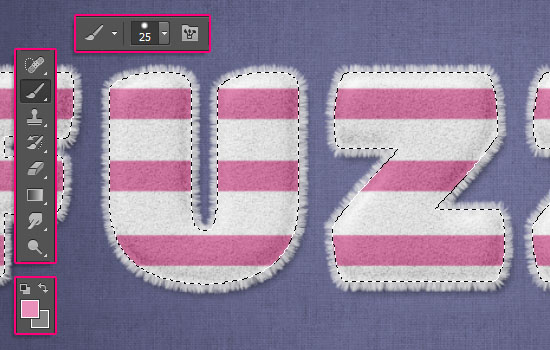
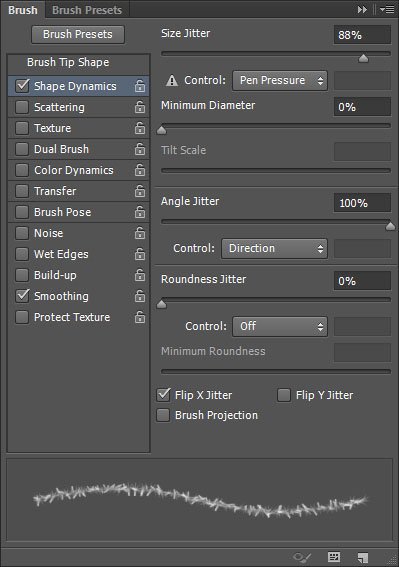
Pick the Eraser Tool, open the Brush panel again, and choose a soft round 5 px brush, then modify its Settings as below:
Brush Tip Shape
Shape Dynamics

Hit the Enter/Return key once to stroke the path with the Eraser Tool‘s brush tip. This will create soft jagged edges for the stripes, which will help make the final effect more realistic.
Step 7
Pick the Brush Tool, and from the Brush panel, choose the Grass brush tip, and modify its Settings as below:
Brush Tip Shape
Shape Dynamics
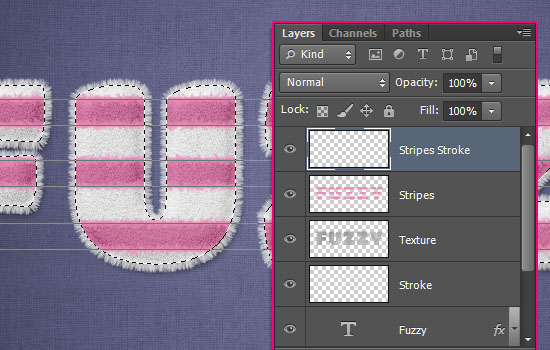
Create a new layer on top of all layers and call it Stripes – Stroke, make sure that the Foreground color is the same as the stripes’ color, the hit the Enter/Return key a couple of times (3 – 5) to stroke the edges of the stripes.
Once you like the result, pick the Direct Selection Tool (A) and hit Enter/Return to get rid of the path, go to Select > Deselect to get rid of the selection, and then go to Filter > Sharpen > Sharpen to make the edges more defined.
After that, change the Stripes layer’s Blend Mode to Normal.
Select both the Stripes and the Stripes – Stroke layers, go to Layer > Merge Layers, then change the merged layer’s Blend Mode back to Linear Burn.

With the Foreground color still set to the stripes’ color, and the Background color set to White, go to Filter > Noise > Add Noise. Change the Amount to 5, the Distribution to Gaussian, and check the Monochromatic box.

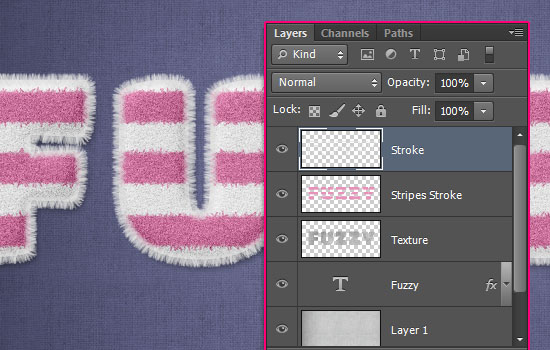
Step 8
Drag the Stroke layer on top of all layers.
Duplicate the text and the Stroke layers, then right click the text layer and choose Clear Layer Style.
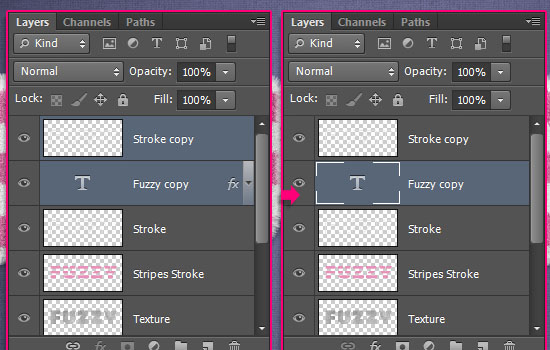
Select the copy text and Stroke layers, merge them, rename the merged layer to Shadow, and drag it right below the original text layer.
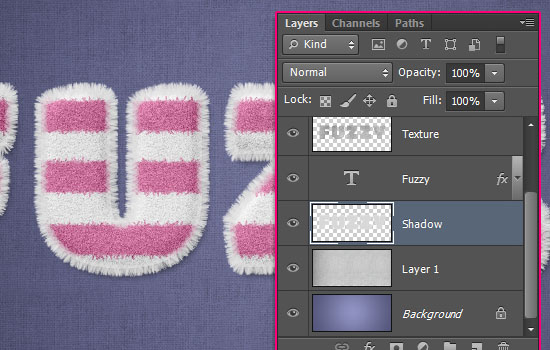
Double click the Shadow layer to apply a Drop Shadow effect:
- Color :
#767676 - Opacity : 58%
- Distance : 15
- Size : 10
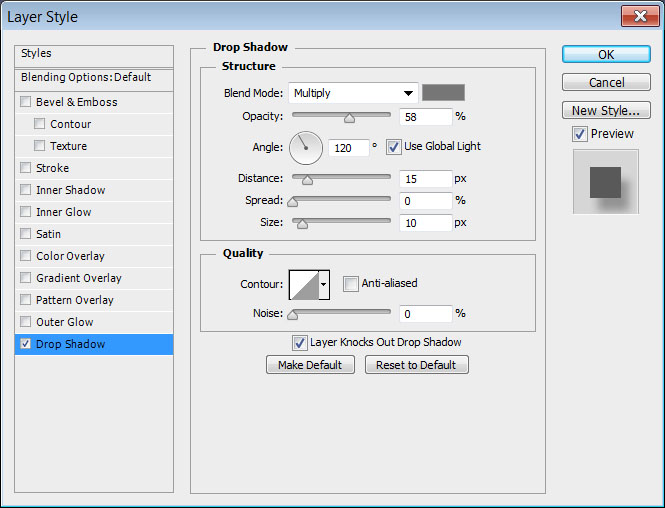
This will add some more depth to the text.
Step 9
Pick the Brush Tool one more time, and modify the Grass tip’s Settings as below:
Brush Tip Shape

Shape Dynamics
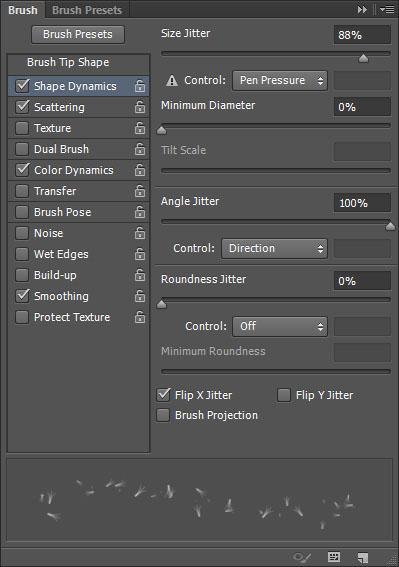
Scattering
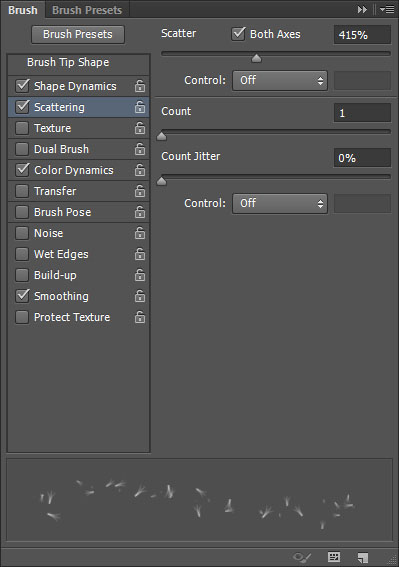
Color Dynamics
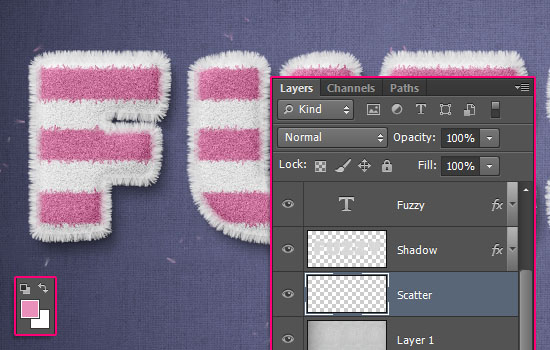
Make sure that the Foreground color is still set to the stripes’ color, and the Background color set to White, then create a new layer below the Shadow layer and call it Scatter.
Click and drag very slightly around the text to add some scattered pieces.
And you’re done!
Hope you enjoyed the tutorial and found the tips and tricks used helpful 🙂
Did you enjoy this post? Please consider donating to help us cover our server costs.


Very cool! and once again thanks for sharing…. I’m working on applying this effect to some shapes (Teddy Bear’s)… 🙂
That’d look awesome 🙂
Thanks a lot for the comment 🙂
Looks great, very detailed steps! thank you 🙂
Many thanks for the always amazing comments 🙂
this was a cool tut to try 🙂 two things I like to ask you about, I only got the color on the stripes very very light – even though I used a kind of dark, but not to dark color.
and I remember somewhere that someone asked about how come she/he got the text always much too big for the canvas, that´s what happens with me, I don´t know what I´m doing wrong and I don´t remember what answer you gave that person, but I though when I read it that it was the same problem that I have been having !!! still have ? can you imagine what I´m doing wrong!
As for the stripes’ color, please make sure when you select the Brush Tool that the Opacity and Flow values in the Options bar are set to 100%. The Layer’s Opacity and Fill values should be set to 100% as well. If that doesn’t solve the issue, please feel free to add a screenshot.
The text issue was due to the Resolution value used. You can check the Resolution of the document you’re working on by going to Image -> Image Size. If the value is not set to 72, then you’ll need to create a new document, and in the New dialog box, set the Resolution to 72.
Hope this helps 🙂 Please feel free to leave any other questions you have.
Thanks for the comment.
Thank´s going to try out the new tut and see if the Resolution to 72 is what I´m doing wrong – and I did not check the Opacity and Fill Layer´s values, will do that also.
You really are amazing and have the must awesome tutorials and great explanations 🙂
very nice as always. thank you for the tutorial. You’re great
You’re very welcome, glad you liked it.
Thank you very much for the amazing comment 🙂
J’aime beaucoup !! Mais j’ai un soucis je ne peux créer un texte de travail car il me dire que je suis en ” Faux Gras ” pourtant j’utilise la police fournie. Merci
Excusez moi c’est tout bon.
Encore merci. très beau.
Was the problem solved? If not, I do believe it’s a Faux Bold issue. You can fix it by going to Window -> Character to open the Character panel, then un-click the “Faux Bold” icon. Check this image please.
Hope this helps.
Merci beaucoup for the comment 🙂
Tuto and effects very nice, as usual !
Merci !!!
http://www.casimages.com/photos/cixi42/215700/11909259
Very nicely done! Cool background as well 😉
Merci beaucoup for the comment and for sharing your work 🙂
OMG.. I like it <3 <3 <3
you are the best Rose
Aww! So glad you do 😀
Thanks a lot for the lovely comment Rana 🙂
Very cool and detailed tutorial!Thanks for sharing!
Glad you enjoyed it 😀
Many thanks for the kind comment 🙂
great tutorial! thanks!
You’re welcome.
Thanks for the comment.
Hi This is my first word for your work so nice and not have much word and l have learnt much tips from your tutorials. i always visit to you site for learning something for new. tip… pl.. do not mind my english is not good i am from India. Thanks…..so much for taking time for tutorials keep it always good work….
That’s really very kind of you to say, and it means so much!
Happy to know that you find the tutorials useful 🙂
Many thanks for taking the time to write such a nice comment, really appreciate it 🙂
Glad you like it 🙂
Muchas gracias for the comment.
Hello. Very nice tutorial. Keep it up.
l do have a question. My computer does not support png file format. l tryed to convert it to png, but didn’t make it. Any ideas?
That’s weird. What is exactly the thing you’re not able to do, and in what step please? Do you get any error messages? Please feel free to upload a screenshot of the issue as well.
I didnt work for me either although it did recognize it as adobe fw file, so i just screen capped it and saved it as jpg.
Good to know you were able to work around the issue, even though I still don’t know why the original file won’t be opened!
Thanks for the comment and the tip anyway 🙂
awesome tutorial. like it (y)
Happy you do 🙂
Thanks for the comment.
Great tutorial. I’ve learned a lot from this one.
That’s great to know!
Many thanks for the comment 🙂
Very helpful!! that’s why i love this website, can’t wait for the next tut… <3
Really glad to know that!
Thank you very much for the kind words, your support means a lot 🙂
Thank you very much 🙂
thax im enjoyed by tutorial
Wonderful outcome! The darker lines around the stripes look really nice.
Many thanks for sharing your work and for the kind comment 🙂
wasted my time with this one, was working fantastic until I got to the merging layer stages then it wouldn’t work for me, scrapped my work
Sad to know that 🙁
Can you please explain what went wrong when you tried to do so?
Hi Rose,
I always interested in your PS tutorials and you have made a great one, again. I have learned a lot from it, thanks you. Please look at my outcome.
Really glad to know that 🙂
Your outcome looks absolutely awesome! Nice work indeed 😉
Many thanks for the kind words and for sharing your work.
Nice tutorial
Awesome outcome!
Thanks a lot for sharing your work and for the comment 🙂
The Angle Jitter under Shape Dynamics in the Brush panel is what controls the angle of the brush tip. Did you make sure it is set to 0 and that the Control is set to Direction?
Please feel free to leave a reply with a screenshot of the issue if it still exists.
Thanks a lot for the comment 🙂
That would be it. Thanks so much!
You’re very welcome! Glad the problem was solved 🙂
so simple and fantastic effect
Nicely done!
Thanks a lot for the comment and for sharing your work 🙂
when i click the Potatoe sack link it doesn’t work 🙁
Seems like it was deleted by its owner 🙁
You can try using other similar textures like this one or this this one instead.
Hope this helps 🙂
Excellent ! but if you also include video tutorial that will be much batter.
Thanks a lot for the comment and for the suggestion, will make sure to take it into consideration 🙂
This is my version…..thank you so very much I just love your tutorials 🙂
That’s a nice fluffy one!
Thank you very much for the comment and for sharing your work 🙂
Hellô Rose, thank you very much for tutorials, but i did not get the potato sack
It seems to have been deleted by it’s owner, unfortunately 🙁
Please check the alternatives in this comment.
Many thanks for the comment 🙂