
Cherry Blossoms Text Effect
Cherry blossoms, or Sakura, are one of Spring’s most beautiful signs. Their fresh-looking pinkish-hued flowers are always a sight to behold. This tutorial will show you how to create a simple cherry blossoms – inspired text effect using Shapes, Brushes, and Layer Styles.
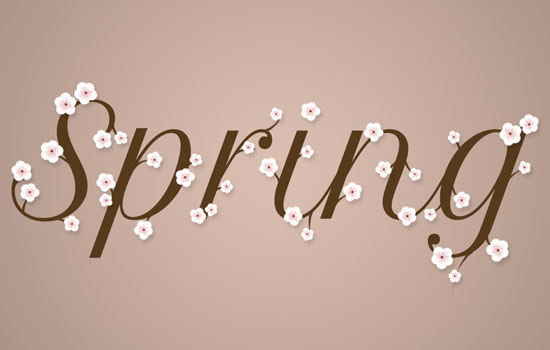
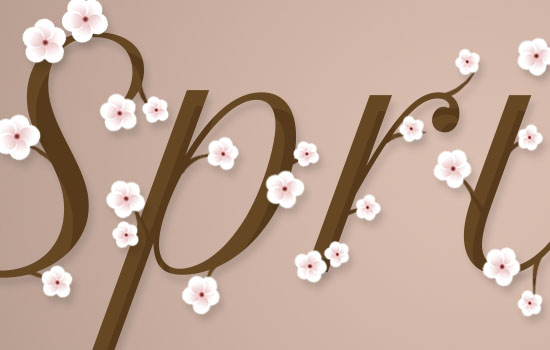
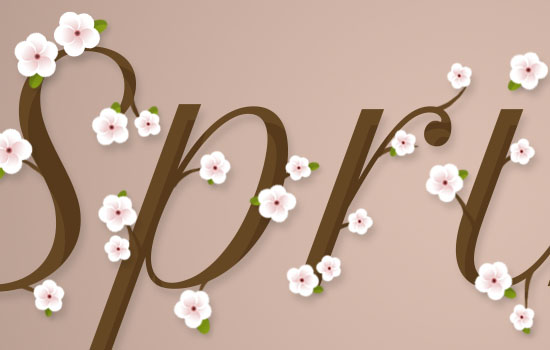
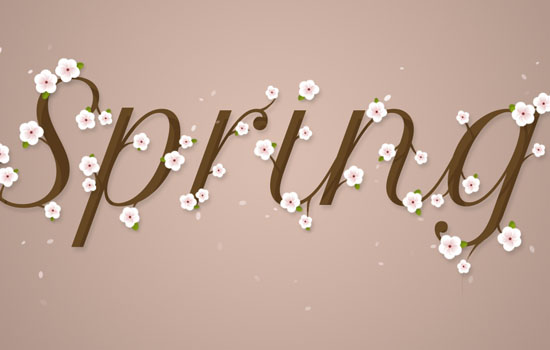
The result is very minimal and basic, but it still captures the loveliness of the blooming season.
The Final Result

Tutorial Details
- Software Used : Photoshop
- Version : CC (CS3+ versions can be used as well)
- Time : 0:45 – 1:30
Resources
- Petit Formal Script font.
- Paper T4 texture by ENJAUMA.
Step 1
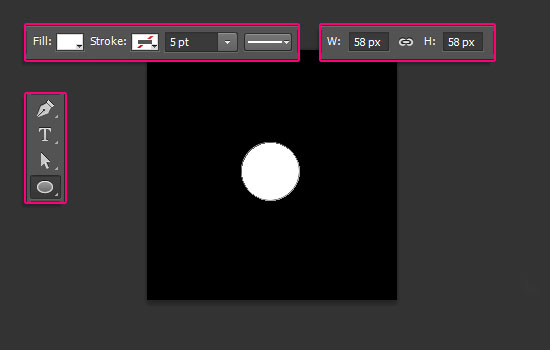
Create a new 250 x 250 px document and fill its Background with Black. Then pick the Ellipse Tool, and create a 58 x 58 px white circle.
Create another 41 x 41 px black circle, and place it near the bottom of the white one.
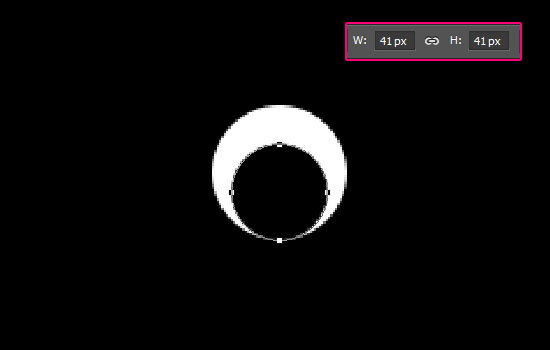
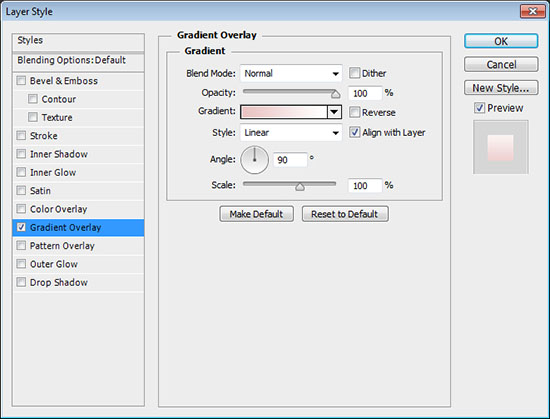
Double click the black circle’s shape layer to apply a Gradient Overlay effect, using a gradient fill created with the colors #eac3c3 to the left and #ffffff to the right.
This will create the petal’s shape.

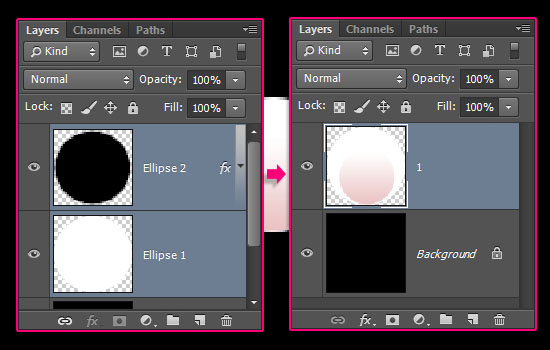
Select both circle shape layers, go to Layer > Rasterize > Layers, then to Layer > Merge Layers. Rename the merged layer to 1.
Step 2
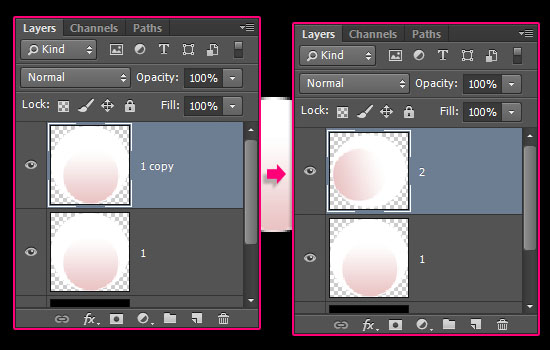
Duplicate the petal layer and rename the copy to 2.
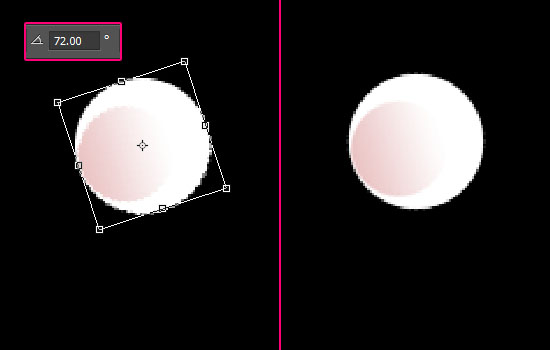
Go to Edit > Transform > Rotate. You’ll need to choose a Rotation Angle based on the number of petals you want to create, by dividing 360 by that number of petals.
In this tutorial, 5 petals will be created, so the Rotate value in the Options bar will be set to 72. Hit Enter/Return when done.
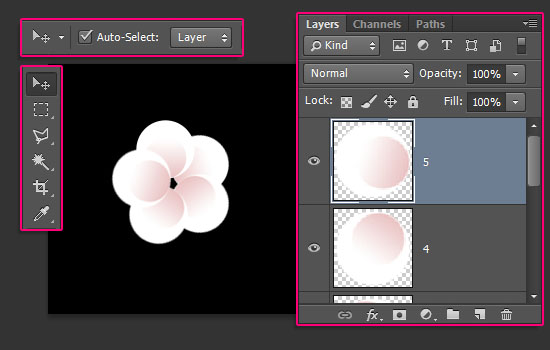
Continue duplicating the petal layers and rotating them until you get the number of petals you want, or simply press the Alt + Ctrl + Shift + T or Option + Cmd + Shift + T keys to do so.
Once you have all the petals, pick the Move Tool, and start placing the petals to create the flower. You can check the Auto-Select box in the Options bar to select and move the petals faster, but make sure to un-check it when you’re done.
Use the Ellipse Tool to create a circle that covers the center of the petals, then change its layer’s Fill value to 0.
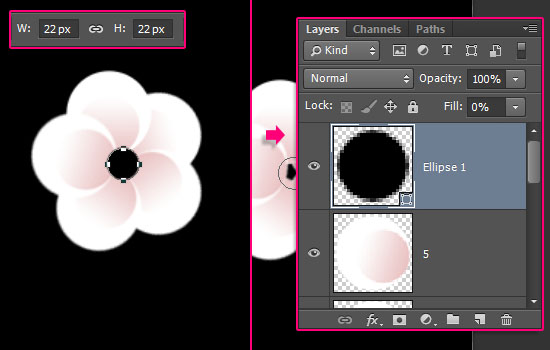
Double click the center circle’s layer to apply a Gradient Overlay effect by changing the Style to Radial, then click the Gradient box to create it.
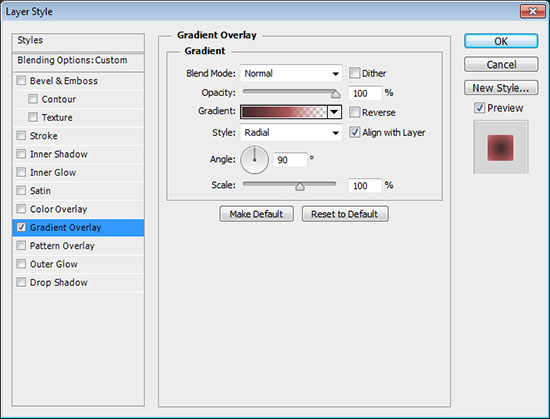
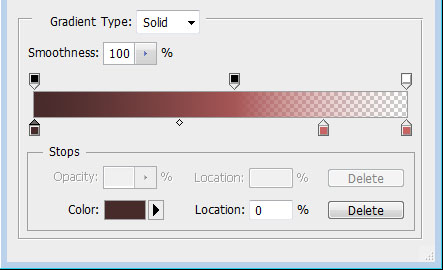
To create the Gradient, you’ll need to click below the gradient bar to add Color Stops, and on top of it to add Opacity Stops. Then, when you click a Color Stop, you can change its Color and Location values, and when you click an Opacity Stop you can change its Opacity and Location values. Here are the Color Stops values used from left to right:
Color – Location
#472a2a– 0%#c86464– 77%#c86464– 100%
Opacity – Location
- 100% – 0%
- 100% – 55%
- 0% – 100%
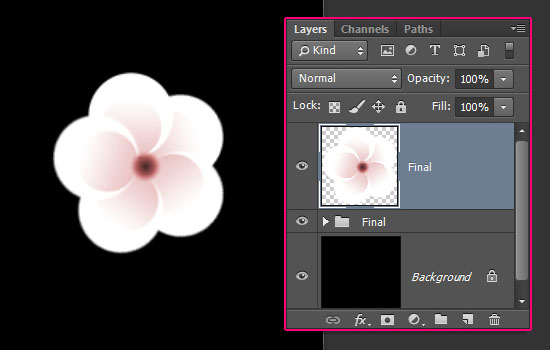
This will style the center.
Group all the Shape layers you have, duplicate the group, make it invisible by clicking the eye icon next to it, then select the copy and go to Layer > Merge Group. Rename the original group and the merged one to Final.
Save the file and close it.
Step 3
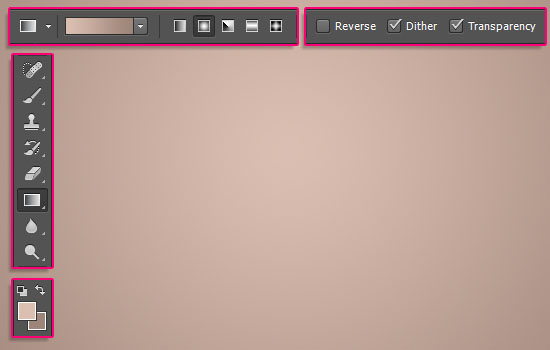
Create a new 1250 x 1250 px document. Set the Foreground color to #dbbfb1 and the Background color to #9d8579. Pick the Gradient Tool, choose the Foreground to Background gradient fill, and click the Radial Gradient icon.
Then, click and drag from the center of the document to one of the corners to create the background gradient.
Create the text using the font Petit Formal Script. The color is #563a1b and the Size is 283 pt.

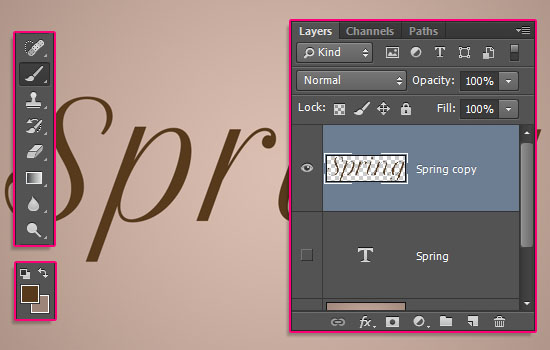
Duplicate the text layer and make it invisible. Then, select the copy and go to Layer > Rasterize > Type. Set the Foreground color to #563a1b, and pick the Brush Tool.
Step 4
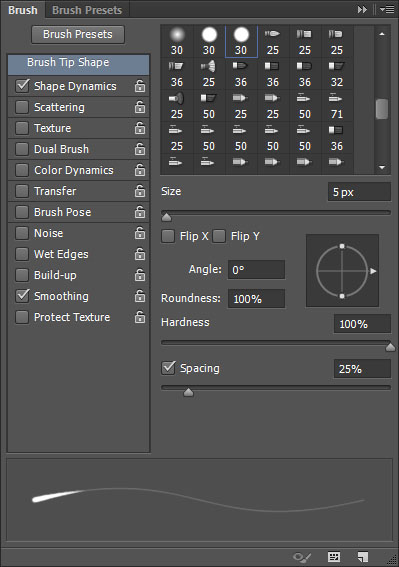
Open the Brush panel (Window > Brush), pick a hard round tip and modify its Settings as shown below:
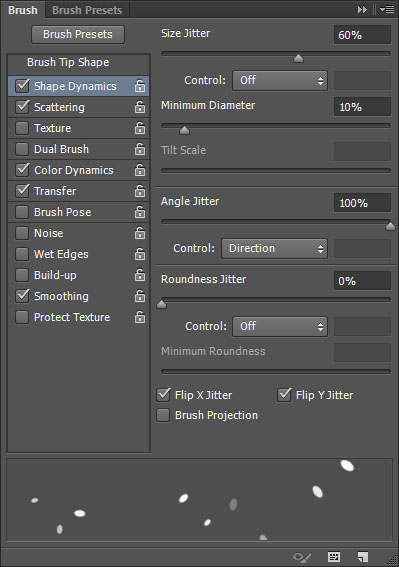
Brush tip Shape
Shape Dynamics
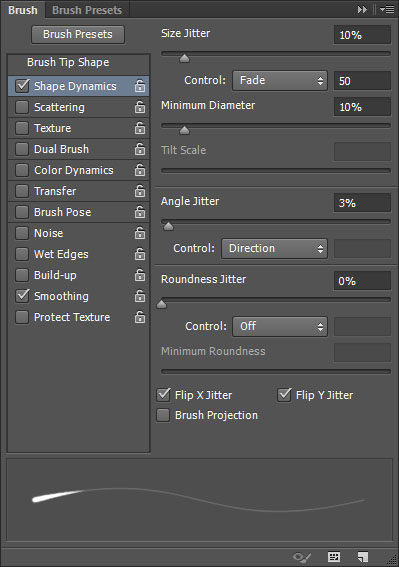
What the Fade values do is make the drawn line of brush get thinner when dragged out. So if you place the brush tip inside the text, then click and drag outwards, you’ll see the line getting thinner – but it won’t disappear.
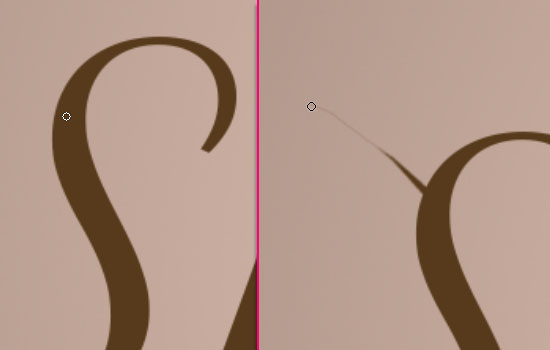
If you want the line to completely disappear after it fades, change the Minimum Diameter value under Shape Dynamics to 0.
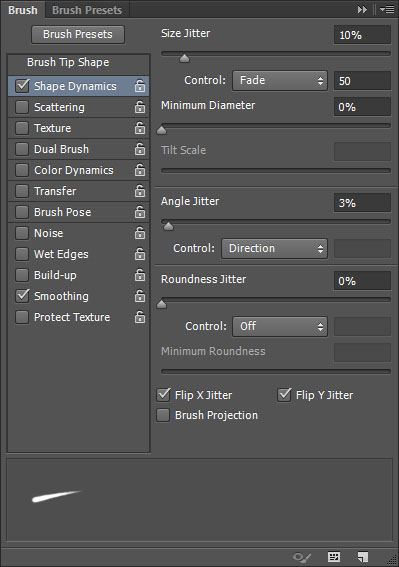
Choose the value you like depending on the result you prefer.

What you’ll need to do after that, is use the brush tip to create branches all around the text. You can do that now, or add them after placing the blossoms if you like. Whatever you feel more comfortable with.

Step 5
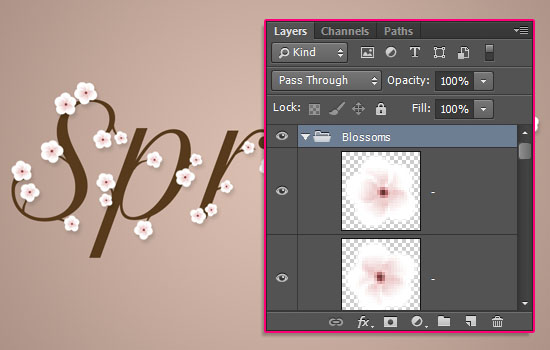
Duplicate the merged blossom flower’s layer created in Step 2 to the document you’re working on, then duplicate it to create a copy.
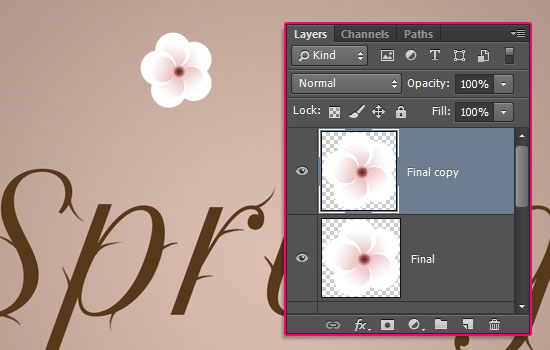
Press Ctrl/Cmd + T to enter the Free Transform Mode. Resize, rotate, and place the flower where you like, the hit Enter/Return to accept the changes.
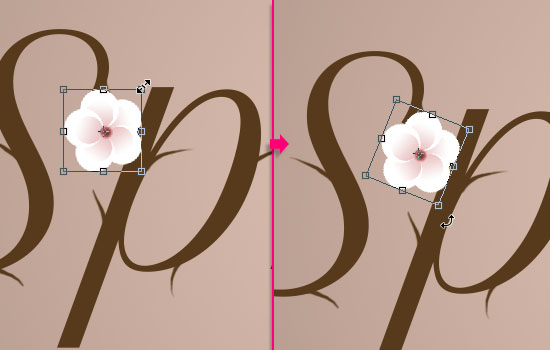
Continue duplicating, transforming, and positioning the flowers until you like the result you get.
Group all the flower layers you have to keep things organized.
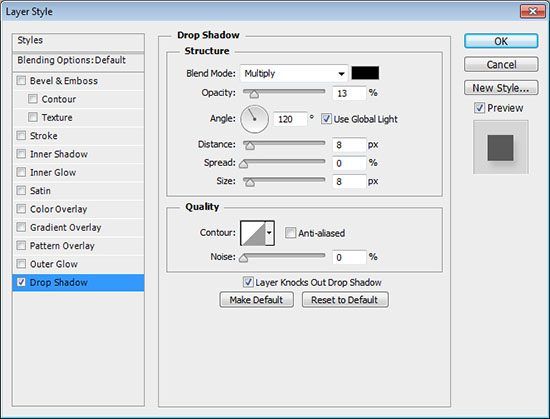
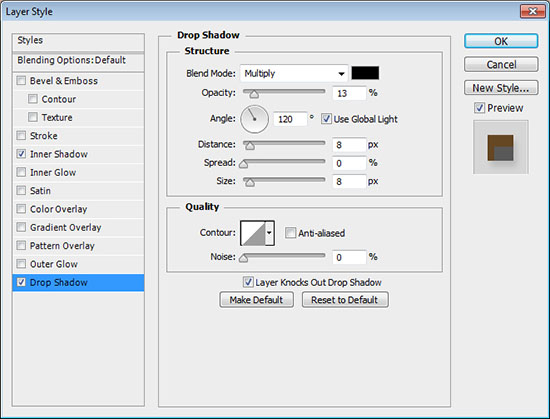
Double click any of the flower layers to apply a Drop Shadow effect:
- Opacity : 13%
- Distance : 8
- Size : 8
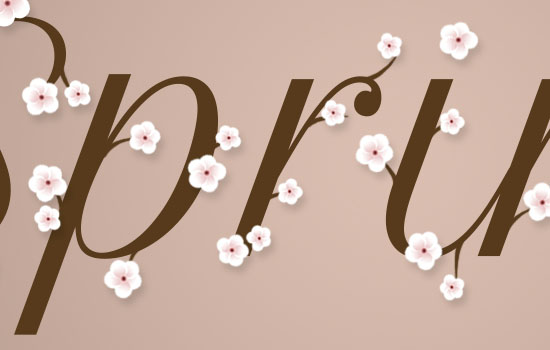
Right click the styled layer, choose Copy Layer Style, then select all the other blossom flowers’ layers, right click any of them, and choose Paste Layer Style.
This will add a subtle shadow to the flowers.
Step 6
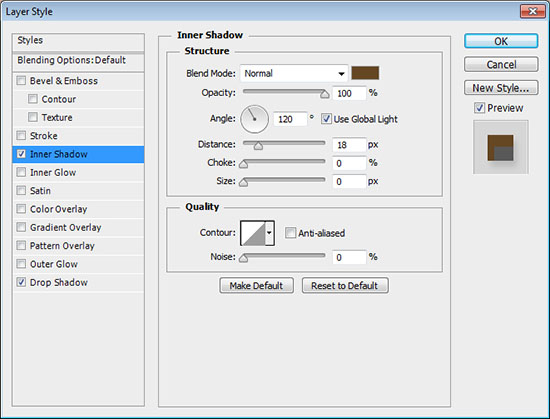
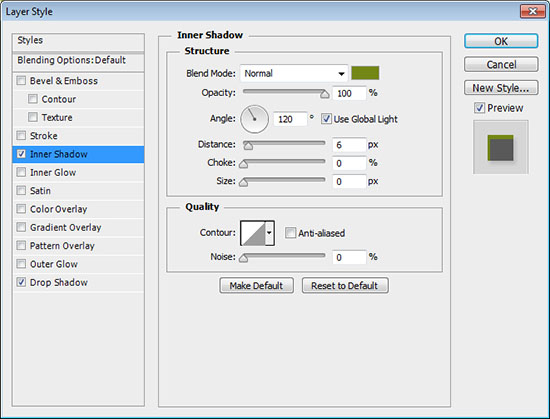
Double click the rasterized text’s layer to apply the following Layer Style:
– Inner Shadow
- Blend Mode : Normal
- Color :
#664724 - Opacity : 100%
- Distance : 18
- Size : 0
– Drop Shadow
- Opacity : 13%
- Distance : 8
- Size : 8
This will add some flat shadow detailing to the text.
Step 7
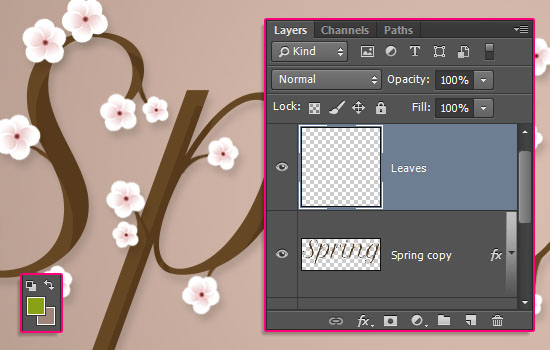
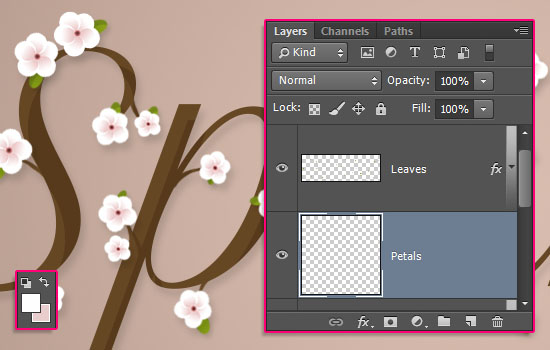
Create a new layer on top of the text layers and call it Leaves, set the Foreground color to #89a115, and pick the Brush Tool.
Open the Brush panel, choose a hard round brush tip, and modify its Settings as shown below:
Brush Tip Shape

Shape Dynamics

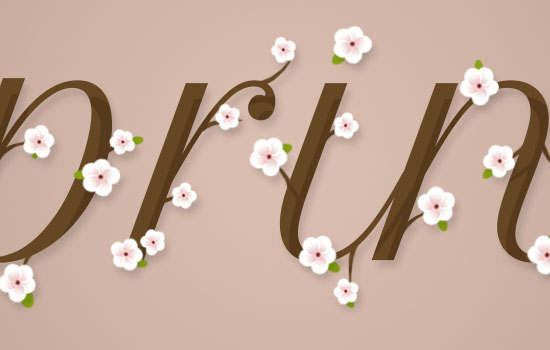
Next, start clicking to add leaves for some of the blossom flowers you have. The Shape Dynamics‘ settings will help you create leaves with different sizes and angles, so you can choose where to add the leaf each time, as well as undo and redo the process until you like the outcome.
Double click the Leaves layer to apply the following Layer Style:
– Inner Shadow
- Blend Mode : Normal
- Color :
#738717 - Opacity : 100%
- Distance : 6
- Size : 0
– Drop Shadow
- Opacity : 13%

This will style the leaves.
Step 8
Create a new layer below the Leaves layer, call it Petals, set the Foreground color to #fefefe and the Background color to #e9cccc.
In the Brush panel, modify the Settings of the selected brush tip as below:
Brush Tip Shape
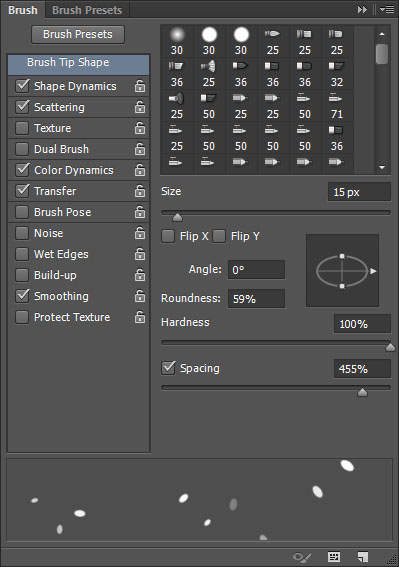
Shape Dynamics
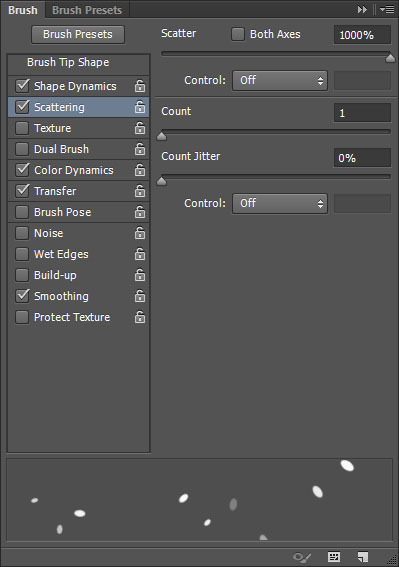
Scattering
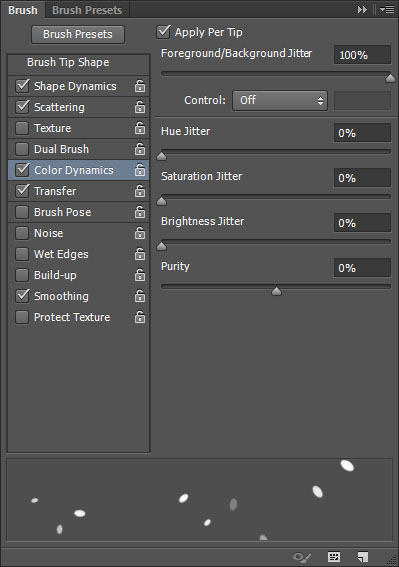
Color Dynamics
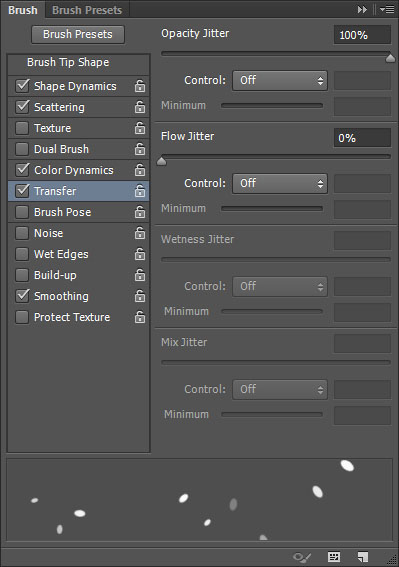
Transfer
Click and drag slightly in different areas around the text to scatter some petals.
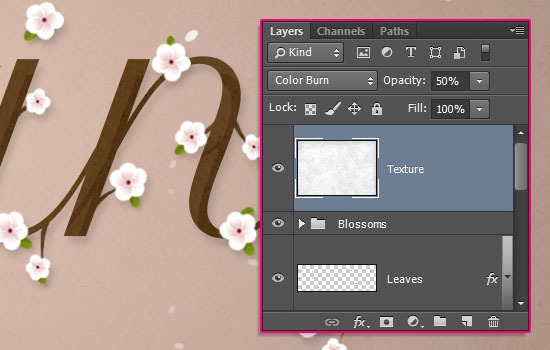
Finally, place the Paper T4 image on top of all layers, and go to Image > Adjustments > Desaturate. Then, resize the texture as needed, and change its layer’s Blend Mode to Multiply and its Opacity to 50%.
And you’re done!
Hope you enjoyed the tutorial and found it helpful. Have a nice Spring 😉
Did you enjoy this post? Please consider donating to help us cover our server costs.


soooooo nice 3ks 🙂
Glad you like it 🙂
Thanks for the comment.
Loved it! just what I was looking for and so easy to follow. Hope to see more tutorials from you
That’s great to know 😀
Many thanks for the kind words 🙂
the most thing I like in your tuts that it’s easy to follow 🙂 .. Big like and Thank you so much
Really glad to know you find them so 😀
Many thanks for your absolutely kind words 🙂
Very good! Thanks
You’re welcome 🙂
Thank you for the comment.
Like it so much!! Very good and clear tutorial! Thanks for sharing.
Happy to know you do 😀
Many thanks for the awesome comment 🙂
Your collection is too competent for intermediate stage. I found some techniques here. Thanks so much. Specially I love “Shape Dynamics” from them.
That’s great to know!
Glad you found the tips useful.
Thanks a lot for the comment 🙂
Wow, just wow!! this is amazing!!!
Very glad you like it 😀
Thank you very much for the lovely comment 🙂
Awesome! My friend like it too!
That’s wonderful!
Thanks a lot 🙂
I love it …..it’s wonderful … thanks for the tutorial
Super lovely outcome!
Thank you very much for sharing it and for the comment 🙂
hello and welcome,
A problem has been created IN step no 2 you write “Save the file and close it.” in this step you make the ” petal flower”. After that in step no 5 ” Duplicate the merged blossom flower’s layer created in Step 2 to the document you’re working on, then duplicate it to create a copy”.NOW there is two” file or document ” has been created .no 1 is “flower” no 2 is” text”.Problem is that in step no 5 how can YOU open the “petal flower”FILE in text FILE.
THANKS