
Crumpled Paper Textured 3D Text Effect In Photoshop CS5 – Part 2
This is Part 2 of this tutorial. This part will explain how to decorate the 3D text created in Part 1, and finalize the effect, using some brushes, textures and adjustment layers.
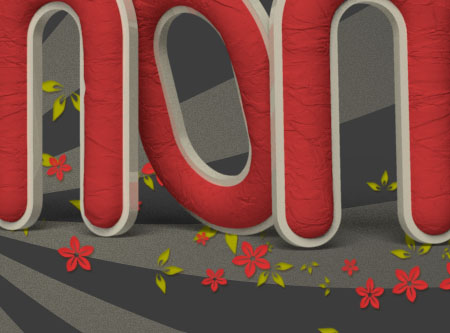
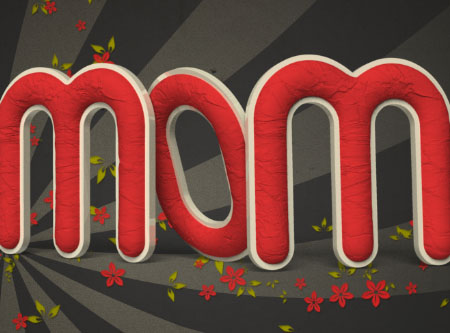
The Final Result

Tutorial Details
- Software Used : Photoshop
- Version : CS5 Extended
- Time : 0:30 – 0:45
Resources
- RisingSun brushes by env1ro.
- gvl Suddenly Spring brushes by gvalkyrie.
- Flower Brush Set 1 by gvalkyrie.
- Grungy paper texture v.5 by bashcorpo.
Step 1
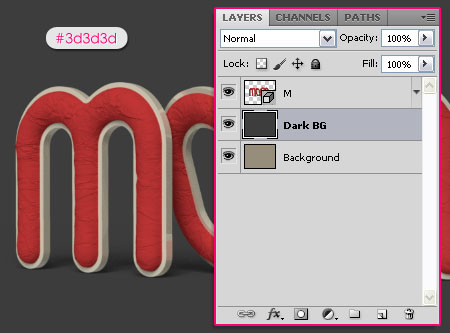
Once you’re done rendering the 3D scene, create a new layer on top of the Background layer, and call it “Dark BG”. Fill the new layer with a dark color. Here, the color #3d3d3d is used.
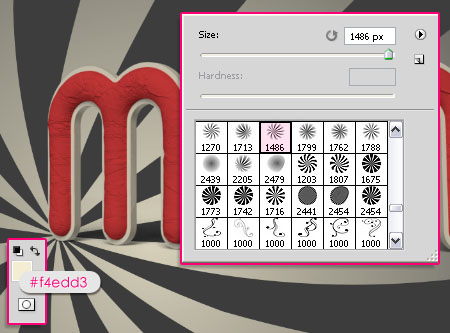
Download the RisingSun brushes set, and load it into your Brushes Preset. Create a new layer on top of the “Dark BG” layer and call it “Rays”. Set the Foreground color to #f4edd3, and use brush 3 (or any other one you like) to add the rays-shape on the new layer.
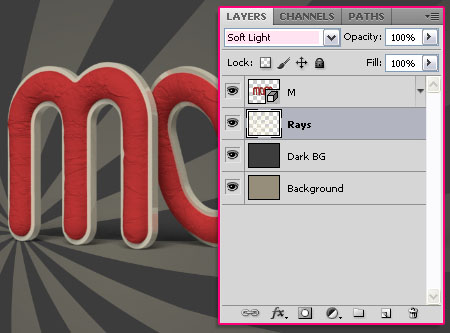
Change the “Rays” layer’s Blend Mode to Soft Light.
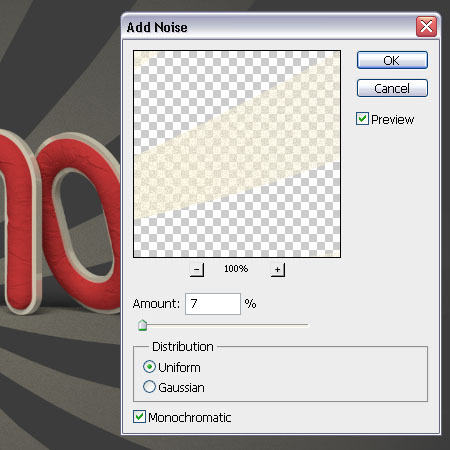
Go to Filter > Noise > Add Noise, and set the Amount to 7, the Distribution to Uniform, and check the Monochromatic box.
Step 2
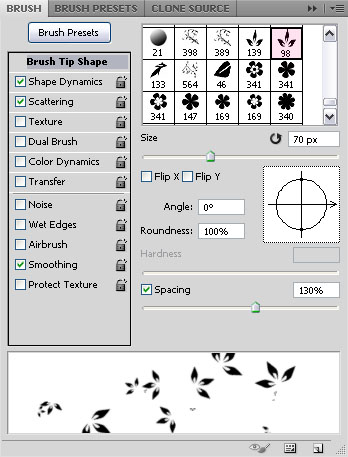
Download the gvl Suddenly Spring brushes and the Flower Brush Set 1, and load them into the Brushes Preset.
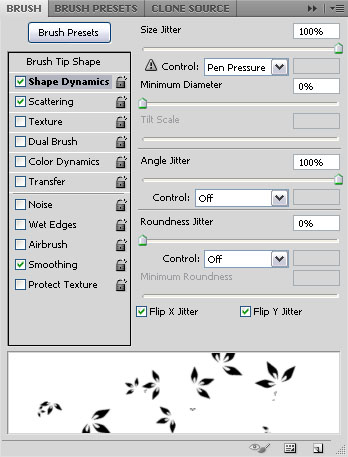
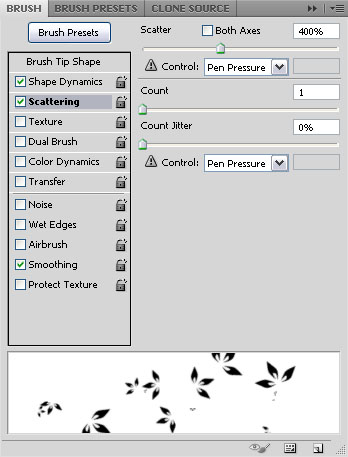
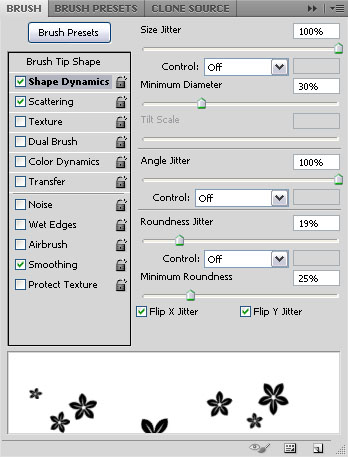
Pick the Sampled Brush 27 tip, and open the Brush panel (Window > Brush) to modiy the Settings as shown below:
Brush tip Shape
Shape Dynamics
Scattering
Create a new layer on top of the Rays layer and call it Leaves. Set the Foreground color to #a7a400, and start painting some stokes of leaves with the brush. You can Undo/Redo the process until you’re satisfied with the result.
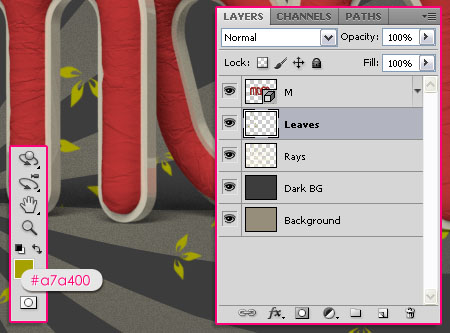
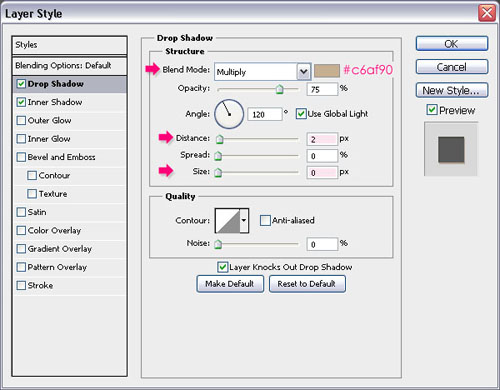
Once you’re done painting the leaves, double click on the Leaves layer to add the following Layer Style:
– Drop Shadow
- Color :
#c6af90 - Distance : 2
- Size : 0
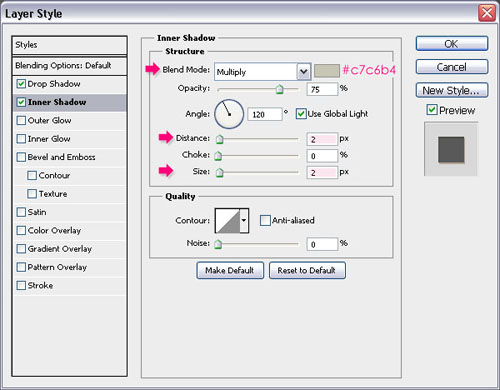
– Inner Shadow
- Color :
#c7c6b4 - Distance : 2
- Size : 2
Step 3
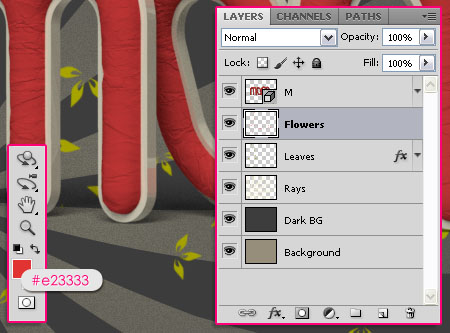
Create another new layer on top of the Leaves layer, and call it Flowers. Set the Foreground color to #e23333.
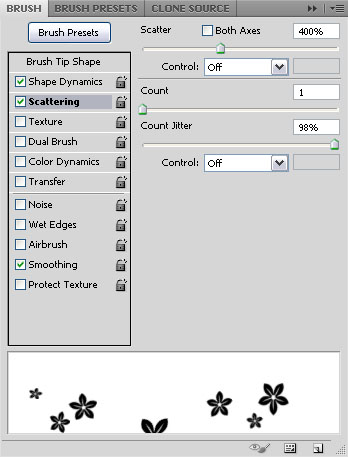
Pick the Sampled Brush 19, and in the Brush panel, change the Settings as below:
Brush Tip Shape
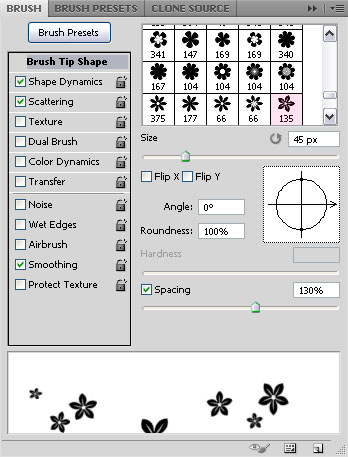
Shape Dynamics
Again, paint the flowers on the new layer.

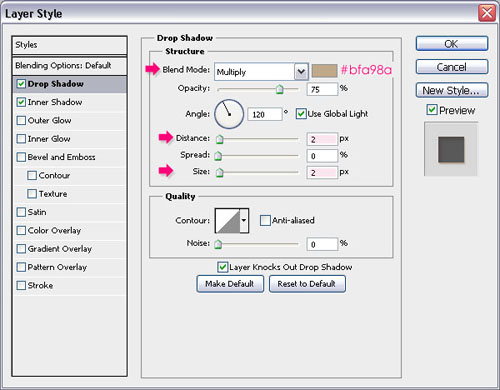
Once you’re done painting, double click the Flowers layer to add the following Layer Style:
– Drop Shadow
- Color :
#bfa98a - Distance : 2
- Size : 2
– Inner Shadow
- Color :
#dfc6c7
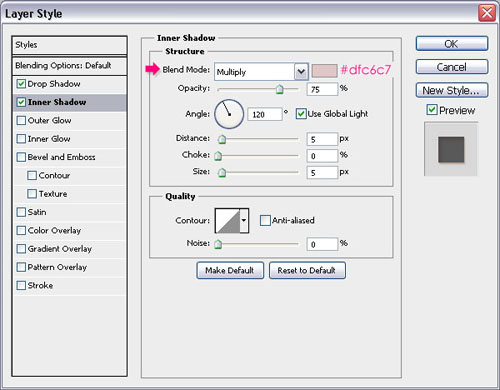
Applying the Layer Style adds more depth to the painted shapes, and makes them pop out even more.
Step 4
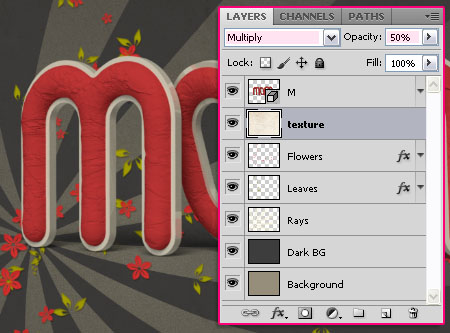
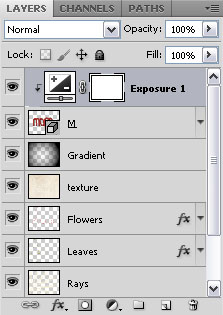
Open the Grungy paper texture v.5 and place it under the 3D text layer.

Change the texture layer’s Blend Mode to Multiply, and the Opacity to 50%.
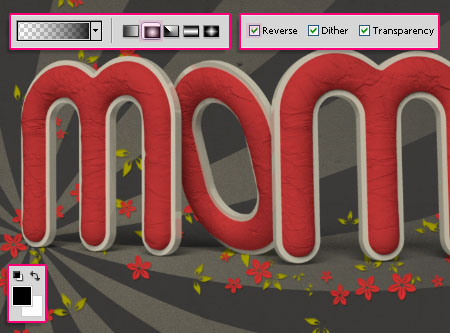
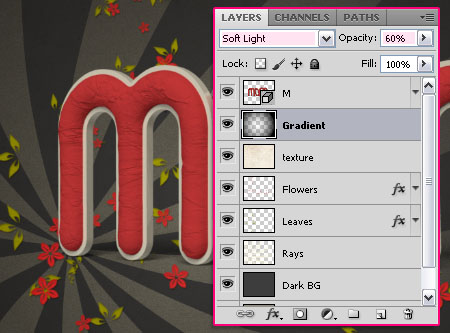
Create a new layer on top of the texture layer and call it Gradient. Set the Foreground color to Black, and grab the Gradient Tool to create a Radial Gradient, using the Foreground to Transparent fill. Check the Reverse box so that the black color covers the corners not the center, and click and drag from the center of the document to one of the corners.
Change the Gradient layer’s Blend Mode to Soft Light, and the Opacity to 60%.
Step 4
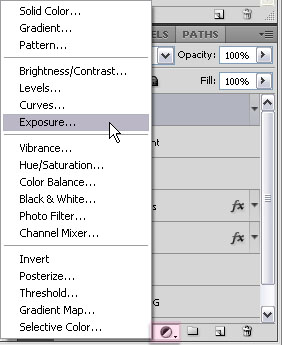
Click the 3D text layer, then, click the Create new fill or adjustment layer icon at the bottom of the Layers panel. Choose the Exposure adjustment layer.
Right click the Exposure adjustment layer, and choose Create Clipping Mask.
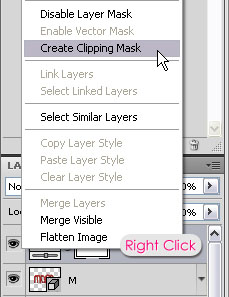
This will make the adjustment layer affect the 3D text layer only (the layer below it).
Change the Exposure to 0.55, the Offset to -0.0080, and the Gamma Correction to 0.80.
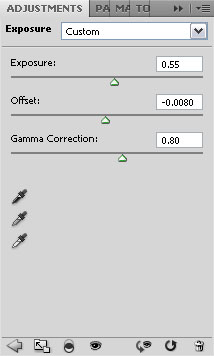
You can change the values as you like, or use other adjustment layers. But for now, that’s it.
And this is the final result once again.
Did you enjoy this post? Please consider donating to help us cover our server costs.


Thanks..^^
You’re welcome.
Thanks for the comment 🙂
Anywhere we can download the .psd ?
(to learn from it)
very nice tutorial, i’ve used it, but don’t like the effect of mine, it comes out total different
is it possible to DL the .psd to see what I’ve done wrong?
Hello Hedin,
Actually, the PSD files are not available for download right now, especially for advanced and 3D tutorials, but I can help you with whatever step things went wrong in.
If the problem can’t be solved, I can send you the file via email (for educational purposes only).
Sorry for the inconvenience, but there are some issues I need to work on before making the PSD files available for download!
Thank you for the comment.
Best regards.
o resultado é lindo,uma pena ser tão dificil de fazer :/,mesmo assim,obrigado por ter postado ;D,gostaria de que você continuasse postando tutoriais de tipografias em 3D,pois realmente gosto do resultado e queria aprender.até mais
Hello stroOnger,
It is a bit advanced, but once you’re familiar with the 3D environment and tools, things get easier.
I will definitely try my best to post more 3D tutorials whenever possible, as I try to explain new tips and concepts in each tutorial.
Muito obrigada for the comment.
Cheers 🙂
Wow! Very nice. Thanx for sharing it!
You’re welcome!
Thanks for the comment.
Great tutorial, I’ll have to try it out. Does it work on previous versions of Photoshop or only in CS5?
Hello Kotisivut,
It only works in CS5, as this is the only version that has the 3D capabilities.
Thanks for the comment.
¡Hola!
This is the first time I comment, about two weeks ago I found this fabulous site and loved it.
And this tutorial was something I was looking for.
Greetings from Mexico!
Thank you so much for leaving a comment.
I’m really glad you found the tutorial useful.
Thanks once again for your kind words 🙂
This tutorial is great, but is very difficult for me 🙂 . Here are my results. Thanks to the author!
http://i294.photobucket.com/albums/mm106/almavez/alma/tutorials/CrumpledPaperTextured3DText.jpg
It is a bit advanced tutorial considering it deals with 3D, but you did a good job with it.
Thanks for the comment and the link 🙂
Yeah, it looks good 😉
Wonderful tutorial, thank you.
You did a very good job being thorough with everything, and turned something that could be quite difficult for the inexperienced into something easy.
Thanks again!
It’s great to know that you found the tutorial easy to follow.
Thank you very much for your kind comment, I really appreciate it 🙂
Best regards.
Thank you very much!
You’re welcome.
Thanks for the comment.
Very Cool and helpful. Enjoyed 🙂
Actually ‘Rendering’ part takes time to have good final quality
Sure it does. It should take a couple of hours to get a “clean” final result with as little noise as possible.
Glad you liked the tutorial and found it useful.
Thanks for the comment 🙂
nice concept
Thank you!