
Minty Text Effect
A simple tutorial for a fresh “Minty” text effect!
The Final Result

Tutorial Details
- Software Used : Photoshop
- Version : CS3
- Time : 5 – 10 min.
Resources
- Tapeman font.
Step 1
Create a new 1024 x 768 px docuemnt. Fill the Background with a Linear Gradient that uses the colors #39482c to the left and #3f621c to the right. Then create the text using the font TAPEMAN, the Size 177 px, and the color #8dc63f.

Step 2
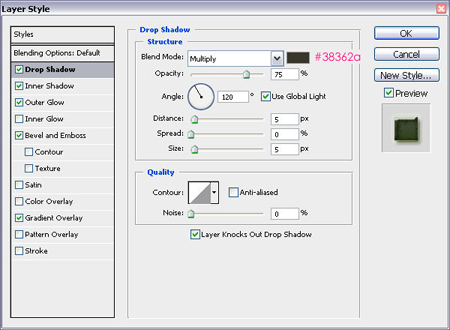
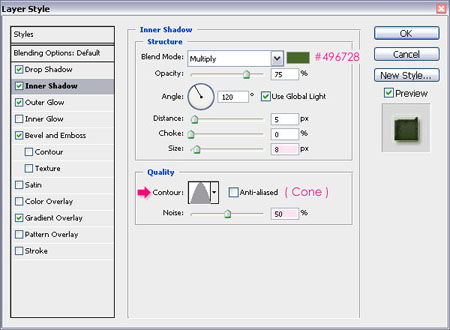
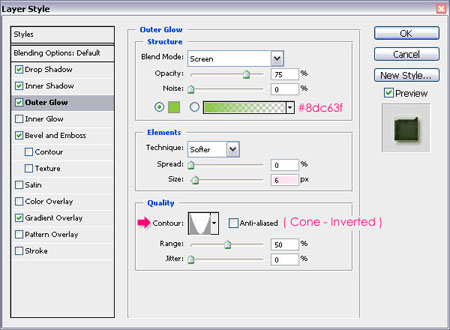
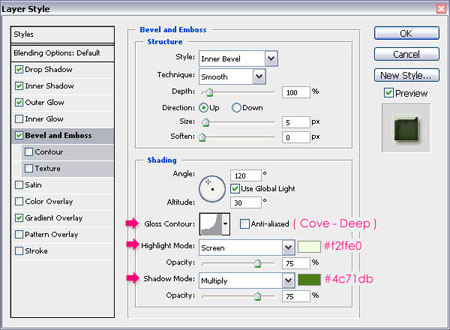
Double click the text layer to apply the following Layer Style:
– Drop Shadow
- Color :
#38362a
– Inner Shadow
- Color :
#496728 - Size : 8
- Contour : Cone
- Noise : 50%
– Outer Glow
- Color :
#8dc63f - Contour : Cone – Inverted
– Bevel and Emboss
- Gloss Contour : Cove- Deep
- Highlight Mode – Color :
#f2ffe0 - Shadow Mode – Color : #4c7d1b
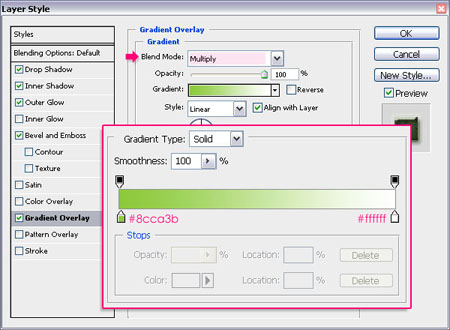
– Gradient Overlay
- Blend Mode : Multiply
- Click the Gradient box to create the gradient
Create the gradient using the colors #8cca3b to the left and #ffffff to the right.
Step 3
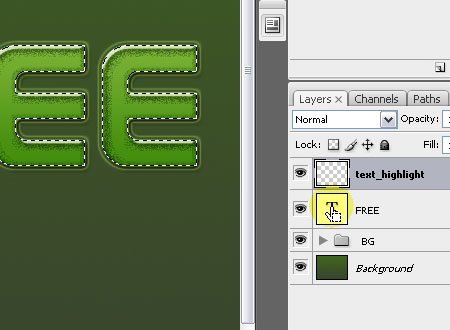
Create a new layer on top of the text layer and call it text-highlight. Ctrl/Cmd + click the text layer’s thumbnail to create a selection.
Step 4
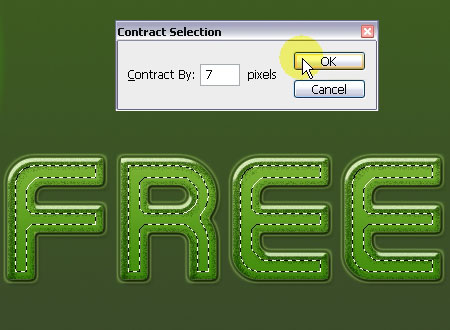
Go to Select > Modify > Contract, and type in 7.
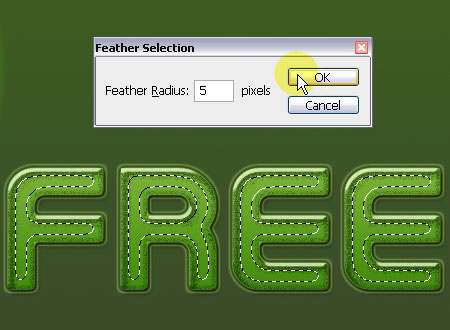
Then go back again to Select > Modify > Feather, and type in 5. This will smooth the edges of the selection and make the highlight more natural.
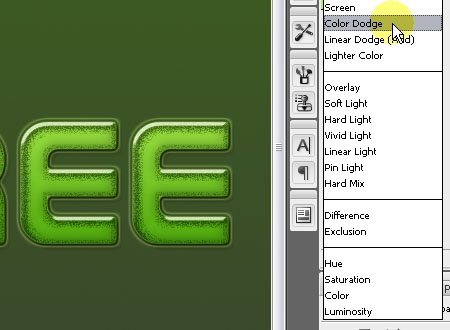
Step 5
Fill the selection with the color #38362a.

And finally, change the text-highlight layer’s Blend Mode to Color Dodge. This will make the text look fresh and bright.
The final result:
Did you enjoy this post? Please consider donating to help us cover our server costs.


Wow So…Free get it right? Now its cool so i like it
Hello Toxcinator,
Thank you for your comment :).
Glad you liked it!
Thanks for your tutorials…^^
I could’t find a Free Gradients.
Check please…
Uploaded! Really sorry for the missing links, and thank you for reporting them.
Best Regards.
Basix Page link is the same error….^^
Fixed ^_^
i like the effect
Glad you do! Thanks for the comment.
I’m so thankful, it’s great tutorial!. Thank you for your tutorial.
Thanks a lot for your kind words, I really appreciate it 🙂
Thanks for the tutorials! They’ve really helped make the website I’m working on look better!
That’s great to know 🙂
Thanks for the comment.