
Glossy Candy Cane Text Effect + PSD Download
It’s December, and it’s time for an awesome candy cane text effect!
This tutorial will show you a super easy way to create a glossy candy cane inspired text effect using a bunch of Layer Styles.
The effect is fully editable, so you can change the text it’s applied to any time without the need to recreate the effect itself.
The Final Result

Tutorial Details
- Software Used : Photoshop
- Version : CC
- Time : 0:15 – 0:30
Resources
- BubbleGum Regular font.
- Texture 72 by Malleni-Stock.
- Goodies: „Back To School“ Dots & Stripes Patterns by zooll.
- Diagonal Stripes Pattern.
Step 1
Create a new 800 x 600 px document and duplicate the Background layer.
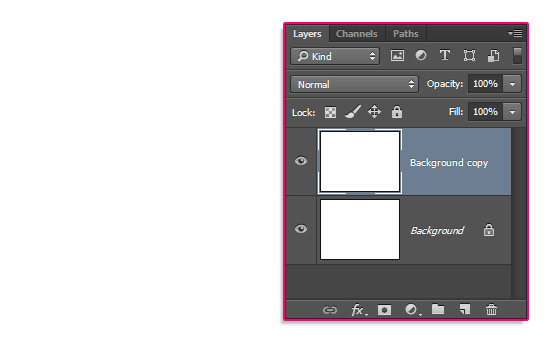
Double click the Background copy layer to apply a Gradient Overlay effect with the following settings:
- Style : Radial
- Scale : 150%
- Click the Gradient box to create the gradient using the colors
#ffffffto the left and#979797to the right.
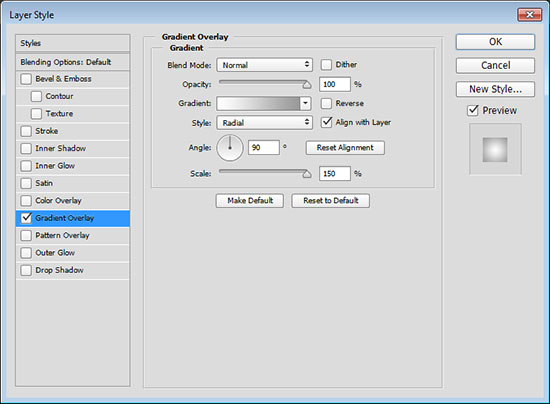
This will apply a simple radial gradient to the Background copy layer.

Place the Texture 72 image on top of both Background layers, change its layer’s Blend Mode to Soft Light, and resize it as needed.

Step 2
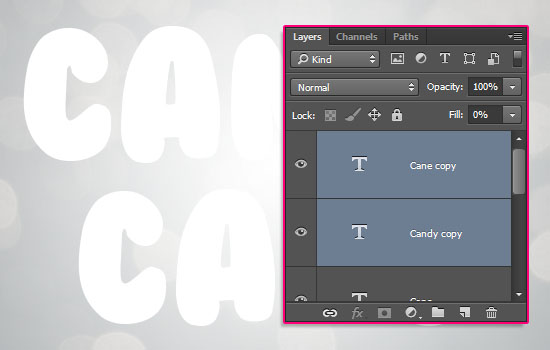
Create the text using the font BubbleGum Regular and the Size 170 pt. If you’re creating more than one line of text, create each one in a separate layer.
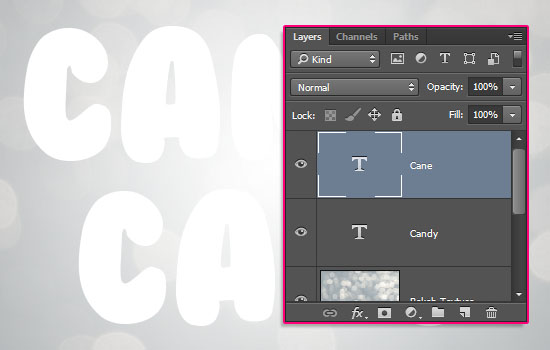
Select the text layers you have and duplicate them, then change the copy layers’ Fill values to 0.
Step 3
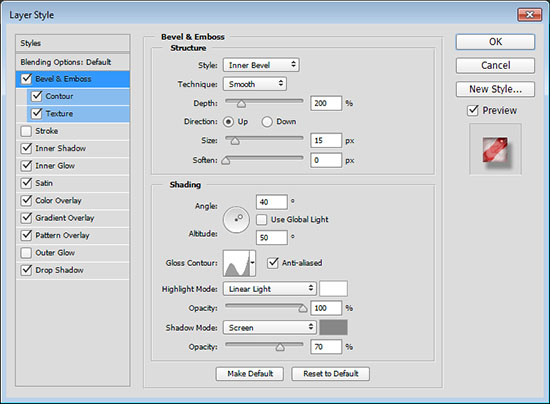
Double click the original text layer of the first line of text you have to apply the following Layer Style:
– Bevel and Emboss
- Depth : 200
- Size : 15
- Uncheck the Use Global Light box
- Angle : 40
- Altitude : 50
- Gloss Contour : Valley – Low
- Check the Anti-aliased box
- Highlight Mode : Linear Light
- Opacity : 100%
- Shadow Mode : Screen
- Color :
#878787 - Opacity : 70%
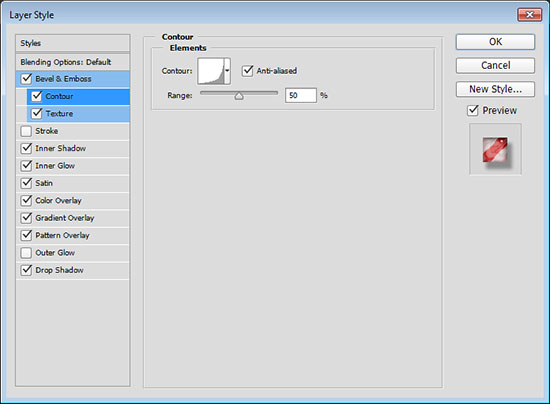
– Contour
- Contour : Log
- Check the Anti-aliased box.
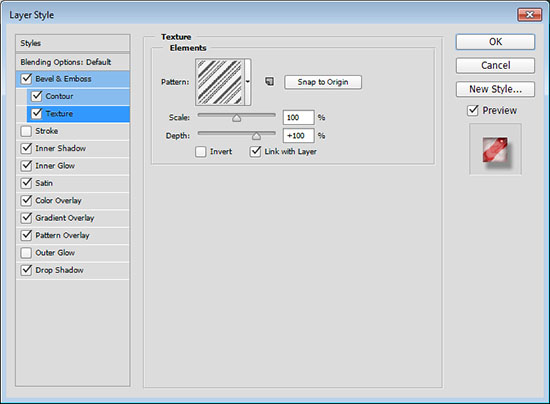
– Texture
- Pattern : Diagonal Stripes Pattern
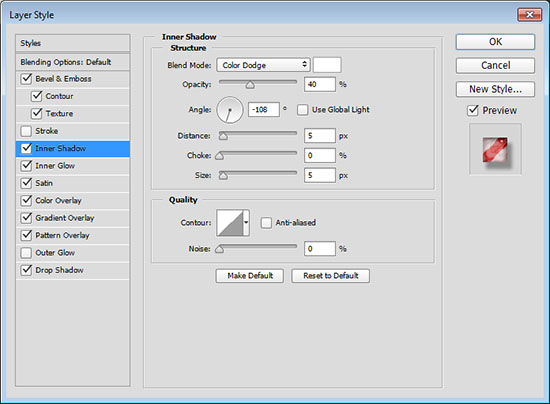
– Inner Shadow
- Blend Mode : Color Dodge
- Color :
#ffffff - Opacity : 40%
- Uncheck the Use Global Light box
- Angle : -108
– Inner Glow
- Blend Mode : Linear Burn
- Opacity : 61%
- Check the Gradient Option, then click the Gradient box to create the gradient using the colors
#391c21to the left and#f7efedto the right. - Size : 10

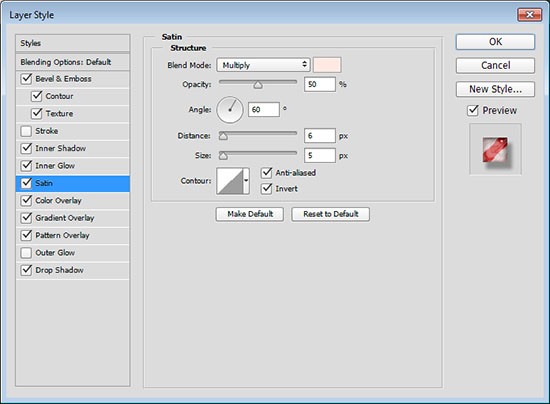
– Satin
- Blend Mode : Multiply
- Color :
#ffeae3 - Angle : 60
- Distance : 6
- Size : 5
- Contour : Linear
- Check the Invert box
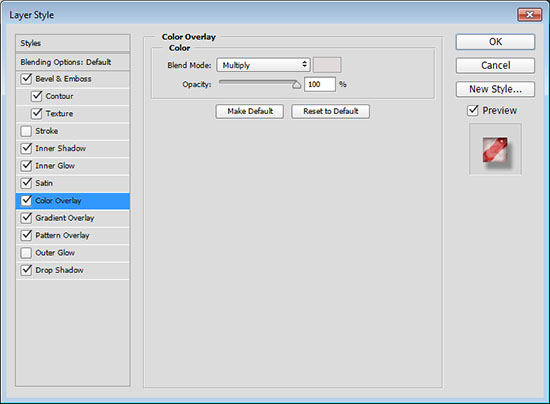
– Color Overlay
- Blend Mode : Multiply
- Color :
#e0dadb
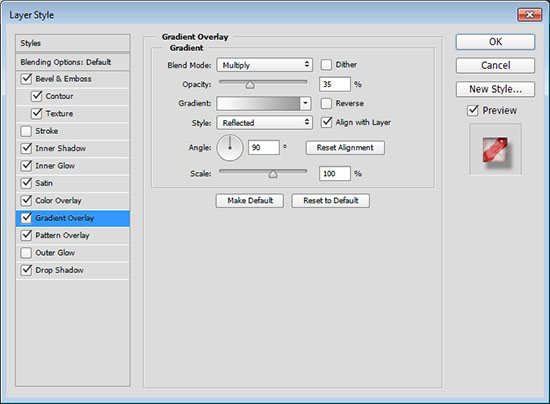
– Gradient Overlay
- Blend Mode : Multiply
- Opacity : 35%
- Style : Reflected
- Click the Gradient box to create the gradient using the colors
#ffffffto the left and#999999to the right.
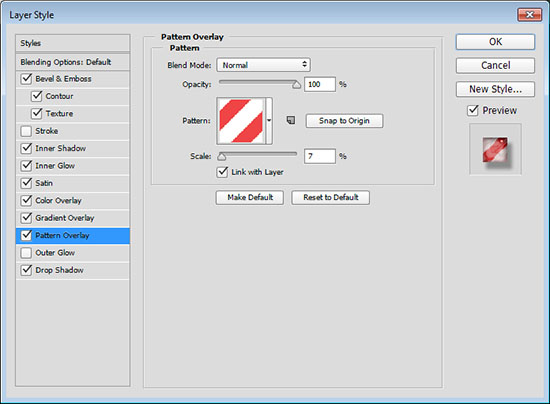
– Pattern Overlay
- Pattern : Back To School Pattern #6
- Scale : 7%
– Drop Shadow
- Opacity : 35%
- Distance : 9
- Spread : 10
- Size : 10
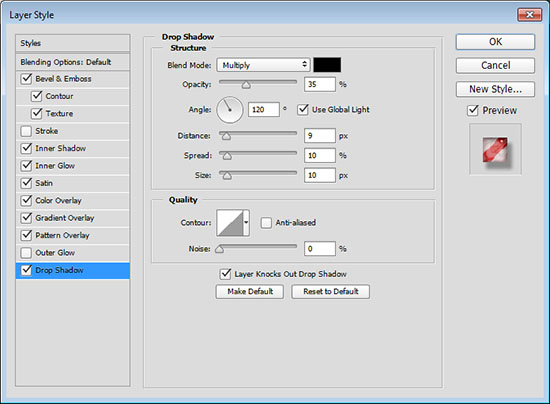
This will style the main layer of the text effect.
Right click the styled layer, choose Copy Layer Style, then right click each original layer of every line of text you have and choose Paste Layer Style.
This will apply the same style to the rest of the original text layers you have.

Step 4
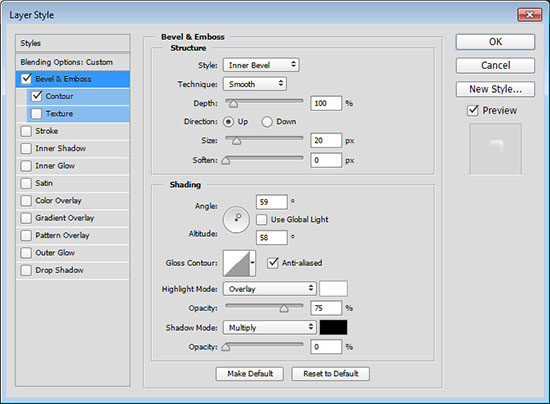
Double click the copy text layer of the first line of text you have to apply the following Layer Style:
– Bevel and Emboss
- Size : 20
- Uncheck the Use Global Light box
- Angle : 59
- Altitude : 58
- Check the Anti-aliased box
- Highlight Mode : Overlay
- Shadow Mode – Opacity : 0%
– Contour
- Contour : Half Round
- Check the Anti-aliased box.
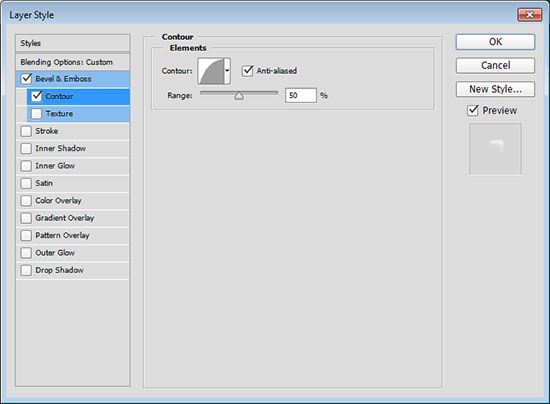
This will enhance the glossiness and shininess of the effect, and make it look more 3D.
Copy and paste the Layer Style to the rest of copy text layers you have just like you did before.

And there you have it! Save this file, and you can re-open it to change the text any time you like (double click each text layer’s thumbnail to change its content).
Hope you enjoyed the tutorial 🙂
Did you enjoy this post? Please consider donating to help us cover our server costs.


Thanks for a great tutorial. So easy to follow.
Thanks a lot for the lovely comment 🙂
GOOD TUT
Thank you!
Very nice outcome 🙂 Thanks for sharing you work 😉
Thanks
Looks amazing!
Thanks for sharing your work 🙂
Amazing tutorial, we have featured it here : http://theneodesign.com/best-photoshop-tutorials-december-2014/
That’s great to know!
Thank you.
Thanks!
Lovely outcome!
Thanks a lot for the comment and for sharing your work 🙂
nice tutorial thx
yea you be welcome maam!!!
This thing poo I too dumb to understand