
Shiny Inflated Foil 3D Text Effect
The many different 3D options, settings, and capabilities in Photoshop CS6 make creating dazzling 3D text effects an easy and fun job! This tutorial will show you how to play around with the material settings to create a puffy shiny foil-textured 3D text effect.
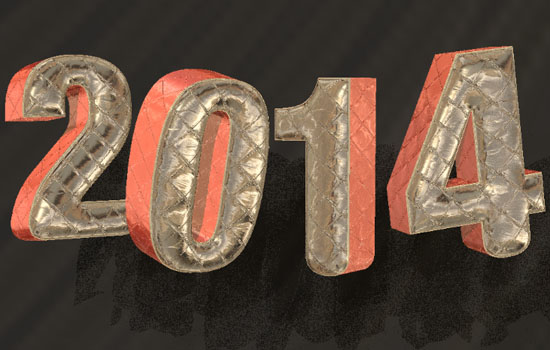
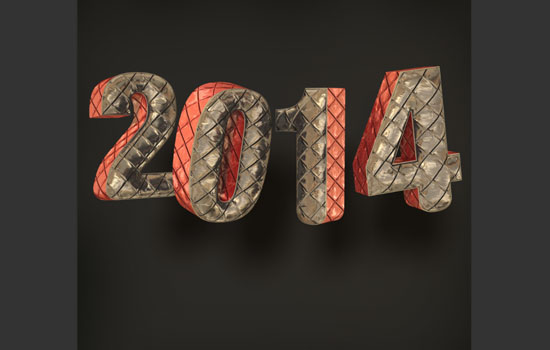
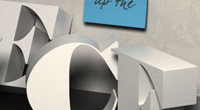
The Final Result

Tutorial Details
- Software Used : Photoshop
- Version : CS6 Extended
- Time : 0:45 – 1:45
Resources
- Don’t Panic font.
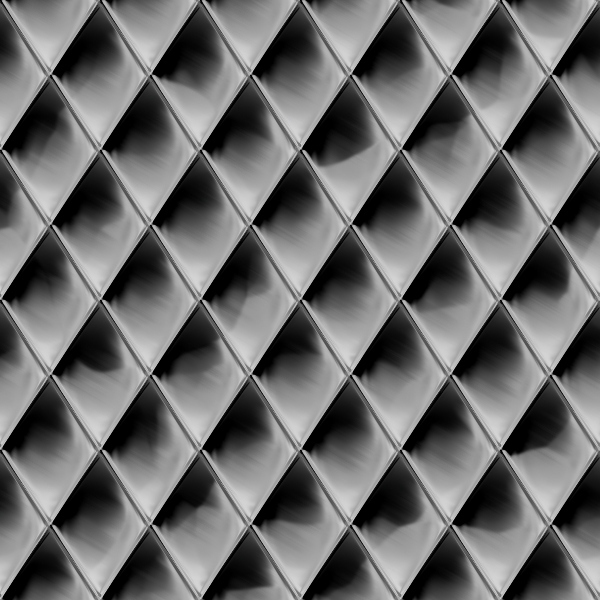
- Bump Texture pattern, created using the Hot Dog Cart Metal Diamonds filter by tigerAspect.
- Environment IBL texture, created using the Alien Metal filter by Vladimir Golovin.
- Fireworks Stock 18 by BlueDragon1.
Wishing you a very special, prosperous, and wonderful 2014.
Rose
.
Step 1
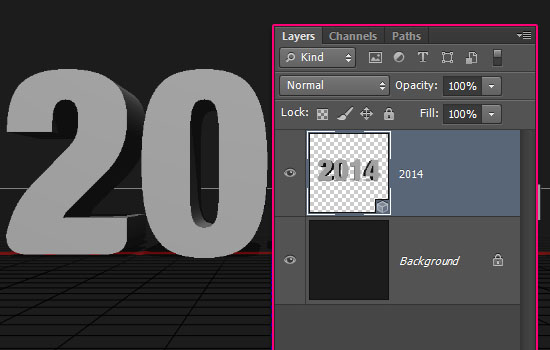
Create a new 1000 x 1000 document and fill the Background with the color #1c1c1c.
Then, create the text using the font Don’t Panic and the font Size 392.5 pt.

Go to 3D > New 3D Extrusion from Selected Layer to convert the text layer into a 3D layer.
Duplicate the Background layer and drag the copy to the top. Then, go to 3D > New Mesh from Layer > Postcard. This will covert the duplicated layer into a 3D plane layer.
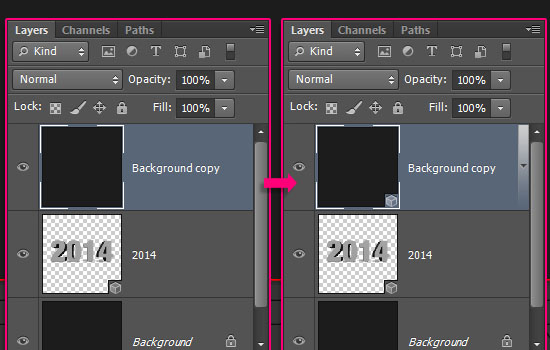
Select both 3D layers, then go to 3D > Merge 3D Layers.
This will place both 3D meshes in the same scene.
Step 2
To access the 3D mesh Settings and properties, you’ll need to open two panels: The 3D panel, and the Properties panel (both found under the Window menu).
The 3D panel has all the components of the 3D scene, and when you click the name of any of those, you’ll be able to access its Settings in the Properties panel. So make sure to always select the name of the element you want to modify in the 3D panel before you change its Settings in the Properties panel.
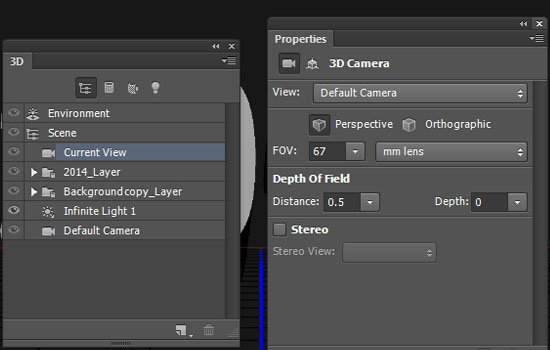
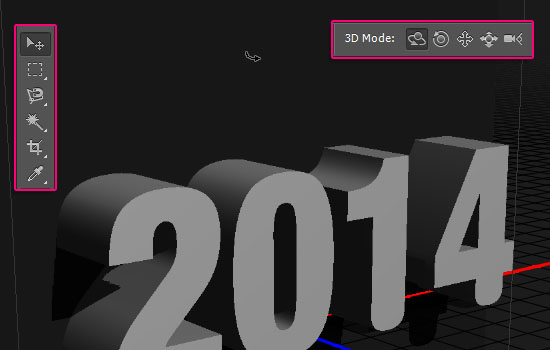
Select the Move Tool and check its Options bar. You’ll find a set of 3D Modes for the tool to the right of the bar. When you choose one of those, you can then click and drag to perform any changes (on the selected element in the 3D panel).
Step 3
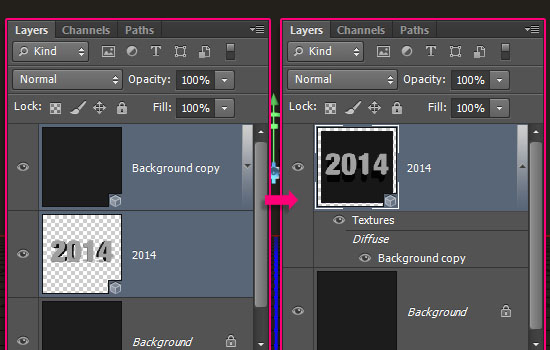
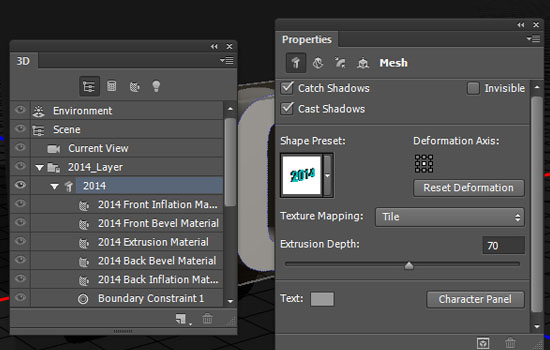
Click the text 3D mesh name in the 3D panel, then, in the Properties panel, change the Texture Mapping to Tile, and the Extrusion Depth to 70.
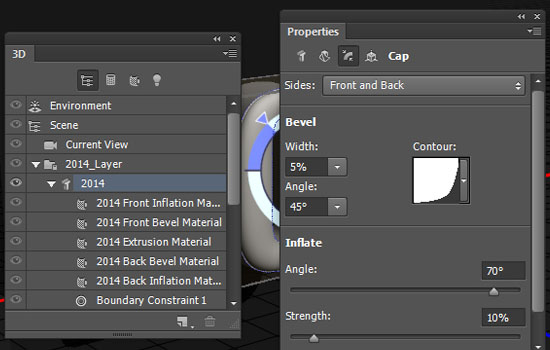
Click the Cap icon at the top of the Properties panel, then change the Sides to Front and Back, the Bevel Width to 5, the Contour to Log, the Inflate Angle to 70, and the Strength to 10.
Step 4
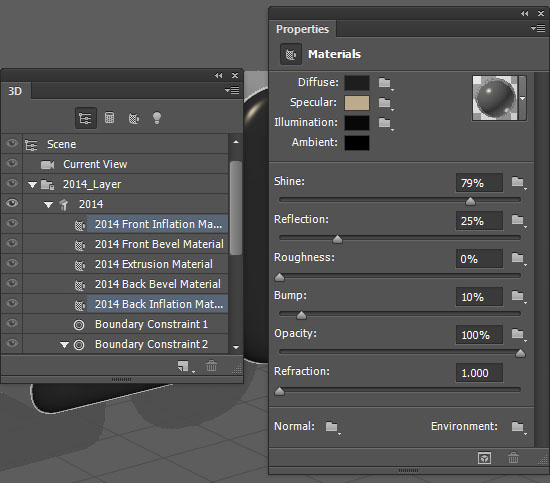
Select the 3D text mesh Front Inflation and Back Inflation Material tabs in the 3D panel (Ctrl/Cmd + click each), then change the values in the Properties panel as below:
- Diffuse :
#1e1e1e - Specular :
#bbab8c - Illumination :
#080808 - Ambient :
#000000
- Shine : 79%
- Reflection : 25%
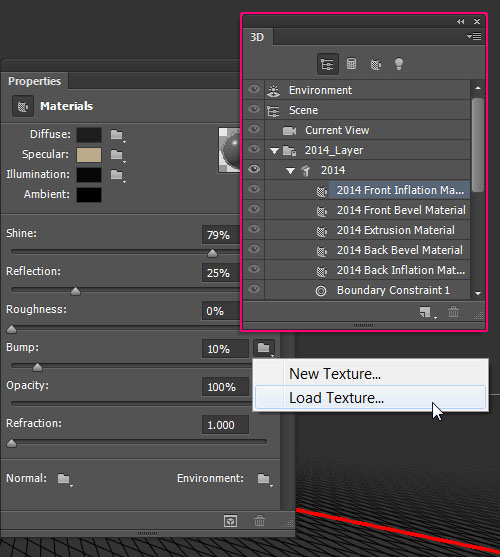
Select the Front Inflation Material tab, click the Bump folder icon, and choose Load Texture. Then, open the Bump Texture image.
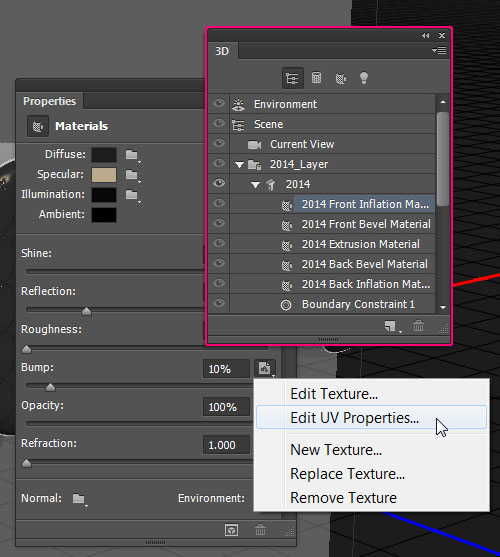
Click the Bump texture icon and choose Edit UV Properties.
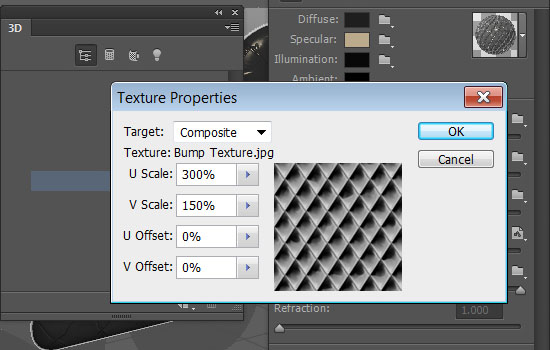
Change the U Scale to 300%, the V Scale to 150%, and the U Offset and V Offset to 0. You can use different values depending on how small or big you want the texture to be.
Step 5
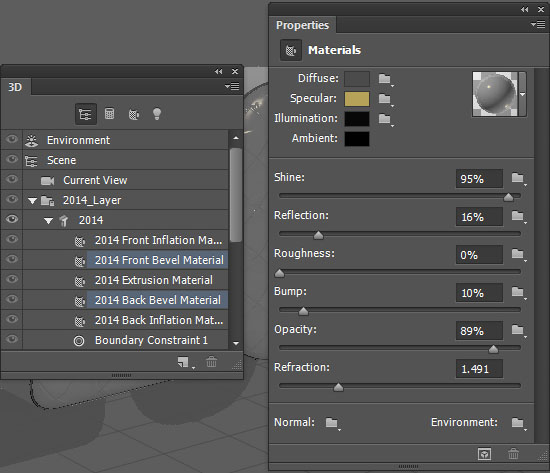
Select the Front Bevel and Back Bevel Material tabs, and change their values as below:
- Diffuse :
#4b4b4b - Specular :
#b6a359 - Illumination :
#080808 - Ambient :
#000000
- Shine : 95%
- Reflection : 16%
- Opacity : 89%
- Refraction : 1.5
Select the Extrusion Material tab, and change its Settings as below:
- Diffuse :
#721010 - Specular :
#bbab8c - Illumination :
#080808 - Ambient :
#000000
- Shine : 79%
- Reflection : 25%
- Bump : 5
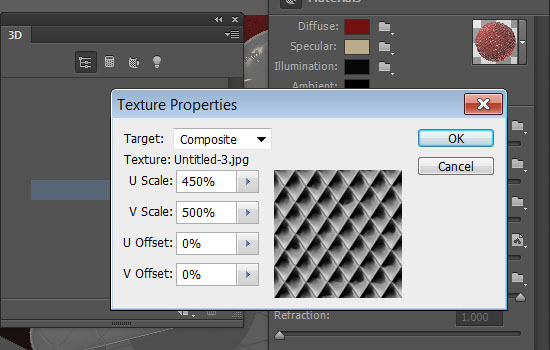
Then, click the Bump folder icon, choose Load Texture, and open the Bump Texture image once again.
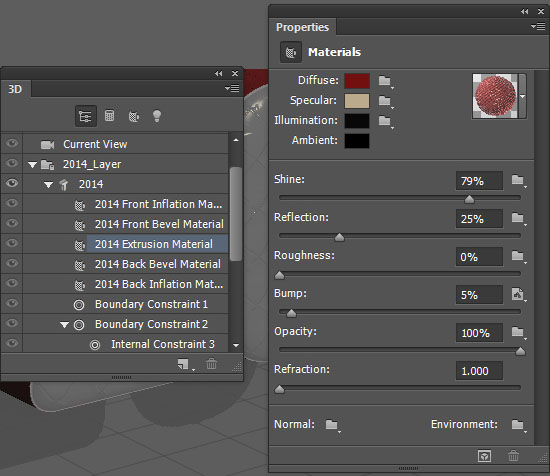
Click the Bump texture icon and choose Edit UV Properties. Change the U Scale to 450%, the V Scale to 500%, and the U Offset and V Offset to 0.
If these values don’t match the extrusion bump with the front and back one, then you can try different ones until you like the outcome.
Step 6
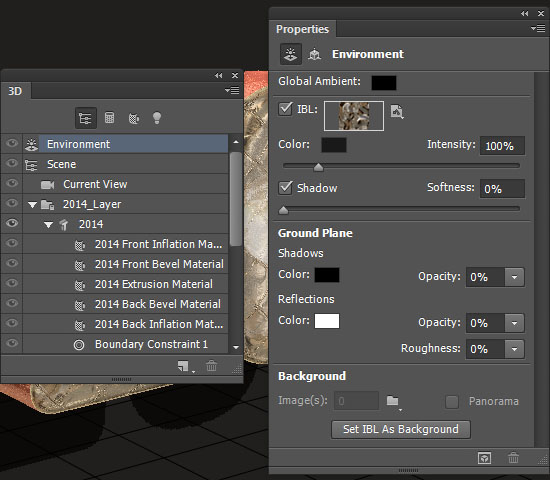
Click the Environment tab in the 3D panel, then click the IBL folder icon in the Properties panel and choose Load Texture to open the Environment IBL image.

Make sure that the Intensity is set to 100%, and under Ground Plane, set the Shadows and Reflections Opacity values to 0.
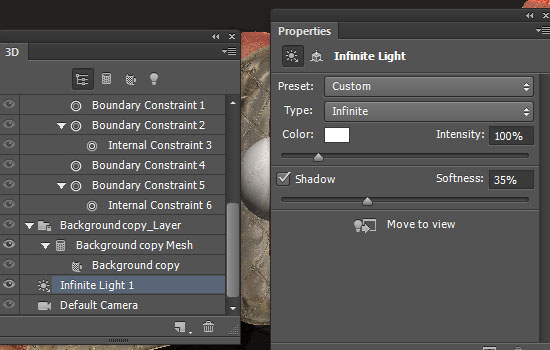
Select the Infinite Light 1 tab, and change its Intensity to 100% and its Shadow Softness to 35%.
Click the Coordinates icon at the top of the Properties panel, and use the values below.

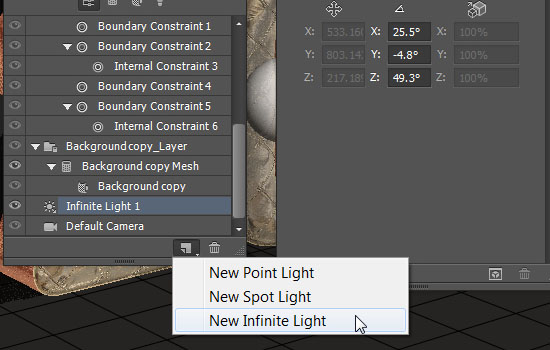
Click the Add new Light to Scene icon down the 3D panel and choose New Infinite Light.
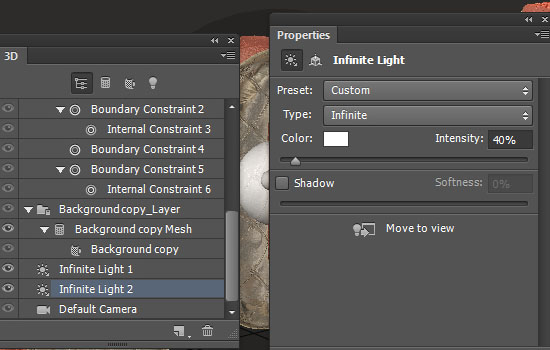
Change the Intensity to 40% and uncheck the Shadow box.
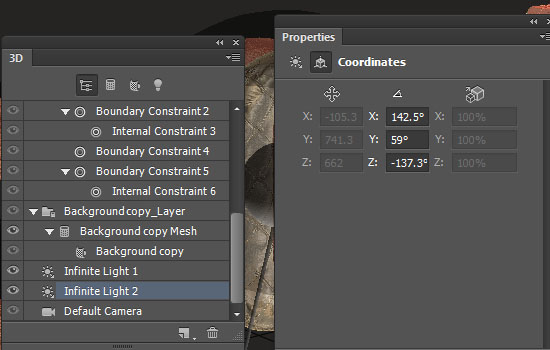
Modify the Coordinates values as below:
You can also use the Move Tool to move the light around if you want to change the lighting of the scene.
Step 7
Click the plane mesh material tab, then click the Diffuse texture icon and choose Remove Texture. Remove the Opacity texture as well.
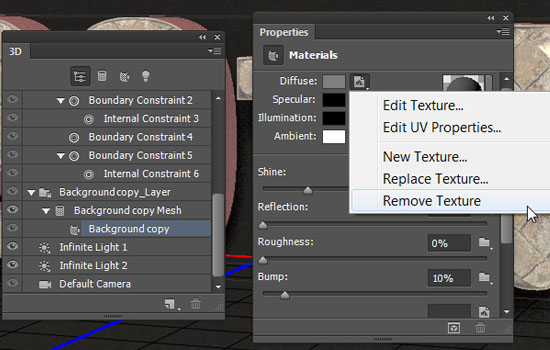
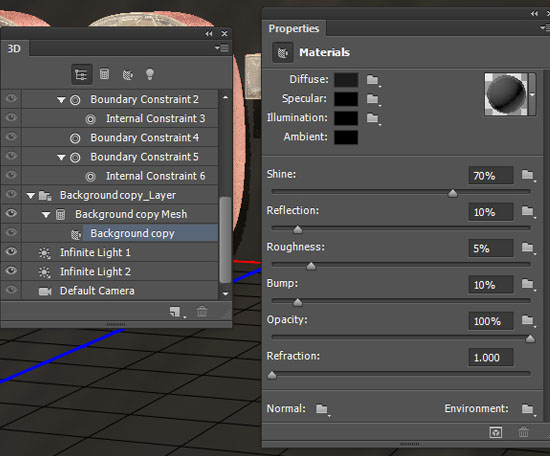
Change the rest of the values as follows:
- Diffuse :
#1c1c1c - Specular :
#000000 - Illumination :
#000000 - Ambient :
#000000
- Shine : 70%
- Reflection : 10%
- Roughness : 5
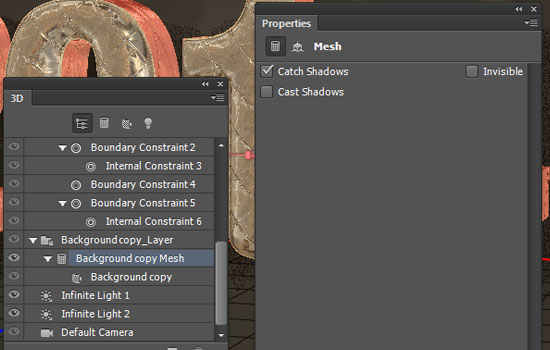
Click the plane’s mesh name, and uncheck the Cast Shadows box.
Step 8
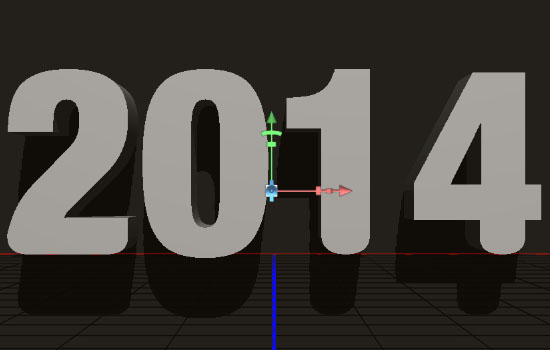
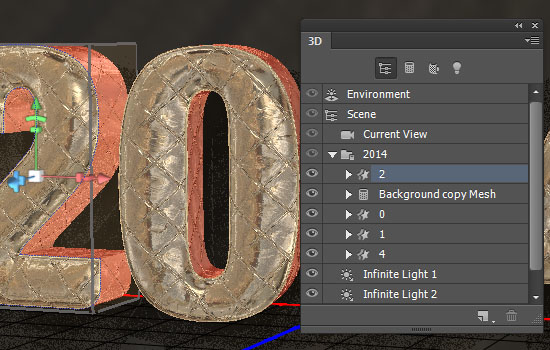
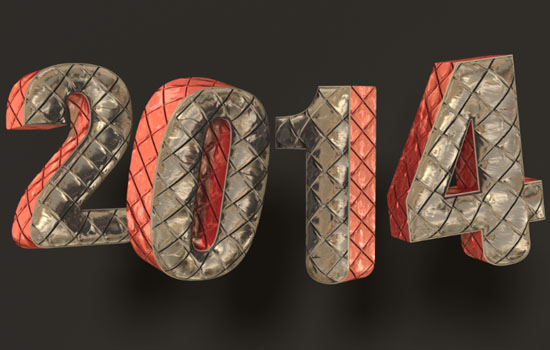
Select the 3D text mesh name, then go to 3D > Split Extrusion. This will split the text into separate letter meshes, which will allow you to move each one on its own.
You might need to adjust the Extrusion Bump UV Properties for some letters. Here, the U Scale and V Scale values of the “1” mesh are changed to 300% and 450%.
After that, start moving and rotating the meshes you have, and change the camera view as needed, until you like the result.
You can use the 3D Axis to do that (with the Move Tool selected). The arrows at the ends of the 3D Axis move the mesh, the part below them is used for rotation, and the cubes are used for scaling. The cube in the center is used to scale the object uniformly. All you need to do is click and drag the part you need to perform the changes.
When you’re done, render the scene (3D > Render).
The rendering might take some time, but you can stop it anytime by pressing the Esc key.
Step 9
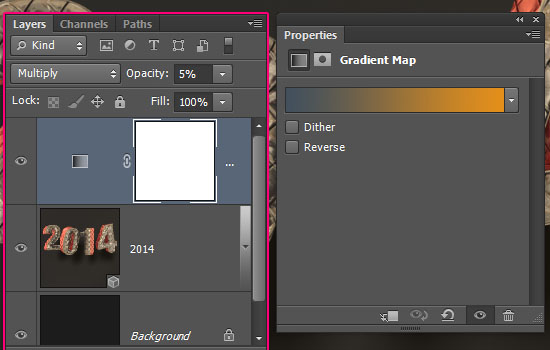
When the rendering is finished, click the Create new fill or adjustment layer icon down the Layers panel and choose Gradient Map.

Change the Gradient Map layer’s Blend Mode to Multiply and it Opacity to 5%. Click the Gradient box to create the gradient using the colors #42505d to the left and #e38f1b to the right.
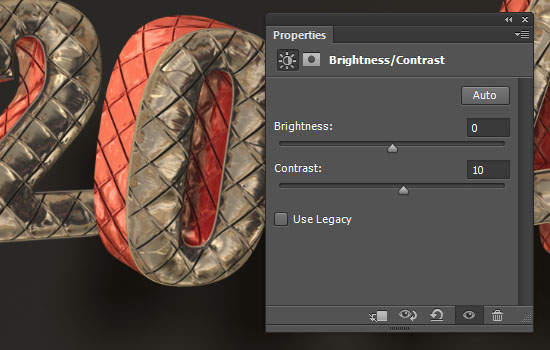
Click the Create new fill or adjustment layer icon once again, and choose Brightness/Contrast.
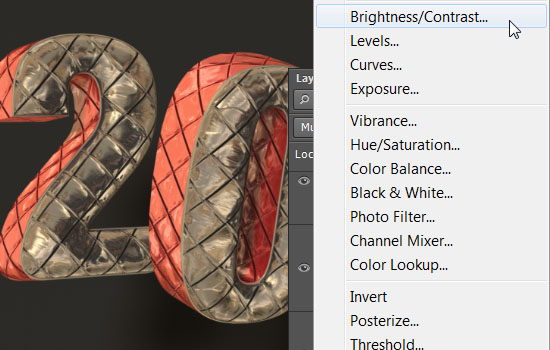
Change the Contrast value to 10%.
Set the Foreground color to Black, pick a big round soft brush, create a new layer on top of all layers, change its Opacity to 60%, then start clicking at the edges of the document to add a subtle vignette effect.
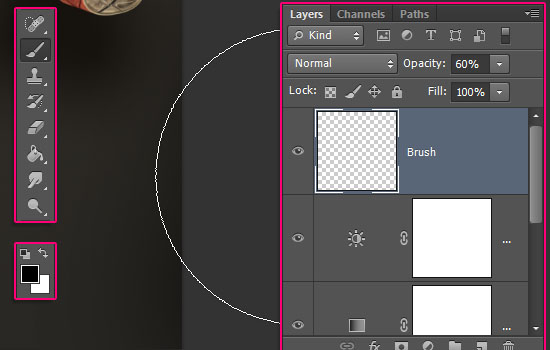
You can change the opacity value as you like.
Place the Fireworks Stock 18 image on top of all layers, then change its layer’s Blend Mode to Color Dodge.
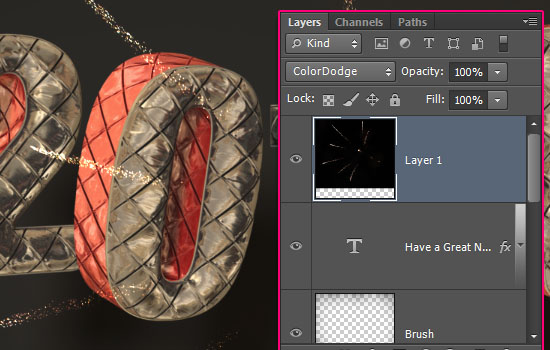
Pick the Eraser Tool, choose a hard round brush tip, then erase the parts of the image on top of the text, to make the fireworks look like they are actually behind the text.

And you’re done! Hope you enjoyed the tutorial and found it helpful.
Have a very Happy New Year 😀
Did you enjoy this post? Please consider donating to help us cover our server costs.


This is great! I just have to ‘squeeze’ it down to have as my Facebook cover.. 😉 Happy New Year
Awesome 😀 Glad you like it 😉
Thanks a lot, and Happy New Year to you as well.
I love it! Its really beutiful to make it as greeting card.. Thanks tuts and happy new year!
It sure can be used for many things 🙂
Thank you very much for the kind words, and Happy New Year to you as well 😀
I thought it was number shaped salmon, awesome tutorial! 🙂
That’s funny 😀
Glad you like it though. Thanks for the comment 🙂
Hey! Can you give to me the style of
”Have a Great New Year”
And its font?
Its really beautiful.. Please.
The font is Sacramento – a really beautiful free font, the font Size is 75 pt, and the color is #ac9b7f.
As for the Style, it’s a simple Bevel and Emboss effect using the Contour “Ring – Double” and the Size 1, and a Drop Shadow effect (you can change its values as you like). Then, you can add a simple Gradient Overlay to finish it off. 🙂
Hope this helps.
Thanks for the comment 🙂
Hi thanks for the tut. Can it be done in Cs5.5?
Sure. The settings’ names and locations will not be exactly the same, but they can be figured out.
Thanks for the comment 🙂
After I type my text in step 1, it will not let me chose New 3D Extrusion from selected layer. Is there something I am missing?
You might need to check your 3D settings under Edit > Preferences > 3D and Edit > Preferences > Performance (make sure that the Use Graphics Processor box is checked).
Hope this helps.
I make this
Nice change of color!
Thank you for sharing your work 🙂