
Simple Masking Tape Text Effect
This tutorial will show you a super easy way to create a masking tape – inspired text effect using basic Layer Styles and an Eraser Brush.
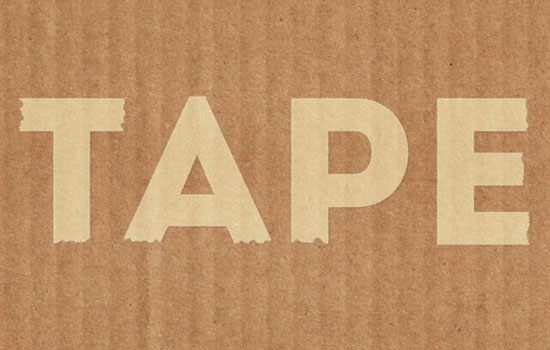
The Final Result

Tutorial Details
- Software Used : Photoshop
- Version : CC
- Time : 0:15 – 0:30
Resources
- Intro font.
- Cardboard texture stock by YmntleStock.
Step 1
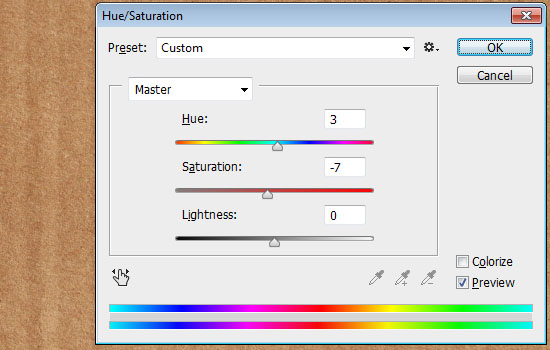
Create a new 1475 x 950 px document, place the Cardboard texture stock image on top of the Background layer, and resize it as you like. Then go to Image > Adjustments > Hue/Saturation, change the Hue to 3 and the Saturation to -7.
Create the text using the font Intro, the font Size 525 pt, and the color #efebca. You can use any other Size you like depending on the text you’re going to create.

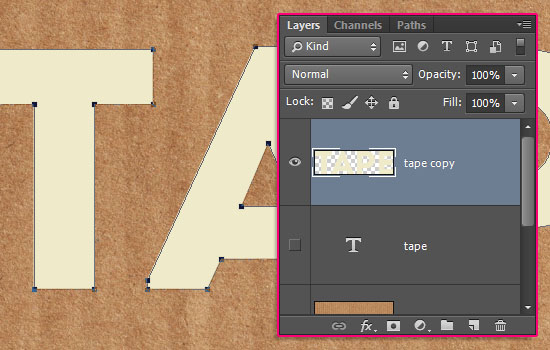
Right click the text layer and choose Create Work Path.

Duplicate the text layer and make it invisible by clicking the eye icon next to it. Then, right click the copy and choose Rasterize Type.
Step 2
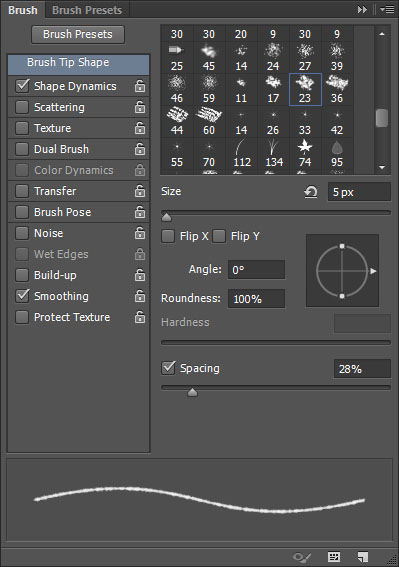
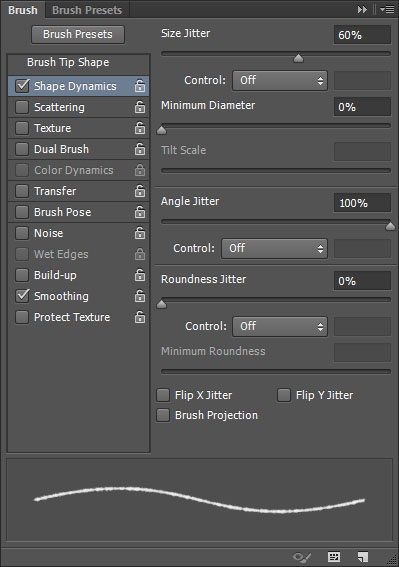
Pick the Eraser Tool and open the Brush panel (Window > Brush). Choose the Chalk 23 pixels tip and modify its Settings as below:
Brush Tip Shape
Shape Dynamics
Pick the Direct Selection Tool, right click the work path you created earlier, and choose Stroke Path. Then, choose Eraser from the Tool drop down menu and click OK.
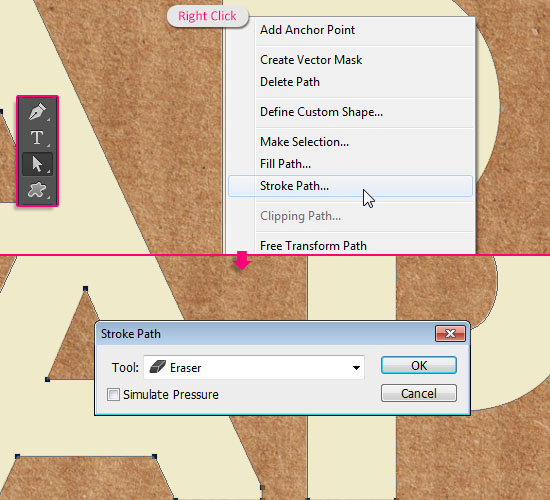
This will feather out the edges a little bit so that they’re not as straight and sharp. Hit Enter/Return to get rid of the work path.

Step 3
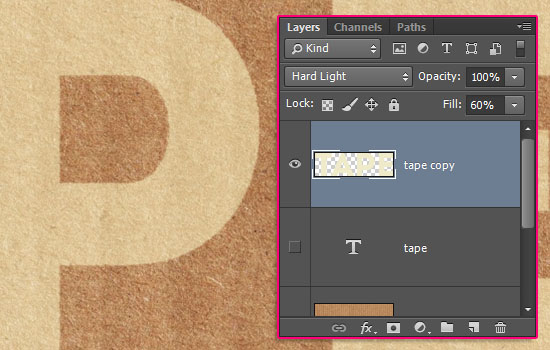
Change the rasterized text layer’s Blend Mode to Hard Light, then change its Fill value to one you like. Here, it is 60%.
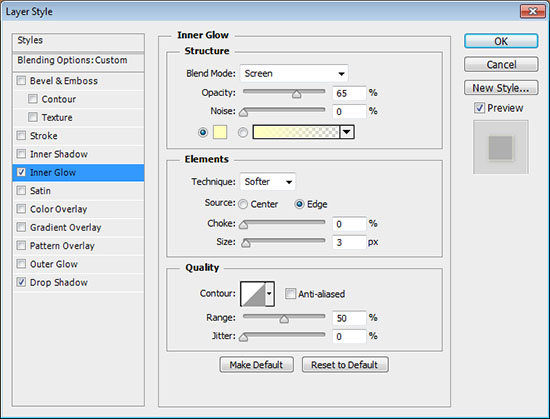
Double click the layer to apply the following Layer Style:
– Inner Glow
- Opacity : 65%
- Size : 3
– Drop Shadow
- Opacity : 17%
- Distance : 1
- Size : 5
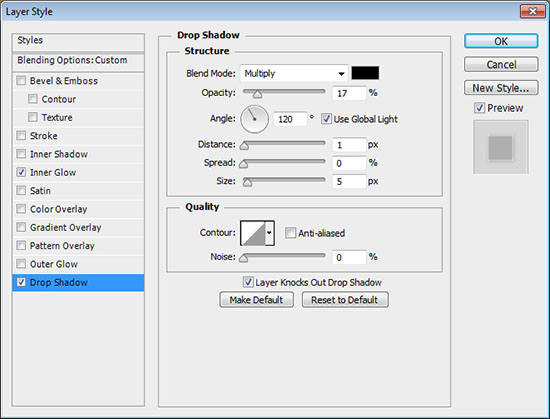
This will style the text.

Step 4
Pick the Eraser Tool again, and use the same exact brush you modified earlier, but change its Size to 20, to erase the letters’ torn ends.

Just erase those parts randomly creating jagged areas that go in and out.
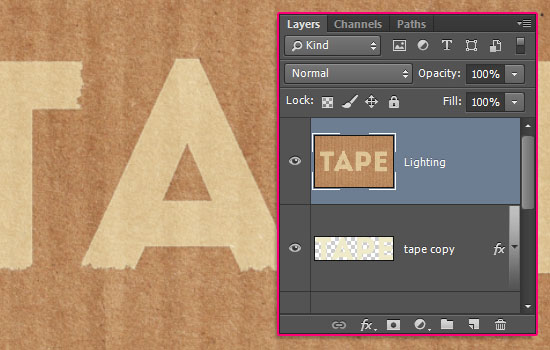
Select the styled text layer and the cardboard texture layer, duplicate them, then merge the copies (Layer > Merge Layers), and rename the merged layer to Lighting.
Step 5
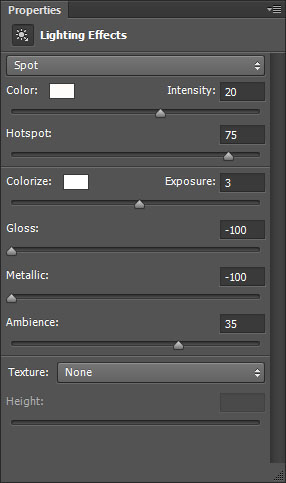
Go to Filter > Render > Lighting Effects. Choose a Spot Light and play around with it to get a lighting effect you like. You can click and drag the ellipses and/or their handles to move them around.

You can also change the Settings in the Properties panel to the right. Once you’re done, click the OK button at the top.
The lighting adds a neat final touch to the effect.
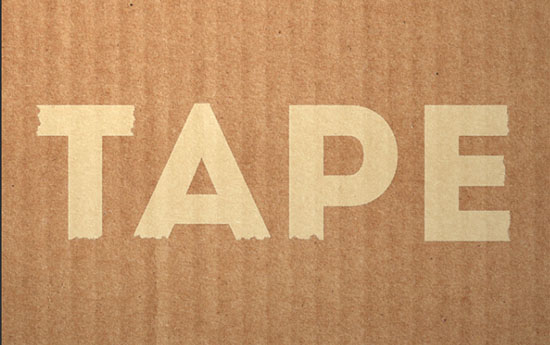
And you’re done!
Really quick and simple! Hope you enjoyed it and found it helpful 🙂
Did you enjoy this post? Please consider donating to help us cover our server costs.


That is a useful tutorial, we have featured it here : http://theneodesign.com/best-photoshop-tutorials-may-2014/
That’s great!
Thank you.
Always welcome 🙂
EHRMAGERD THIS LOOKS BADASS
Cool! Glad you like it.
Thanks for the comment 😉
Very nice effect! Thanks for the tutorial 🙂
Glad you like it!
Thank you for the comment 🙂