
Old Iron Text Effect
This tutorial will explain an easy way to create an old-looking iron (metal) text effect, using Layer Styles and some Filters.
The Final Result

Tutorial Details
- Software Used : Photoshop
- Version : CS5 Extended
- Time : 1:00 – 1:25
Resources
- Deutsch Gothic font.
Step 1
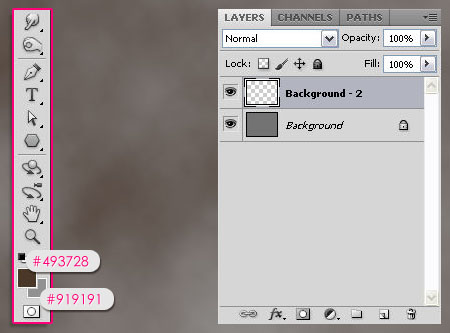
Create a new 1024 x 768 px document., and fill the Background with the color #737373.

Set the Foreground color to #493728, and the Background color to #919191. Create a new layer, call it Background-2, then go to Filter > Render > Clouds.
Step 2
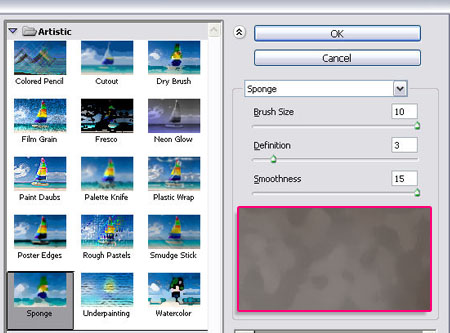
Go to Filter > Artistic > Sponge. Change the Brush Size to 10, the Definition to 3, and the Smoothnessto 15.
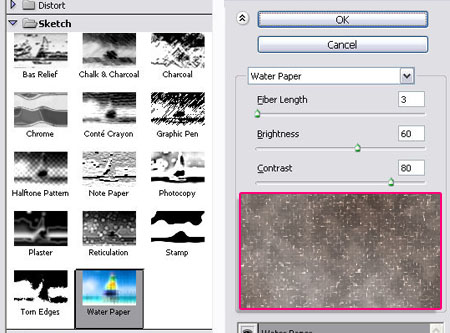
Go to Filter > Sketch > Water Paper. Change the Fiber Length to 3, the Brightness to 60, and the Contrast to 80.
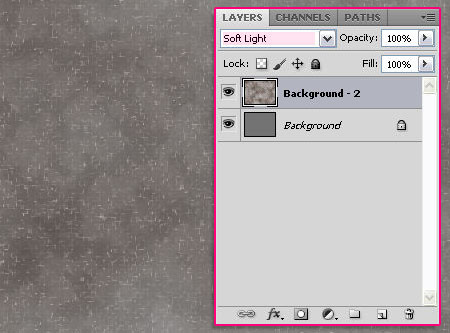
Change the Background-2 layer’s Blend Mode to Soft Light.
Step 3
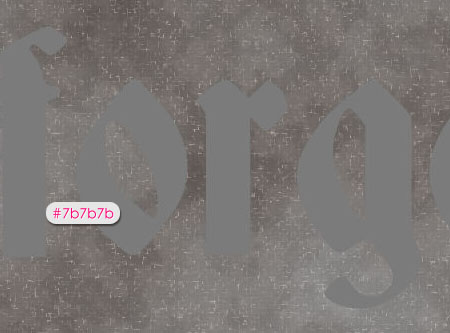
Create the text using the font Deutsch Gothic, the Size 300px, and the color #7b7b7b.
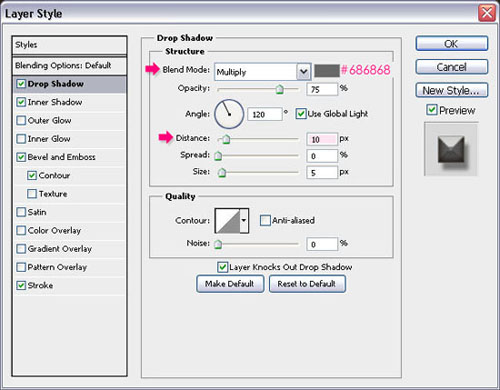
Double click the text layer to apply the following Layer Style:
– Drop Shadow
- Color :
#686868 - Distance : 10
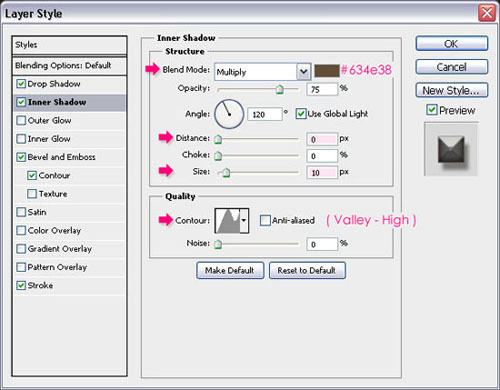
– Inner Shadow
- Color :
#634e38 - Distance : 0
- Size : 10
- Contour : Valley High
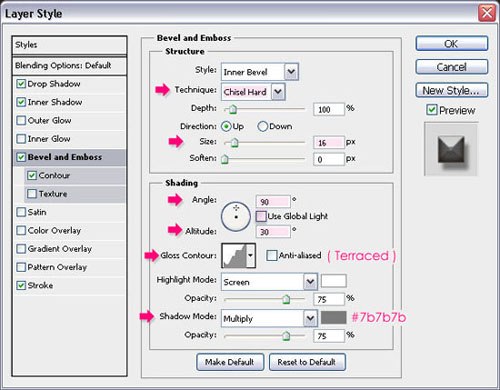
– Bevel and Emboss
- Technique : Chisel Hard
- Size : 16
- Uncheck the Use Global Light box
- Angle : 90
- Altitude : 30
- Gloss Contour : Terraced
- Shadow Mode – Color :
#7b7b7b
Check the Contour box as well.
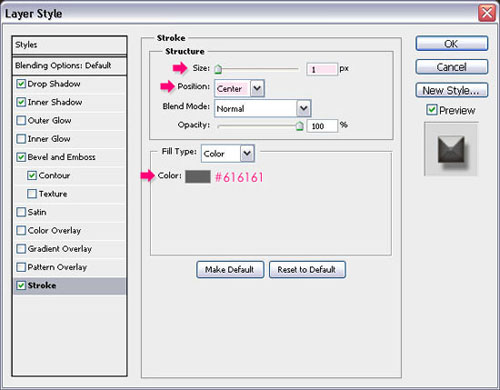
– Stroke
- Size : 1
- Position : Center
- Color :
#616161
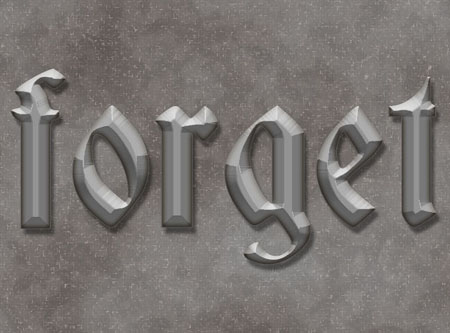
You should end up with something like this:
Step 4
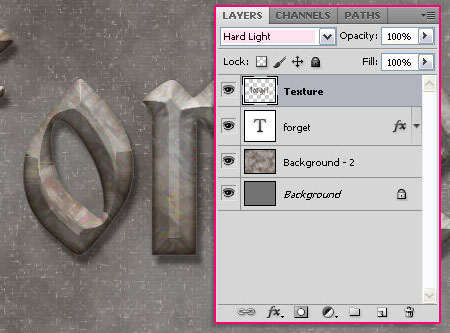
Create a new layer on top of the text layer and call it Texture. Ctrl/Cmd + click the text layer’s thumbnail to create a selection.
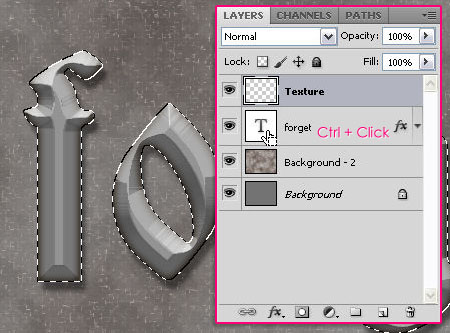
Make sure that the Foreground and the Background colors are still set to the same values in Step 1, and go to Filter > Render > Clouds.
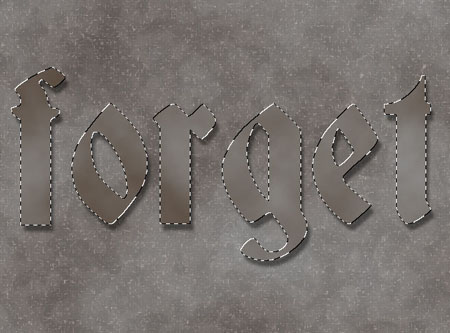
Go to Filter > Artistic > Paint Daubs. Change the Brush Size to 8, the Sharpness to 7, and choose Sparkle form the Brush Type drop down menu.
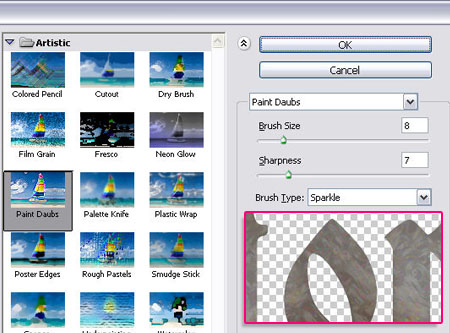
Press Ctrl/Cmd + D to get rid of the selection, and change the Texture layer’s Blend Mode to Hard Light.
Step 5
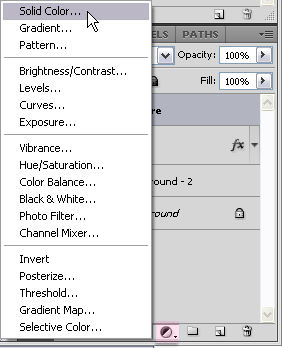
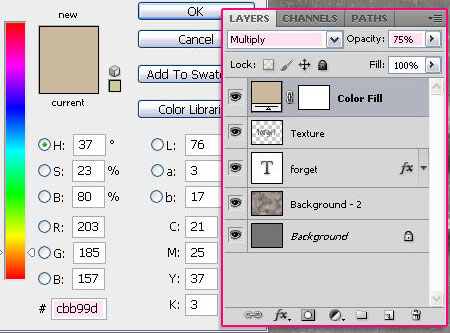
Add a Solid Color adjustment layer on top of all layers.
Use the color #cbb99d. Then, change the adjustment layer’s Blend Mode to Multiply, and the Opacity to 75%.
Step 6
Finally, set the Foreground color to Black, pick the Gradient Tool, and choose the Foreground to Transparent gradient fill. Click on the Radial Gradient icon, and check the Reverse box.
Create a new layer and call it Gradient, then change its Blend Mode to Soft Light. Click in the center of the document then drag to one of the corners to create the gradient.

And this is the final result.
Did you enjoy this post? Please consider donating to help us cover our server costs.


i like it 😀
Thanks 🙂
i will try it later.
Good!
Amazing I love it!!
Thanks! Glad you do.
Good job!..^^
I can’t find a this link”Old Iron Text Effect Color Palette”
Please share it.
Sorry for the missing link, I’ve uploaded it now.
If you still can’t download it please tell me.
Thanks a lot!
I got it..Thank you so much..
Have a nice day..^^
Great! You too 🙂
Nice……..
Thanks.
Simple An Nice..!
Thank you.
Liked the tut very much. The only problem I had was duplicating the contours. They are not included in Photoshop 7. Even so I liked my final result. Did not look quite like yours but I liked it. Thanks for sharing your tuts with us.
Hello Lilly,
Thanks a lot for your comment. Have you tried appending them using this method? I don’t know if this works for Photoshop 7, but this is how I get those contours in CS3 and CS5. Hope this works.
Thanks once again.
Wow thank you! I did not know that I could do that. The ones that you used are also in Photoshop 7. That is great now I will try this again using the preset contours. Again toda raba.
Shalom Lilly
Great! It’s good that they are available in PS7 as well.
Thanks for your comments Lilly.
Have a nice day.