
Sharp Fold Text Effect
This tutorial will explain how to create a sharp fold text effect, by converting the Text layer into a Shape layer, adding and moving a couple of anchor points, and using a simple Gradient Fill with different Blend Modes.
The Final Result

Tutorial Details
- Software Used : Photoshop
- Version : CS5 Extended
- Time : 1:00 – 1:45
Resources
- Magnum font.
- Grungy seamless tiling cement by LANBO.
Step 1
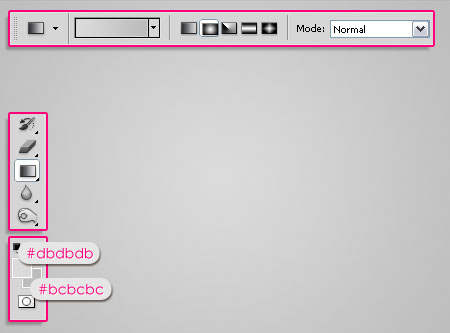
Create a new 1024 x 768 px document. Set the Foreground color to #dbdbdb, and the Background color to #bcbcbc, then, create a Radial Gradient from the center of the document to one of the corners.
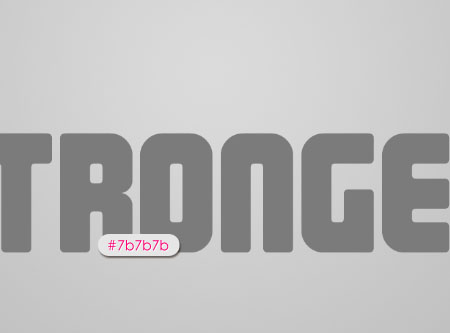
Create the text using the color #7b7b7b. The font used is Magnum and the Size is 250 pt.
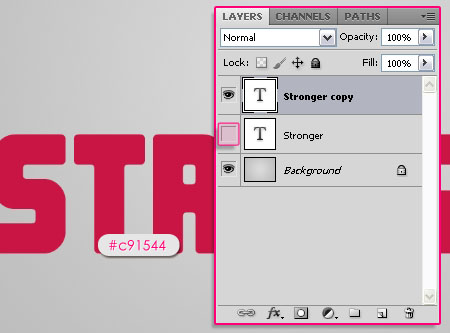
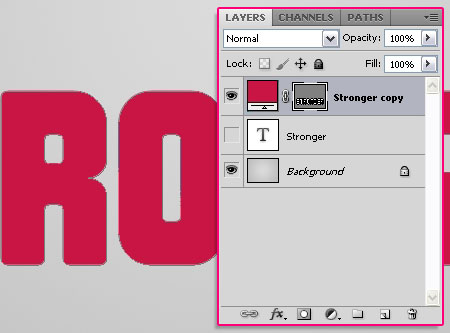
Duplicate the text layer, and change the copy’s font color to #c91544. Make the original text layer invisible (click the eye icon next to it).
Right click the copy text layer and choose Convert to Shape.
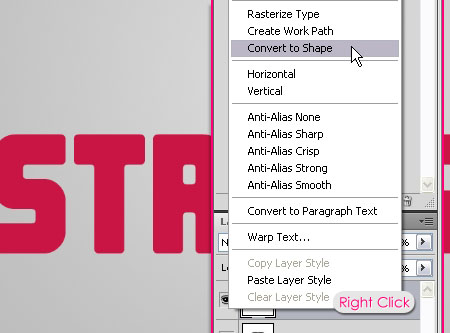
This will convert the Text layer to a Shape layer. The thumbnail to the left is the Fill color, and you can double click it to change the color anytime you want to. The thumbnail to the right is the Layer Mask, and it shows the shape of the path that defines what’s visible on the layer.
* Make sure to click the Layer Mask before modifying the path.
Step 2
Pick the Direct Selection Tool. This is the tool we will be using to move any points on the path.
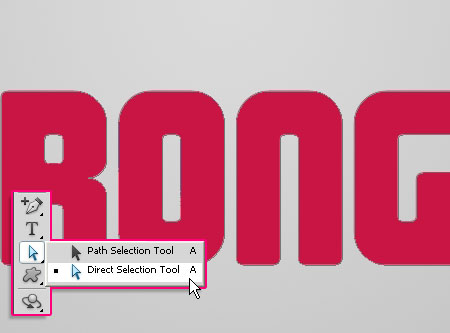
Click and drag to select the anchor points of the first letter.
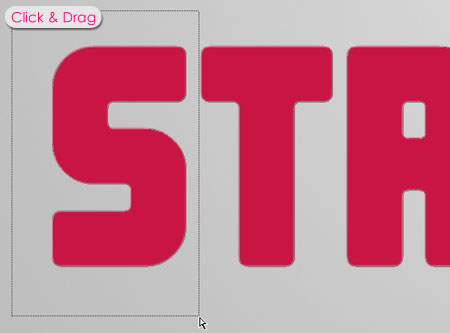
The anchor points are the points that control the path. Adding, deleting, or moving any of them will change the shape of the path. Try to add the folds where there aren’t many really close anchor points.

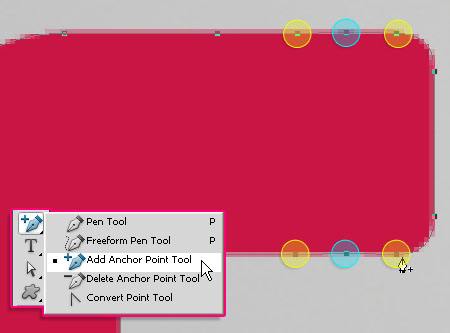
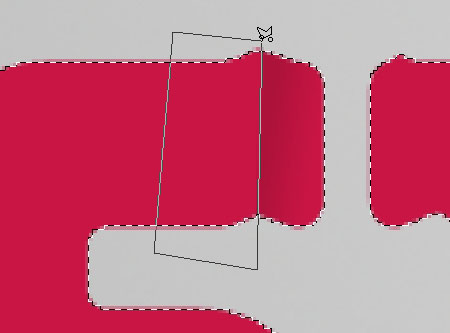
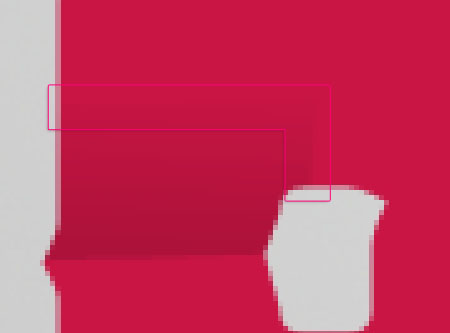
Pick the Add Anchor Point Tool to start adding the fold’s anchor points. Each fold will need 3 anchor points on each side. The ones to the right and left are where the fold begins and ends (yellow highlight), and the ones in the middle control the actual fold (blue highlight).
Click to add the 6 anchor points on each side. Don’t worry about aligning the points perfectly, you can even leave different spaces between the anchor points to create a more tilted fold.
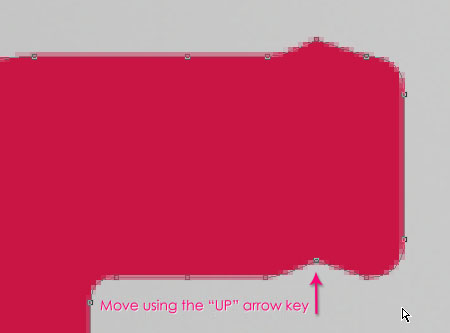
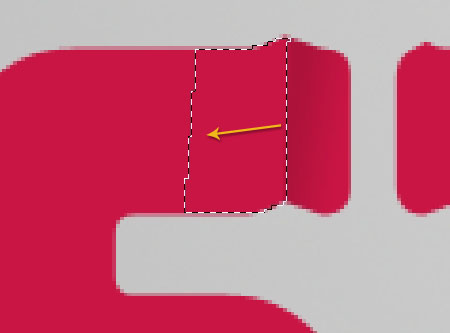
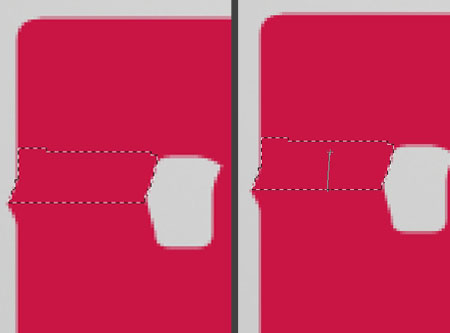
Pick the Direct Selection Tool once again, click and drag to select the anchor points in the middle (or Shift + click them).

Use the Up arrow key (the Move Tool (V) should be selected) to move the selected anchor points slightly upwards.
When creating the Horizontal folds, you should move the fold to the Right instead.
Repeat the same steps to create more folds wherever you want.

Step 3
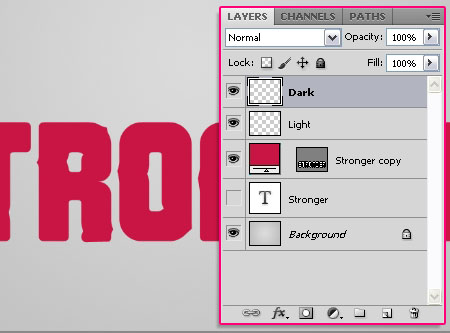
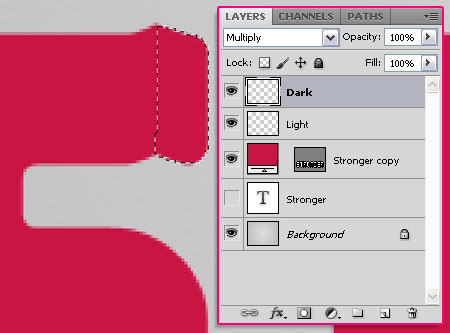
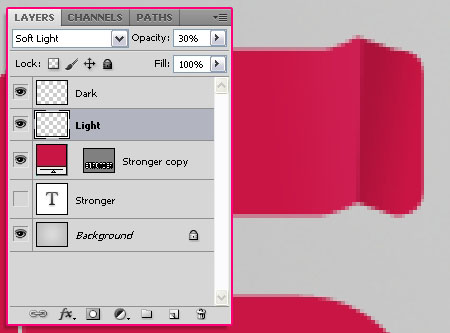
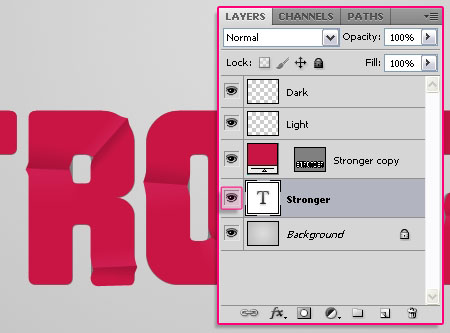
Create two new layers on top of all layers, and call them Light and Dark. We will be using them to add the gradients to the sides of the fold.
Set the Light layer’s Blend Mode to Soft Light and its Opacity to 30%.
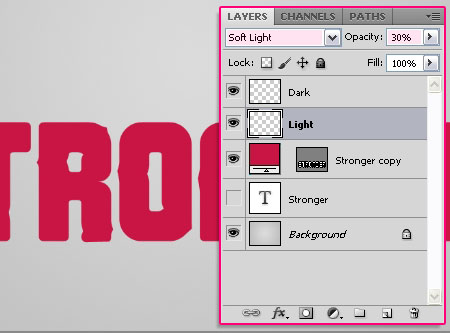
Set the Dark layer’s Blend Mode to Multiply.

Step 4
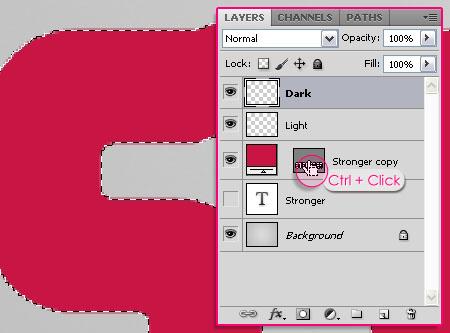
Ctrl/Cmd and click the Shape Layer Mask’s thumbnail to create a selection.
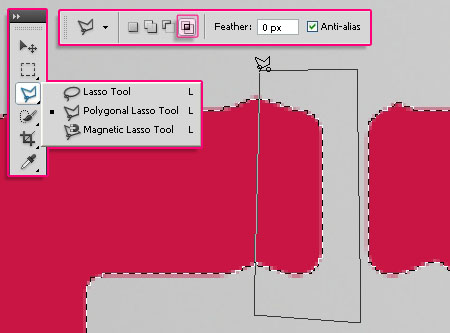
Pick the Polygonal Lasso Tool and click the Intersect with Selection icon in the Options bar.
Next, create a selection that intersects with the right half (side) of the fold.
Make sure that the Dark layer is selected.
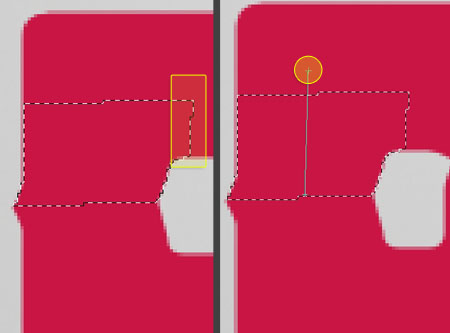
Pick the Gradient Tool, and click the Linear Gradient icon in the Options bar. With the Foreground color set to #dbdbdb, choose the Foreground to Transparent gradient, and fill the selection starting from the middle of the fold.
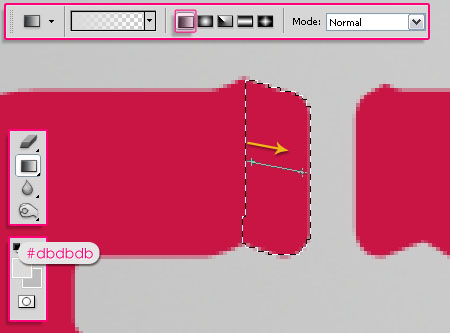
The Multiply Blend Mode set previously will make the gradient look like a shadow covering the selected area.
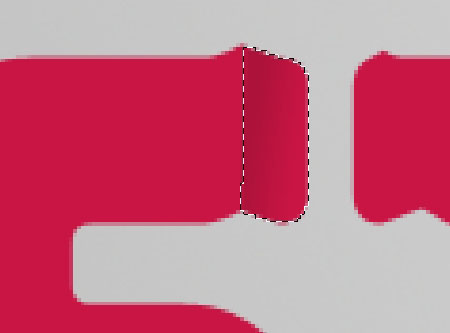
Select the shape once again (Ctrl/Cmd + click the thumbnail), and use the Polygonal Lasso Tool to create a selection that intersects with the left half of the fold.
Select the Light layer this time, then fill the selection with the gradient.
This will brighten the left side of the fold a little bit.
Note: Try not to include the areas separated by corners in the selection, and avoid dragging the Gradient outside the selection as well.
Doing so will result in hard disconnected gradient fills.
Just make sure that the selected areas are contiguous, and that the gradients end near the edge of the selection.
This will make the gradient fills look more smooth and realistic.

Do the same for all the remaining folds. Remember, the parts bending up should be lighter, and the ones going down should be darker. Simply, apply the Gradient fills clockwise to all the folds.

Step 5
Make the original text layer visible.
Right click the original text layer and choose Rasterize Type.
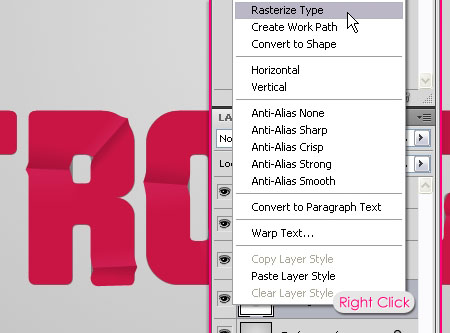
This will reasterize the text layer, which means you will not be able to modify the text anymore. You can use Smart Objects instead if you like.

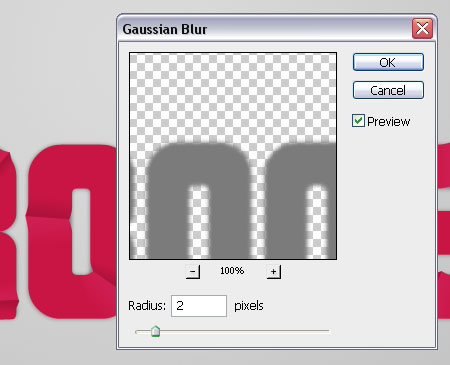
Go to Filter -> Blur -> Gaussian Blur, and set the Radius to 2.
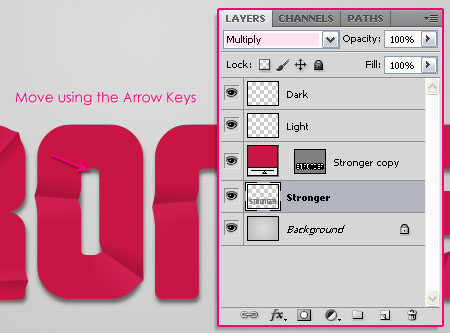
Set the rasterized text layer’s Blend Mode to Multiply. Pick the Move Tool, and use the Arrow Keys to move the text a little bit downwards and to the right, in order to create a simple shadow.
Step 6
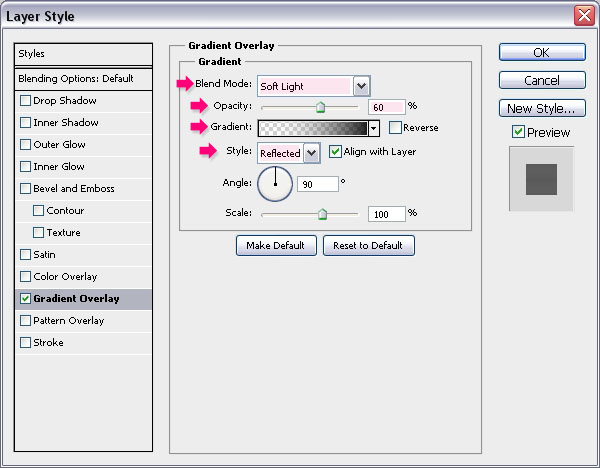
Double click the Shape layer to add a simple Gradient Overlay:
– Gradient Overlay
- Blend Mode : Soft Light
- Opacity : 60%
- Style : Reflected
- Click the Gradient box to create the gradient
The Gradient used is a very simple one. Click each one of the Color Stops (at the bottom of the Gradient bar), then click the Color box below, and set the colors to #ffffff and #000000.
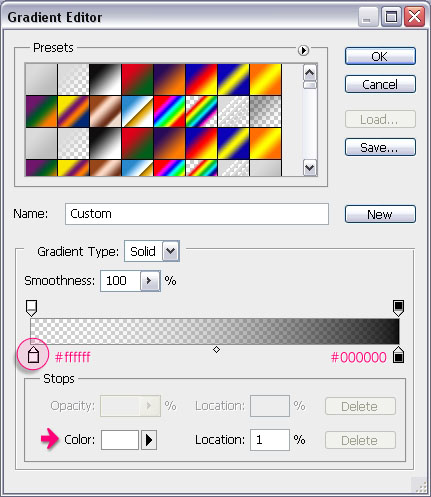
Now, click each one of the Opacity Stops (at the top of the Gradient bar) to set the Opacity values to 0 and 100%.
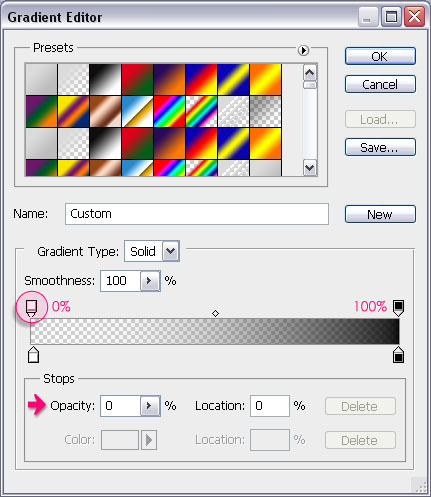
This will add a nice gradient to the text.

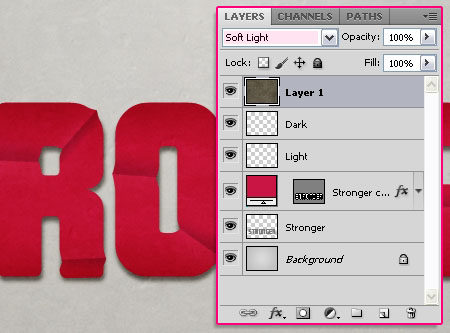
Finally, place the Grungy seamless tiling cement texture on top of all layers, and change its layer’s Blend Mode to Soft Light.
That’s it!
Did you enjoy this post? Please consider donating to help us cover our server costs.


Nice tut! Thanks so much for sharing. 🙂
Glad you liked it.
Thanks for the comment 🙂
Nice photoshop tutorial.I have learn many things.
That’s great to know 🙂
Thanks a lot for the comment 🙂
Great work …. I always learn from this site
I’m so happy you do 🙂
Than you very much for leaving a comment 🙂
As usual, neat tutorial. I always love reading them and seeing what new effect or idea you come up with. Thanks for sharing.
Thank you so much for your kind words, glad you’re enjoying the tutorials 🙂
Looks great, very realistic effect!
Thank you very much 🙂
Awesome thank you
very skilled designer i see :3
Glad you liked it.
Thanks a bunch, this really means a lot 🙂
I love coming to admire your work and doing the tuts when I have time. But whether I do the tuts or not, you always WOW me with your designs and knowledge. Thank you so much for being such a generous teacher and for sharing your amazing PhotoShop powers, Rose.
Thank you so very much for your kind words, they really truly mean a lot 🙂
I’m so glad you like the tutorials and find them useful.
Thanks a lot once again 🙂
thanks tut. i learn new things. keep it up!!!
That’s great to know!
Thanks a lot for the comment 🙂
Great site and amazing tutorials, I learnt lot from your site keep it up.
It means a lot that you found the tutorials useful.
Thank you so much for the nice comment.
Awesome tutorial. I am learning designing and this was really helpful. Thanks for sharing. Cheers!
That’s great to know! Glad you found it helpful.
Thanks a lot for the comment.
Fantastic, bro. I am new to this site and am loving it. Awesome tutorials, mister!
So glad you are, really means a lot 🙂
Thank you very much for your kind words (I’m a girl though ^_^)
Regards.
Merci pour votre billet qui m’a été très agréable à lire. Votre site internet a pas mal de bon contenu, je ne manquerais pas de faire suivre l’adresse de votre site à mes proches et à revenir souvent.
This sure means a lot 🙂
Very glad you liked the tutorials and found them helpful.
Merci beaucoup for the kind words and for the support.