
Simple Zipper Text Effect – Part 1
A zipper-inspired text effect can be created in many different ways, since zippers have different shapes, types, and details.
This tutorial, however, will explain how to create a basic zipper shape, with the main parts, and apply it to a sports-themed text.
This concept was suggested by Hashim Raza. Thank you for the great suggestion, Hashim.
The Final Result

Tutorial Details
- Software Used : Photoshop
- Version : CS6 Extended
- Time : 1:00 – 1:45
Resources
- Junegull font.
- Rocky wall pattern by Projecteightyfive.
- Small Crosses pattern by Ian Dmitry.
- Diamonds Are Forever pattern by Tom Neal.
- Carbon fibre pattern by Atle Mo.
- Diagonal Noise pattern by Christopher Burton.
Step 1
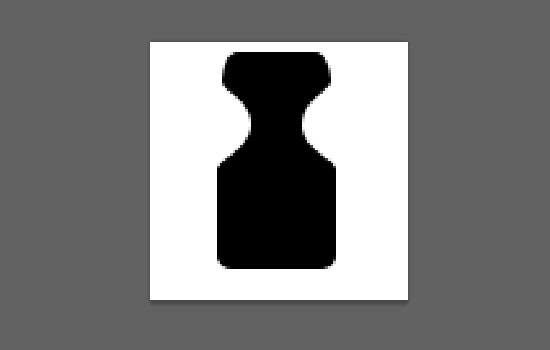
Let’s start by creating the main zipper brush.
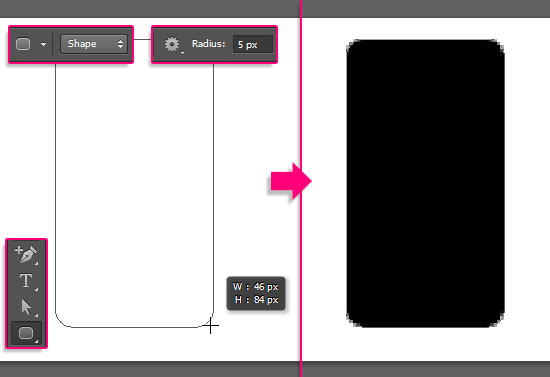
Create a new 100 x 100 px document. Set the Foreground color to Black, and pick the Rounded Rectangle Tool. Choose Shape and set the Radius to 5 in the Options bar. Then click and drag to create a 46 x 84 px rectangle.
Next, we are going to create some guides to help us add a couple of anchor points. To do so, you’ll need to show the Rulers (View > Rulers), pick the Move Tool, then click and drag a ruler to create a guide.
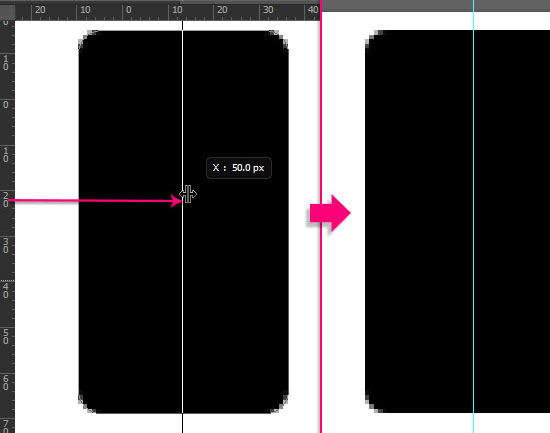
The first guide is a vertical one in the middle of the document, so you’ll need to click and drag the vertical ruler. Once you place the guide in the center (it will snap to the center automatically if you have the Snap option under the View menu checked), move the rectangle so that it is in the center of the document as well.
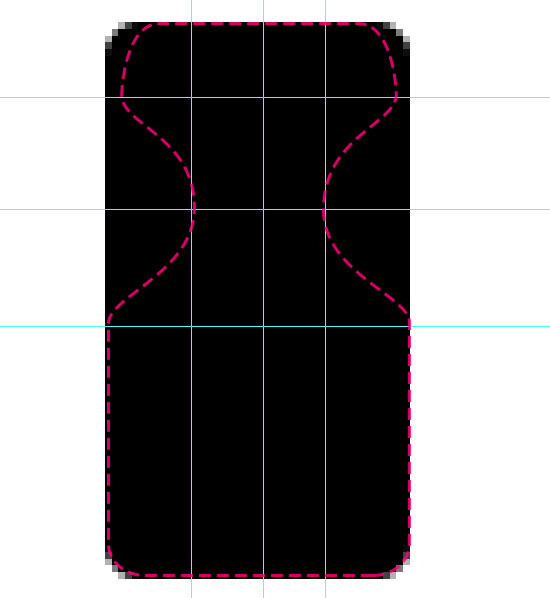
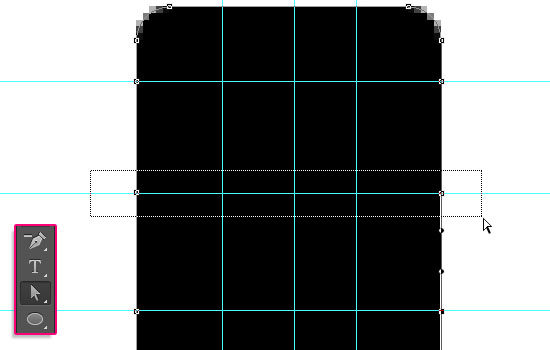
Add two more vertical guides and three horizontal ones as shown below. These will be used to help us place some anchor points to create the shape represented in the dashed pink line.
So imagine the shape and place the guides accordingly.
You can move the guides after you create them using the Move Tool, so don’t worry if you don’t get things right the first time.
Once you’re done adding the guides, pick the Add Anchor Point Tool, then click at both ends of each horizontal guide to add anchor points.
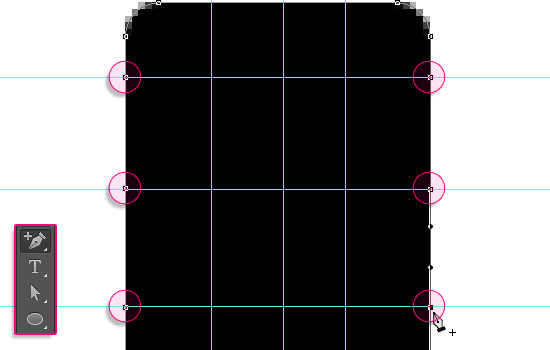
Pick the Direct Selection Tool, then click and drag to select the two points in the middle.
Go to Edit > Transform Points > Scale, then press and hold the Alt/Option key, and click and drag the right side of the Transform box. The Alt/Option key will make both points move inwards towards the center simultaneously.
Drag the points until they touch the two vertical lines, then release the mouse button.
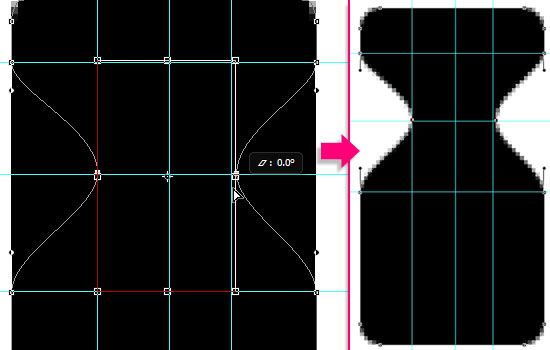
Now click and drag the upper side of the Transform box outwards to widen the curves a little bit. Once you’re done, hit Enter/Return to accept the changes and get out of the Transform Mode.
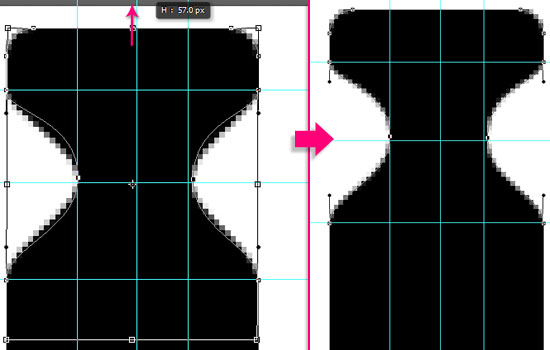
You can also click individual anchor points then use the Direct Selection Tool to modify them, but keep in mind that you should make the exact same changes to both sides.
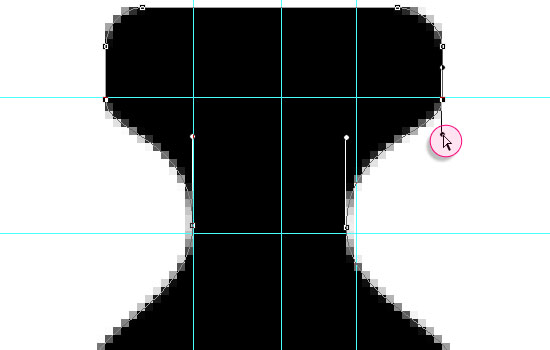
Select and scale the points at the top as well, and move them upwards or downwards using the Up and Down Arrow keys if needed, until you like the tip shape.
When you’re done, go to Edit > Define Brush Preset, and type in the name Zipper Brush.
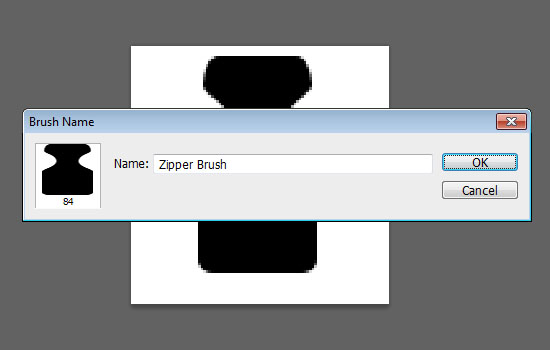
Save the document if you like (and it is recommended that you do so), then close it.
Step 2
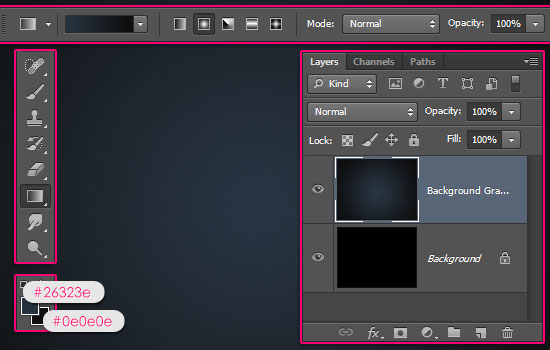
Create a new 1152 x 864 px document. Set the Foreground color to #26323e and the Background color to #0e0e0e. Pick the Gradient Tool, choose the Foreground to Background, Radial Gradient, in the Options bar. Create a new layer, call it Background Gradient, then click and drag from the center of the document to one of the corners to create a simple radial gradient.
Double click the Background Gradient layer to apply a Pattern Overlay effect:
- Blend Mode : Color Burn
- Opacity : 80%
- Pattern : Rocky wall
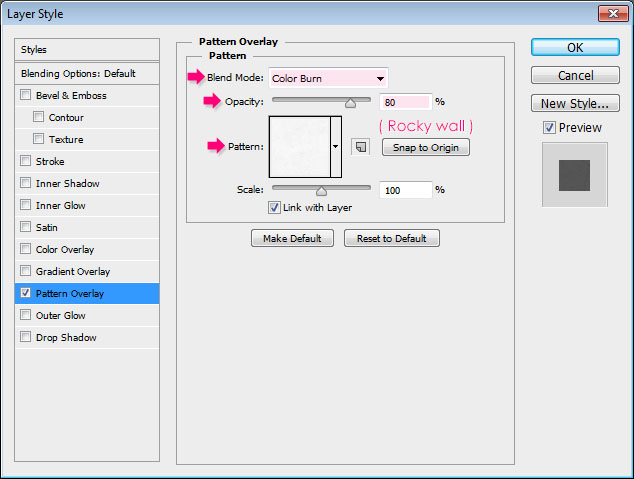
This will apply a subtle texture to the background.

Step 3
Create the text using the font Junegull. The font color is #6a6a6a, and its Size is 618 pt.
This tutorial uses only one letter, but you can create as many letters as you like. Just make sure to increase the Tracking value so that the letters won’t overlap.

The text will be used only as a reference for the work path we’re going to create in the center of the letter.
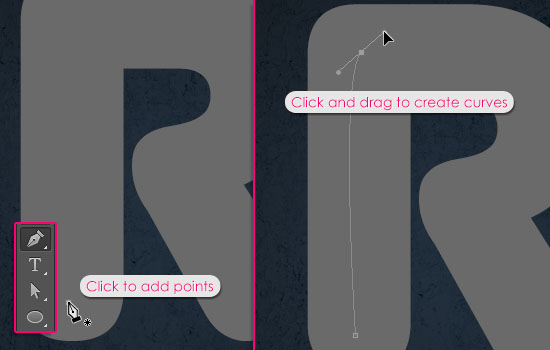
So pick the Pen Tool, click to add points, click and drag to create curves. Use that to make a work path inside your text.
It is important to create all the corners as curves, as we don’t want sharp angles anywhere.
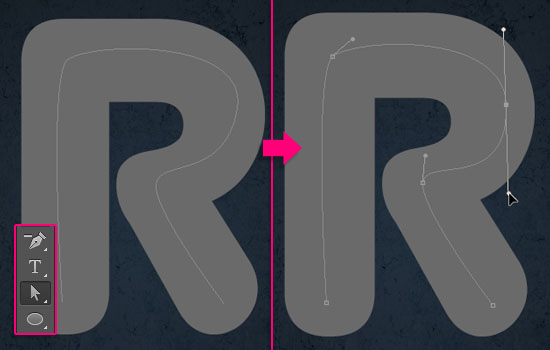
You don’t have to create a perfect work path, as you can use the Direct Selection Tool afterwards to move the anchor points or their handles, and modify the path created.
(You can click the Direction Points at the end of the two Direction Handles, then move them around to change the orientation of the curve, or drag them outwards and inwards to make the curve wider or narrower.)
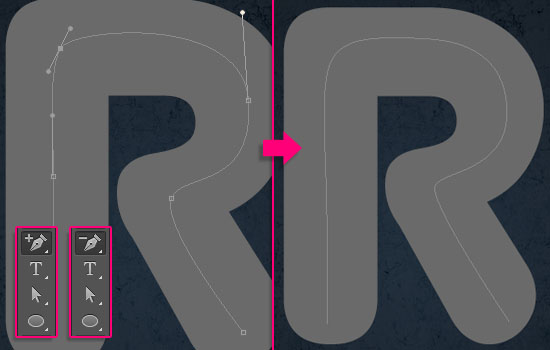
And you can add or delete anchor points using the Add Anchor Point Tool and Delete Anchor Point Tool.
Use the tools you need to modify the work path until you like the shape.
Step 4
Now, we are going to create six new layers, and name them according to the brush size that will be used for the stroke on each one of them.
So it is important to create an name them exactly as below.
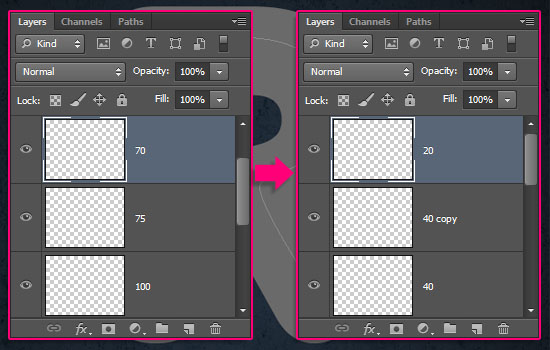
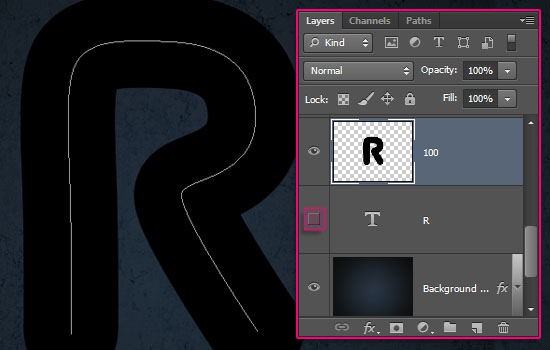
Start by creating a new layer and call it 100. Then, add the new layers on top of it.
So from the layer “100” upwards, you should have:
100 – 75– 70 – 40 – duplicate the 40 layer so that you have a 40 copy layer – and finally 20.
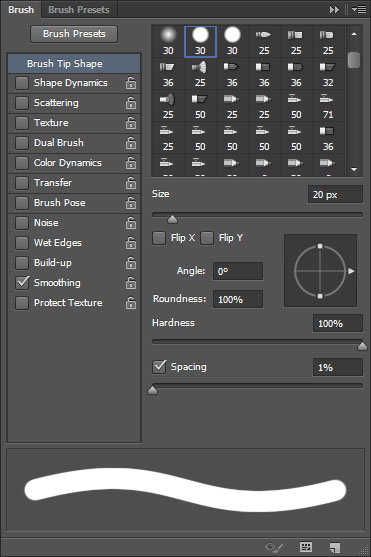
Pick the Brush Tool and choose a hard round brush. Then open the Brush panel (Window > Brush), and change the Spacing to 1%.
Set the Foreground color to Black. We are going to add colors using the Color Overlay effect when we apply the Layer Styles.
Next, we will click each layer, and stroke the path with a brush Size that matches the selected layer’s name.
So if the 20 layer is selected, the brush Size should be 20 px.
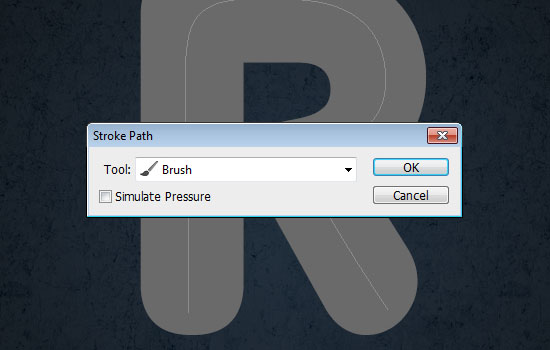
To stroke the path, pick the Direct Selection Tool, right click the path, and choose Stroke Path.
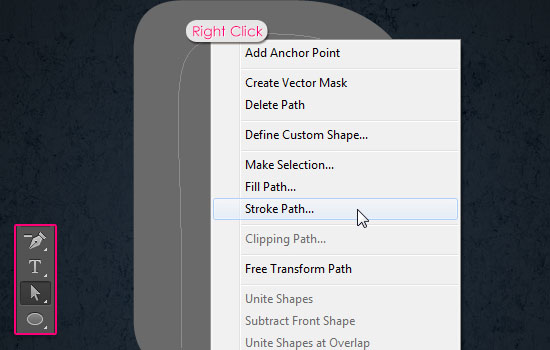
Choose Brush from the Tool drop down menu, and make sure that the Simulate Pressure box is unchecked, then click OK.
An easier way to stroke a path is by selecting the Brush Tool, then hitting the Enter/Return key once.

Repeat this step to stroke the path on the remaining layers, and remember to change the Size according to the layer’s name.
When done, make the original text layer invisible by clicking the eye icon next to it.
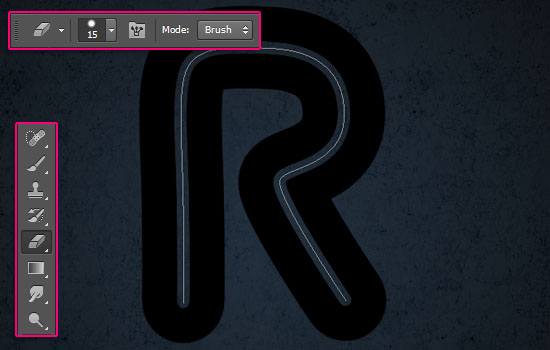
Pick the Eraser Tool, choose a 15 px hard round brush, and set its Spacing to 1%.
Select each stroke layer, and hit the Enter/Return key to erase the center of the stroke. No need to change the brush Size this time.
Once you’re done erasing, you should have an empty area as shown below.
Step 5
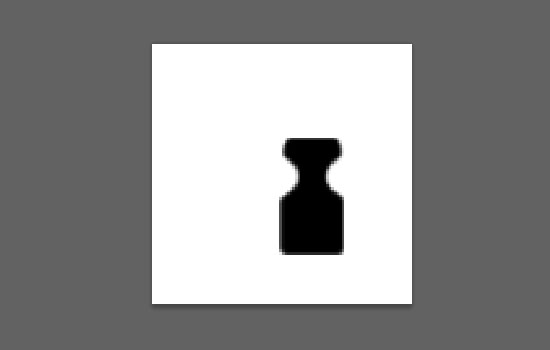
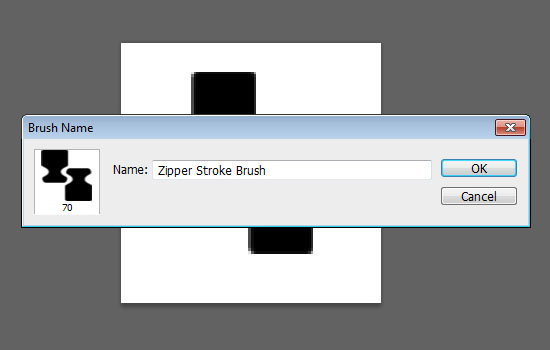
Create a new 150 x 150 px document with a White background. Set the Foreground color to Black, pick the Brush Tool, and choose the Zipper Brush tip you created earlier, change the Size to a value around 45 px, then click once to the right side of the document.
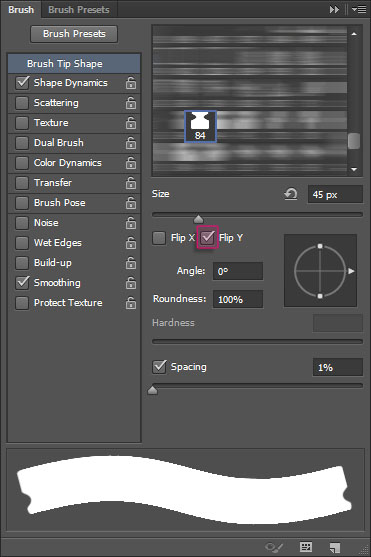
In the Brush panel, under Brush Tip Shape, check the Flip Y box to flip the brush tip vertically.
Place the brush next to the one you created, not too close and not too far, then click to add the vertically flipped tip.
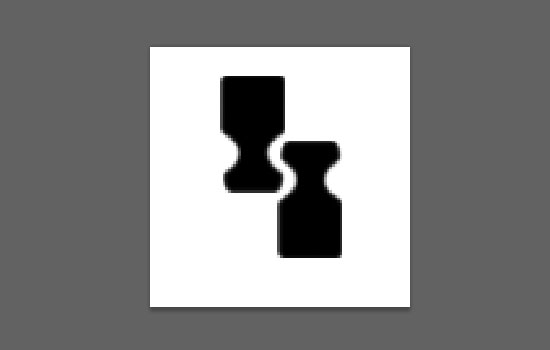
Go to Edit > Define Brush Preset, and type in Zipper Stroke Brush.
Close this document and go back to the original one.
Step 6
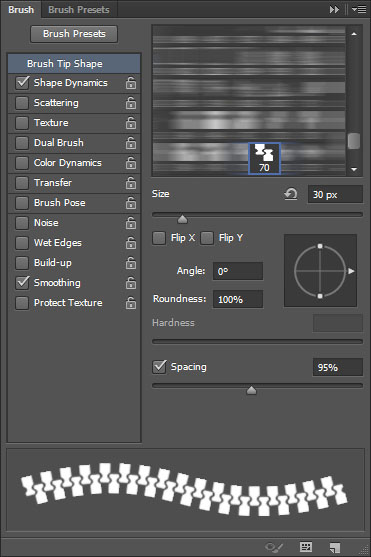
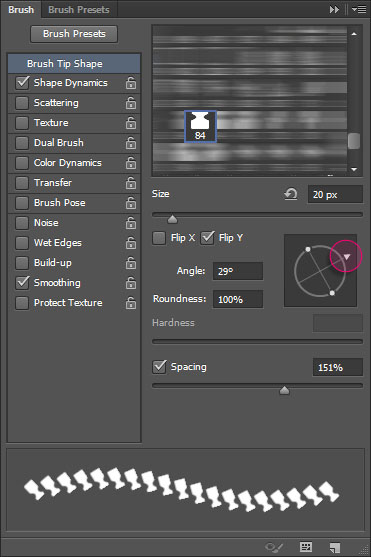
Pick the Zipper Stroke Brush tip, open the Brush panel, and change the Size to a smaller value (depending on how big or small you want the zipper tips to be). The value used here is 30 px.
Drag the Spacing slider until the distance between the tips is the same. So basically you’ll need to match the Spacing value with the space you created to make the zipper flow seamlessly.
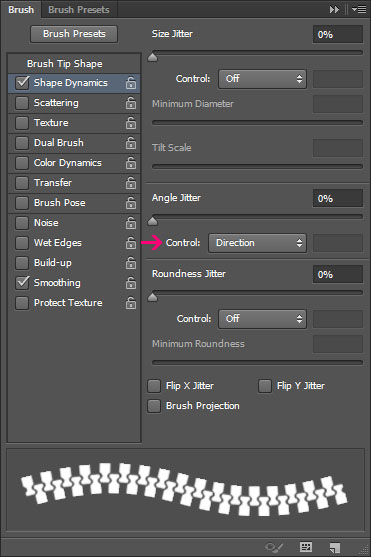
Under Shape Dynamics, just change the Angle Jitter Control to Direction. This will rotate the tips with the work path. Make sure that the other values are set as shown below as well.
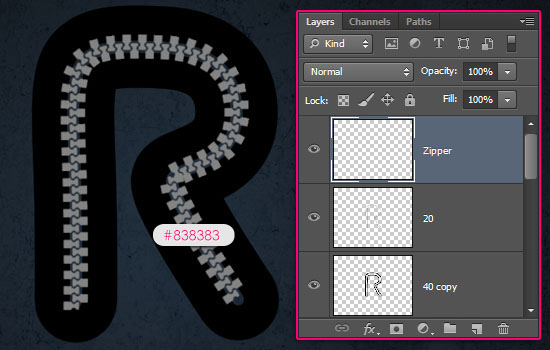
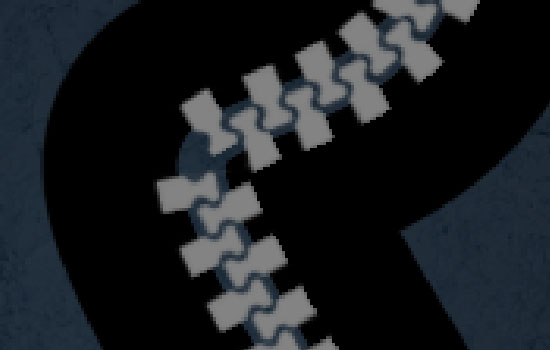
Create a new layer on top of all layers, call it Zipper, set the Foreground color to #838383, and stroke the path with the brush. Hit Enter/Return to get rid of the path.
Now as you can tell, there is a problem in the last corner where the tips overlap a bit.
To fix this, pick the original Zipper Brush tip, change its Size to match the stroke’s zipper tips’, then change its angle by clicking and dragging the arrow in the Angle preview box.
Erase the overlapping tips, then add new ones manually. Change the Angle of each tip according to its position.
You can remove more tips then add them in different angles to recreate the curve shape. But if this doesn’t work, then just modify the overlapping parts, and we’ll add a rivet in the empty area later on.
Step 7
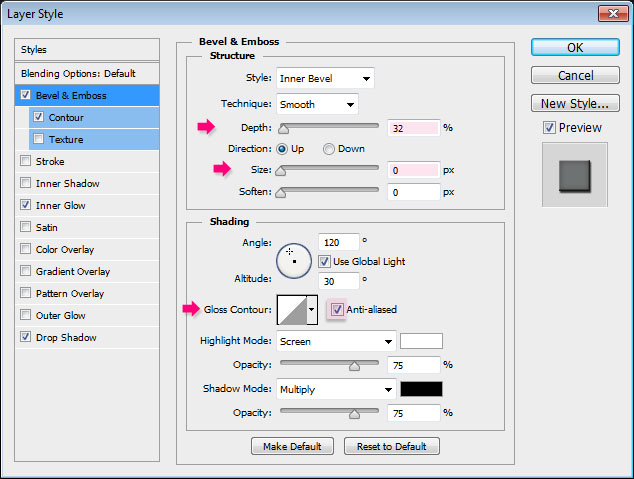
Double click the Zipper layer to apply the following Layer Style:
– Bevel and Emboss
- Depth : 32
- Size : 0
- Check the Anti-aliased box
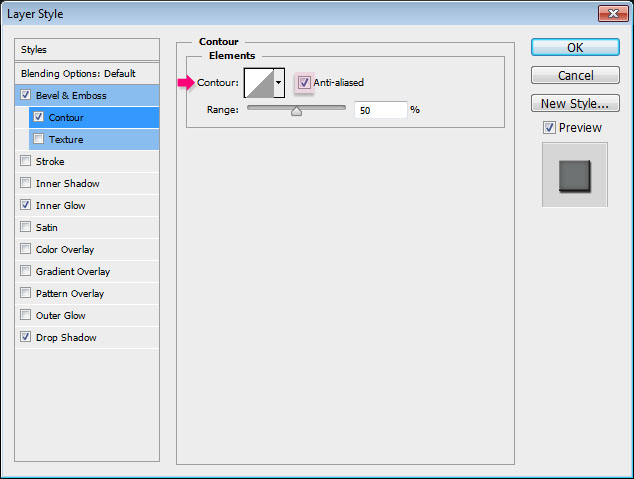
– Contour
- Check the Anti-aliased box.
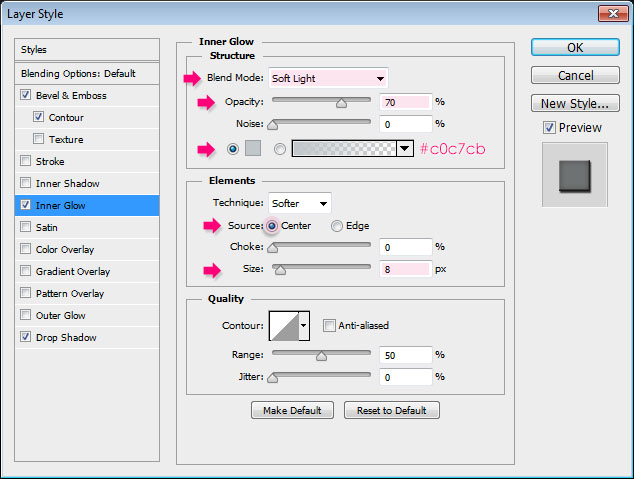
– Inner Glow
- Blend Mode : Soft Light
- Opacity : 70%
- Color :
#c0c7cb - Source : Center
- Size : 0
– Drop Shadow
- Distance : 2
- Spread : 22
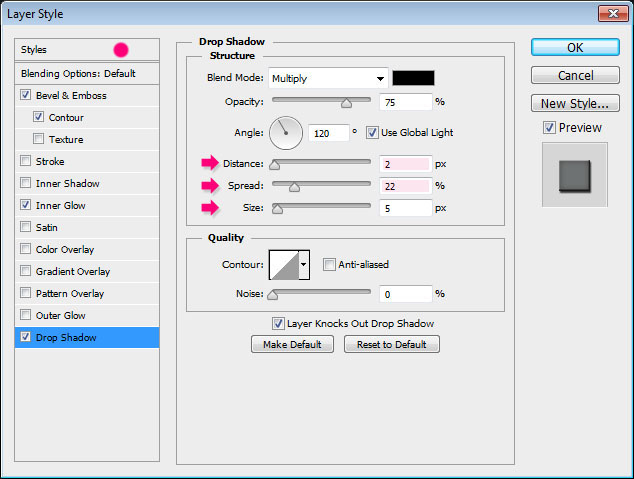
This will style the zipper.

In Part 2, we’ll style the stroke layers, and add the remaining parts to finish everything up.
Did you enjoy this post? Please consider donating to help us cover our server costs.


Wait is over and here is my requested tutorial :)…thx a lot for sharing such a wonderful tutorial. Well done
Very glad you liked it!
Thank you very much for the comment and for the awesome suggestion 🙂
Very well, the next part, please !
very well, thank you
but
nex part please
@cixi42 and @Marif44,
Thanks a lot for the comments.
Next part coming very soon.
Hi,
this work isn’t “simple” text effect, very super and spectacular! I’m waiting the next part. When can I get that? Hurry up, pleeeeese…
Thank you very much! That’s really nice of you to say, and it does mean a lot.
The second part is already posted. You can check it out here.
Thanks a lot once again.
this tutorial helped me a lot – saved a lot of time in making zipper texures
That’s great to know!
Thanks a lot for the comment 🙂
In below link I made zipper texture using this tutorial – changed a little to my requirement (only the zipper teeth part only)
http://www.marvelousdesigner.com/community/gallery/2402?page=2
hope you like the leather jacket.
Oh wow! That’s actually quite amazing.
It’s really nice to see the techniques used in many different ways.
Thank you very much for sharing your awesome work 🙂
Do you mind if I quote a couple of your articles
as long as I provide credit and sources back to your site? My blog site is in the very
same area of interest as yours and my visitors would really
benefit from some of the information you provide here. Please let me know if this okay with you.
Thanks a lot!
Yes much appreciated that you link back to us, and we
want to share knowledge. Enjoy !
HI
Why are these corrupted to download? Thanks for solving the problem.But only his font is healthy.
Rocky wall pattern by Projecteightyfive.
Small Crosses pattern by Ian Dmitry.
Diamonds Are Forever pattern by Tom Neal.
Carbon fibre pattern by Atle Mo.
Diagonal Noise pattern by Christopher Burton.