
Type Styles in Photoshop CS6
One of the amazing new features in Photoshop CS6, which has been released as a free beta version recently, is the Type Styles feature. This feature enables you to define text styles, for both paragraphs and characters, in a very similar way as in InDesign. This means that you can change the appearance of any text you have easily and quickly. A real time saver when working with many text layers or large text blocks in a file.
This tutorial will explain how this feature works, and how it can be used to enhance your text formatting workflow.
So, what exactly are Type Styles?
A type style is the group of attributes of a formatted text, meaning that each style stores information about a certain text structure. This includes two types of styles:
1- Character Styles: Which control character attributes, such as font size, color, kerning, leading, etc (the attributes in the Character panel).
2- Paragraph Styles: Which control both character AND paragraph attributes, such as indents and spacing, alignment, hyphenation, etc (the attributes in the Paragraph panel).
So while paragraph styles apply to the whole paragraph, character styles are used to format selected text within the paragraph, like making some words bold or italic for example.
Before we start working with Type Styles, let’s take a look at the different panels we will be using. These panels can be found under the Window menu, OR under Type -> Panels, where you can find the four following panels.
Paragraph and Character Panels
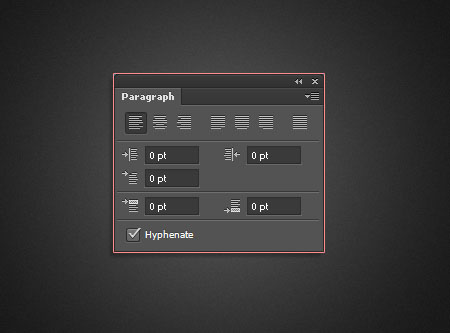
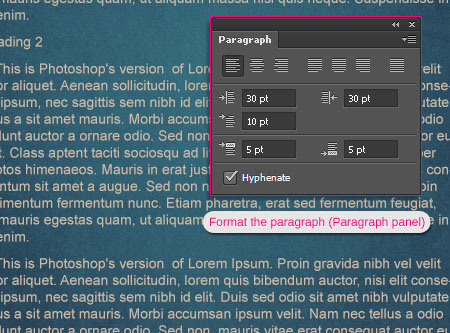
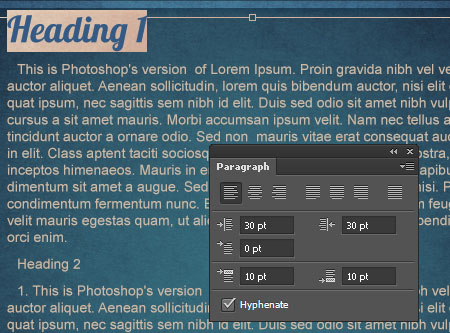
– Paragraph Panel
The panel where the paragraph formatting attributes can be modified.
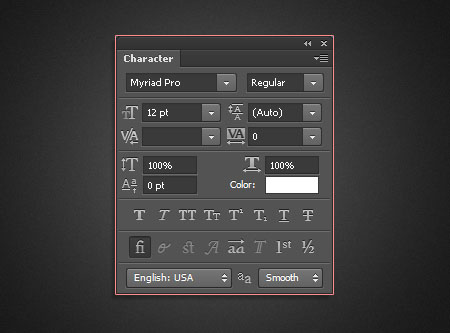
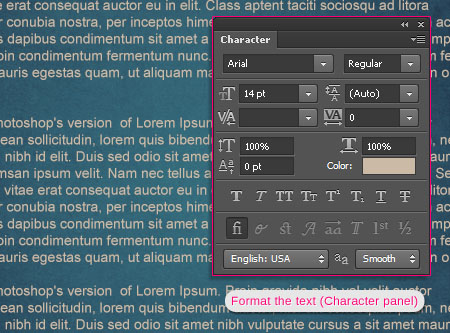
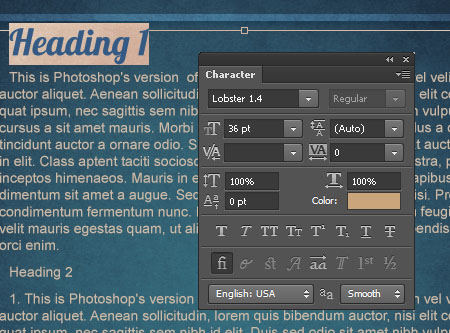
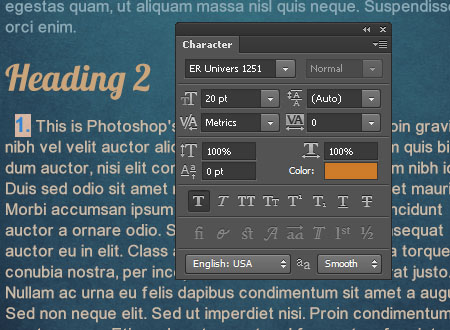
– Character Panel
The panel where the character formatting attributes can be modified.
Paragraph Styles and Character Styles Panels
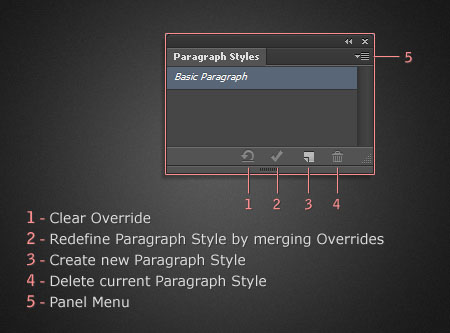
– Paragraph Styles Panel
The panel where the paragraph styles are stored and can be modified.
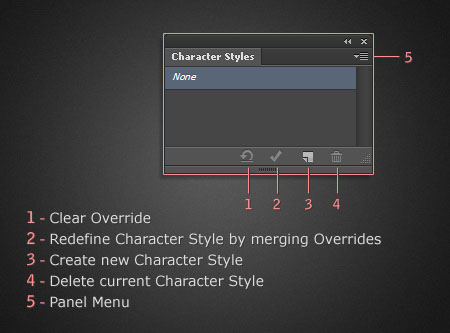
– Character Styles Panel
The panel where the character styles are stored and can be modified.
So while the first two panels are used to change the values, the other two are used to control the styles that store those values.
Setting Up Type Styles
To create a type style, you need to create some text first, then you either format it and create a type style based on whatever attributes assigned to that text, or you just create the type style first, then do the formatting.
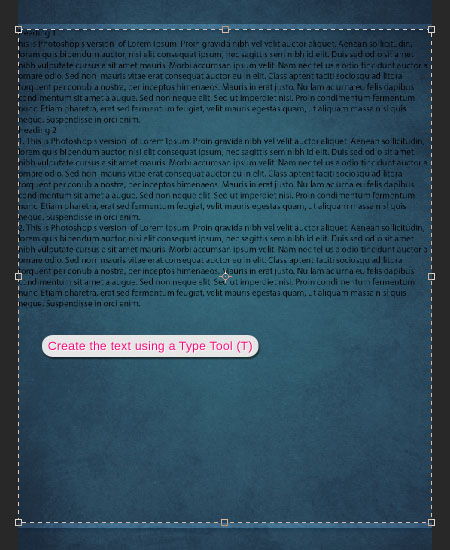
So pick a Type Tool (T) and create the text. You can as well insert some dummy text by going to Type -> Paste Lorem Ipsum, which is a new feature in Photoshop CS6.
Creating Paragraph Styles
Usually, it is better to start by creating paragraph styles, as they deal with most of the text in a document. After that, you can create character styles for selected text inside the formatted paragraphs.
So start by adding some basic formatting to the text you created.
Example:
– In the Character panel: A couple of values are changed, like the color, the font, and the font size.
– In theParagraph panel: Some spacing and indentation values are modified.
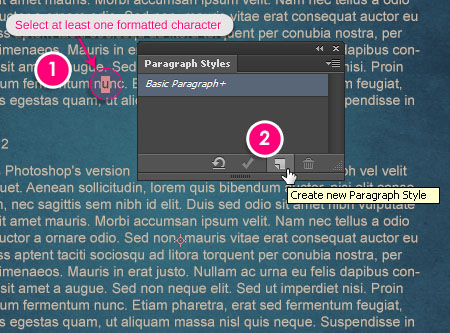
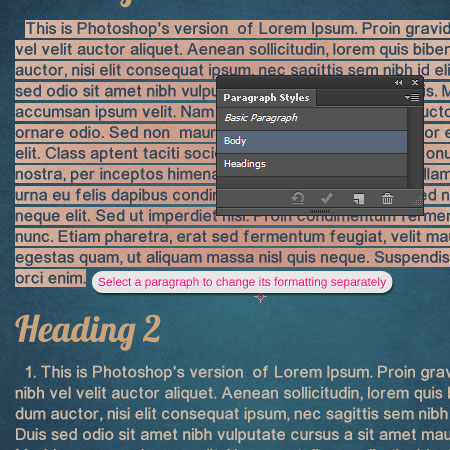
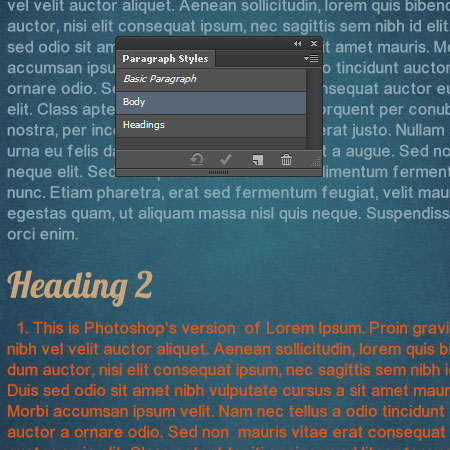
– Open the Paragraph Styles panel (Window -> Paragraph Styles OR Type -> Panels -> Paragraph Styles). You’ll notice that the panel already has a default style called “Basic Paragraph”. If you see a plus “+” sign next to it don’t worry about it, we’ll get back to it later on.
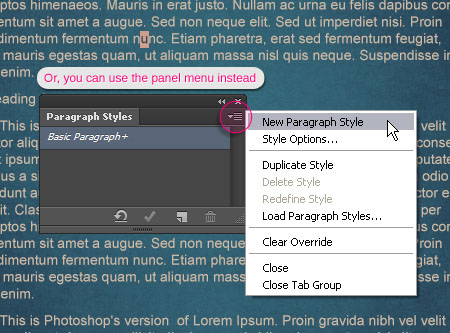
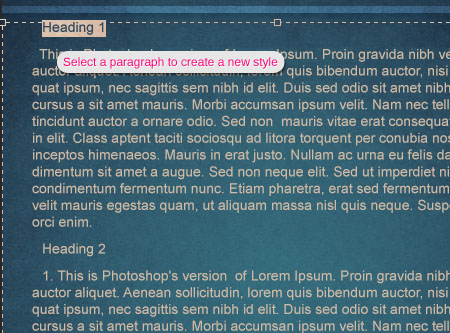
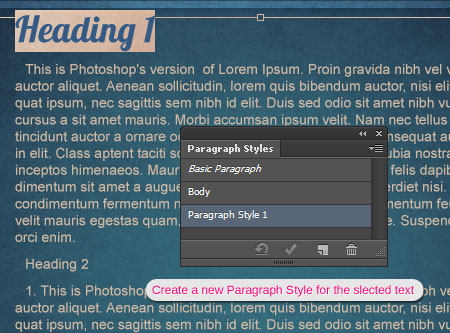
To create a new paragraph style based on the attributes assigned to the paragraph, you need to select at least one character first. Then, click the Create New Paragraph Style icon down the Paragraph Styles panel.
OR, click the panel menu arrow at the top right corner and choose New Paragraph Style. Just keep in mind that the panel menu has all the options you need.
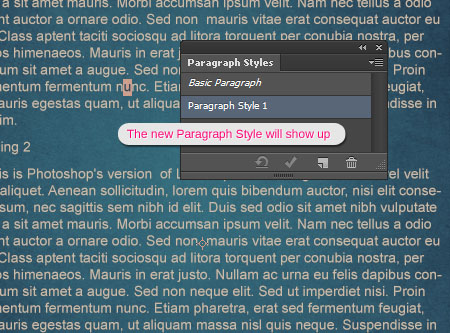
– You’ll notice that a new paragraph style called “Paragraph Style 1” shows up in the Paragraph Styles panel. That means you’ve just created a paragraph style.
Modifying Paragraph Styles
Now that you have the new paragraph style in the panel, you can view and modify its settings anytime you want to.
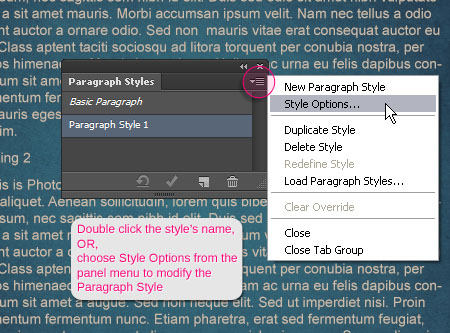
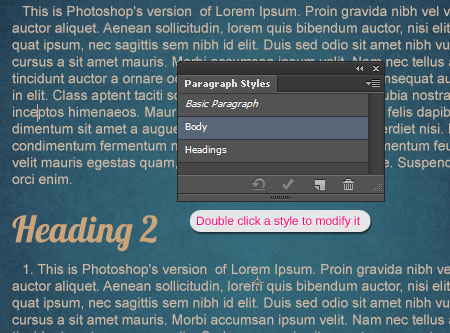
To modify a paragraph style you can either Double click its name in the Paragraph Styles panel, OR select it then choose Style Options from the panel menu.
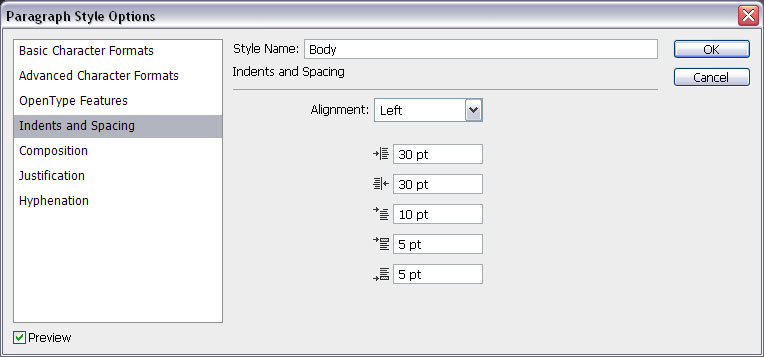
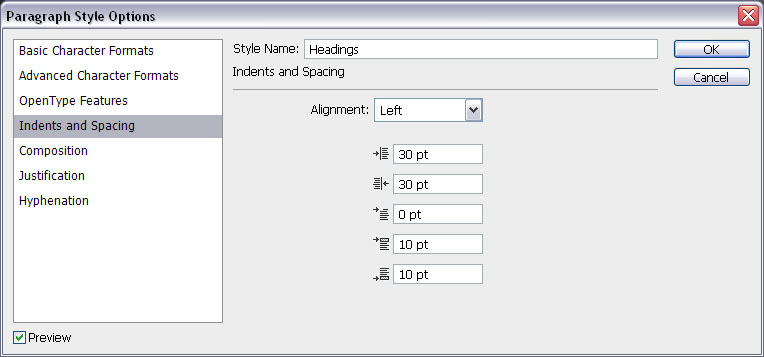
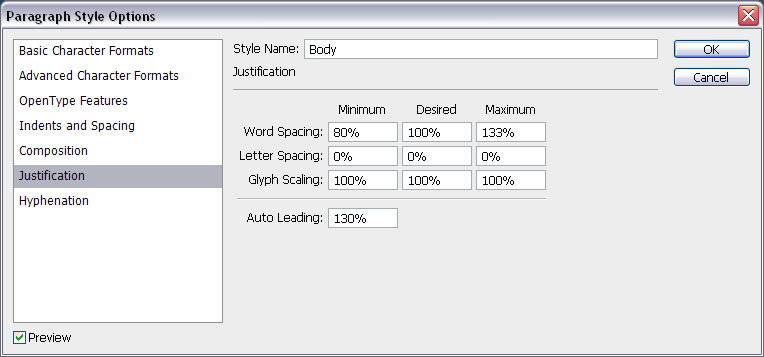
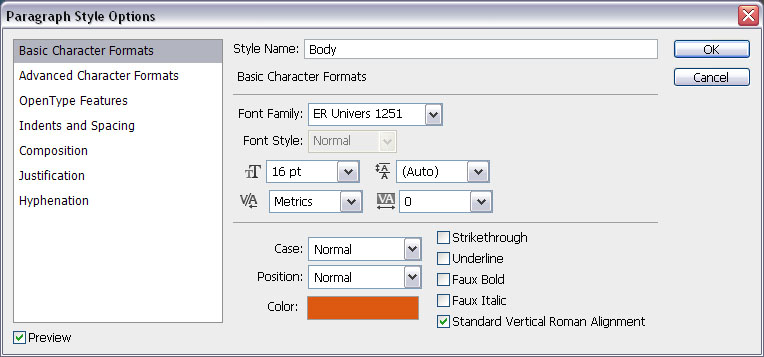
This will open the Paragraph Style Options dialog box, where you can change the different settings of the style.
You’ll notice that the first three tabs to the left control the character attributes, and the rest control the paragraph attributes.
The first thing you need to do is rename the style so that the name makes sense. This will make applying and modifying the styles much easier.
Here, the style is renamed to “Body”.
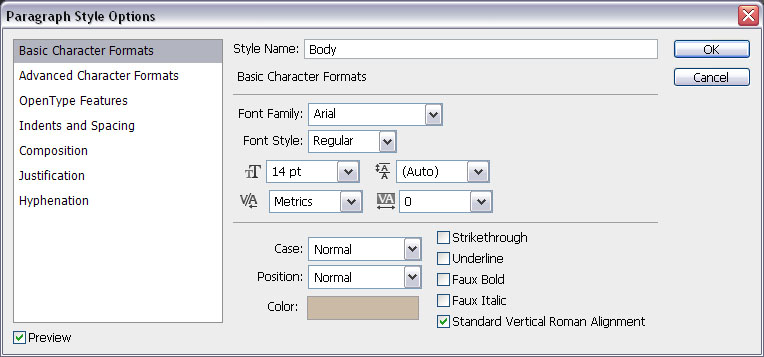
– Note: The values in the dialog box are the ones you assigned to the text before creating the style.
But if you create the paragraph style before you format the text, you’ll not have any values in this dialog box. Which enables you to create a clean paragraph style from scratch.
Modify whatever settings you need to change.
You don’t need to make all the changes at once, as you can always open this dialog box again to modify the formatting anytime you want to.
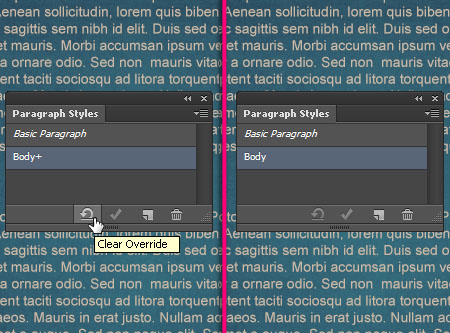
Once you’re done click OK. The changes will be stored in the style you created, and applied to the corresponding text or text layer.
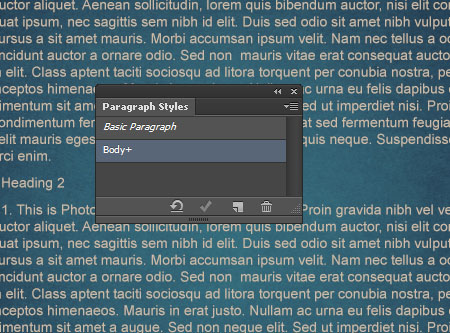
If you get the “+” sign, just click the Clear Override icon down the panel. We’ll get back to Overrides later.
Multiple Paragraph Styles
You can create as many paragraph styles as you want, and apply them do different paragraphs in your text.
To do so, use a Type Tool to select the paragraph you want to apply the new paragraph style to.
Example:
Creating a paragraph style for Headings.
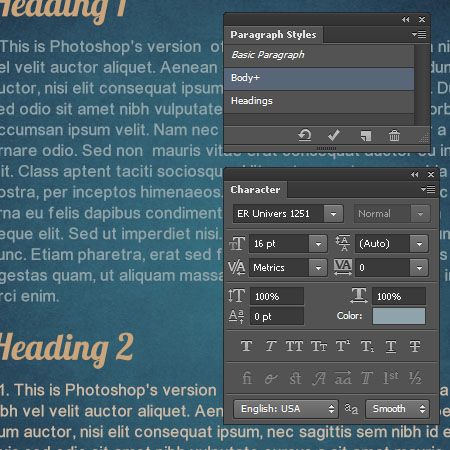
Format the selected paragraph as you like.
Here, the font, font size, and font color values are changed in the Character panel.
And some other values in the Paragraph panel are changed as well.
With the paragraph still selected, click the Create new Paragraph Style icon down the Paragraph Styles panel. A new style will show up in the panel.
Double click the new style to rename it and make any other changes. Here, it’s renamed to “Headings”.
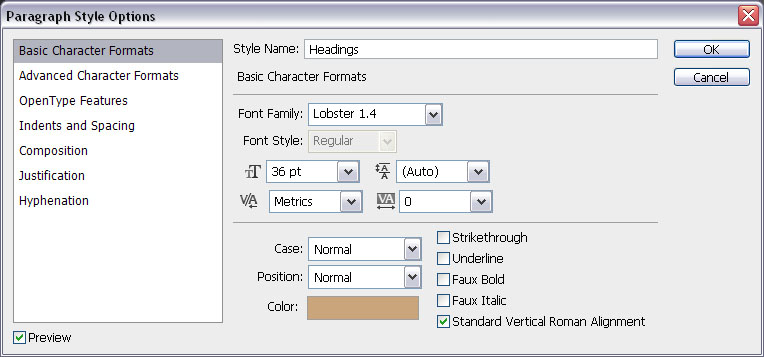
Notice that the values are the new ones you’ve just modified for the selected paragraph.
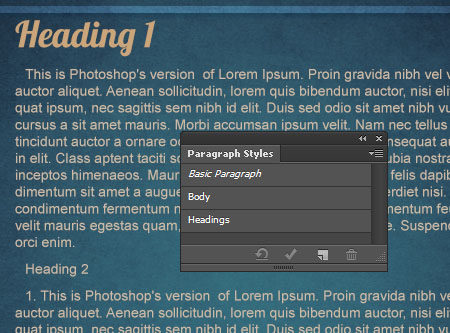
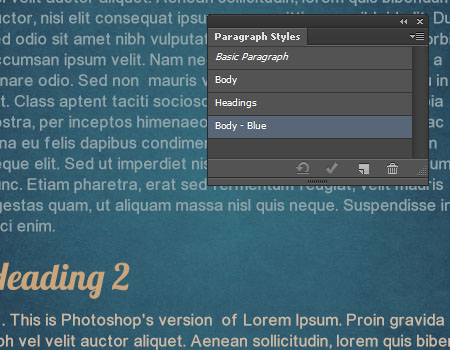
You’ll have two different paragraph styles in the Paragraph Styles panel, and each one is applied to a different paragraph inside the same text block.
Selecting Paragraph Styles
Now that you have more than one paragraph style, you need to be careful when you select the styles to apply them or modify their values.
You need to make sure not to click or double click the style’s name directly, because if a text layer is selected and you click or double click a paragraph style, it will be applied to the whole text.
To avoid this, you can either:
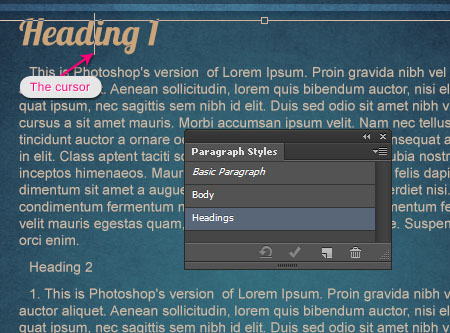
1- place the Type Tool cursor inside the text to which the style is applied, and the corresponding paragraph style will be automatically selected in the Paragraph Styles panel.
This is really useful when you are not sure what style is applied to the text as well.
So when the cursor is inside the ‘body’ text, the “Body” paragraph style will be automatically selected in the Paragraph Styles panel.

And if you place the cursor inside the Heading 1 paragraph, the “Headings” paragraph style will be selected.
Once the style is selected, you can go ahead and double click it to modify its settings.
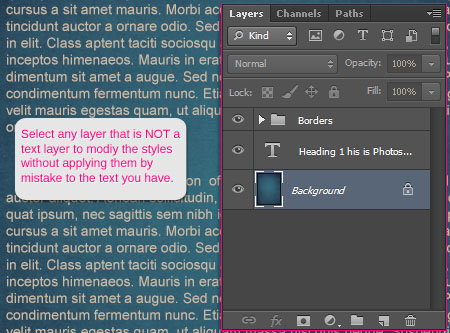
2- A better practice is to click off all text layers, by selecting any other layer (that is not a text layer), then double click the style you want to modify in the Paragraph Styles panel.
This will make sure that the changes will only affect that style, and won’t be applied to any other parts of the text by mistake.
Applying Paragraph Styles
If you want to apply a paragraph style to an unformatted paragraph you need to:
1- Select that paragraph, and make sure it is a paragraph, not a text inside a paragraph.
Example:
Applying the “Headings” paragraph style to the ‘Heading 2’ paragraph.

2- Click the style’s name to apply it to the selected paragraph.
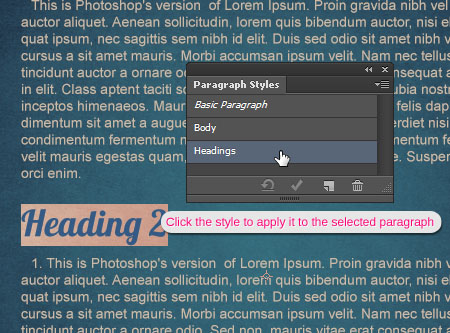
The style with all its settings will be applied with just one click.
Changing a Paragraph Style’s Settings
Whenever you want to modify a paragraph style, make sure to select it correctly first, as explained before.
1- Double click the selected paragraph style.
2- Change the values inside the Paragraph Style Options dialog box.
Example:
a- Changing the font and the font size for the “Body” paragraph style.

b- Changing the Auto Leading (space between the lines) value.
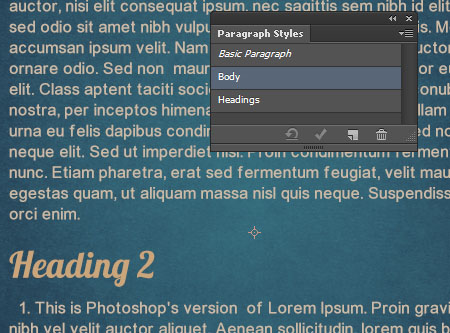
Once you click Ok, you’ll notice that the changes will be applied to all the paragraphs that have the “Body” style applied to them, and the other paragraphs will not be affected at all.
Overrides
If you modify any of the attributes outside the Paragraph Styles Options dialog box, or apply a paragraph style to a preformatted text, a plus “+” sign will appear next to the modified style’s name.
Example:
Changing the color of one of the “Body” style paragraphs to blue.
If the changes are made in the Character panel, a + sign will appear next to the “Body” paragraph style.
The + sign means that the text settings do not match the original style settings, or that there are Overrides.
There are three ways to deal with Overrides:
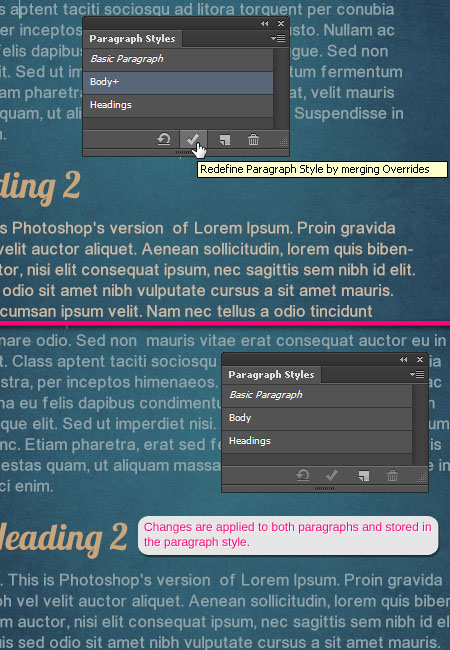
1- Redefining Styles by Merging Overrides:
If you want to add the changes to the current style, so that they replace that style’s settings, you can click the Redefine Paragraph Style by merging Overrides icon down the Paragraph Styles panel, or click the panel menu icon and choose Redefine Style.
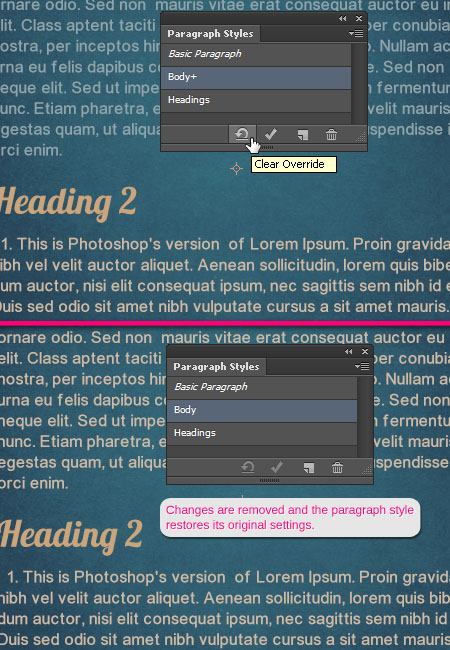
2- Deleting Overrides:
If you want to get rid of any overrides, and go back to the original style’s settings, select the style, then click the Clear Override icon down the Paragraph Styles panel, OR, click the panel menu icon, and choose Clear Override.
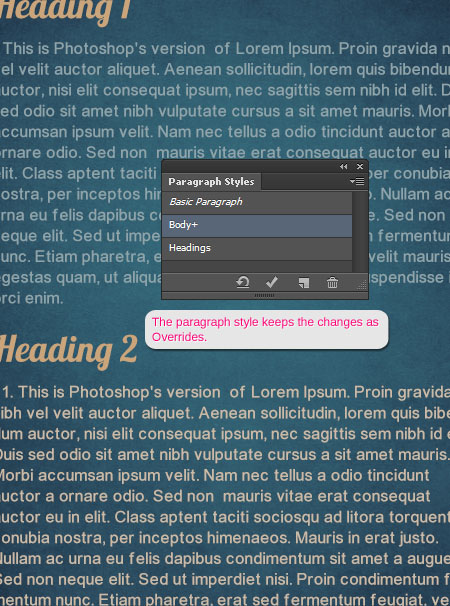
3- Keeping the Overrides
If you do not want to add the changes to the style nor delete them, you can just leave them as overrides, and the + sign will not be removed
Duplicating Paragraph Styles
If you need to change some attributes of a style then save it as a new one, you can duplicate that style instead of recreating it from scratch.
To do so, select the style’s name in the Paragraph Styles panel, then, from the panel menu choose Duplicate Style.
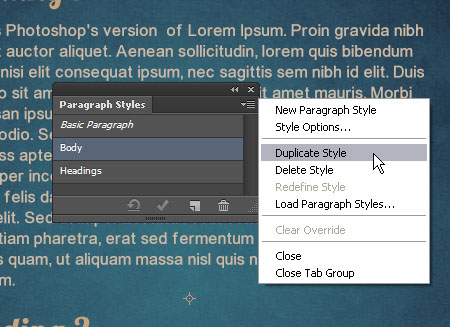
A copy will appear in the panel, so you can select it and change its Style Options as shown previously.
Example:
Changing the color of one of the “Body” style paragraphs to blue, then save the new settings in a separate style.
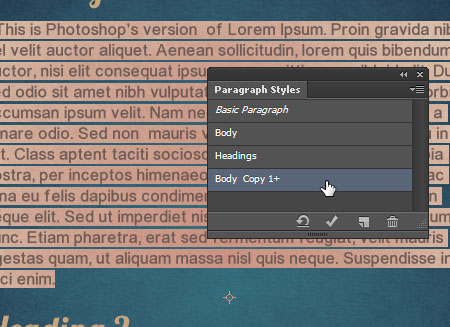
So after duplicating the “Body” paragraph style, selecting one paragraph, and changing its color to blue, double click the modified style to rename it.
You’ll notice that the color in the Paragraph Style Options dialog box is set to blue now.
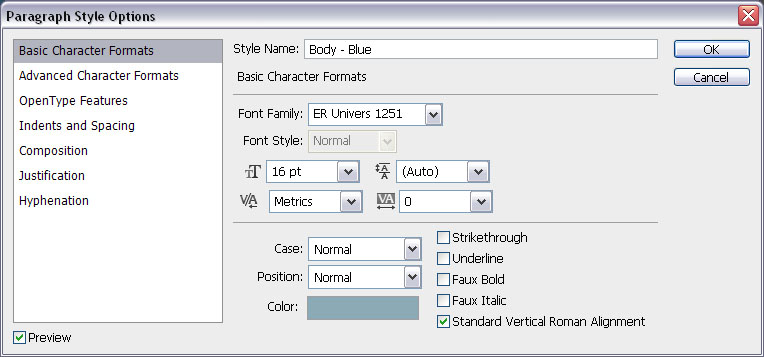
Now the duplicated paragraph style is a new separate one.
This comes in handy when you have a style with tons of different settings, and you need to modify only one of them to save it in a new style. Duplicating is the way to go!
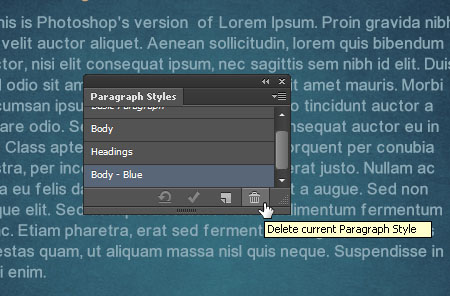
Deleting Paragraph Styles
If you want to get rid of a paragraph style, you need to select that style, then click the Delete current Paragraph Style icon down the Paragraph Styles panel, OR, choose Delete Style from the panel menu.
This will remove the style, but will keep its settings applied to whatever paragraphs the style was applied to.
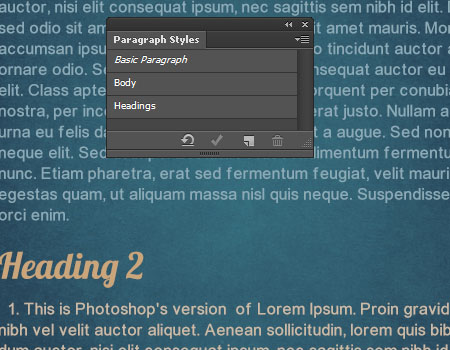
Those paragraphs will not be affected by the other paragraph styles as well.
For example, if we change the “Body” paragraph style color in the Paragraph Style Options dialog box…
The changes will affect only one paragraph, and the other one will stay as it is.
Those are pretty much the main points regarding Paragraph Style. As for the Character Styles, things are almost the same, except that you’ll be dealing with text inside the paragraph instead of the paragraph itself.
Creating Character Styles
First, you need to select the text you want to apply the character style to. Then, format that text if you like before creating the style (or you can go ahead and create a new character style then change the settings).
Example:
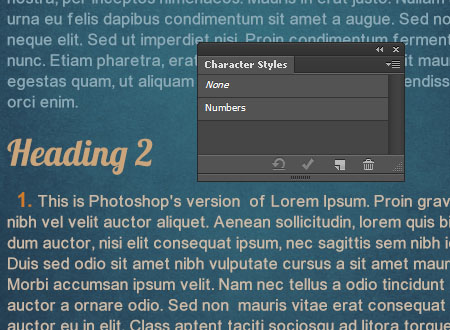
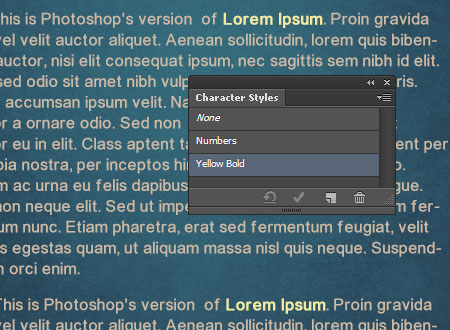
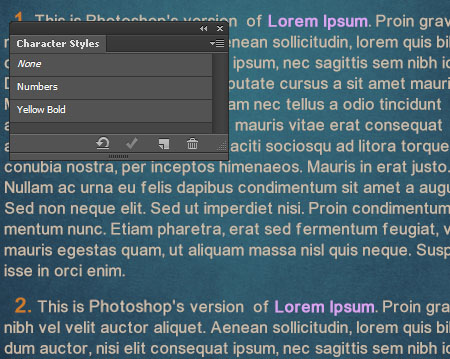
Creating a character style for the numbers. So the values changed in the Character panel are the color and the font size.
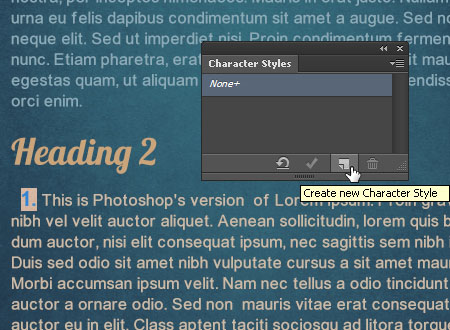
– Open the Character Styles panel (Window -> Character Styles, OR Type -> Panels -> Character Styles). You’ll notice that the default style is “None”.
– To create a new character style, click the Create new Character Style OR click the panel menu arrow at the top right corner and choose New Character Style.
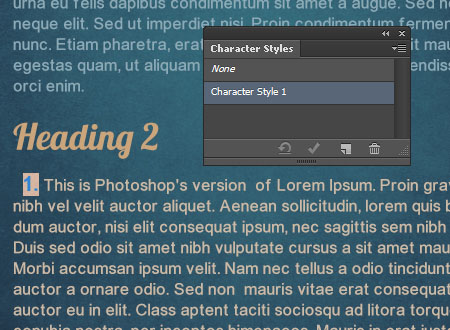
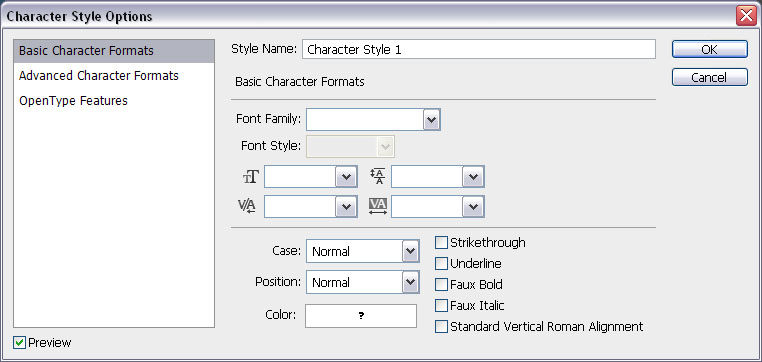
– A new character style called “Character Style 1” will show up in the Character Styles panel.
Modifying Character Styles
– To view and modify the new style’s settings, you can either Double click its name in the Character Styles panel, OR select it then choose Style Options from the panel menu.
This will open the Character Style Options dialog box.
You’ll find three tabs to the left, and those tabs control the character attributes only. There are no tabs to control the paragraph attributes at all.
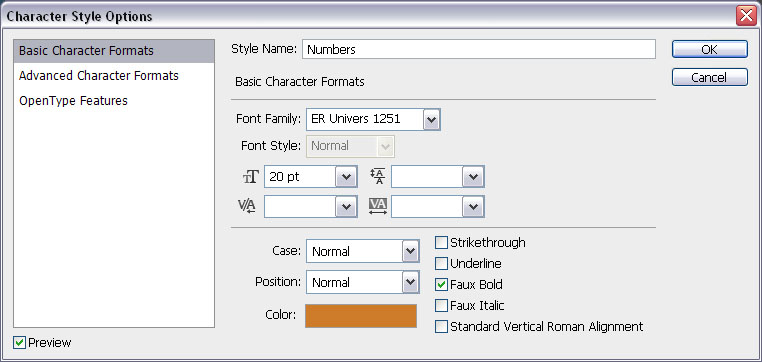
Don’t forget to rename the style. Here, the style is renamed to “Numbers”.
Applying Character Styles
If you want to apply a character style to an unformatted text you need to:
1- Select that text using a Type Tool.
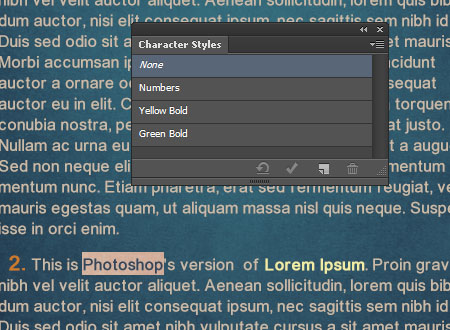
Example:
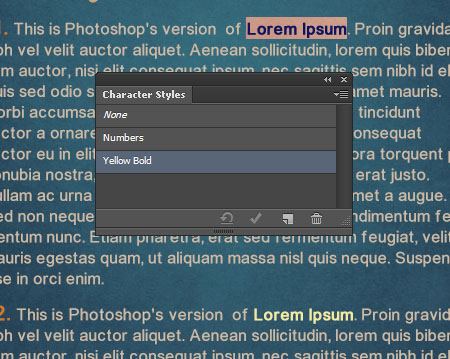
Applying the “Numbers” character style to number ‘2’.

2- Click the style’s name to apply it to the selected text.
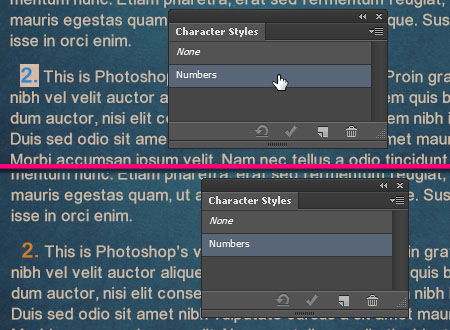
The style with all its settings will be applied with just one click.
Multiple Character Styles
Just like the paragraph styles, you can create as many character styles as you need. Just remember to select the text each time to avoid applying the style to the whole block of text.
Example:
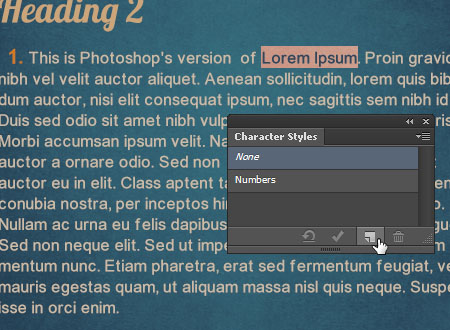
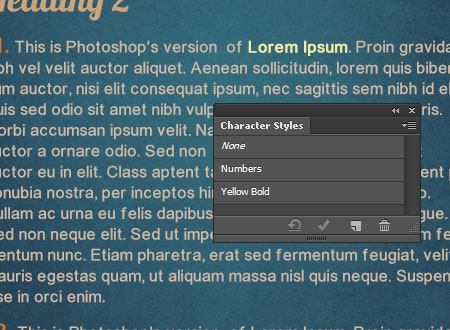
Creating a character style for the words ‘Lorem Ipsum’.
1- Select the text.
This time, we are not going to format the text. Instead, we will create a new character style first.
2- With the text still selected, double click the new style’s name.
This will open the Character Style Options dialog box.
As you can tell, there are no values assigned. That’s because we did not add any formatting to the text before creating the style.
– Rename the style, and change the settings as you like.
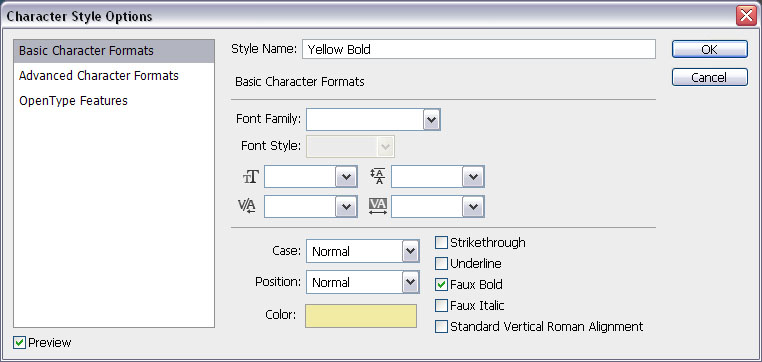
– When you click Ok, the new settings will be applied to the selected text.
Once again, you can select any other text, then click the style’s name to apply it to that text as well.
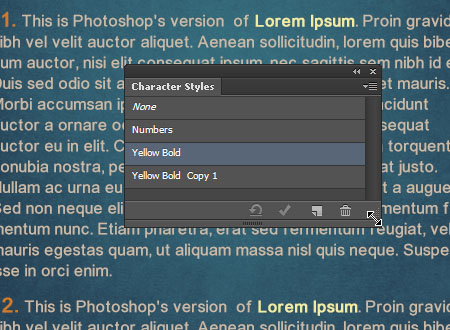
Overrides
Just like the paragraph styles, character styles will have a plus “+” sign next to them if they are modified outside the Character Styles Options dialog box, or if they’re applied to a preformatted text.
Example:
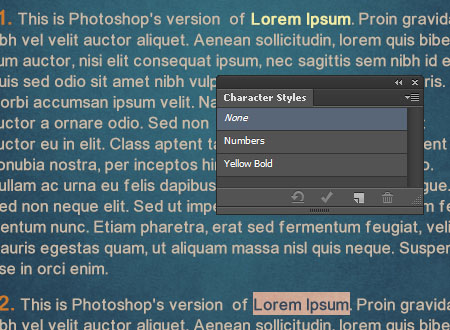
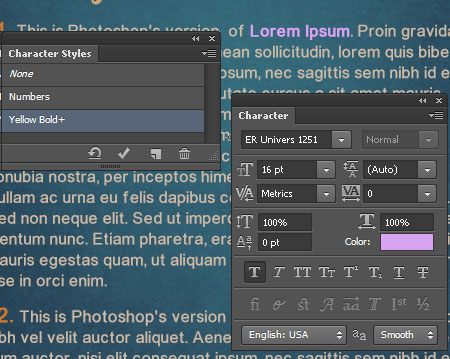
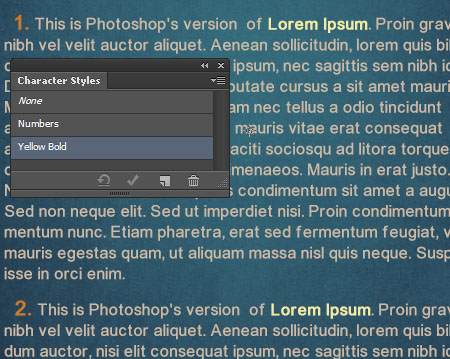
Changing the color of one of the “Yellow Bold” style ‘Lorem Ipsum’ text to blue.
So select the text first.
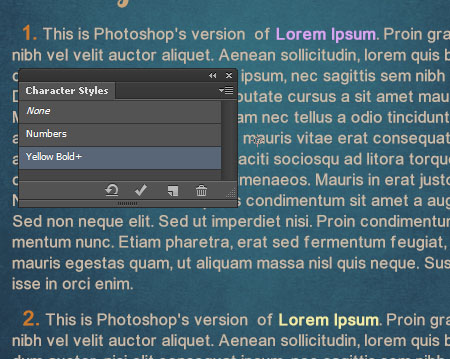
Then change its color, or any other attributes in the Character panel, and you’ll get the + sign next to the “Yellow Bold” style’s name in the Character Styles panel.
The three ways to deal with Overrides are:
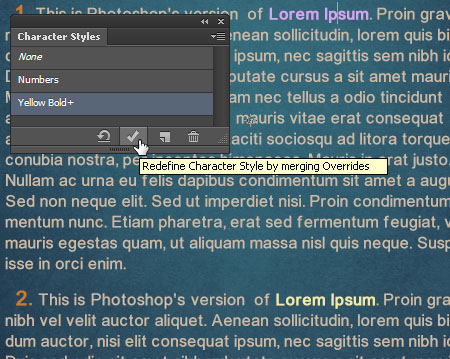
1- Redefining Styles by Merging Overrides:
To add the changes to the current style, click the Redefine Character Style by merging Overrides icon down the Character Styles panel, or click the panel menu icon and choose Redefine Style.
2- Deleting Overrides:
To get rid of any overrides, select the style, then click the Clear Override icon down the Character Styles panel, OR, click the panel menu icon, and choose Clear Override.

3- Keeping the Overrides
To keep the changes without adding them to the style, leave them as overrides.
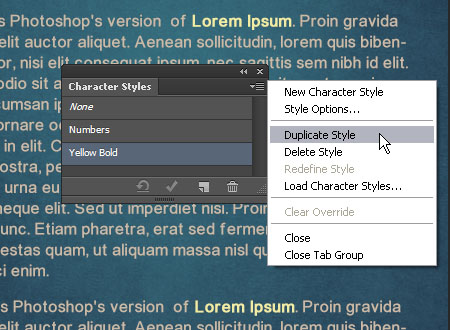
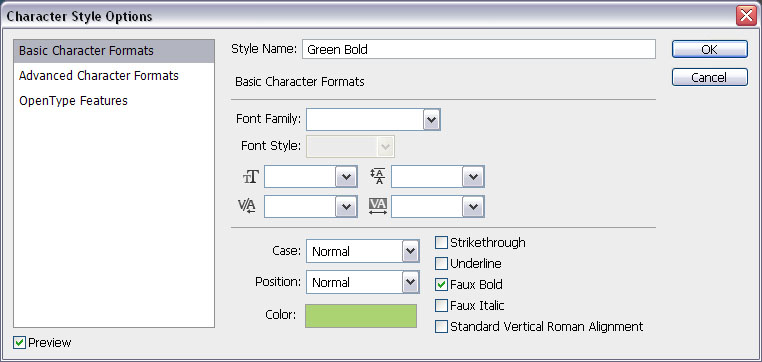
Duplicating Character Styles
– To duplicate a character style, select the style’s name in the Character Styles panel, then, from the panel menu choose Duplicate Style.
– Double click the copy to modify its settings.
– In the Character Style Options dialog box, modify the settings you want to change.
Example:
To create a “Green Bold” character style, by changing the color to green, and renaming the style.
– The duplicated character style will become a new separate one.
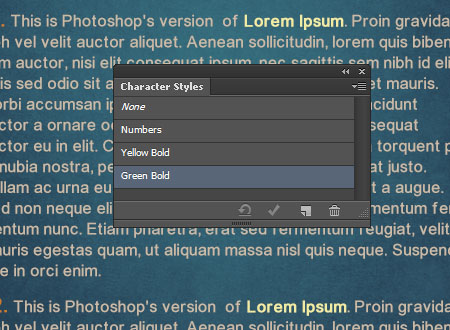
– All you need to do is select some text.
– Then click the new style’s name to apply it to the selected text.

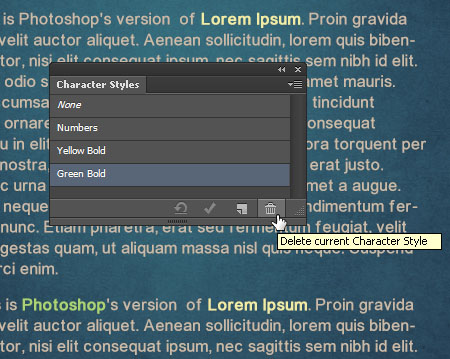
Deleting Character Styles
To get rid of a character style, select it first, then click the Delete current Character Style icon down the Character Styles panel, OR, choose Delete Style from the panel menu.
This will remove the style, but will keep its settings applied to whatever text the style was applied to.
But you can select that text and apply an existing character style to it of course.
Conclusion
Hopefully this gave you an idea of how Type Styles work, and how you can use them to enhance your workflow.
Once again, what’s great about this feature is that instead of applying and modifying the styles to one block of text at a time, you can now do that one time to all the text blocks that share the same style. Pretty amazing, right?
Just make sure to select the right type style, by selecting the text or placing the cursor insides it, or by clicking any layer that is not a text layer. It is so important to always keep this in mind when working with Type Styles.
Will be glad to know what you think of this feature, and if you have any other cool tips and ideas on how to use it as well.
Did you enjoy this post? Please consider donating to help us cover our server costs.


Thanks for this.
Have you / anyone found a way to export/import style across files. Can see an option to load styles but nothing obvious to save out. Possibly because it’s still in beta version.
Cheers
The styles are saved within the PSD file. So if you click the Load Styles option, you can choose the PSD file that has the styles you want to use, and they will appear in the styles panel.
But I don’t think there is a way to save the styles separately like brushes, patterns, or even layer styles. It’ll be good if this feature comes with the extended version though!
Thanks for the comment.
Is there any way to assign quick keys to the styles?
Yes it is. You can make an action out of everything you want in Photoshop and can assign shortcut for that action afterward.
Awesome tutorial =D
Thank you so much ^^
You’re welcome 🙂
Thanks for the comment.
Undoubtedly, an awesome feature. I have a few queries are as follow:
Does this work like InDesign styles like Book?
How can we maintain consistency if we are working 15 psd files based on the same stylesheet?
If there are changes in the style will this affect all the 15 psd files?
Anyone help me.
An awesome feature indeed!
As for the queries, the feature does work in a similar way as in InDesign.
If by “maintaining consistency” you mean using the same Styles for the 15 PSD files, this can be done by loading the Styles after saving the main PSD file as mentioned in the reply to the comment above. But I don’t think that applying changes through the same Style to all 15 PSD files is possible though. You’ll need to reload the modified Style to all of those files as the changes are applied within the same document only.
Hope this helps.
Regards.
Is there way to find any unstyled or modified styles? I remember I could do that in InDesign by pressing CTRL+F.
Sometimes I may accidentally change some style, or forgot to make one. I don’t want to manually select all text one by one and look if there is + sign in panel.
Interesting question! I don’t think there’s a similar thing in Photoshop though, but I might be wrong.
If you find a way please feel free to share it with us 🙂
Regards.
I found these styles very useful, Adobe PS CS6 have great type styles, and you have also provided the nice way to use this important tool, which is used in web designing.
They sure are! Glad you found the article helpful.
Thanks a lot for the comment 🙂
Thanks for the article, it was very helpfull to me.
Very glad to know it was.
Thanks a lot for leaving a comment.
Hey Textuts,
I just stumbled across this and ive looked almost everywhere for tutorials on painting water but i havent been able to find the kind of style im looking for. ive also tried deviantart, but still, im coming up with nothing. The type of style im aiming for is somewhere in between CG and oil painting.
Catch you again soon!
Did you check the
Smudged Watercolor Text Effect? It might be a bit helpful.
Please feel free to post some photo samples of the effect you’re looking for.
Thanks for the comment.
Could not get better and ask for more than this – well elaborated tutorial for those working on CS6, and easy to catch following the steps! Thanks a lot Textuts!
This means a lot!
Glad you found it helpful.
Thank you very much for the kind words.
Good work.Thanks for your sharing its really help me.
Glad to know that you found it useful.
Thanks a lot for the comment.
Very Useful 🙂
Glad you found it so.
Thanks for the comment 🙂
Sorry, meant to start a new reply.
Is there any way to assign quick keys to each style?
I don’t think so.
Shortcuts can be assigned to Photoshop’s built-in functions and commands. So I’m not sure user defined styles can have shortcut keys.
Excellent article, You have thoroughly explained text formatting, I have not expected this much text formatting available in photoshop.
Very glad you liked the article and found it helpful. The Type Styles are definitely a great feature in CS6.
Thank you very much for the comment.
does anyone know how to change the order of the character style sheet? Please help!
Do you mean the order of the styles you add inside the panel? I don’t believe there’s a way to change their order, since that depends on the order of creating the styles themselves.
If this is not what you meant, please feel free to add more details in a reply.
that kind of make it less useful. cause we use a lot of styles. any other way to change order like third party scrips etc??
Gary, did you found a solution for that problem?
Quite detailed tut i ever seen before. I am glad that i found it here..
Online Logo Design Company
Glad you found it helpful!
Thanks for the comment 🙂
insanely detailed post! Great job!
Thank you very much! 🙂