
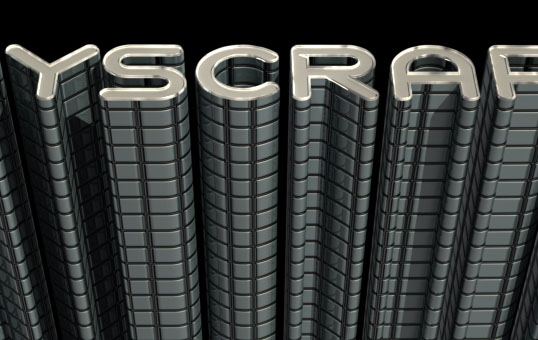
3D Skyscraper Text Effect – Updated for Photoshop CS6
A while ago, a 3D Skyscraper inspired text effect tutorial was published, and it was created using Photoshop CS5.
Recently, many requests were received asking for an unpdated version using the CS6 3D Tools.
And since nothing is different except for the 3D part of the tutorial, you can still follow the other steps of the original tutorial (Part 1 and Part 2), then check the steps below to create the 3D part in CS6.
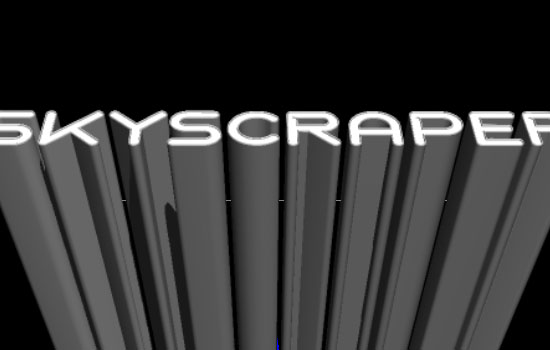
The Final Result:

Step 1
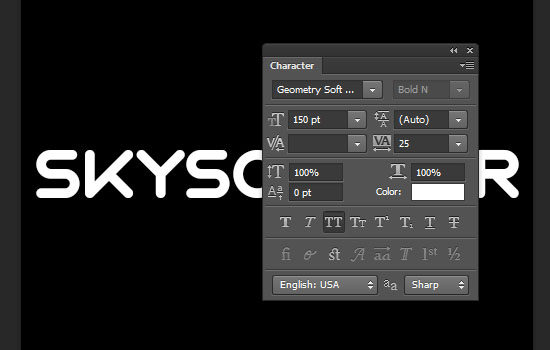
– Start by creating the text in All Caps. The font used is Geometry Soft Pro, the size is 150 pt, the color is White, and the Tracking value is 25.
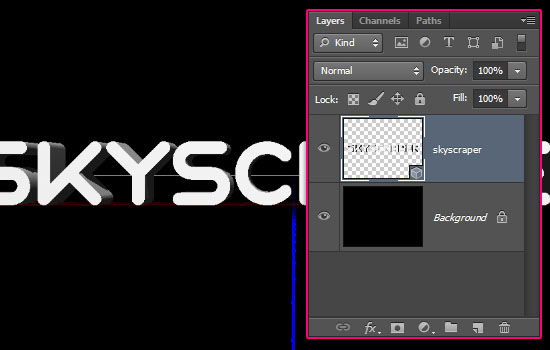
– Go to 3D -> New 3D Extrusion from Selected Layer. This will convert the text layer into a 3D layer.
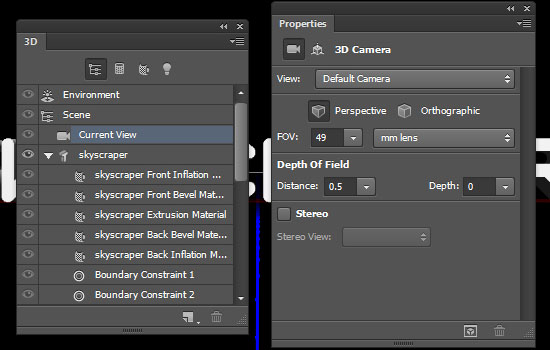
– To access the 3D mesh settings and properties, you’ll need to open two panels: The 3D panel, and the Properties panel (both found under the Window menu).
The 3D panel has all the components of the 3D scene, and when you click the name of any of those, you’ll be able to access its settings in the Properties panel. So make sure to always select the name of the element you want to modify in the 3D panel before you change its settings in the Properties panel.
Step 2
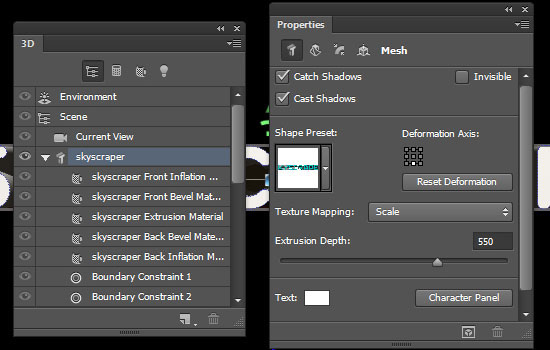
– Click the text 3D mesh name in the 3D panel, then, in the Properties panel, change the Deformation Axis to bottom, the Texture Mapping to Scale, and the Extrusion Depth to 550.
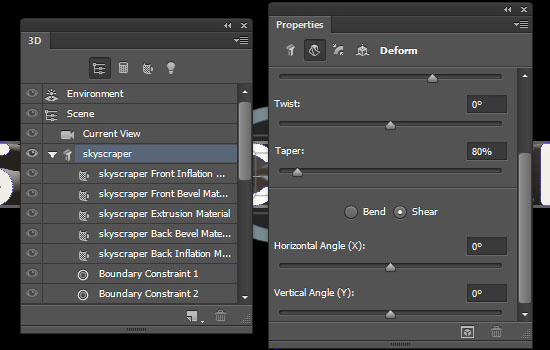
– Click the Deform icon at the top of the Properties panel, then change the Taper to 80% and click the Shear radio button.
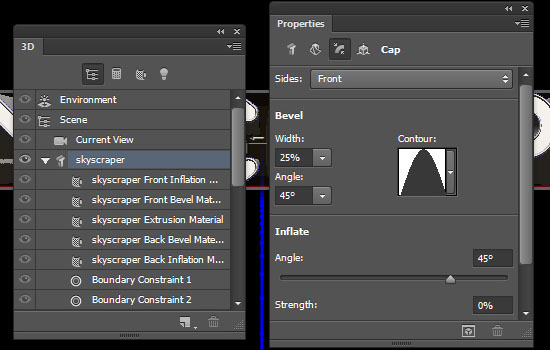
– Click the Cap icon (also at the top of the Properties panel), change the Bevel Width to 25%, and the Contour to Cone. You can increase the Bevel Width if you want the top edges to be more raised.
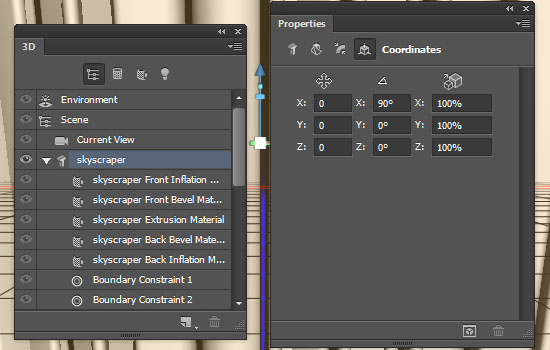
– Click the Coordinates icon, and change the X Rotation Angle to 90. This will rotate the mesh 90° vertically.
Once you do that, go to 3D -> Snap Object to Ground Plane to make sure that the mesh isn’t floating above or below the Ground Plane.
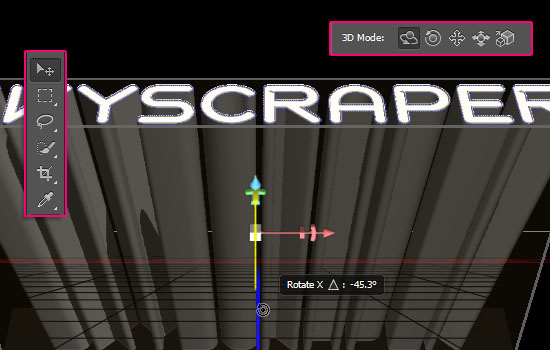
– Pick the Move Tool and check its Options bar. You’ll find a set of 3D Modes for the tool to the right of the bar. When you choose one of those, you can then click and drag to perform any changes (on the selected element in the 3D panel).
You can also click the mesh in the 3D scene (or select its name in the 3D panel), and use the 3D axis to move it around.
The arrows at the ends of the axis move the mesh, the part below them is used for rotation, and the cubes are used for scaling. The cube in the center is used to scale the object uniformly. All you need to do is click and drag the wanted part.
So use the 3D Axis to place the mesh at the bottom of the document, then rotate it slightly forwards.
– You can also click the Current View tab in the 3D panel, then click and drag in an empty area to change the camera view as well (using one of the 3D Modes).
It is important to keep the 3D mesh snapped to the Ground Plane, and change the Camera view to move the scene up and down instead of moving the mesh itself.
Step 3
– Next, we’ll apply the materials. This might be a tiny bit different from the CS5 version, since some settings do not exist in both Photoshop versions. But the final outcome is almost the same.
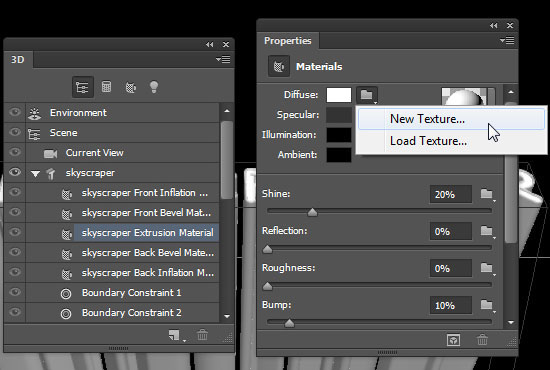
Start by selecting the Extrusion Material in the 3D panel, then click the Diffuse folder icon and choose New Texture.
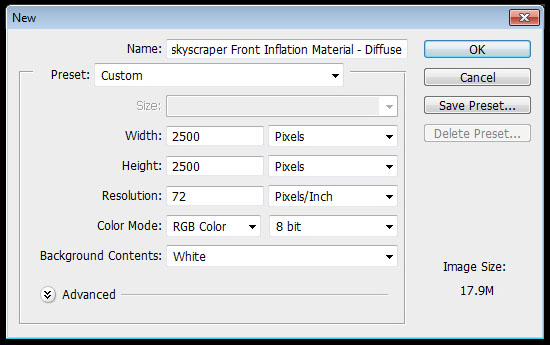
– For this tutorial, the dimensions will be 2500 x 2500. This will enable a better tiling of the texture.
– Click the Diffuse Texture icon and choose Edit Texture.

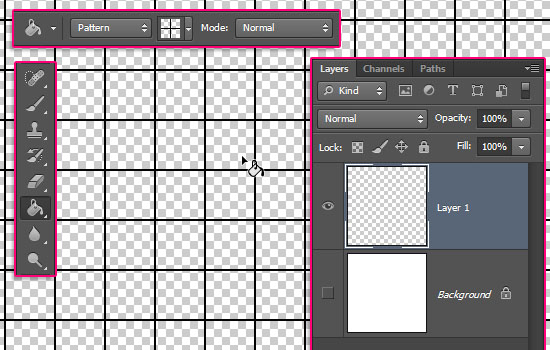
– This will open the texture file. Make the Background layer invisible by clicking the eye icon next to it, then create a new layer on top of it.
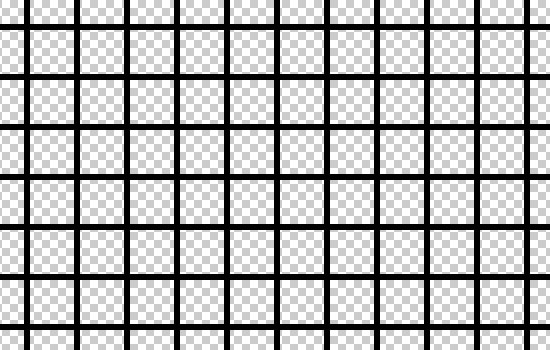
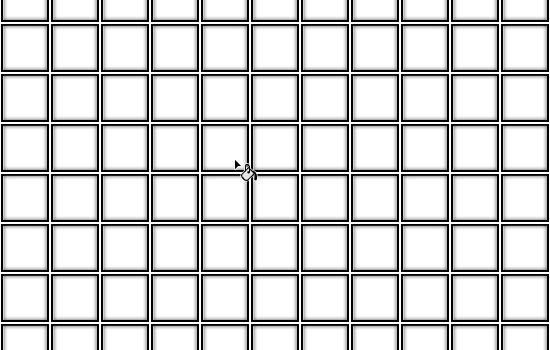
Pick the Paint Bucket Tool, choose the Pattern Fill in the Options bar, choose the “Diffuse” pattern and fill the layer with it.
– Double click the layer to apply a Stroke effect by changing the Size to 2.
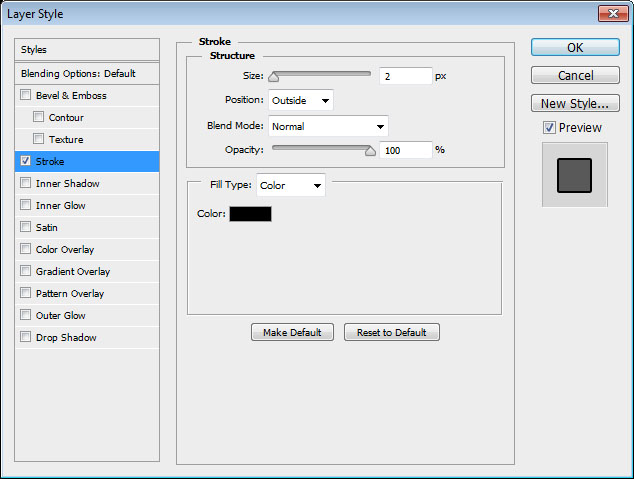
– This will thicken the lines a bit. Save the document (File -> Save), then close it (File -> Close) to go back to the original document.
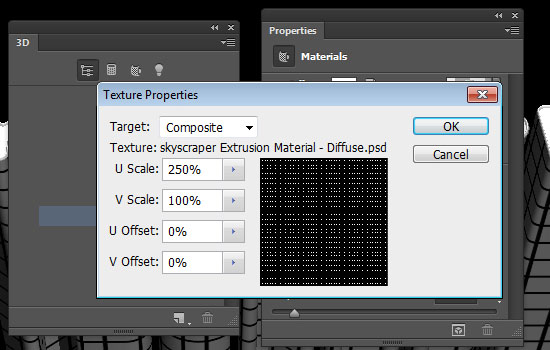
– Click the Diffuse texture icon, then choose Edit UV Properties.
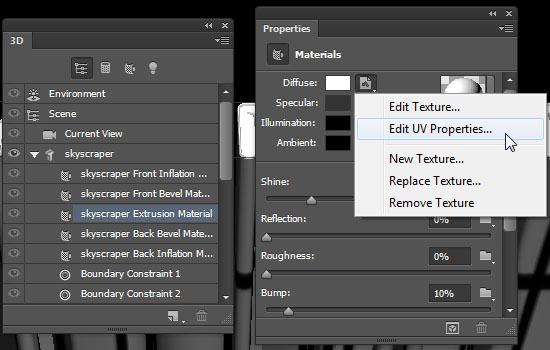
– Change the U Scale to 250% (this will repeat the texture vertically), the V Scale to 100%, and both the U Offset and V Offset values to 0.
Step 4
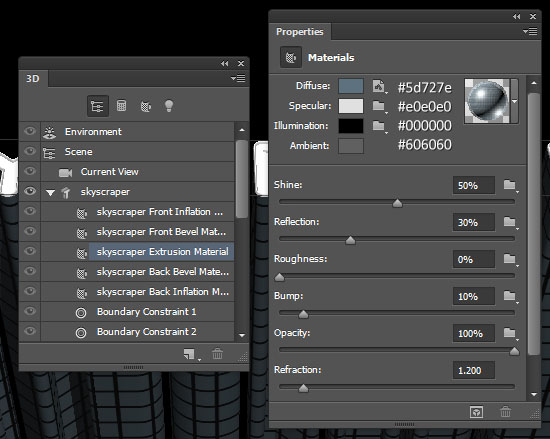
– Change the other Extrusion Material values as below. The Diffuse color is #5d727e, the Specular is #e0e0e0, the Illumination is #000000, and the Ambient is #606060.
– Click the Bump folder icon, choose New Texture, set its Width and Height values to 2500, then click the Bump texture icon and choose Edit Texture.
Fill the document with the “Bump” texture, then save the file and close it to go back to the original one.
– Click the Bump texture icon once more, choose Edit UV Properties, and use the exact values used for the Diffuse texture.

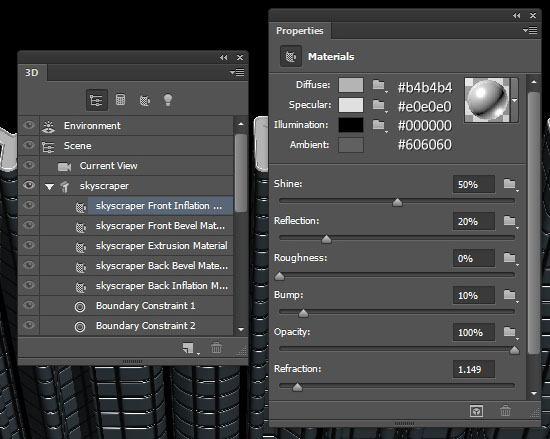
– Click the Front Inflation Material tab in the 3D panel and modify its settings as below.
The Diffuse color is #b4b4b4, the Specular is #e0e0e0, the Illumination is #000000, and the Ambient is #606060.
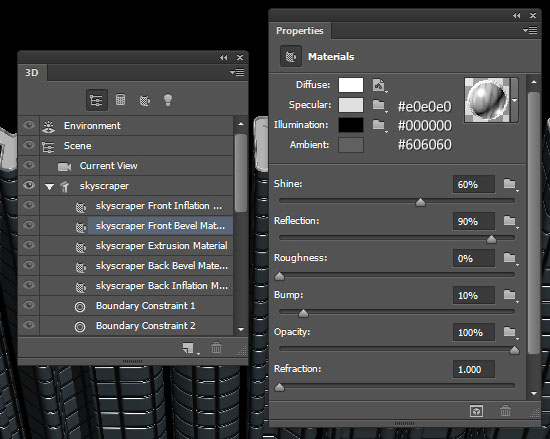
– Finally, click the Front Bevel Material, and create its texture as illustrated in the original tutorial.
Then, modify the rest of the values as below.
The Specular color is #e0e0e0, the Illumination is #000000, and the Ambient is #606060.
Step 5
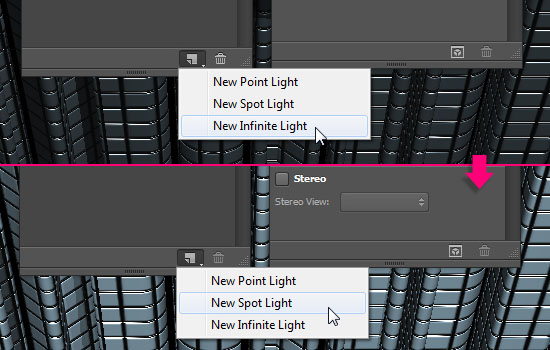
– Click the ‘Add new Light to Scene’ icon down the 3D panel, and add two lights: and Infinite Light, and a Spot Light.
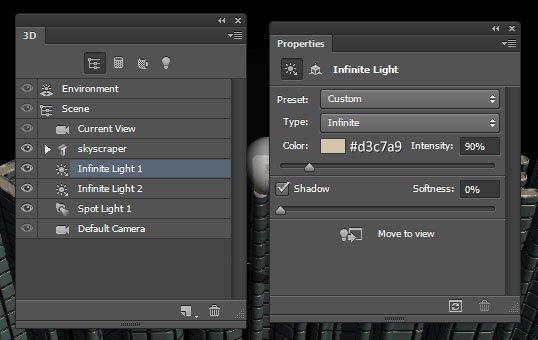
– Click the Infinite Light 1 tab, then change the light Color to #d3c7a9.
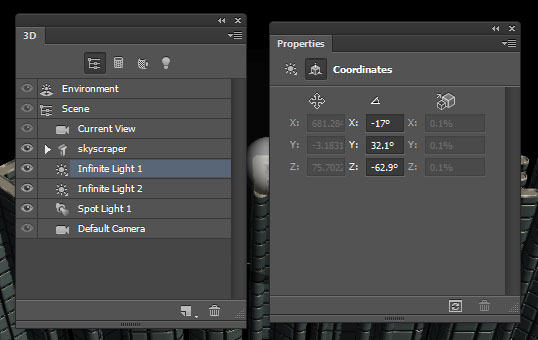
– Click the Coordinates icon at the top of the Properties panel and use the values below.
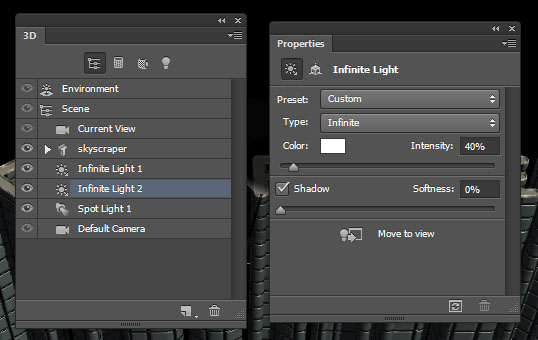
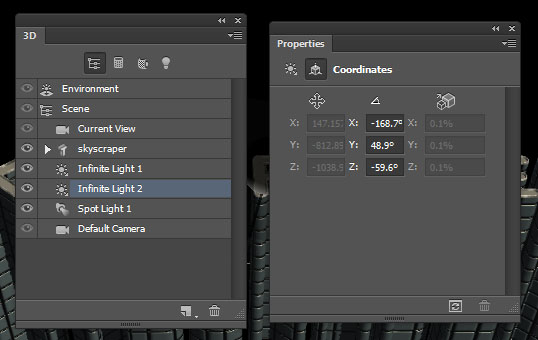
– Click the Infinite Light 2 tab, and change its Intensity to 40%.
– Then modify its Coordinates.
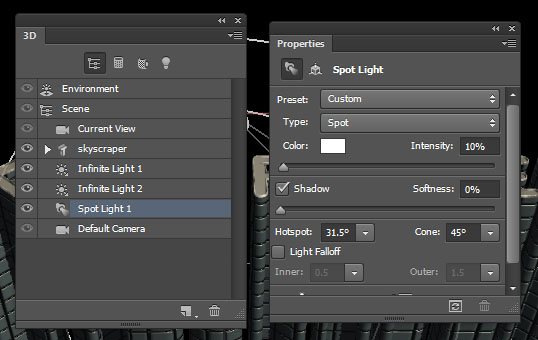
– Click the Spot Light 1 tab, and change it Intensity to 10%.
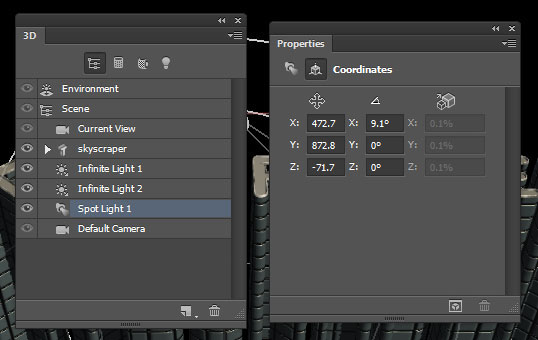
– And change the Coordinates values to match the ones below.
You can play around with the values if you like to change the lighting.
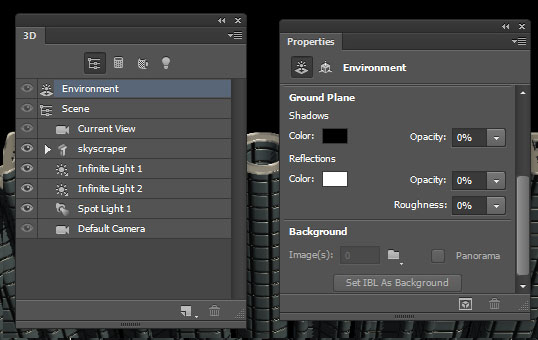
– Finally, click the Environment tab, and change the Shadows Opacity (under Ground Plane) to 0%. This will make sure that no shadows are rendered (since they’re not supposed to appear in the final result).
Step 6
– Finish modifying everything, then go to 3D -> Render. This will render the final scene.
The rendering might take a while, but you can stop it anytime by clicking anywhere inside the document.
– When the rendering is done, you can follow the steps in Part 2 to finish up the rest of the effect.
And that’s it for the CS6 3D version of this tutorial.
Thank you for sending in your requests for this update.
Please feel free to leave any questions you have in the comments section below. And if you have any other requests, don’t hesitate to send us and email through our Contact Form.
Did you enjoy this post? Please consider donating to help us cover our server costs.


Thank you – I tried this myself a few weeks back and was a little disappointed with the result – however, following this tutorial I’ve learnt where I went wrong and it now looks great… 🙂
That’s awesome to know! Really glad you found this helpful.
Thanks a lot for the comment 🙂
no words to tel just its great work thank you for tutorial
Oh wow! thank you very much for the absolutely kind words. They mean a lot 🙂
When rendering, what quality settings would you recommend? On mid settings it takes around 30-40 mins, i’ve got Photoshop CC.
Well that depends on how clean you want the final result to be. The default settings usually work fine, but you can always check out more settings by going to Edit > Preferences > 3D, and Edit > Preferences > Performance.
Some of the settings I tend to change are the Shadow Quality, which I set to High or Very High, and the Render Tile Size to Extra Large or Huge for big files.
That might increase the rendering time quite a lot, but as I mentioned, will give cleaner final result.
Hope this helps 🙂
When I am trying to create new pattern in diffuse – I do not have the option in my patterns to use the diffuse pattern… what am i doing wrong?
step 3 – i dont have the option of diffuse pattern when i try to use the paint bucket, what am I doing wrong?
Did you define the pattern and chose the Pattern option in the options bar?
Please make sure to check Part 1 of this tutorial for more details on how to create and define the pattern.
Hope this helps.