
Elegant Glossy Gold Text Effect
This tutorial will show you an easy way to create a luxurious super glossy golden text effect using Layer Styles, a Filter, and a simple brush.
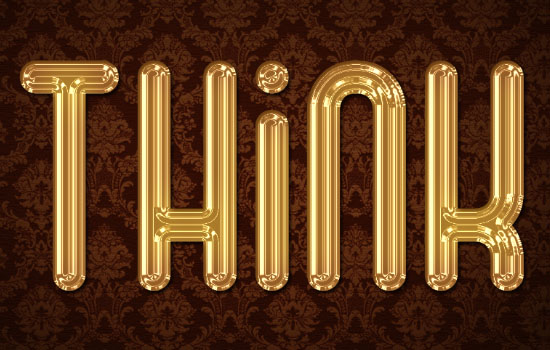
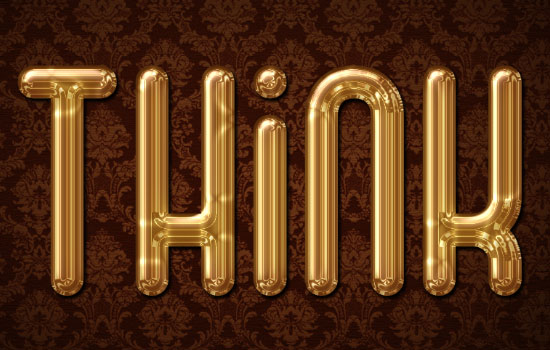
The Final Result

Tutorial Details
- Software Used : Photoshop
- Version : CS6 Extended
- Time : 0:30 – 0:45
Resources
- False Positive BRK font.
- Rice paper pattern by Atle Mo..
- Damask Texture by mangion.
- ETHON font.
Step 1
Create a new 1000 x 800 px document. Duplicate the Background layer then fill it with the color #452c16.
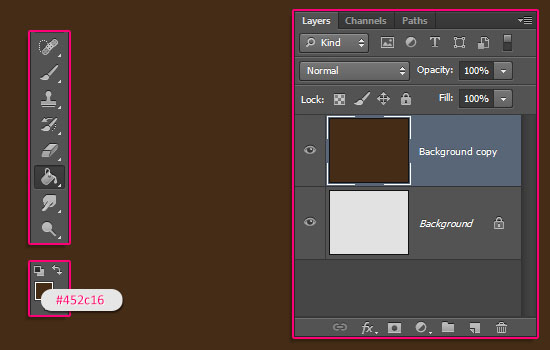
Double click the Background copy layer to apply a Pattern Overlay effect:
– Pattern Overlay
- Blend Mode : Multiply
- Pattern : Rice paper
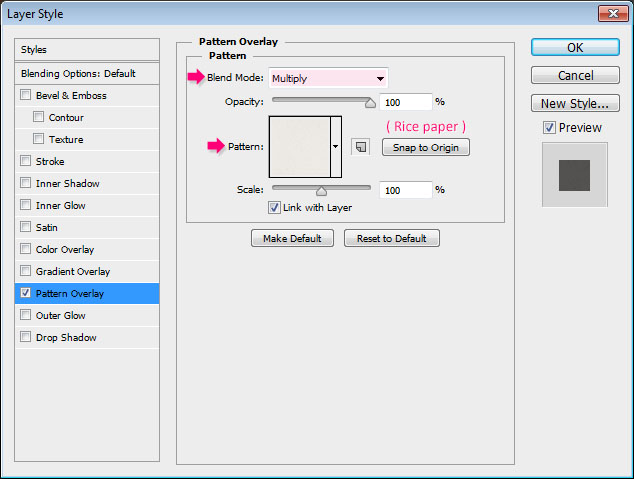
This will add a subtle texture to the background.

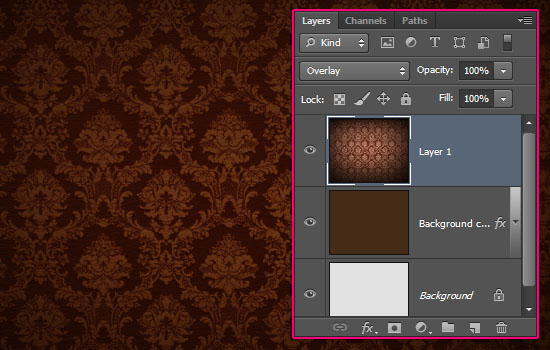
Place the Damask Texture image on top of the Background layer, resize it as needed, then change its layer’s Blend Mode to Overlay.
Step 2
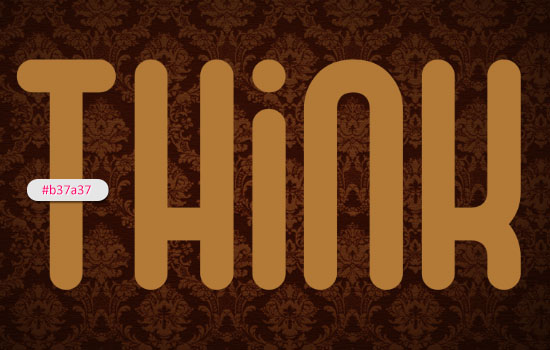
Create the text using the font False Positive BRK, the color #b37a37 and the Size 430 pt.
Duplicate the text layer then change the copy’s Fill value to 0.
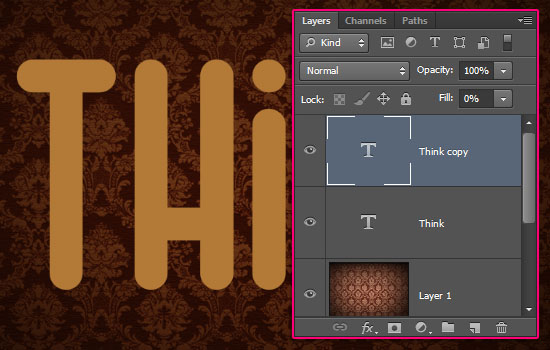
Step 3
Double click the original text layer to apply the following Layer Style:
– Bevel and Emboss
- Technique : Chisel Soft
- Size : 21
- Gloss Contour : Ring – Double
- Check the Anti-aliased box
- Highlight Mode : Linear Dodge (Add)
- Shadow Mode – Color :
#c7b299

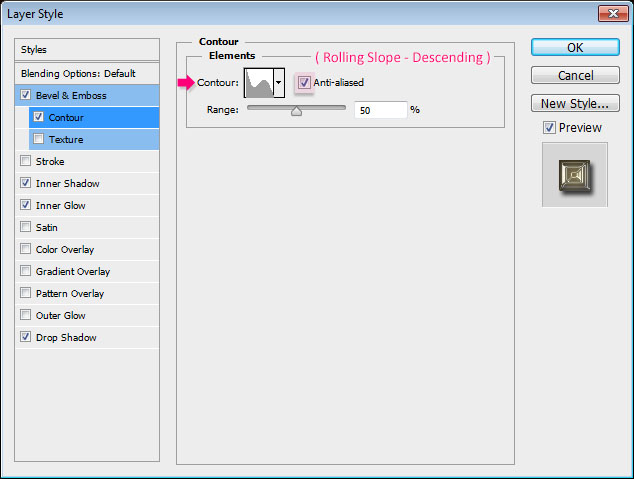
– Contour
- Contour : Rolling Slope – Descending
- Check the Anti-aliased box.
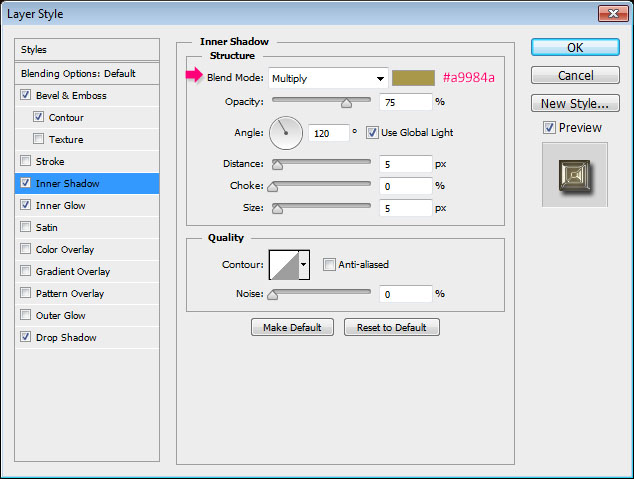
– Inner Shadow
- Color :
#a9984a
– Inner Glow
- Blend Mode : Overlay
- Color :
#eadfa2 - Source : Center
- Size : 60

– Drop Shadow
Use the default values.
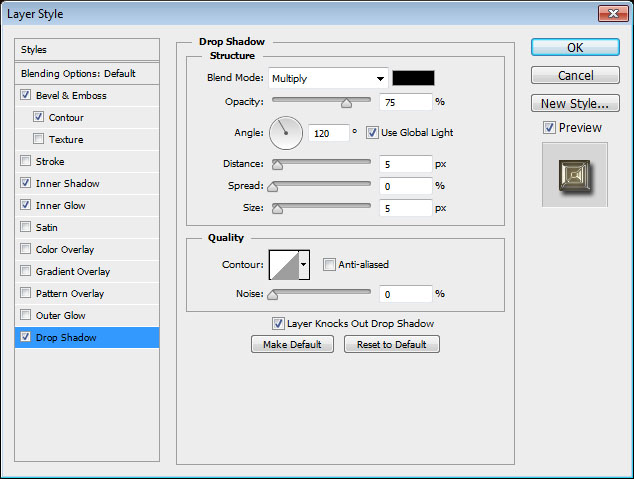
This will create the first layer of the effect, with the shiny bright parts.
Step 4
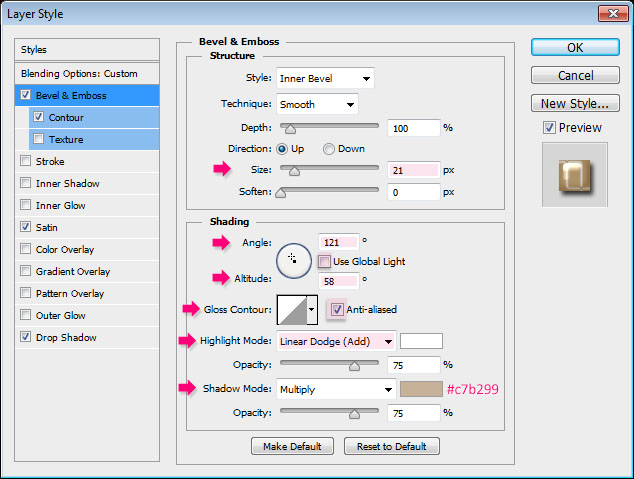
Double click the copy text layer to apply the following Layer Style:
– Bevel and Emboss
- Size : 21
- Uncheck the Use Global Light box
- Angle : 121
- Altitude : 58
- Highlight Mode : Linear Dodge (Add)
- Shadow Mode – Color :
#c7b299
– Contour
- Contour : Half Round
- Check the Anti-aliased box.

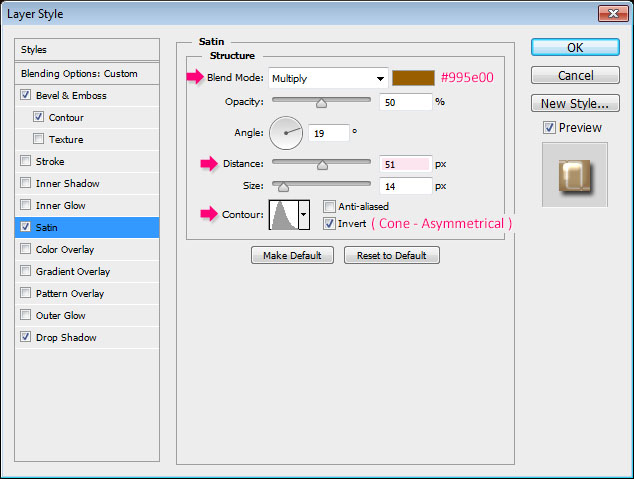
– Satin
- Color :
#995e00 - Distance : 51
- Contour : Cone – Asymmetrical
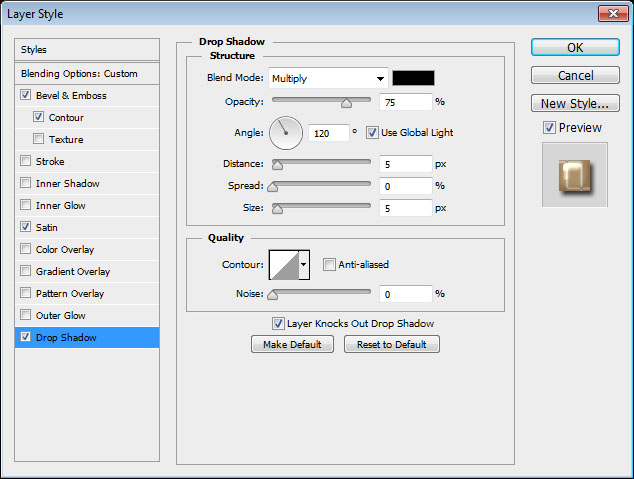
– Drop Shadow
Use the default values.
This will create the second layer of the effect, which adds the glossy, velvety, effect to the text.
Step 5
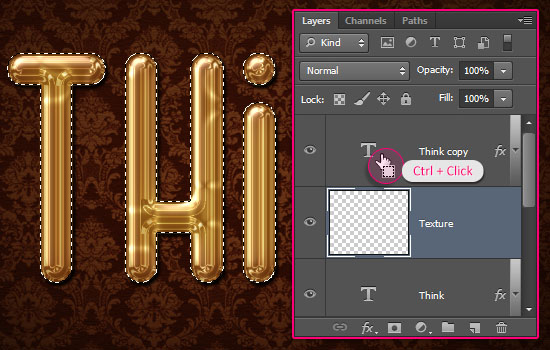
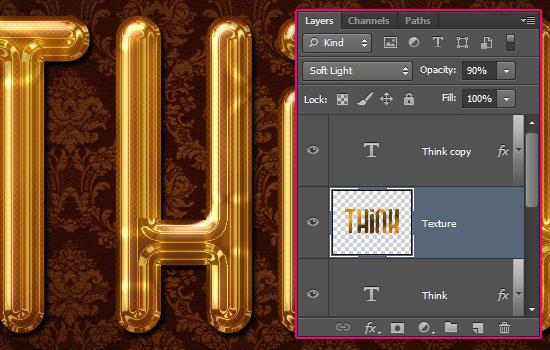
Ctrl/Cmd + click a text layer’s thumbnail to create a selection, then, create a new layer between the two text layers and call it Texture.
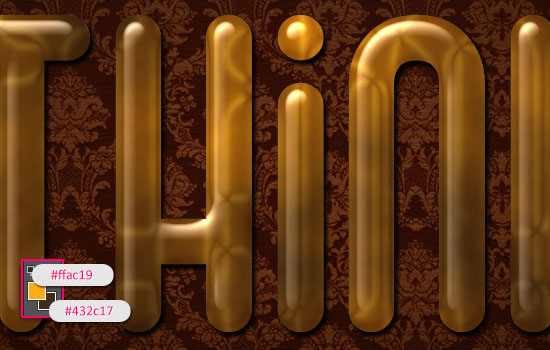
Set the Foreground color to #ffac19 and the Background color to #432c17. Go to Filter > Render > Clouds, then go to Select > Deselect (Ctrl/Cmd + D) to get rid of the selection.
Go to Filter > (Filter Gallery) > Sketch > Halftone Pattern, and change the Size to 1, the Contrast to 5, and the Pattern Type to Dot, then click OK.
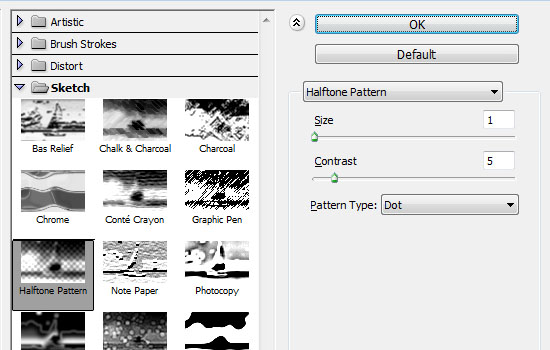
This will create a very simple pattern.

Change the Texture layer’s Blend Mode to Soft Light, and reduce its Opacity to a value you like. Here, it is reduced to 90%. This will add a nice touch to the plain golden effect.
Step 6
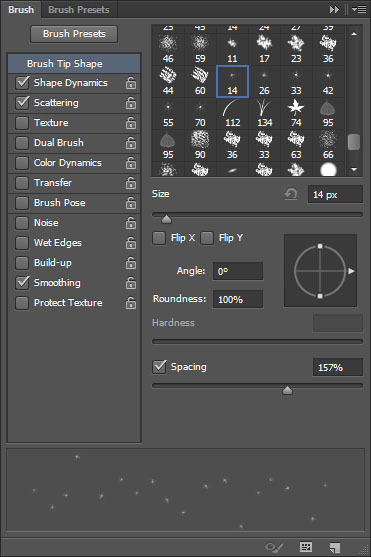
Pick the Brush Tool, then open the Brush panel (Window > Brush).
Choose the Star 14 pixels brush tip, and modify its Settings as shown below:
Brush Tip Shape
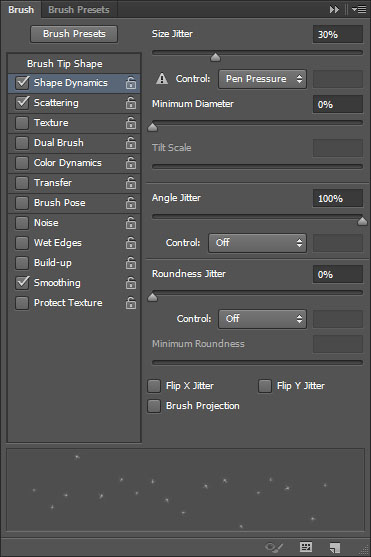
Shape Dynamics
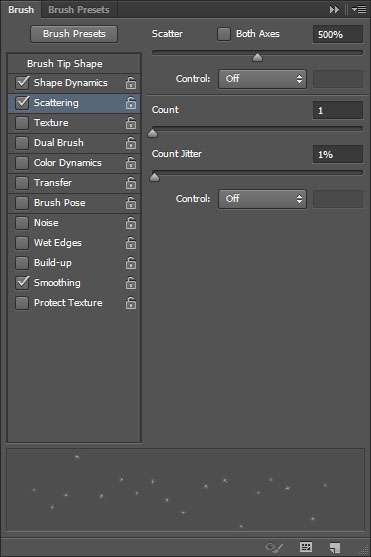
Scattering
Step 7
Right click the text layer and choose Create Work Path.
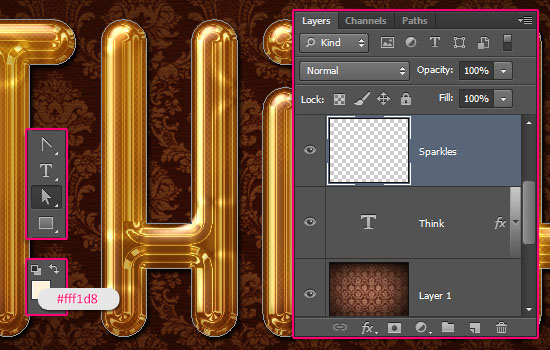
Create a new layer on top of the original text layer and call it Sparkles.
Set the Foreground color to #fff1d8, and pick the Direct Selection Tool.
Right click the work path and choose Stroke Path. Then, choose Brush from the Tool drop down menu, and make sure that the Simulate Pressure box is un-checked.
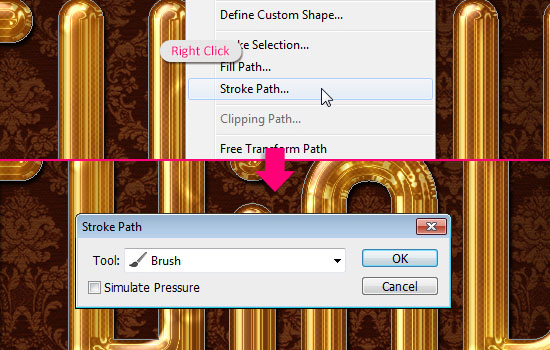
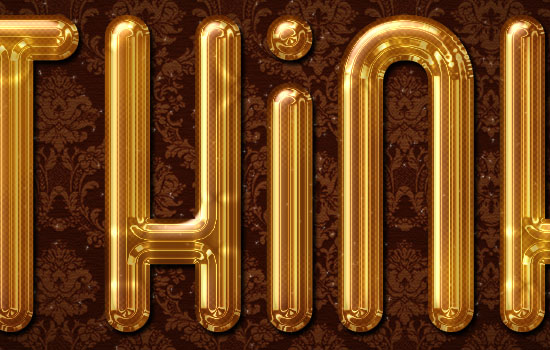
This will add tiny sparkles around the text. Hit Enter/Return to get rid of the path.
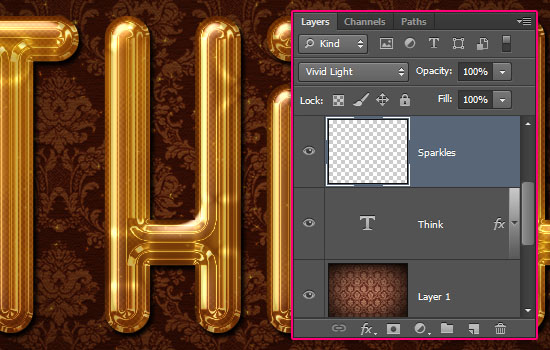
Change the Sparkles layer’s Blend Mode to Vivid Light.
And finally, the text at the top and bottom is created using the font ETHON, the font Size is 100, the color is #ffe9e1, the Blend Mode is Soft Light, and then, a default Drop Shadow effect is applied.
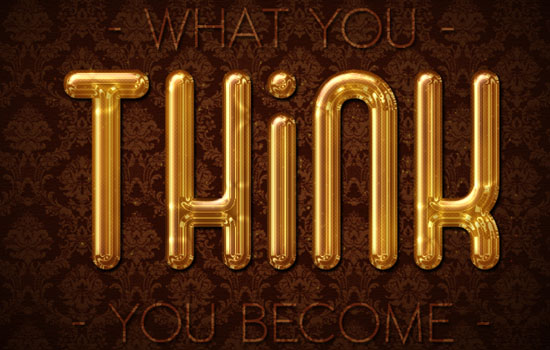
And there you have your glamorous shiny gold text effect!
Did you enjoy this post? Please consider donating to help us cover our server costs.

Great tutorial (again)… I noticed in Step 6 the 3rd screen (Scattering) is not correct but I managed (all on my own!) to get it looking as it should. Thanks for sharing …..
Oops! Sorry about that!
Fixed now 🙂
Thanks a lot for the comment.
Excellent Tutorial 🙂
Thanks a lot! 🙂
very nice tutorial … 🙂
here my try out…
http://www3.picturepush.com/photo/a/13378041/img/Picture-Box/elelgant-glossy-gold-effect.jpg
Awesome! Very well done!
Thanks a lot for the comment and for the link – always great to check out the different results 🙂
Nice tut! thanks for sharing 🙂
Glad you like it.
Thanks for the comment.
niu bi !!!
Thank you!
MIND BLOWING………….BEST BEST BEST BEST…………
THANK YOU VERY MUCH FOR SHARING WITH US
Oh WOW!
Really glad you like the tutorial!
Thank you very much for the awesome comment 🙂
At step 7, when i create a work path, i cant click “Stroke path´´.. help please!
Did you make sure that the “Sparkles” layer is selected before right clicking the work path? Can you please upload a screenshot of the problem?
Fnd This is Excellent tutorial..if you can publish this using video ?it’s very helpful for me…
Tnx u very much for sharing this… 🙂
Really happy you like the tutorial.
Unfortunately though, we don’t publish video tutorials for now 🙁
But you can leave any questions you have in a comment.
Thanks a lot for the comment 🙂
do you can give to me yr email address ?
… You can send us an email through our Contact form 🙂
(y) Thank you !!!
You’re welcome 🙂
nice!!! tnx for the tutorial
You’re welcome, thanks for the comment 🙂
ty
Awesome! Great outcome indeed.
Thanks a lot for sharing your work 🙂
thanks’ for the tutorial ?
Definitely nicely done – great job 😉
Thank you for the comment and for sharing your work 🙂
can u type ( dizzle ) like same gold tube font
Wow! The most awesome gold text effect ever!
That’s really wonderful of you to say 😀 Glad you liked it.
Many thanks for the comment 🙂
awesome!!!!!!!!!!!!!!
Thank you 😀
Awesome 🙂
Awesome
Amazing result!
Thanks for the comment and for sharing your outcome.
Thanks for sharing this informative information love to see these kind of post.
Thanks for the great tutorial. I used slightly different colors, a red background, and the font Great Vibes for the other text. Also, I messed around a bit for something a little more “opaque”, but I really like how it turned out. I see myself having a lot of fun with this technique. Thanks again!
Great result! Always nice to see different outcomes indeed.
Thank you very much for the comment and for sharing your work 🙂
Awsome!!! 🙂 🙂 🙂
Thank you! 😀
Hello I Love your work is the best font art ! 😀 ?
But i don’t understand the step 5 when you said ” Set the Foreground color to #ffac19 and the Background color to #432c17. Go to Filter > Render > Clouds, then go to Select > Deselect (Ctrl/Cmd + D) to get rid of the selection.” I have this result.. :”(…
http://zupimages.net/up/17/02/rgui.png
Please can you help me ? :”(
(sorry for my bad english -.-“)
Appreciate your instructive step by step tutorial. I think it’s a delighted post for learning new texture effect. Thank you so much for sharing with us your ideas.
“Could not complete your request because the type layer uses a faux bold style.”
what was that mean? i change it to many fonts that i can but it always prompt me that.
i am using Ps CC and i switched to Ps CS6, do i really need to use the Extended one ?
can’t follow through that part haha. XD 😀
very nice tutorial.. love it.. thanks!