
Shiny Text Effect
In this tutorial, we are going to create a shiny text effect, using layer styles and some blurring filters. It is a simple tutorial, but the result is pretty much awesome.
The Final Result

Tutorial Details
- Software Used : Photoshop
- Version : CS3
- Time : 0:30 – 0:45
Resources
- Signika font.
Step 1
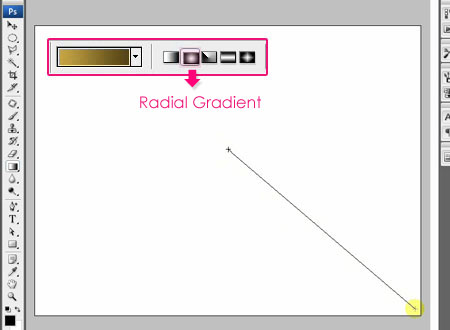
Create a new 1024 x 768 px document. Set the Foreground color to #c8a445 and the Background color to #534215. Choose the Foreground to Background, Radial Gradient, and click and drag from the center of the document to one of the corners to create the gradient.
You can then use the Levels or Hue/Saturation options to get a brighter or more vibrant Background.
(You can as well add some sparkles using a soft round brush, then apply some glow effects to it.)
Step 2
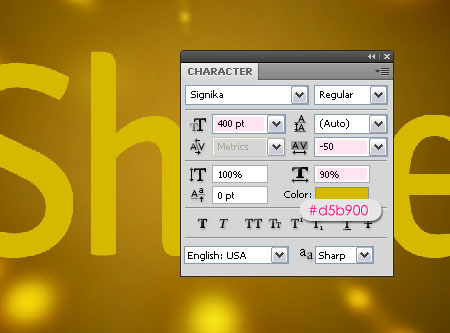
Create the text using the font Signika, the Size is 400 pt, and the color is #d5b900.
Also, the Tracking value is set to -50, and the Horizontal Scale value is set to 90%, to make the text look narrower and more condensed.
Step 3
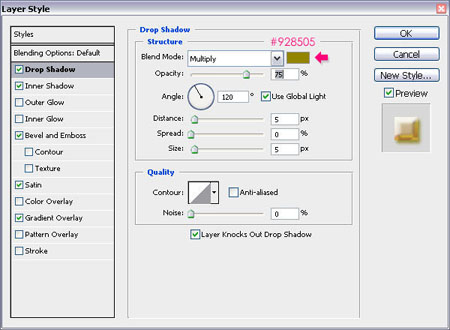
Double click the text layer to apply the following Layer Style. You might need to adjust or change the values if the size of your text is much bigger or much smaller than the one in the tutorial.
– Drop Shadow
- Color :
#928505
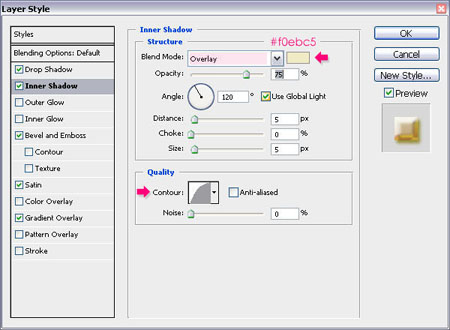
– Inner Shadow
- Blend Mode : Overlay
- Color :
#f0ebc5 - Contour : Half Round
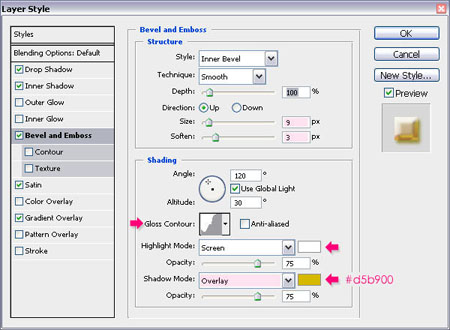
– Bevel and Emboss
- Size : 9
- Soften : 3
- Gloss Contour : Notched Slope – Rounded
- Shadow Mode – Color :
#d5b900
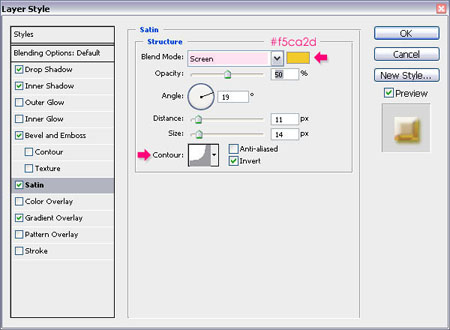
– Satin
- Blend Mode : Screen
- Color :
#f5ca2d - Contour : Cove – Deep
– Gradient Overlay
- Blend Mode : Soft Light
- Click the Gradient box to create the gradient
Create the gradient using the colors #952e2f to the left and #ffffff to the right.
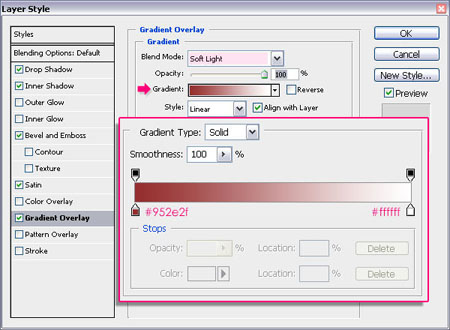
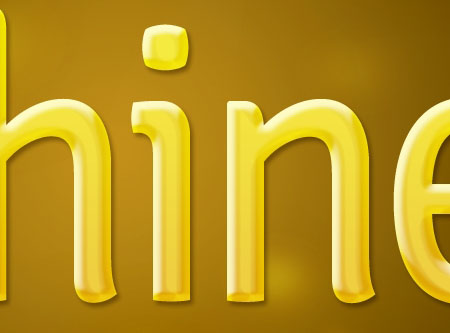
This will create a nice glossy effect.
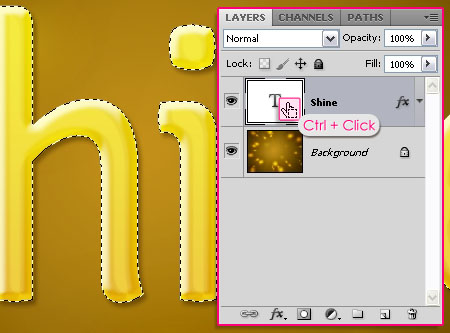
Step 4
Ctrl/Cmd + click the text layer’s thumbnail to create a selection.
Go to Select > Modify > Expand, and type in 6.
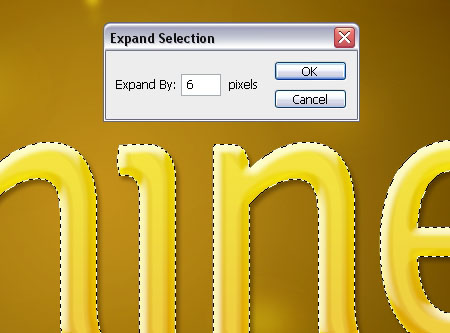
This will expand the selection 6 px outwards.
Step 5
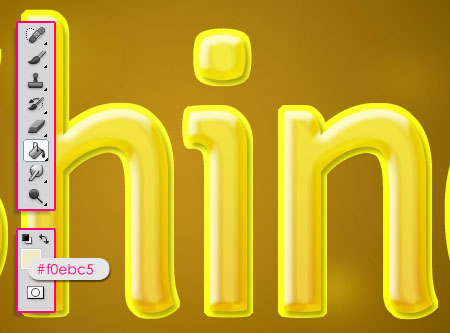
Create a new layer below the text layer, and rename it to Light, then change its Blend Mode to Vivid Light.
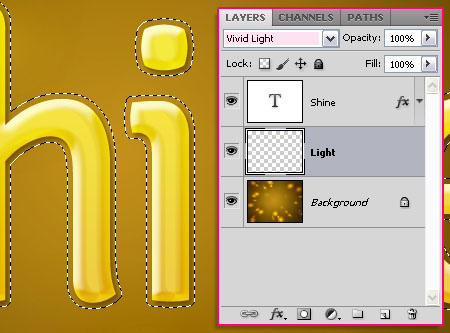
Fill the selection with the color #f0ebc5. Then, go to Select > Deselect to get rid of the selection.
Step 6
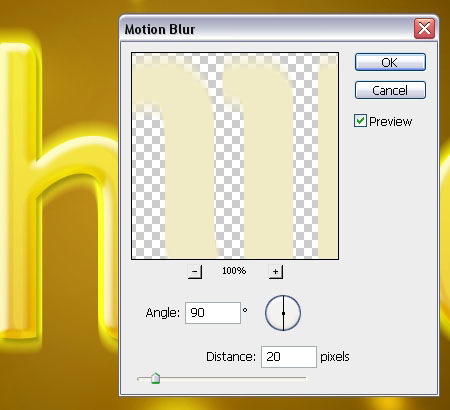
Go to Filter > Blur > Motion Blur to apply a vertical motion blur. Change the Angle to 90, and the Distance to 20.
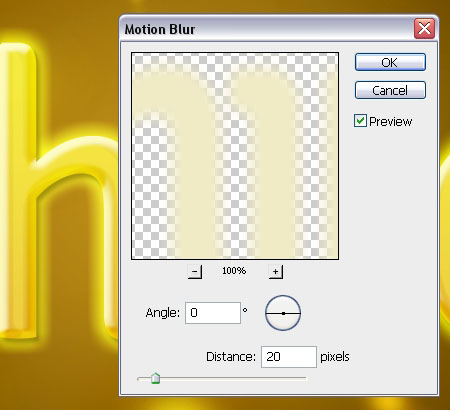
Go back to Filter > Blur > Motion Blur, but this time apply a horizontal motion blur, so just change the Angle value to 0.
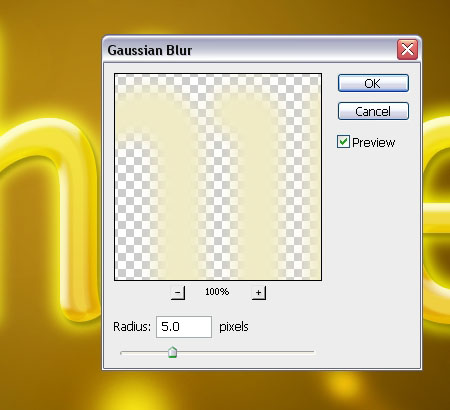
Finally, go to Filter > Blur > Gaussian Blur, and type 5 for the Radius value.
And that’s it, we’re done!
Hope you had fun creating your “Shiny” text!
Did you enjoy this post? Please consider donating to help us cover our server costs.


I really like this text effect! It was so easy,well written. Todah!
Thanks for your lovely comments Lilly. 🙂
very awesome tutorial and also easy to make thanks.
Thanks for your comment ally.
Very interesting and beautiful this text tutorial. I love tutorial text effects.
Keep up the good work.
Hello Carlos,
Thanks a lot for the comment. Glad you enjoyed the tutorial.
Best regards.
very interesting . amazing tutorial . i hope you can make another text effect . 😀
Glad you like it 🙂
You can check the many other text effects on this site whenever you like, and hopefully you’ll enjoy them as well 😉
Thanks for the comment.