
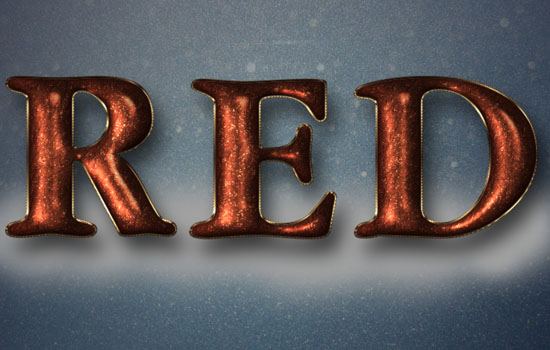
Glittering Red and Melting Ice Text Effect
This tutorial will explain how to use multiple Layer Styles to create a velvety glossy glittering red text effect. Then, using some more Layer Styles and a simple brush, that text will be surrounded with melting ice. It’s an easy, very wintry-looking effect, that uses mainly the power of Photoshop’s Layer Styles. Let’s get started!
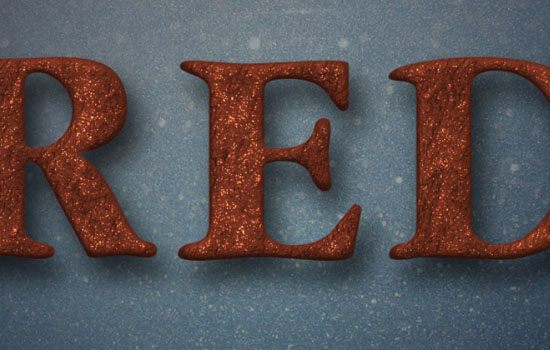
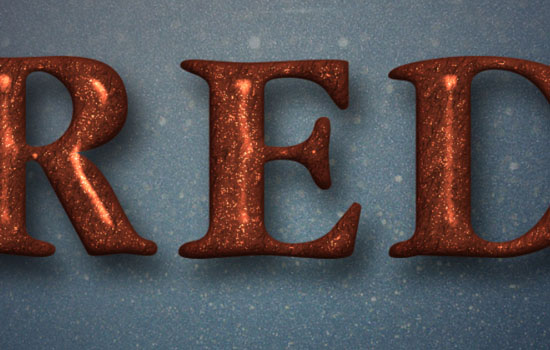
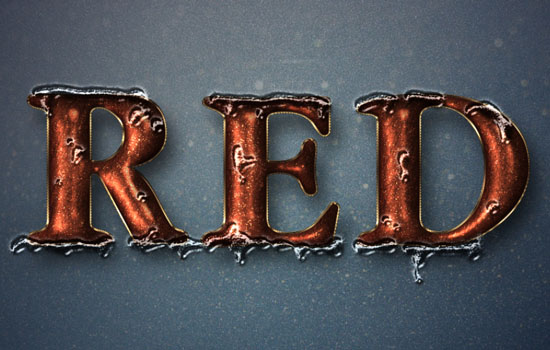
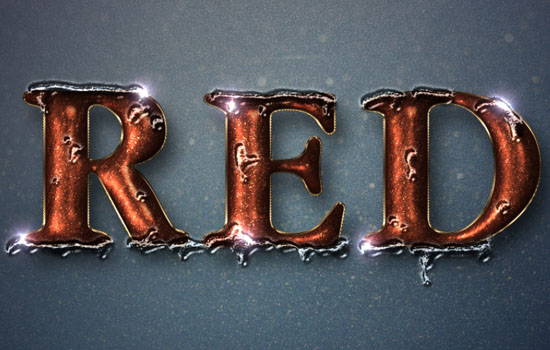
The Final Result

Tutorial Details
- Software Used : Photoshop
- Version : CS6 Extended
- Time : 0:30 – 0:45
Resources
- Garnet font.
- Car Paint texture by Doodlee-a.
- texture 4 blue snow by i-see-faces.
- GlitteringMetal pattern. (Created using the Wet Stone filter by Vladimir Golovin).
- Fake brick pattern by Marat.
- gradient-shapes for Photoshop by ilnanny (Load the METALS.grd file).
- Texturetastic Gray pattern by Adam Pickering.
- lens flare 10 by aloschafix.
Step 1
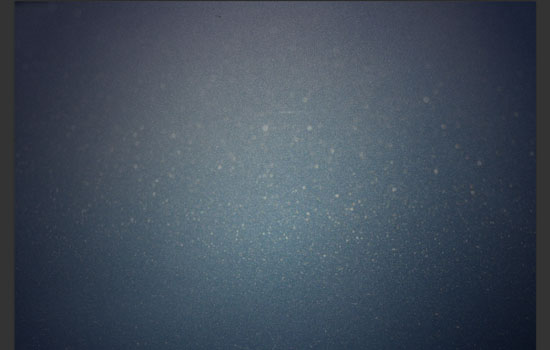
Create a new 1152 x 864 px document, place the Car Paint texture image on top of the Background layer, resize it so that it fits within the document, then merge it with the Background layer (Layer > Merge Down).
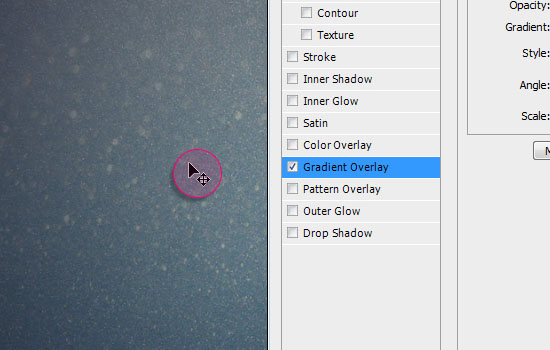
Place the texture 4 blue snow texture on top of the Background layer, and change its layer’s Blend Mode to Soft Light.
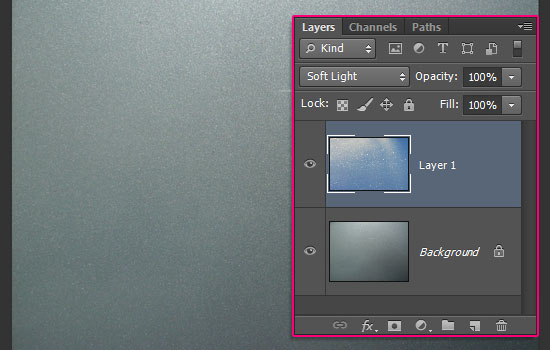
Double click the texture 4 blue snow layer to apply a Gradient Overlay effect, by changing the Blend Mode to Multiply and the Opacity to 95%, using a Transparent to Color gradient fill with the color #353750, changing the Style to Radial, and the Scale to 150.
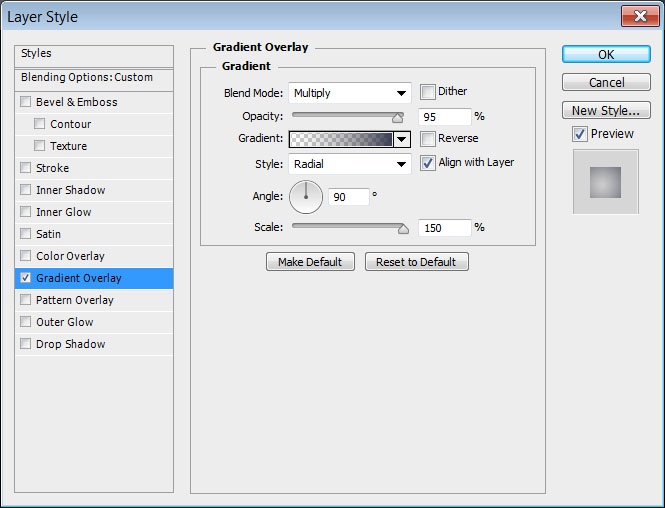
You can click and drag the gradient around as you like.
This will add a nice purple-y tone to the background, and darken the corners a little bit.
Step 2
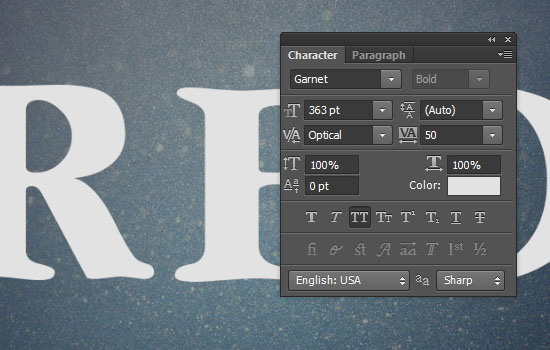
Create the text in All Caps using the font Garnet, the font Size 363, the color White, and the Tracking value 50.
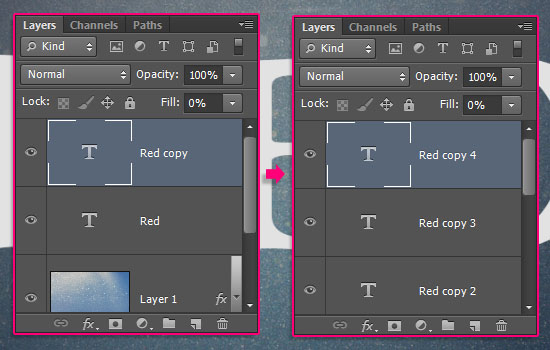
Duplicate the text layer, then change the copy’s Fill value to 0. Duplicate the copy layer 3 more times.
Next, we’ll be applying Layer Styles to each text layer we have. So for each text layer, double click it, then use the values shown below:
Step 3
Original text layer:
– Bevel and Emboss
- Depth : 30
- Size : 15
- Check the Anti-aliased box
- Highlight Mode : Vivid Light
- Color :
#e0e0e0 - Shadow Mode – Color :
#4f3a11
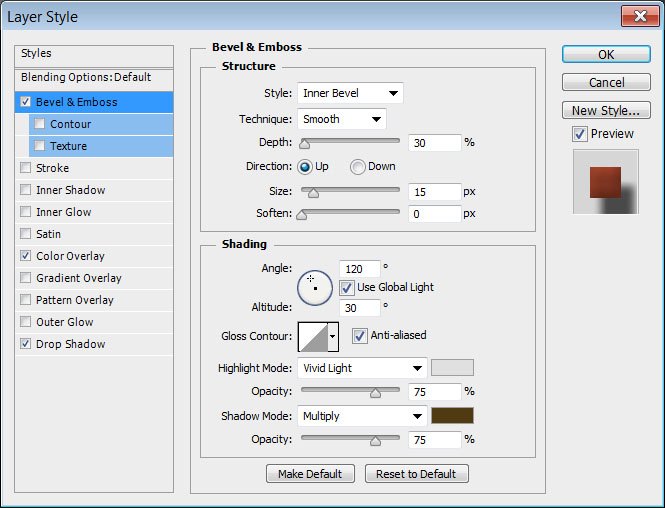
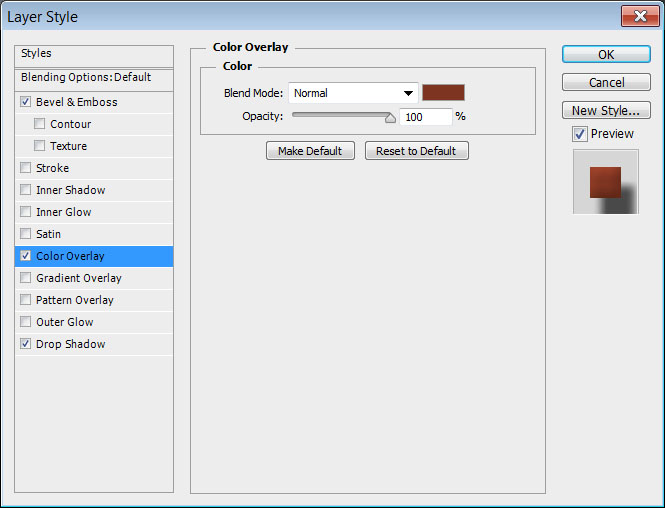
– Color Overlay
- Color :
#7d3421
– Drop Shadow
- Opacity : 66%
- Distance : 24
- Spread : 6
- Size : 32
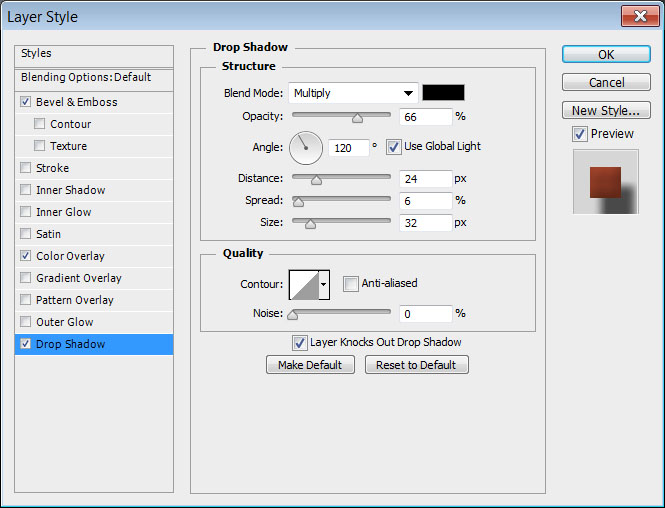
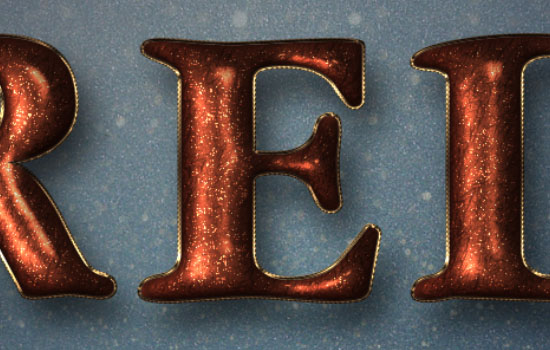
This will create the main text layer with the color and drop shadow values.

Step 4
First copy text layer:
– Bevel and Emboss
- Size : 16
- Uncheck the Use Global Light box
- Angle : 45
- Altitude : 74
- Check the Anti-aliased box
- Highlight Mode : Vivid Light
- Shadow Mode – Color :
#393939

– Contour
- Contour : Half Round
- Check the Anti-aliased box.

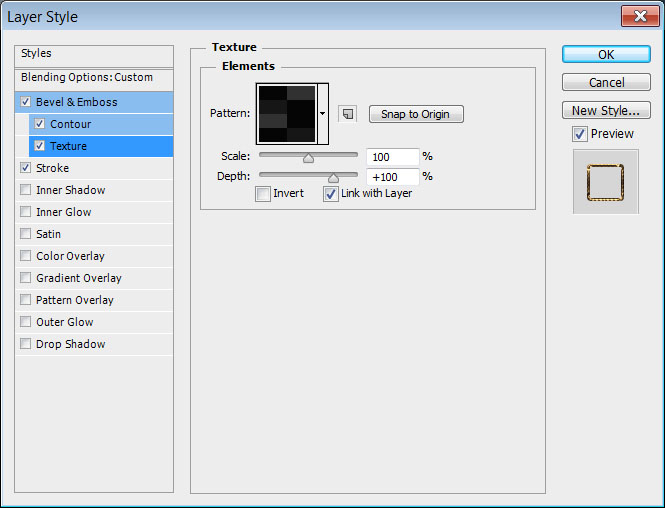
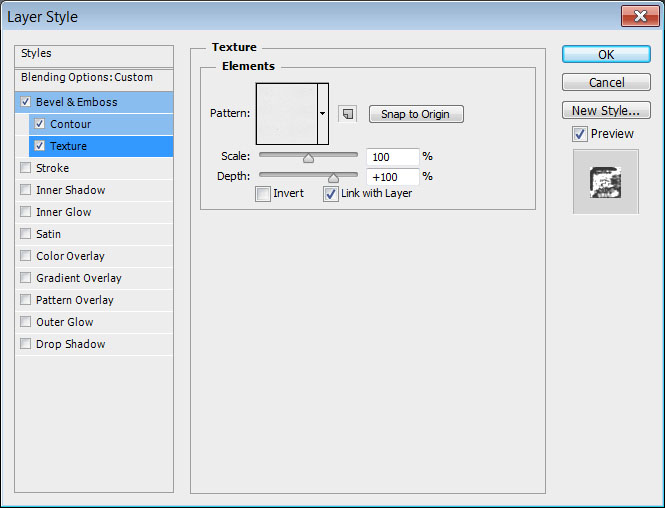
– Texture
- Pattern : GlitteringMetal
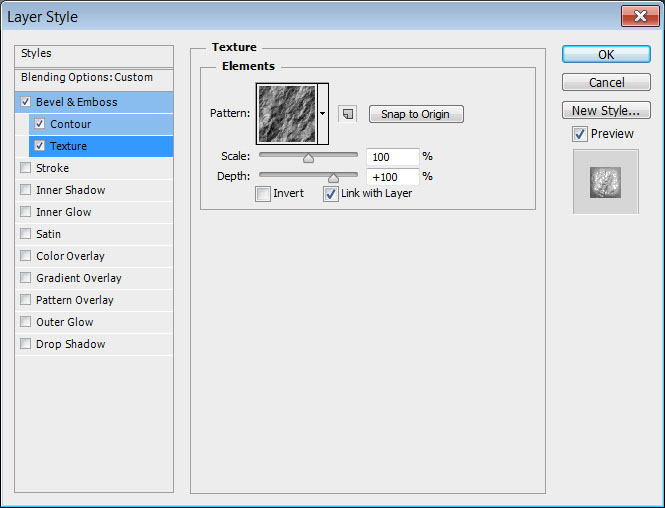
This will create the glittering part of the text.
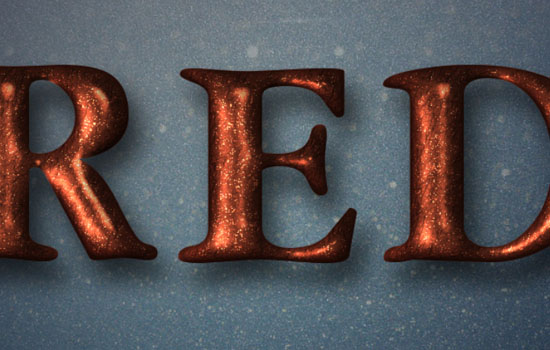
Step 5
Second copy text layer:
– Bevel and Emboss
- Size : 40
- Uncheck the Use Global Light box
- Angle : 45
- Altitude : 74
- Check the Anti-aliased box
- Highlight Mode : Vivid Light
- Shadow Mode – Color :
#4c0a0a - Opacity :
50%
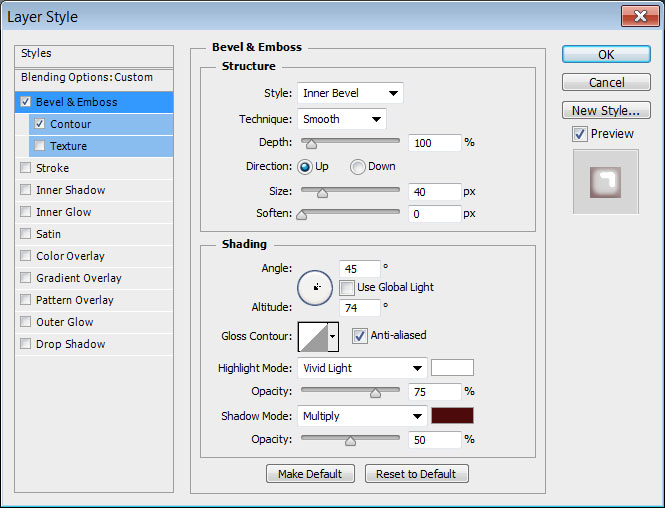
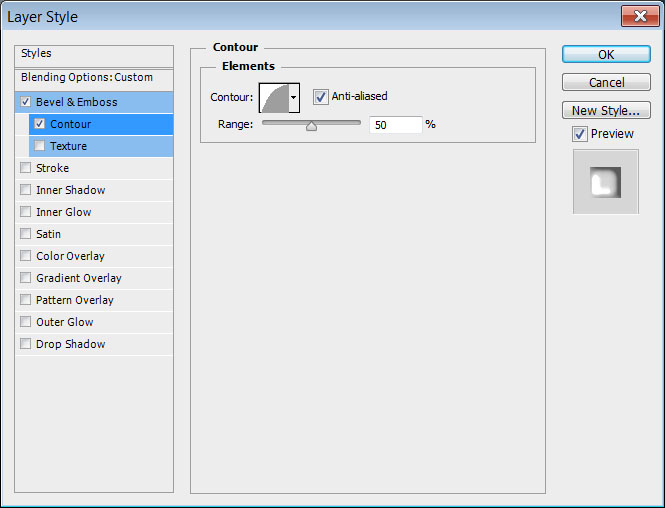
– Contour
- Contour : Half Round
- Check the Anti-aliased box.

This will create the first gloss layer.
Step 6
Third copy text layer:
– Bevel and Emboss
- Size : 49
- Uncheck the Use Global Light box
- Angle : -146
- Altitude : 53
- Check the Anti-aliased box
- Highlight Mode : Vivid Light
- Shadow Mode – Color :
#393939

– Contour
- Contour : Half Round
- Check the Anti-aliased box.
This will create the second gloss layer.
Step 7
Fourth copy text layer:
– Bevel and Emboss
- Style : Stroke Bevel
- Gloss Contour : Ring – Double
- Check the Anti-aliased box
- Highlight Mode : Vivid Light
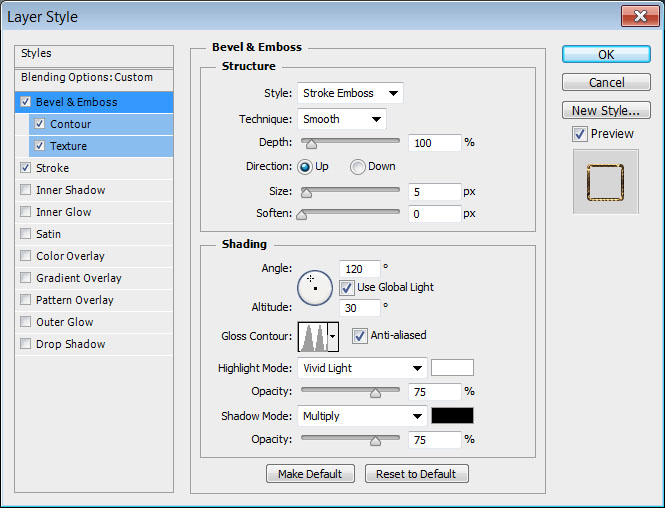
– Contour
- Contour : Log
- Check the Anti-aliased box.

– Texture
- Pattern : Fake Brick
– Stroke
- Size : 3
- Fill Type : Gradient
- Style : Reflected
- Angle : 90
- Gradient Fill : Bronze Br44
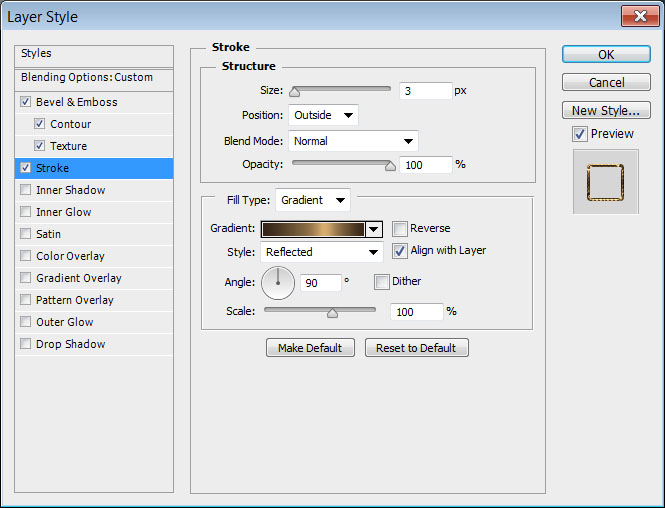
This will create the outer stroke.
Step 8
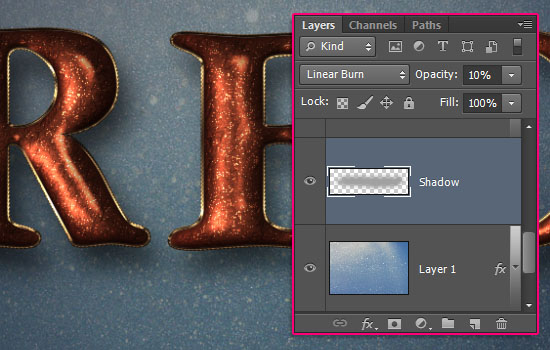
Create a new layer below all text layers and call it Shadow. Set the Foreground color to #a1a1a1, and pick the Brush Tool.
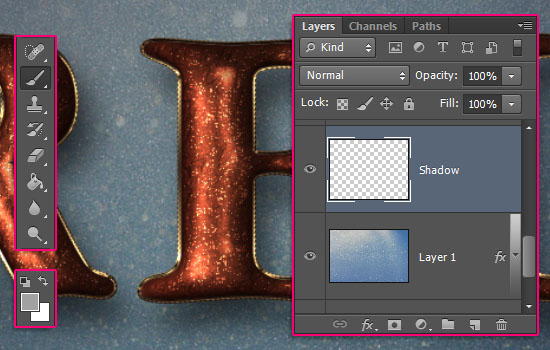
Using a big soft round brush, start dotting the shadow shape below the text.
When you’re done, change the Shadow layer’s Blend Mode to Linear Burn, and its Opacity to 10%.
Step 9
Create a new layer on top of all layers and call it Ice, then change its Fill value to 0.
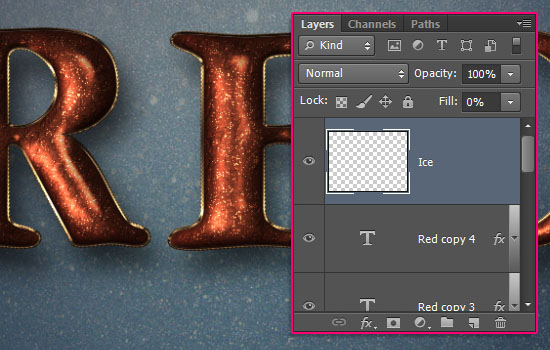
Double click the Ice layer to apply the following Layer Style:
– Bevel and Emboss
- Size : 10
- Contour : Ring
- Check the Anti-aliased box
- Highlight Mode : Linear Light

– Contour
- Contour : Guassian – Inverse
- Check the Anti-aliased box.
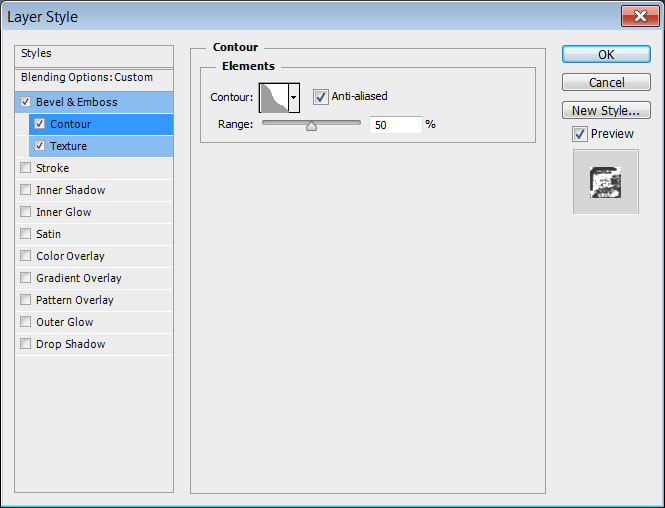
– Texture
- Pattern : Texturetastic Gray
Step 10
With the Brush Tool still selected, open the Brush panel (Window > Brush), choose a soft round brush tip, then modify its Settings as shown below:
Brush Tip Shape
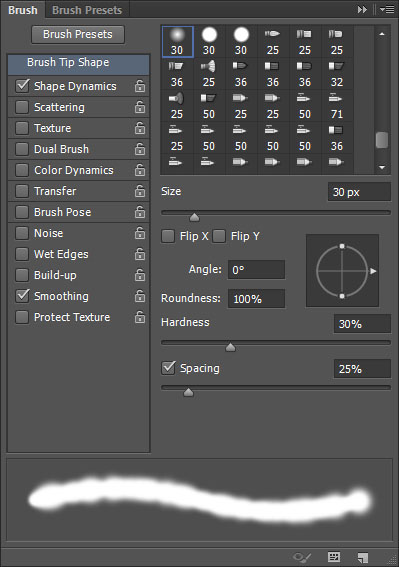
Shape Dynamics

Start creating the ice around and inside the text. You can either click and drag, or just click once, to create the different parts of the ice.
Step 11
Place the lens flare 10 image on top of all layers and change its layer’s Blend Mode to Linear Dodge (Add).
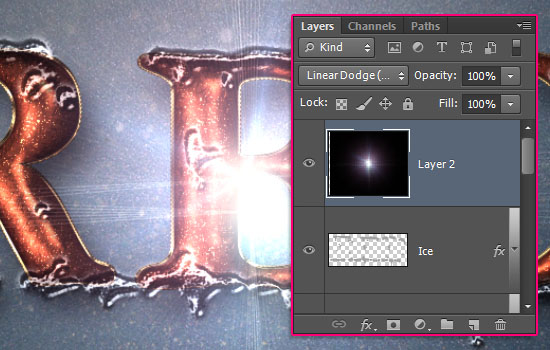
Go to Edit > Free Transform (or press Ctrl/Cmd + T), then resize, rotate, and place the flare as you like. When done, hit the Enter/Return key to accept the changes.
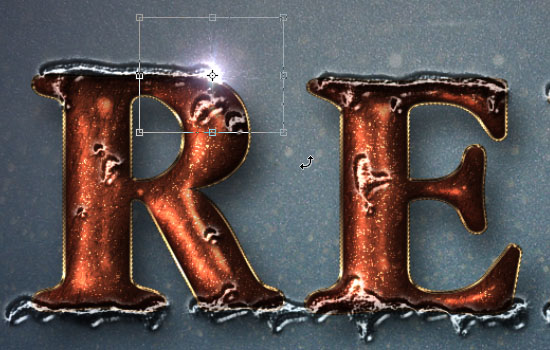
Duplicate the flare’s layer, then transform it again for another letter, and so on until you have flares wherever you want on the text. Try not to create too many or very big flares. They’re meant to add a nice sparkle to the ice, not overwhelm the design.
Step 12
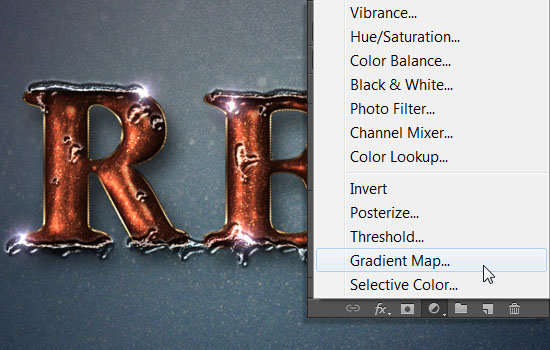
Click the Create new fill or adjustment layer icon down the Layers panel and choose Gradient Map.
Change the Gradient Map layer’s Blend Mode to Soft Light and it Opacity to 35%. Click the Gradient box to create the gradient used
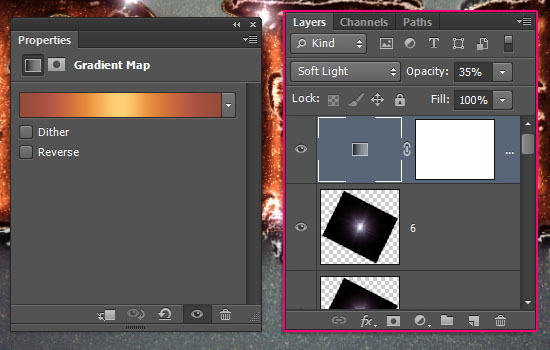
To create the Gradient, you’ll need to click below the gradient bar to add Color Stops, and when you click each Color Stop, you can change its Color and Location values. Here are the Color Stops values used from left to right:
Color – Location
#954c39– 0%#b25744– 15%#e5883b– 32%#ffd175– 50%#e5883b– 66%#b25744– 85%#954c39– 100%
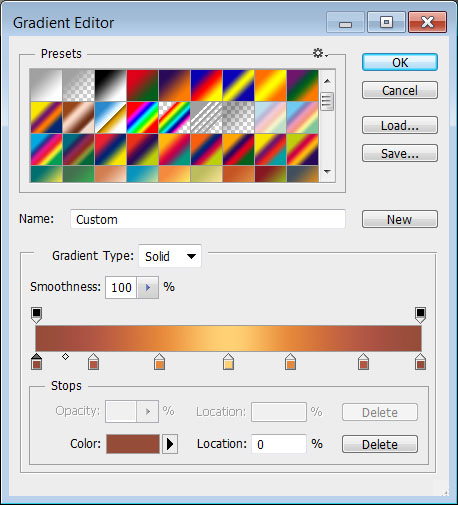
The Gradient Map will finish off the effect, enhancing the overall coloring, and adding a purple tone to the final result.
Hope you enjoyed the tutorial and found it helpful 🙂
Did you enjoy this post? Please consider donating to help us cover our server costs.


Great tut – thanks! one of the best “ice effects” I’ve seen. Happy Holidays…. 🙂
That’s awesome! Thank you very much for the amazing comment, and very Happy Holidays to you as well 🙂
Very creative text effect 🙂
Thank you very much, appreciate it 🙂
I love this icy tutorial..great tuts and happy Christmas!
Glad you do 🙂
Thank you and Happy Holidays to you too 😀
Thanks! Lovely tutorial step-by-step!
Glad you like it 🙂
Thanks a lot for the comment.
This was really great and helpful tutorial. Still learning new approaches… Have a nice day and a happy new year 😉
Glad you liked it and found it helpful.
Many thanks for the comment, and Happy New Year to you as well 🙂
Great Tut!!!
Thanks a lot 🙂
Hey i was just wondering wat the browny red colour is in step 3 is because im not able to get could u tell me the number or specifications please
wait its all good i found it
🙂
what is Bronze Br44?
i cant figure it out
It is the name of the gradient. Once you load the mentioned .grd file into Photoshop, you can hover on the loaded gradients in the Gradient Picker to see their names, then choose the one that has the name “Bronze Br44”.
Hope this helps. If you still can’t find the gradient, please feel free to leave a reply.
Thanks for sharing this nice tut… and that too very well explained.. but i got stuck in Bronze Br44.. in which .grd file this gradient is? like there are lots of .grd.files… please help me out… thanks in advance
I think it’s in the METALS.grd one. Hope this helps.
Thank you very much for the kind words 🙂
thank you very much, a well explained tutorial.
You’re very welcome.
Thanks a lot for the kind comment 🙂
where is the pattern i can’t find it
Which pattern please?
If you mean that you get the images but not the patterns, then please check this link as it might help you with that.
I used your tutorial to springboard a text look I created for an ad. I thought I’d share. Your tutorial inspired me, thank you!
That’s so cool! Really glad you found the tutorial useful 😉
Thanks a lot for the comment and for sharing your version of the effect 🙂
Hi I am trying to download Glittering Metal pattern but the link is broken,,pls help tyvm 🙂
I’ve just checked it out and it works fine for me. What happens when you try to download it, please?
Its ok the link is working now tyvm 🙂
tyvm….so much fun to do and very easy to follow. ty again I also did a few of your tuts already :-)…xoxox
Very nice outcome, well done!
Glad you’re enjoying the tutorials.
Thanks a lot for sharing your work and for the kind words 🙂